2017 MERCEDES-BENZ E-CLASS SALOON light
[x] Cancel search: lightPage 250 of 497
Re
quirements:
R the ball neck must be extended fully electri‐
cal lyand engaged in the securely loc ked
position.
Tr ailers with a 7-pin plug can be connec tedto
th eve hicle with thefo llowing adap ters:
R adap ter plug
R adapte r cable
The trailer will be cor rectly de tected bytheve hi‐
cle only if thefo llowing conditions are me t:
R the trailer is connected cor rectly
R the trailer lighting sy stem is in working order
The operation of thefo llowing sy stems depends
on the trailer being connected cor rectly:
R Active Lane Keeping Assist
R ESP ®
R Parking Assist PARKTRONIC
R Active Parking Assist
R Blind Spot Assist or Active Blind Spot Assi stCoupling up a trailer
* NO
TEDama getothe battery due tofull
discharge Charging
the trailer battery using the po wer
supply of the trailer can damage the batter y. #
Do not use the po wer supp lyto charge
th e trailer batter y. #
Remo vethe co ver from the ball head and
st ore it in a safe place (→ page107). #
Position the trailer on a le vel sur face behind
th eve hicle and couple it up totheve hicle. #
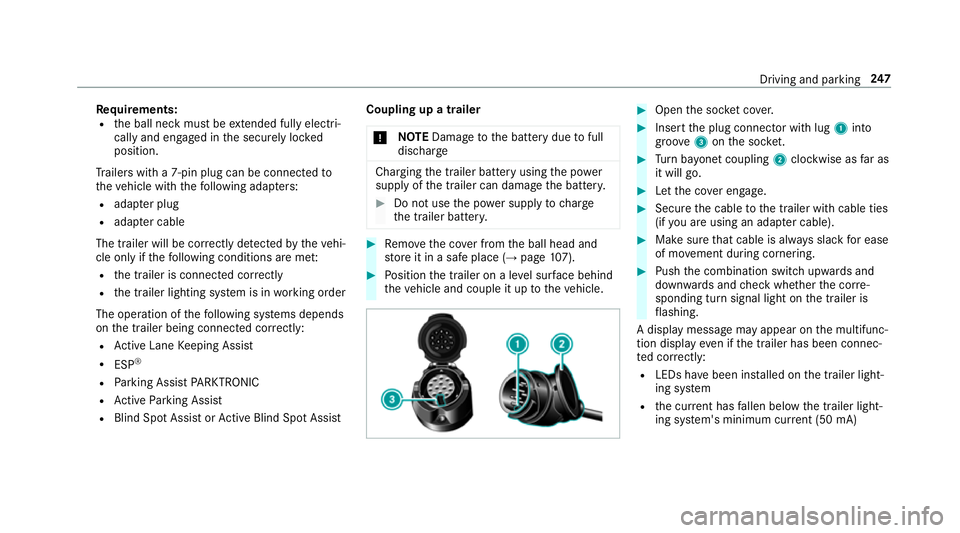
Open the soc ket co ver. #
Insert the plug connector with lug 1into
groo ve3 onthe soc ket. #
Turn bayonet coupling 2clockwise as far as
it will go. #
Let the co ver engage. #
Secure the cable tothe trailer with cable ties
(if you are using an adap ter cable). #
Make sure that cable is alw ays slack for ease
of mo vement during cornering. #
Push the combination switch upwards and
down wards and check whe ther the cor re‐
sponding turn signal light on the trailer is
fl ashing.
A display message may appear on the multifunc‐
tion display even if the trailer has been connec‐
te d cor rectly:
R LEDs ha vebeen ins talled on the trailer light‐
ing sy stem
R the cur rent has fallen below the trailer light‐
ing sy stem's minimum cur rent (50 mA) Driving and pa
rking 247
Page 258 of 497

Overview of displa
yson the multifunction
display 1
Outside temp erature
2 Drive prog ram
3 Transmission position
4 Time
5 Display section
% Ve
hicles with the Instrument Display in
th eWi descreen Co ckpit: the position of
th e displa ysdeviates from those displa yed
here. Fu
rther displa yson the multifunction display:
Z Gearshift
recommendation (→ page 174)
ë Active Parking Assist activated
(→ page 228)
é Parking Assist PARKTRONIC deacti vated
( → page 218)
¯ Cruise control (→
page 201)
È Limi
ter (→ page 202)
ç Active Dis tance Assi stDISTRONIC
(→ page 205)
è Active Steering Assist (→ page210)
è ECO
start/ stop function (→ page166)
ë HOLD fu
nction (→ page 212)
_ Ad
aptive Highbeam Assist (→ page132)
Ad aptive Highbeam Assist Plus
(→ page 134)
ð Ma
ximum pe rmissible speed exceeded
(for cer tain countries only) Ad
justing the in stru ment lighting #
Turn brightness control 1up or down.
The lighting of the instrument display and in
th e control elements in theve hicle interior is
adjus ted. Instrument Display and on-board computer
255
Page 259 of 497

Menus and submenus
Fu
nctions on the Service menu of the on-
board compu terOn-board computer:
, Service #
Toselect the function: swipe upwards or
down wards on the left-hand touch cont rol. #
Press the left-hand touch cont rol.
Fu nctions on theService menu:
R Message memory (→ page 381)
R AdBlue: Adblue ®
ra nge
R Tyres:
- Restarting the tyre pressure loss warning
sy stem (→ page 352)
- Checking tyre pressure with the tyre
pressure monitoring sy stem
(→ page 348)
- Restarting the tyre pressure monitoring
sy stem(→ page 348)
R ASSYST PLUS: Calling up the service due
date (→ page 306) R
Engine oil le vel Calling up
the assistant display On-board computer:
, Assistance
% Ve
hicles with the instrument display in
th e widescreen cockpit: whenyou ha ve
th e design set toProgressive ,yo u can view
th e assis tant displ ayinthe left-hand portion
of the instrument displa y.
The following displa ysare available from the
assis tant displ aymenu:
R Assis tant displ ay
R Attention le vel (→ page 237) #
Toswitch between the displa ys:swipe
upwards or down wards on the left-hand
to uch cont rol. St
atus displa yson the assis tant displ ay:
R é :AT TENTION ASSIST deactivated
R æ: Active Brake Assi stdeactivated
R Light lane markings: Active Lane Keeping
Assist activated
R Green lane markings: Active Lane Keeping
Assist active 256
Instrument Display and on-board computer
Page 266 of 497
When
youre cei vea call, the6 Incoming call
message appears on the head-up displa y.
In audio mode, thest ation name or track is tem‐
porarily shown when the active audio source is
being operated.
Sy stem limits
The visibility is influenced bythefo llowing condi‐
tions:
R seat position
R the positioning of the display image
R light conditions
R wetro ad sur faces
R objects on the display co ver
R polarisation in sunglasses
% Inextreme sunlight, sections of the display
may appear washed out. You can co rrect this
by switching the head-up display off and on
again. Switching
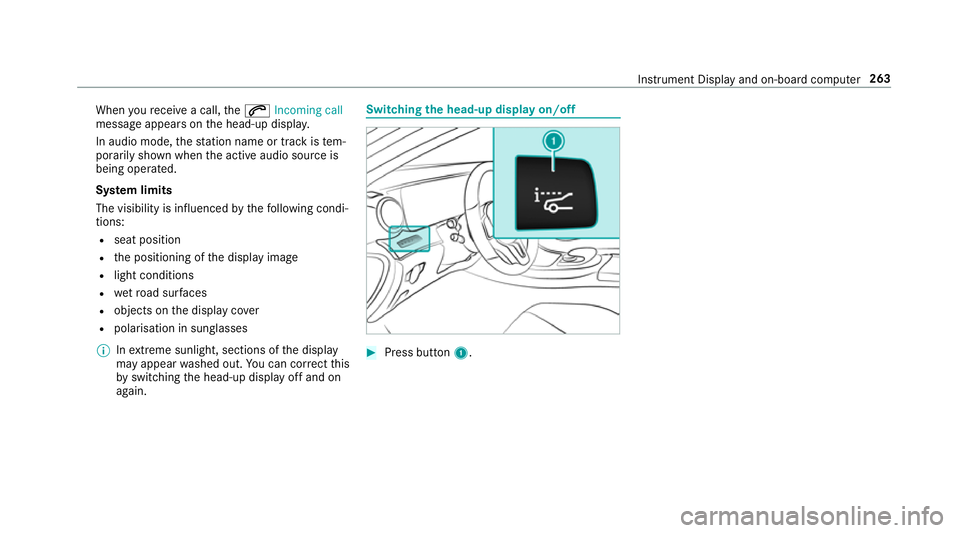
the head-up display on/off #
Press button 1. In
stru ment Display and on-board computer 263
Page 268 of 497
-
calls up a li st
R slide 4 up or down
- highlights a preset in thest ation
- selects a sy stem language
R slide 2 diagonally
- movesth e crosshair across the map
R turn 3
- sound: sets the treble, mid-range and
bass
- Selecting a favo urite
- connects a mobile phone: selects a
mobile phone from the list of de tected
mobile phones
R press 7
- Storing radio stations
- con firm s a selection or entry
To uch Control and touchpad (sin gle-finger swipe)
R swipe left orright
- selects a radio station
- calls up a list R
swipe up or down
- highlights a preset in thest ation
- selects a sy stem language
R swipe diagonally
- movesth e crosshair across the map
R press
- Storing radio stations
- con firm s a selection or entry
To uchpad (t wo-finger swipe)
R turn right or left using two fingers
- tone settings: adjusts the treble, mid-
ra nge and bass
R movetwo fingers apart ortoge ther
- changes the map scale (zoom in or out) To
uch Control Operating
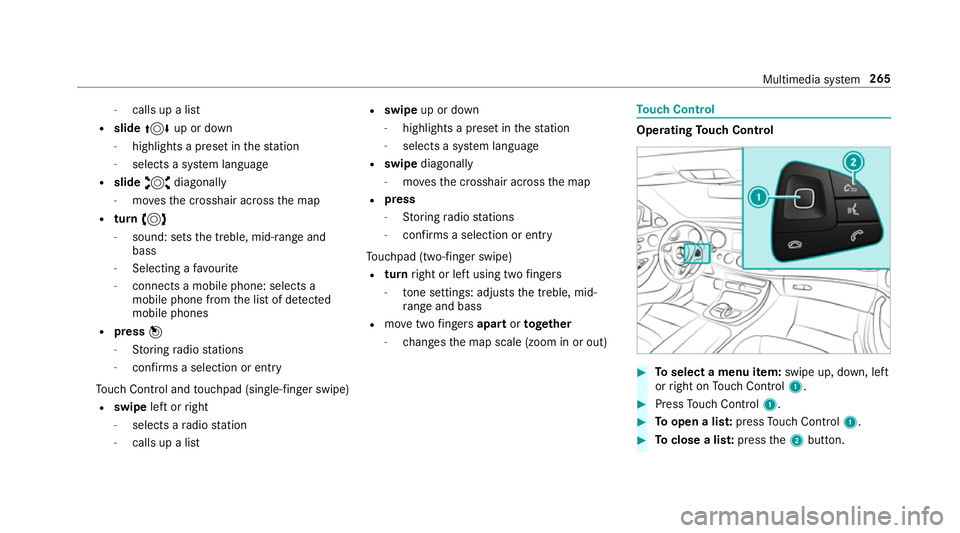
Touch Control #
Toselect a menu item: swipe up, down, left
or right on Touch Control 1. #
Press Touch Control 1. #
Toopen a lis t:press Touch Control 1. #
Toclose a lis t:press the2 button. Multimedia sy
stem 265
Page 275 of 497
On
the controller #
Select a character in thech aracter bar.
Depending on theta rget entry , either a full
set of characters is available or, alternativel y,
only those characters that are available on
th e basis of thech aracters that ha vealready
been entered.
On theto uchpad #
Write thech aracters on theto uch-sensitive
sur face of theto uchpad.
Handwriting recognition suppo rts yo uby
means of character suggestions and a read-
aloud function.
Swit ching between central control elements #
Toactivate Touch Control: pressTouch
Control. #
Toactivate the controller: pressthe con‐
troller. #
Toactivate theto uchpad: presstheto uch‐
pad.
Examples of character ent ry:
R using a keyword sear chfor a track or artist R
connecting the mobile phone tothe multime‐
dia sy stem byentering the passk ey
R entering a phone number
R entering a web address
Entering characters using the controller
Entering characters #
Turn 3 , slide 1 or4 and press
th e controller.
Use thefo llowing editing functions:
R * orE
Swit ches toupper-case or lo wer-case letters
R Ä
Switches tospecial characters and symbols.
R B
Chan gesth e language
R 45
Selects the input line
R 23
Movesth e cursor within the input line
R F Dele
tes a character or an ent ry
R &
Cancels character ent ry
Deleting a character or an entry #
Todel ete a character: whenFis highligh‐
te d, press the controller. #
Todel ete an entr y:when Fis highlighted,
press and hold the controller until the entry
has been dele ted.
Confirming an entry #
Select ¡.
Entering characters on theto uchpad
Entering characters #
Use one finger towrite characters on the sur‐
fa ce.
The character is entered in the input line. If
dif fere nt interpr etations are possible, charac‐
te r suggestions are displa yed.
Selecting a character suggestion #
Turn the controller. 272
Multimedia sy stem
Page 283 of 497
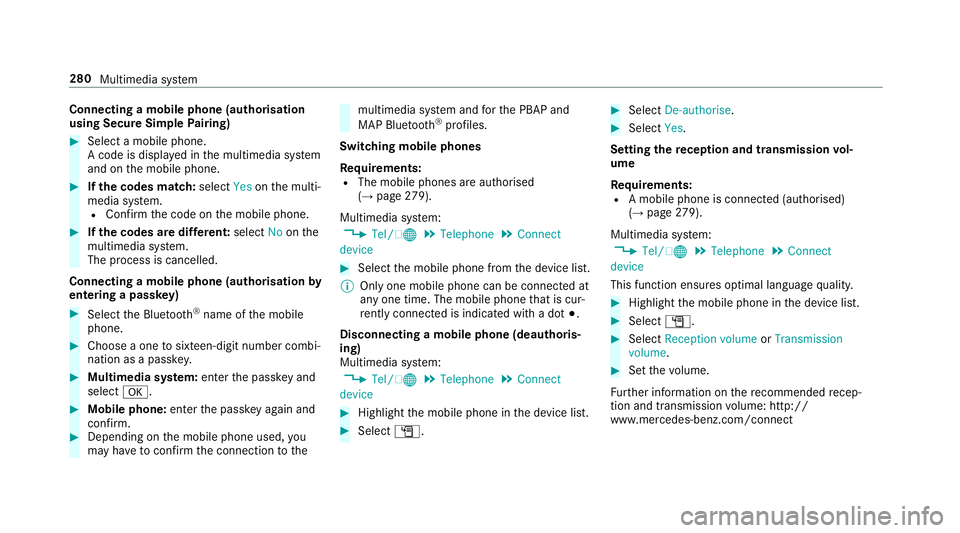
Connecting a mobile phone (au
thorisation
using Secure Simple Pairing) #
Select a mobile phone.
A code is displa yed in the multimedia sy stem
and on the mobile phone. #
Ifth e codes match: selectYesonthe multi‐
media sy stem.
R Confirm the code on the mobile phone. #
Ifth e codes are dif fere nt: select Noonthe
multimedia sy stem.
The process is cancelled.
Connecting a mobile phone (authorisation by
entering a passk ey)#
Select the Blue tooth®
name of the mobile
phone. #
Choose a one tosixteen-digit number combi‐
nation as a passk ey.#
Multimedia sy stem: enter the passk eyand
select a. #
Mobile phone: enterthe passk eyagain and
con firm. #
Depending on the mobile phone used, you
may ha vetoconfirm the connection tothe multimedia sy
stem and forth e PBAP and
MAP Blue tooth®
profiles.
Switching mobile phones
Requ irements:
R The mobile phones are authorised
(→ page 279).
Mul timedia sy stem:
, Tel/ ®.
Telephone .
Connect
device #
Select the mobile phone from the device list.
% Only one mobile phone can be connected at
any one time. The mobile phone that is cur‐
re ntly connected is indica ted with a dot #.
Disconnecting a mobile phone (deauthoris‐
ing)
Multimedia sy stem:
, Tel/ ®.
Telephone .
Connect
device #
Highlight the mobile phone in the device list. #
Select G. #
Select De-authorise. #
Select Yes.
Setting there ception and transmission vol‐
ume
Re quirements:
R A mobile phone is connec ted (authorised)
(→ page 279).
Mul timedia sy stem:
, Tel/ ®.
Telephone .
Connect
device
This function ensures optimal language qualit y. #
Highlight the mobile phone in the device list. #
Select G. #
Select Reception volume orTransmission
volume . #
Set thevo lume.
Fu rther information on there commended recep‐
tion and transmission volume: http://
www.me rcedes-benz.com/connect 280
Multimedia sy stem
Page 288 of 497
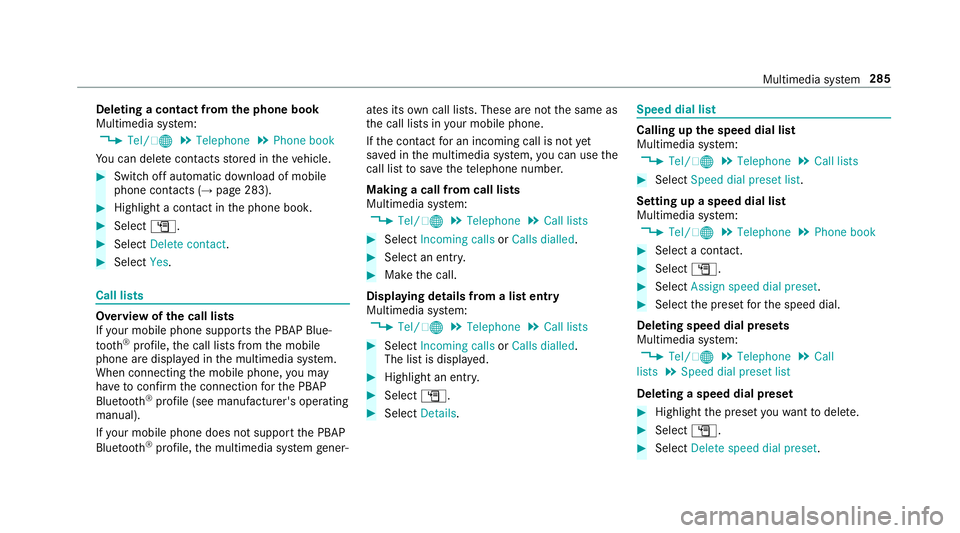
Deleting a contact from
the phone book
Multimedia sy stem:
, Tel/ ®.
Telephone .
Phone book
Yo u can dele tecontacts stored in theve hicle. #
Switch off automatic download of mobile
phone contacts (→ page 283).#
Highlight a contact in the phone book. #
Select G. #
Select Delete contact. #
Select Yes. Call lists
Overview of
the call lists
If yo ur mobile phone suppo rts th e PBAP Blue‐
tooth ®
profile, the call lists from the mobile
phone are displa yed in the multimedia sy stem.
When connecting the mobile phone, you may
ha ve toconfirm the connection forth e PBAP
Blue tooth ®
profile (see manufacturer's operating
manual).
If yo ur mobile phone does not suppo rtthe PBAP
Blue tooth ®
profile, the multimedia sy stem gener‐ ates its
own call li sts. These are not the same as
th e call lists in your mobile phone.
If th e conta ctfor an incoming call is not yet
sa ve d in the multimedia sy stem, you can use the
call li stto save thete lephone number.
Making a call from call lists
Multimedia sy stem:
, Tel/ ®.
Telephone .
Call lists #
Select Incoming calls orCalls dialled . #
Select an entry. #
Make the call.
Displaying details from a list entry
Multimedia sy stem:
, Tel/ ®.
Telephone .
Call lists #
Select Incoming calls orCalls dialled .
The list is displa yed. #
Highlight an ent ry. #
Select G. #
Select Details. Speed dial li
st Calling up
the speed dial list
Multimedia sy stem:
, Tel/ ®.
Telephone .
Call lists #
Select Speed dial preset list .
Setting up a speed dial list
Multimedia sy stem:
, Tel/ ®.
Telephone .
Phone book #
Select a conta ct. #
Select G. #
Select Assign speed dial preset. #
Select the preset forth e speed dial.
Deleting speed dial presets
Multimedia sy stem:
, Tel/ ®.
Telephone .
Call
lists .
Speed dial preset list
Deleting a speed dial preset #
Highlight the preset youwa nttodele te. #
Select G. #
Select Delete speed dial preset. Multimedia sy
stem 285