Page 123 of 571
3-31
Convenient features of your vehicle
3
Power windows (if equipped)
(1) Driver’s door power window
switch
(2) Front passenger’s door power
window switch
(3) Rear door (right) power window
switch
(4) Rear door (left) power window
switch
(5) Window opening and closing
(6) Automatic power window*
(7) Power window lock switch
* : if equipped
WWIINNDDOOWWSS
Page 124 of 571
3-32
Convenient features of your vehicle
The ignition switch must be in the ON
position to be able to raise or lower
the windows. Each door has a Power
Window switch to control that door's
window. The driver has a Power
Window Lock switch which can block
the operation of passenger windows.
The power windows will operate for
approximately 30 seconds after the
ignition switch is placed in the ACC
or OFF position. However, if the front
doors are opened, the Power
Windows cannot be operated even
within the 30 second period.
Information
• In cold and wet climates, power win-
dows may not work properly due to
freezing conditions.
• Whilst driving with the rear win-
dows down or with the sunroof (if
equipped) opened (or partially
opened), your vehicle may demon-
strate a wind buffeting or pulsation
noise. This noise is normal and can
be reduced or eliminated by taking
the following actions. If the noise
occurs with one or both of the rear
windows down, partially lower both
front windows approximately 2.5
cm (1 inch). If you experience the
noise with the sunroof open, slightly
close the sunroof.
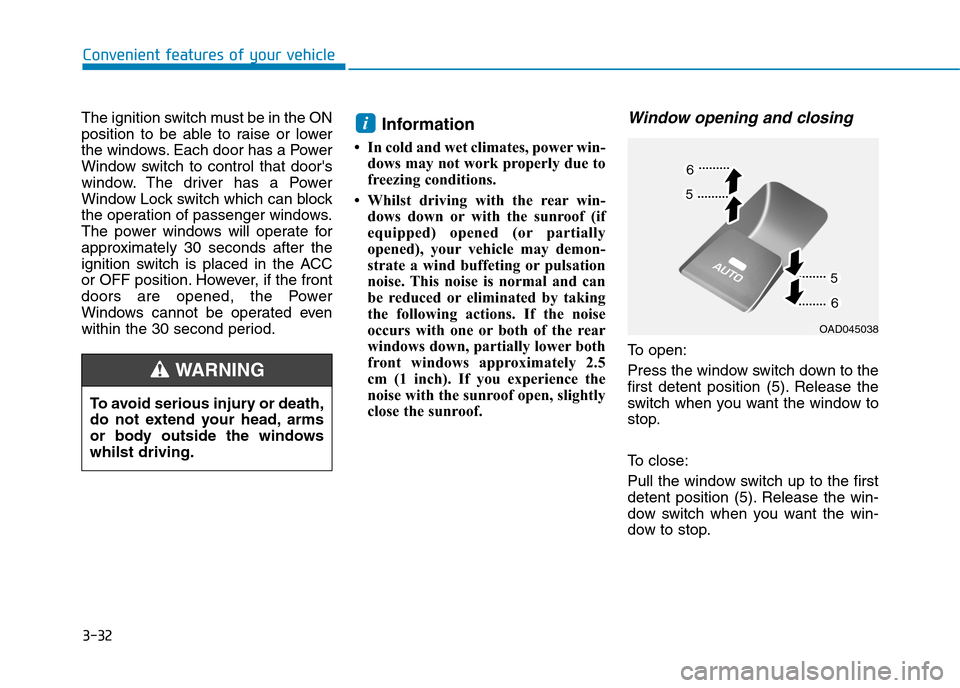
Window opening and closing
To o p e n :
Press the window switch down to the
first detent position (5). Release the
switch when you want the window to
stop.
To c l o s e :
Pull the window switch up to the first
detent position (5). Release the win-
dow switch when you want the win-
dow to stop.
i
To a vo i d s e r i o u s i n j u r y o r d e a t h ,
do not extend your head, arms
or body outside the windows
whilst driving.
WA R N I N G
OAD045038
Page 126 of 571
3-34
Convenient features of your vehicle
Information
The automatic reverse feature is only
active when the “Auto Up” feature is
used by fully pulling up the switch to
the second detent.
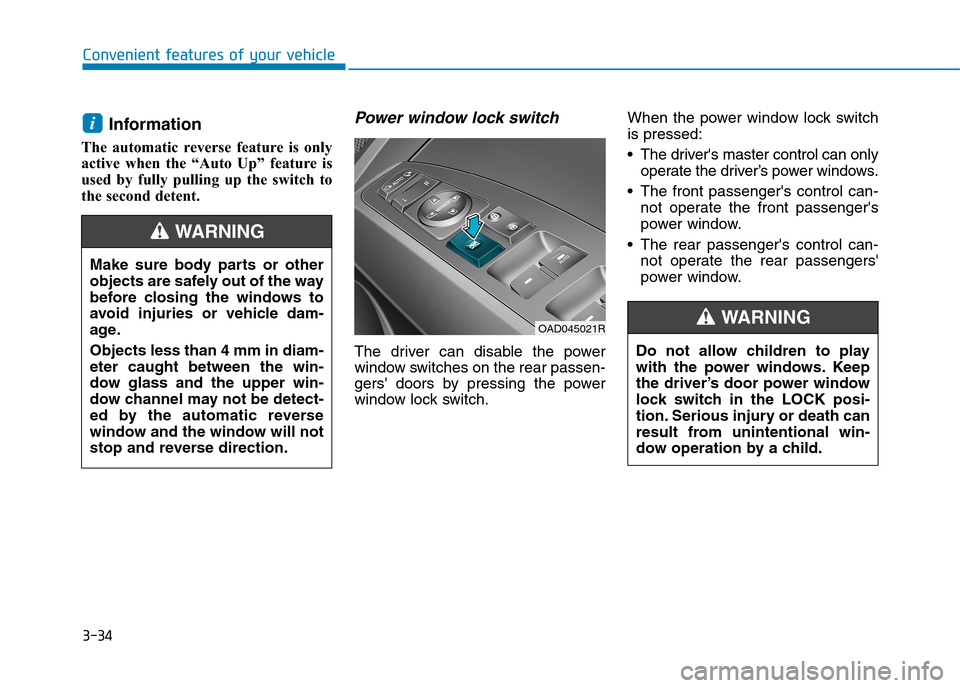
Power window lock switch
The driver can disable the power
window switches on the rear passen-
gers' doors by pressing the power
window lock switch.
When the power window lock switch
is pressed:
•The driver's master control can only
operate the driver’s power windows.
•The front passenger's control can-
not operate the front passenger's
power window.
•The rear passenger's control can-
not operate the rear passengers'
power window.
i
Make sure body parts or other
objects are safely out of the way
before closing the windows to
avoid injuries or vehicle dam-
age.
Objects less than 4 mm in diam-
eter caught between the win-
dow glass and the upper win-
dow channel may not be detect-
ed by the automatic reverse
window and the window will not
stop and reverse direction.
WA R N I N G
Do not allow children to play
with the power windows. Keep
the driver’s door power window
lock switch in the LOCK posi-
tion. Serious injury or death can
result from unintentional win-
dow operation by a child.
WA R N I N G OAD045021R
Page 127 of 571
3-35
Convenient features of your vehicle
3
•To prevent possible damage to
the power window system, do
not open or close two windows
or more at the same time. This
will also ensure the longevity of
the fuse.
•Never try to operate the main
switch on the driver's door and
the individual door window
switch in opposite directions at
the same time. If this is done, the
window will stop and cannot be
opened or closed.
NOTICE
•NEVER leave the keys in your
vehicle with unsupervised
children, when the engine is
running.
•NEVER leave any child unat-
tended in the vehicle. Even
very young children may inad-
vertently cause the vehicle to
move, entangle themselves in
the windows, or otherwise
injure themselves or others.
•Always double check to make
sure arms, hands, head and
other obstructions are safely
out of the way before closing
a window.
•Do not allow children to play
with the power windows. Keep
the driver’s door power win-
dow lock switch in the LOCK
position (pressed). Serious
injury can result from uninten-
tional window operation by
the child.
•Do not extend your head,
arms or body outside the win-
dows whilst driving.
WA R N I N G
Page 133 of 571
3-41
Convenient features of your vehicle
3
Closing the bonnet
1. Before closing the bonnet, check
the following:
• All filler caps in the engine com-
partment must be correctly
installed.
• Gloves, rags or any other com-
bustible material must be removed
from the engine compartment.
2. Return the support rod to its clip to
prevent it from rattling.
3. Lower the bonnet halfway and let it
drop. Make sure that it locks into
place.
•Before closing the bonnet,
ensure all obstructions are
removed from around bonnet
opening.
•Always double check to be
sure that the bonnet is firmly
latched before driving away. If
it is not latched, the bonnet
could open whilst the vehicle
is being driven, causing a
total loss of visibility, which
might result in an accident.
•Do not move the vehicle with
the bonnet in the raised posi-
tion, as vision is obstructed,
which might result in an acci-
dent, and the bonnet could fall
or be damaged.
WA R N I N G
Support rod
•Grasp the support rod in the
area wrapped in rubber. The
rubber will help prevent you
from being burned by hot
metal when the engine is hot.
•The support rod must be
inserted completely into the
hole provided whenever you
inspect the engine compart-
ment. This will prevent the
bonnet from falling and possi-
bly injuring you.
WA R N I N G
Page 134 of 571
3-42
Convenient features of your vehicle
Boot
Opening the boot
1. Make sure the shift lever is in P
(Park, for automatic transmission)
or first gear or R (Reverse, for
manual transmission) and set the
parking brake.
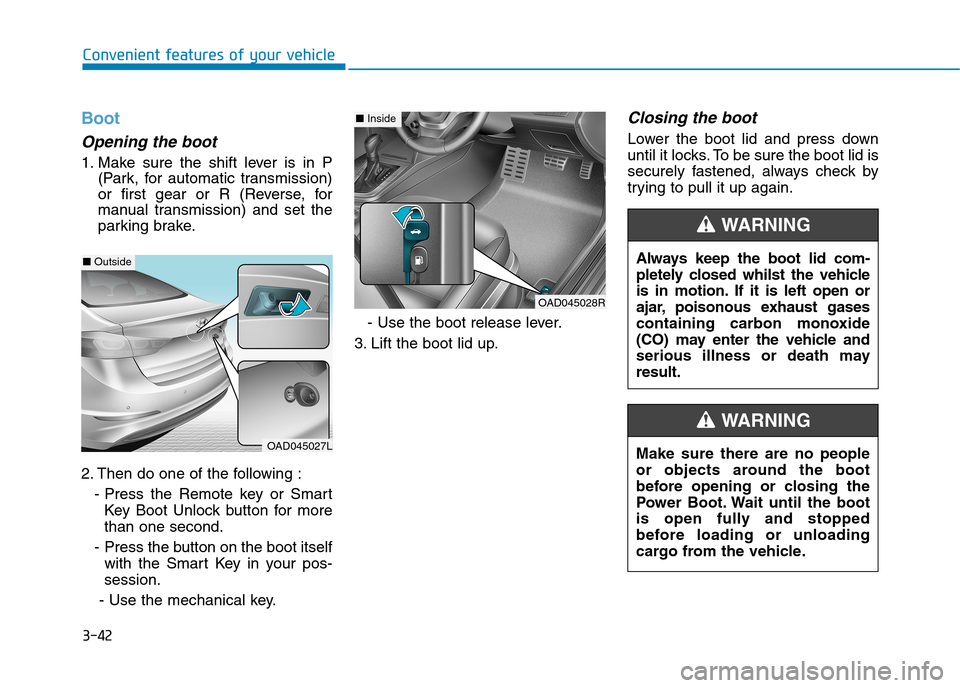
2. Then do one of the following :
- Press the Remote key or Smart
Key Boot Unlock button for more
than one second.
- Press the button on the boot itself
with the Smart Key in your pos-
session.
- Use the mechanical key.
- Use the boot release lever.
3. Lift the boot lid up.
Closing the boot
Lower the boot lid and press down
until it locks. To be sure the boot lid is
securely fastened, always check by
trying to pull it up again.
Always keep the boot lid com-
pletely closed whilst the vehicle
is in motion. If it is left open or
ajar, poisonous exhaust gases
containing carbon monoxide
(CO) may enter the vehicle and
serious illness or death may
result.
WA R N I N G
Make sure there are no people
or objects around the boot
before opening or closing the
Power Boot. Wait until the boot
is open fully and stopped
before loading or unloading
cargo from the vehicle.
WA R N I N G
OAD045028R
■Inside
OAD045027L
■Outside
Page 135 of 571
3-43
Convenient features of your vehicle
3
Information
To prevent damage to the boot lift
cylinders and the attached hardware,
always close the boot before driving.
In cold and wet climates, boot lock
and boot mechanisms may not
work properly due to freezing con-
ditions.
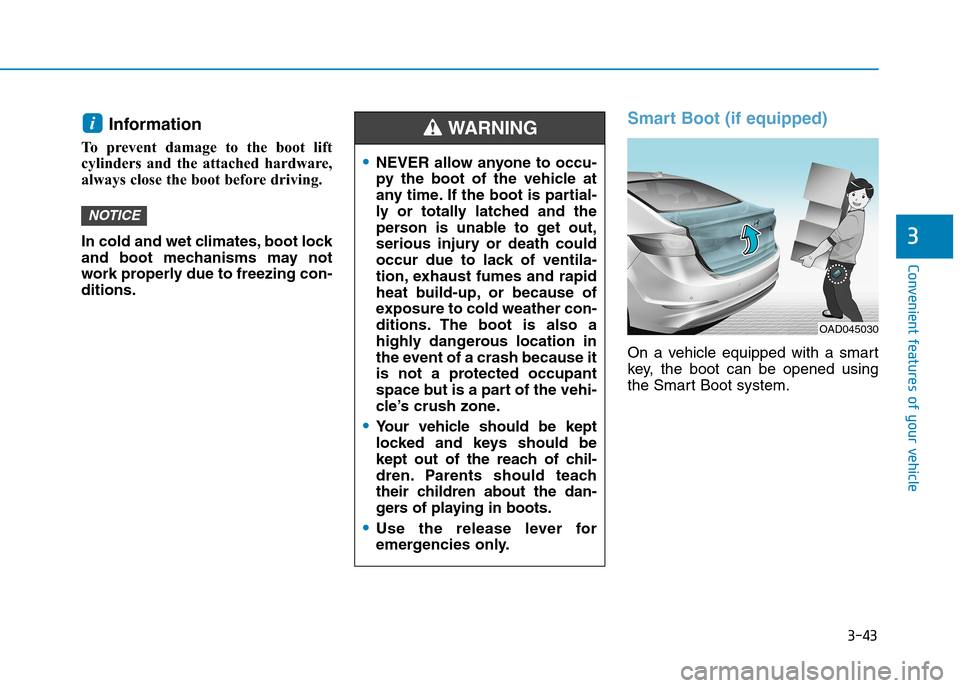
Smart Boot (if equipped)
On a vehicle equipped with a smart
key, the boot can be opened using
the Smart Boot system.
NOTICE
i
•NEVER allow anyone to occu-
py the boot of the vehicle at
any time. If the boot is partial-
ly or totally latched and the
person is unable to get out,
serious injury or death could
occur due to lack of ventila-
tion, exhaust fumes and rapid
heat build-up, or because of
exposure to cold weather con-
ditions. The boot is also a
highly dangerous location in
the event of a crash because it
is not a protected occupant
space but is a part of the vehi-
cle’s crush zone.
•Yo u r v e h i c l e s h o u l d b e k e p t
locked and keys should be
kept out of the reach of chil-
dren. Parents should teach
their children about the dan-
gers of playing in boots.
•Use the release lever for
emergencies only.
WA R N I N G
OAD045030
Page 136 of 571
3-44
Convenient features of your vehicle
How to use the Smart Boot
The boot can be opened with no-
touch activation when the following
conditions are met:
•After 15 seconds when all doors
are closed and locked.
•Positioned in the detecting area for
more than 3 seconds.
Information
• The Smart Boot does not operate
when:
- The smart key is detected within
15 seconds after the doors are
closed and locked, and is continu-
ously detected.
- The smart key is detected within
15 seconds after the doors are
closed and locked, and 1.5 m from
the front door handles (for vehicles
equipped with a Welcome Light).
- A door is not locked or closed.
- The smart key is in the vehicle.
1. Setting
To a c t i v a t e t h e S m a r t B o o t , g o t o
User Settings Mode and select
Smart Boot on the LCD display.
For more details, refer to "LCD
Display" in this chapter.
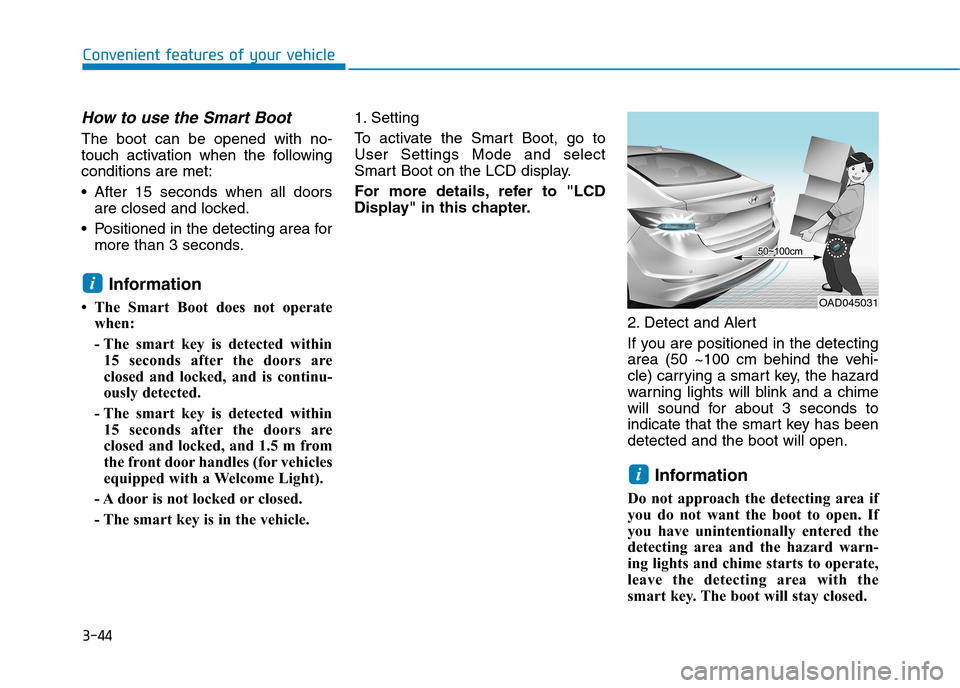
2. Detect and Alert
If you are positioned in the detecting
area (50 ~100 cm behind the vehi-
cle) carrying a smart key, the hazard
warning lights will blink and a chime
will sound for about 3 seconds to
indicate that the smart key has been
detected and the boot will open.
Information
Do not approach the detecting area if
you do not want the boot to open. If
you have unintentionally entered the
detecting area and the hazard warn-
ing lights and chime starts to operate,
leave the detecting area with the
smart key. The boot will stay closed.
i
i
OAD045031