Page 40 of 571
2-13
Safety system of your vehicle
To f o l d d o w n t h e r e a r s e a t b a c k :
1. Set the front seatback to the
upright position and if necessary,
slide the front seat forward.
2. Lower the rear head restraints to
the lowest position.
3. Pull on the seatback folding lever
(1) located in the boot.
4. Fold the seatback toward the front
of the vehicle.
5. To use the rear seat, lift and pull
the seatback rearward. Pull the
seatback firmly until it clicks into
place. Make sure the seatback is
locked in place.
When you return the seatback to
its upright position, always be sure
it has locked into position by push-
ing on the top of the seatback.
2
OAD035019OAD035022OAD035021
Page 41 of 571
2-14
Safety system of your vehicle
Armrest
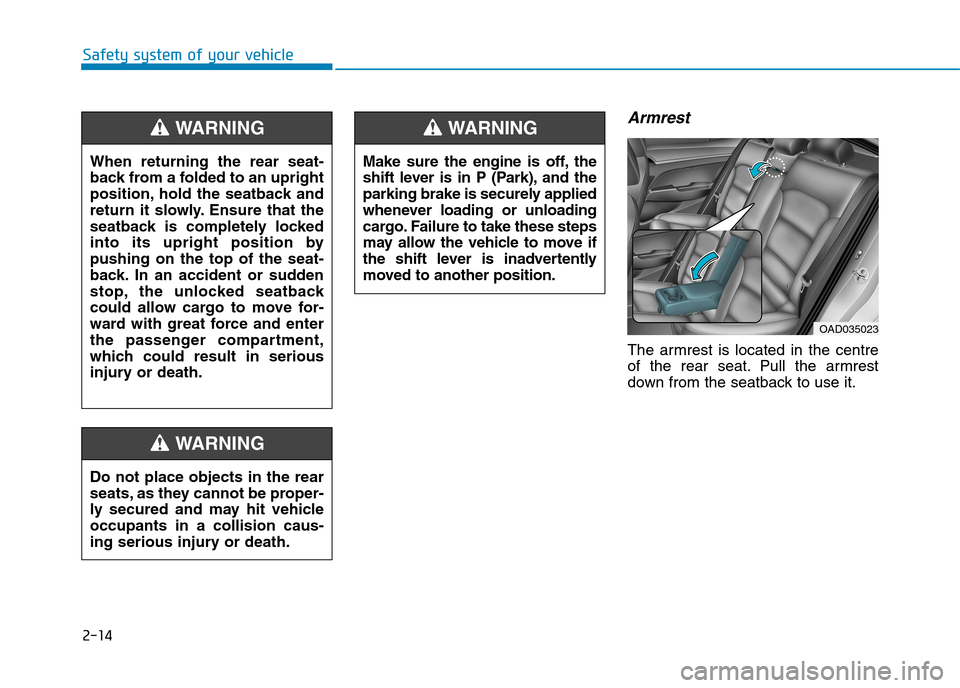
The armrest is located in the centre
of the rear seat. Pull the armrest
down from the seatback to use it.
OAD035023
Make sure the engine is off, the
shift lever is in P (Park), and the
parking brake is securely applied
whenever loading or unloading
cargo. Failure to take these steps
may allow the vehicle to move if
the shift lever is inadvertently
moved to another position.
WA R N I N G
Do not place objects in the rear
seats, as they cannot be proper-
ly secured and may hit vehicle
occupants in a collision caus-
ing serious injury or death.
WA R N I N G
When returning the rear seat-
back from a folded to an upright
position, hold the seatback and
return it slowly. Ensure that the
seatback is completely locked
into its upright position by
pushing on the top of the seat-
back. In an accident or sudden
stop, the unlocked seatback
could allow cargo to move for-
ward with great force and enter
the passenger compartment,
which could result in serious
injury or death.
WA R N I N G
Page 42 of 571
2-15
Safety system of your vehicle
2
Headrest
The vehicle’s front and rear seats
have adjustable headrests. The head-
rests provide comfort for passengers,
but more impor tantly they are
designed to help protect passengers
from whiplash and other neck and
spinal injuries during an accident,
especially in a rear impact collision.
To p r e v e n t d a m a g e , N E V E R h i t o r
pull on the headrests.
NOTICE(Continued)
•
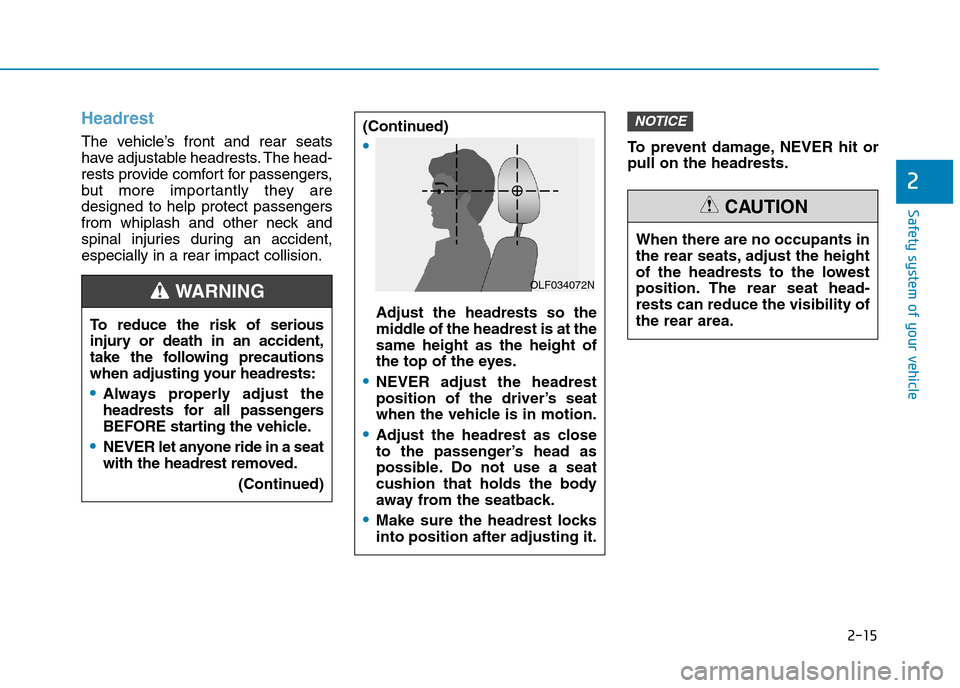
Adjust the headrests so the
middle of the headrest is at the
same height as the height of
the top of the eyes.
•NEVER adjust the headrest
position of the driver’s seat
when the vehicle is in motion.
•Adjust the headrest as close
to the passenger’s head as
possible. Do not use a seat
cushion that holds the body
away from the seatback.
•Make sure the headrest locks
into position after adjusting it.
OLF034072N
To r e d u c e t h e r i s k o f s e r i o u s
injury or death in an accident,
take the following precautions
when adjusting your headrests:
•Always properly adjust the
headrests for all passengers
BEFORE starting the vehicle.
•NEVER let anyone ride in a seat
with the headrest removed.
(Continued)
WA R N I N G
When there are no occupants in
the rear seats, adjust the height
of the headrests to the lowest
position. The rear seat head-
rests can reduce the visibility of
the rear area.
CAUTION
Page 45 of 571
2-18
Rear seat headrests
The rear seats are equipped with
headrests in all the seating positions
for passengers safety and comfor t.
Adjusting the height up and down
(if equipped)
To r a i s e t h e h e a d r e s t :
1. Pull it up to the desired position (1).
To l o w e r t h e h e a d r e s t :
1. Push and hold the release button
(2) on the headrest support.
2. Lower the headrest to the desired
position (3).
Safety system of your vehicle
OLMB033016
OAD035018
Always make sure the headrest
locks into position after rein-
stalling and adjusting it properly.
WA R N I N G
Page 49 of 571
2-22
Safety system of your vehicle
(Continued)
•Avoid spilling liquids on the
surface of the front seats and
seatbacks; this may cause the
air vent holes to become
blocked and not work properly.
•Do not place materials such
as plastic bags or newspa-
pers under the seats. They
may block the air intake caus-
ing the air vents to not work
properly.
•Do not change the seat cov-
ers. It may damage the seat
warmer or air ventilation seat.
•If the air vents do not operate,
restart the vehicle. If there is
no change, we recommend
that you have your vehicle
inspected by an authorised
HYUNDAI dealer.
To p r e v e n t d a m a g e t o t h e s e a t
warmer, air ventilation seat and
seats:
•Use the seat warmer and air
ventilation seat ONLY when
the climate control system is
on. Using the seat warmer and
air ventilation seat for pro-
longed periods of time with
the climate control system off
could cause the seat warmer
and air ventilation seat to mal-
function.
•Never use a solvent such as
paint thinner, benzene, alco-
hol or petrol to clean the
seats.
(Continued)
CAUTION
Page 54 of 571
2-27
Safety system of your vehicle
2
Seat belt restraint system
Lap/shoulder belt
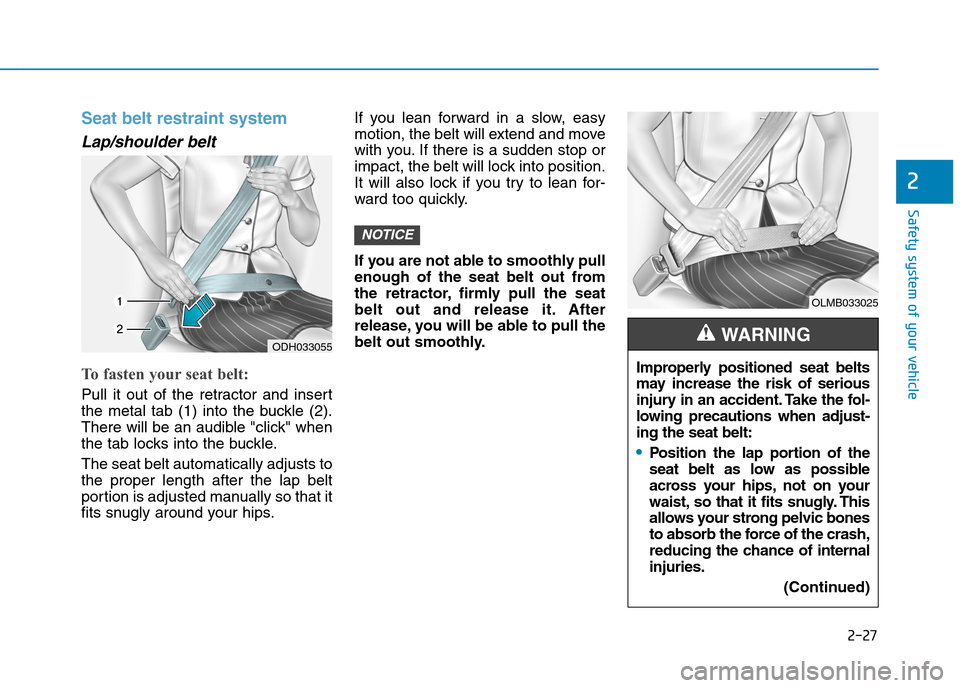
To fasten your seat belt:
Pull it out of the retractor and insert
the metal tab (1) into the buckle (2).
There will be an audible "click" when
the tab locks into the buckle.
The seat belt automatically adjusts to
the proper length after the lap belt
portion is adjusted manually so that it
fits snugly around your hips.
If you lean forward in a slow, easy
motion, the belt will extend and move
with you. If there is a sudden stop or
impact, the belt will lock into position.
It will also lock if you try to lean for-
ward too quickly.
If you are not able to smoothly pull
enough of the seat belt out from
the retractor, firmly pull the seat
belt out and release it. After
release, you will be able to pull the
belt out smoothly.
NOTICE
ODH033055
OLMB033025
Improperly positioned seat belts
may increase the risk of serious
injury in an accident. Take the fol-
lowing precautions when adjust-
ing the seat belt:
•Position the lap por tion of the
seat belt as low as possible
across your hips, not on your
waist, so that it fits snugly. This
allows your strong pelvic bones
to absorb the force of the crash,
reducing the chance of internal
injuries.
(Continued)
WA R N I N G
Page 55 of 571
2-28
Safety system of your vehicle
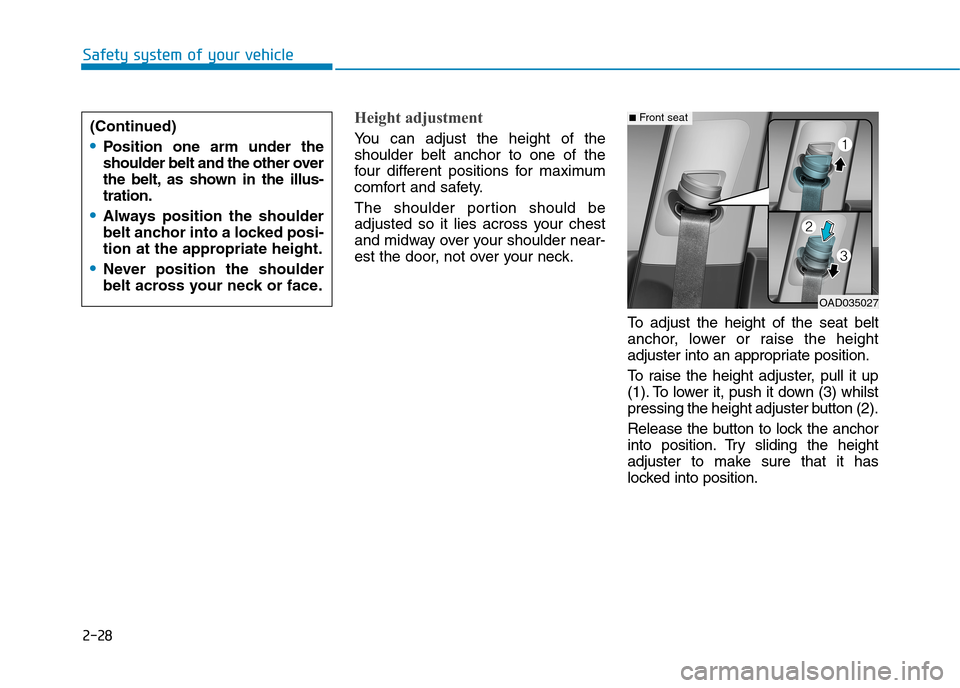
Height adjustment
Yo u c a n a d j u s t t h e h e i g h t o f t h e
shoulder belt anchor to one of the
four different positions for maximum
comfort and safety.
The shoulder portion should be
adjusted so it lies across your chest
and midway over your shoulder near-
est the door, not over your neck.
To a d j u s t t h e h e i g h t o f t h e s e a t b e l t
anchor, lower or raise the height
adjuster into an appropriate position.
To r a i s e t h e h e i g h t a d j u s t e r , p u l l i t u p
(1). To lower it, push it down (3) whilst
pressing the height adjuster button (2).
Release the button to lock the anchor
into position. Try sliding the height
adjuster to make sure that it has
locked into position.
OAD035027
■Front seat(Continued)
•Position one arm under the
shoulder belt and the other over
the belt, as shown in the illus-
tration.
•Always position the shoulder
belt anchor into a locked posi-
tion at the appropriate height.
•Never position the shoulder
belt across your neck or face.
Page 56 of 571
2-29
Safety system of your vehicle
2
Rear centre seatbelt
When using the rear centre seat belt,
the buckle with the “CENTER” mark
must be used.
Information
If you are not able to pull out the seat
belt from the retractor, firmly pull the
belt out and release it. After release,
you will be able to pull the belt out
smoothly.
To release your seat belt:
Press the release button (1) in the
locking buckle.
When it is released, the belt should
automatically draw back into the
retractor. If this does not happen,
check the belt to be sure it is not twist-
ed, then try again.
i
OAD035028
Always have the metal tab
inserted into the buckle.
WA R N I N G
ODH033057