2017 Hyundai Elantra ignition
[x] Cancel search: ignitionPage 116 of 571
3-24
Convenient features of your vehicle
Tilt steering / Telescope steering
Information
After adjustment, sometimes the lock-
release lever may not lock the steering
wheel.
It is not a malfunction. This occurs
when two gears are not engaged cor-
rectly. In this case, adjust the steering
wheel again and then lock the steering
wheel.
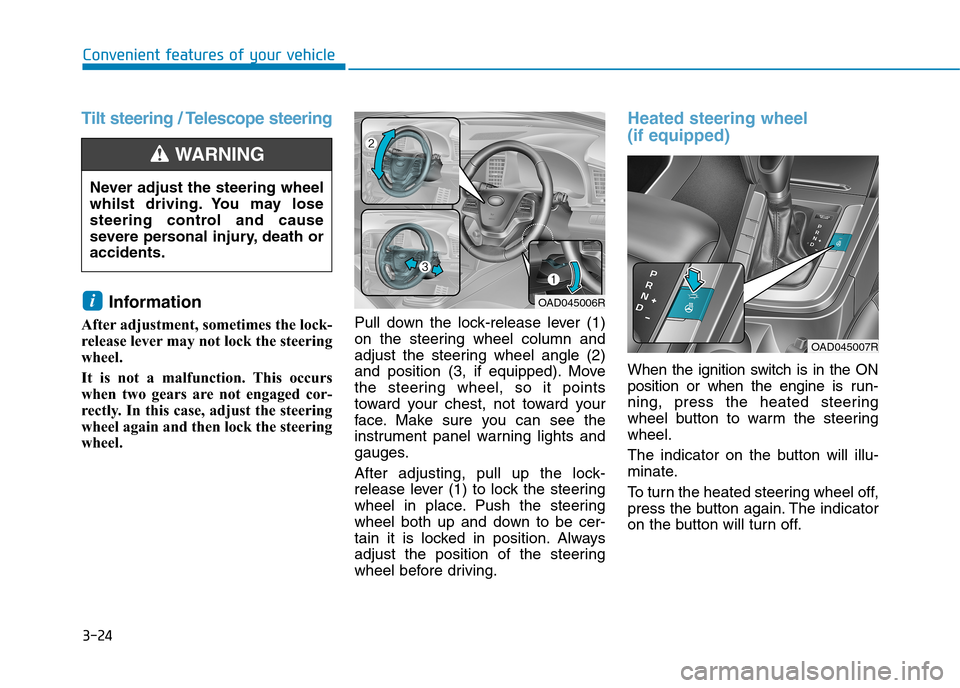
Pull down the lock-release lever (1)
on the steering wheel column and
adjust the steering wheel angle (2)
and position (3, if equipped). Move
the steering wheel, so it points
toward your chest, not toward your
face. Make sure you can see the
instrument panel warning lights and
gauges.
After adjusting, pull up the lock-
release lever (1) to lock the steering
wheel in place. Push the steering
wheel both up and down to be cer-
tain it is locked in position. Always
adjust the position of the steering
wheel before driving.
Heated steering wheel
(if equipped)
When the ignition switch is in the ON
position or when the engine is run-
ning, press the heated steering
wheel button to warm the steering
wheel.
The indicator on the button will illu-
minate.
To t u r n t h e h e a t e d s t e e r i n g w h e e l o f f ,
press the button again. The indicator
on the button will turn off.
i
Never adjust the steering wheel
whilst driving. You may lose
steering control and cause
severe personal injury, death or
accidents.
WA R N I N G
OAD045006R
OAD045007R
Page 119 of 571
3-27
Convenient features of your vehicle
3
Day/night rearview mirror
(if equipped)
Make this adjustment before you
start driving and whilst the day/night
lever is in the day position.
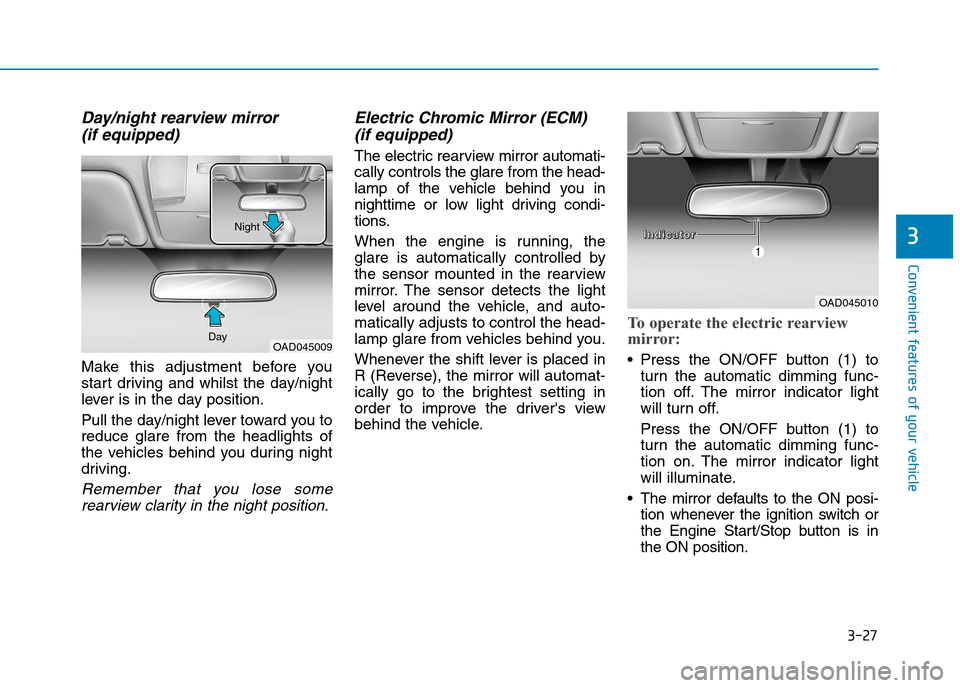
Pull the day/night lever toward you to
reduce glare from the headlights of
the vehicles behind you during night
driving.
Remember that you lose some
rearview clarity in the night position.
Electric Chromic Mirror (ECM)
(if equipped)
The electric rearview mirror automati-
cally controls the glare from the head-
lamp of the vehicle behind you in
nighttime or low light driving condi-
tions.
When the engine is running, the
glare is automatically controlled by
the sensor mounted in the rearview
mirror. The sensor detects the light
level around the vehicle, and auto-
matically adjusts to control the head-
lamp glare from vehicles behind you.
Whenever the shift lever is placed in
R (Reverse), the mirror will automat-
ically go to the brightest setting in
order to improve the driver's view
behind the vehicle.
To operate the electric rearview
mirror:
•Press the ON/OFF button (1) to
turn the automatic dimming func-
tion off. The mirror indicator light
will turn off.
Press the ON/OFF button (1) to
turn the automatic dimming func-
tion on. The mirror indicator light
will illuminate.
•The mirror defaults to the ON posi-
tion whenever the ignition switch or
the Engine Start/Stop button is in
the ON position.
OAD045010
OAD045009Day
NightIIIInnnnddddiiiiccccaaaattttoooorrrr
Page 122 of 571
3-30
Convenient features of your vehicle
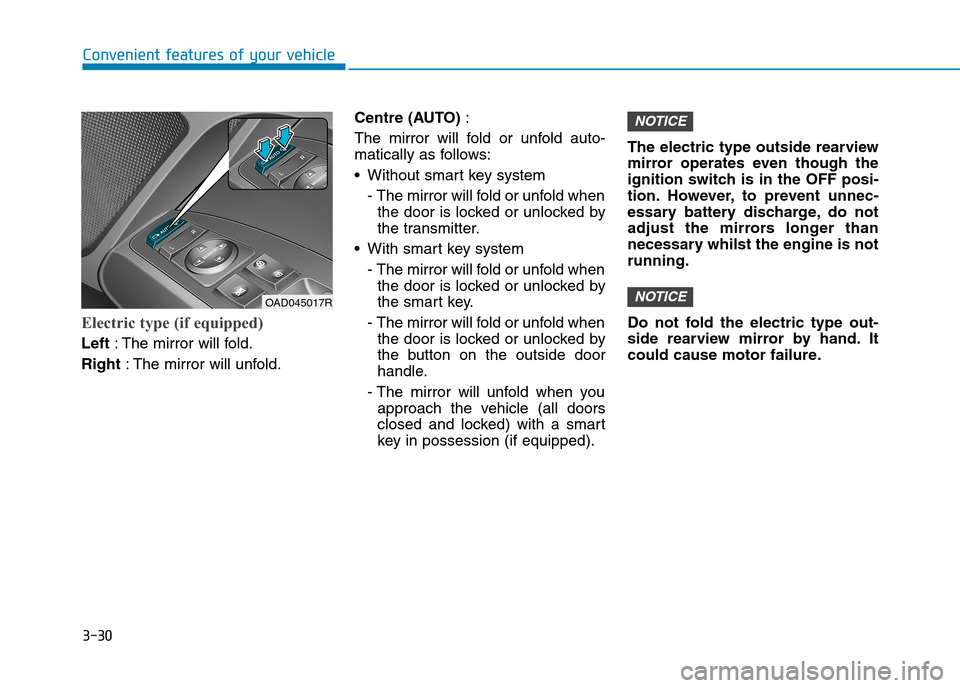
Electric type (if equipped)
Left:The mirror will fold.
Right:The mirror will unfold.
Centre (AUTO):
The mirror will fold or unfold auto-
matically as follows:
•Without smart key system
- The mirror will fold or unfold when
the door is locked or unlocked by
the transmitter.
•With smart key system
- The mirror will fold or unfold when
the door is locked or unlocked by
the smart key.
- The mirror will fold or unfold when
the door is locked or unlocked by
the button on the outside door
handle.
- The mirror will unfold when you
approach the vehicle (all doors
closed and locked) with a smart
key in possession (if equipped).
The electric type outside rearview
mirror operates even though the
ignition switch is in the OFF posi-
tion. However, to prevent unnec-
essary battery discharge, do not
adjust the mirrors longer than
necessary whilst the engine is not
running.
Do not fold the electric type out-
side rearview mirror by hand. It
could cause motor failure.
NOTICE
NOTICE
OAD045017R
Page 124 of 571
3-32
Convenient features of your vehicle
The ignition switch must be in the ON
position to be able to raise or lower
the windows. Each door has a Power
Window switch to control that door's
window. The driver has a Power
Window Lock switch which can block
the operation of passenger windows.
The power windows will operate for
approximately 30 seconds after the
ignition switch is placed in the ACC
or OFF position. However, if the front
doors are opened, the Power
Windows cannot be operated even
within the 30 second period.
Information
• In cold and wet climates, power win-
dows may not work properly due to
freezing conditions.
• Whilst driving with the rear win-
dows down or with the sunroof (if
equipped) opened (or partially
opened), your vehicle may demon-
strate a wind buffeting or pulsation
noise. This noise is normal and can
be reduced or eliminated by taking
the following actions. If the noise
occurs with one or both of the rear
windows down, partially lower both
front windows approximately 2.5
cm (1 inch). If you experience the
noise with the sunroof open, slightly
close the sunroof.
Window opening and closing
To o p e n :
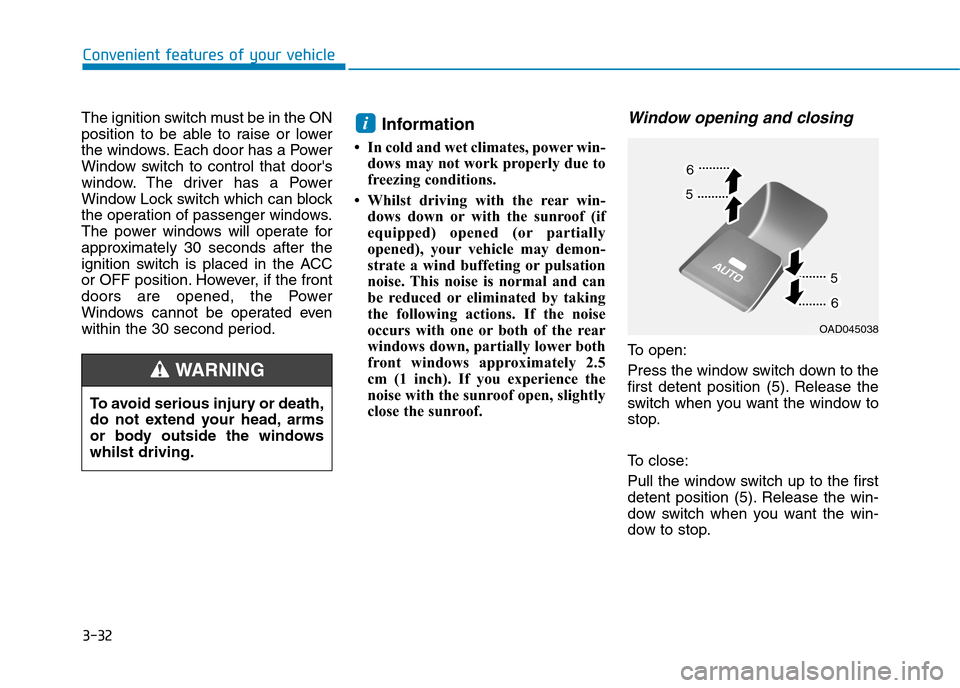
Press the window switch down to the
first detent position (5). Release the
switch when you want the window to
stop.
To c l o s e :
Pull the window switch up to the first
detent position (5). Release the win-
dow switch when you want the win-
dow to stop.
i
To a vo i d s e r i o u s i n j u r y o r d e a t h ,
do not extend your head, arms
or body outside the windows
whilst driving.
WA R N I N G
OAD045038
Page 125 of 571
3-33
Convenient features of your vehicle
3
Auto down window (if equipped)
Pressing the power window switch
momentarily to the second detent
position (6) completely lowers the
window even when the switch is
released. To stop the window at the
desired position whilst the window is
in operation, pull up or press down
and release the switch.
Auto up/down window
(if equipped)
Pressing or pulling up the power win-
dow switch momentarily to the sec-
ond detent position (6) completely
lowers or lifts the window even when
the switch is released. To stop the
window at the desired position whilst
the window is in operation, pull up or
press down and release the switch.
To r e s e t t h e p o w e r w i n d o w s
If the power windows do not operate
normally, the automatic power win-
dow system must be reset as follows:
1. Place the ignition switch to the ON
position.
2. Close the window and continue
pulling up on the power window
switch for at least one second.
If the power windows do not operate
properly after resetting, it is recom-
mended that the system be checked
by an authorised HYUNDAI dealer.
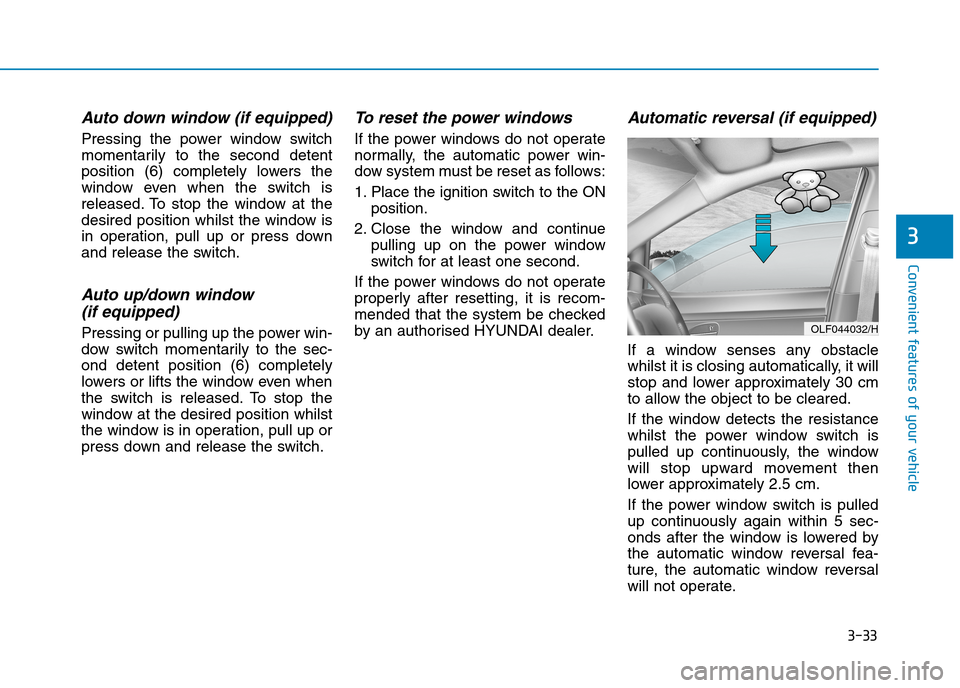
Automatic reversal (if equipped)
If a window senses any obstacle
whilst it is closing automatically, it will
stop and lower approximately 30 cm
to allow the object to be cleared.
If the window detects the resistance
whilst the power window switch is
pulled up continuously, the window
will stop upward movement then
lower approximately 2.5 cm.
If the power window switch is pulled
up continuously again within 5 sec-
onds after the window is lowered by
the automatic window reversal fea-
ture, the automatic window reversal
will not operate.
OLF044032/H
Page 128 of 571
3-36
Convenient features of your vehicle
SSUUNNRROOOOFF ((IIFF EEQQUUIIPPPPEEDD))
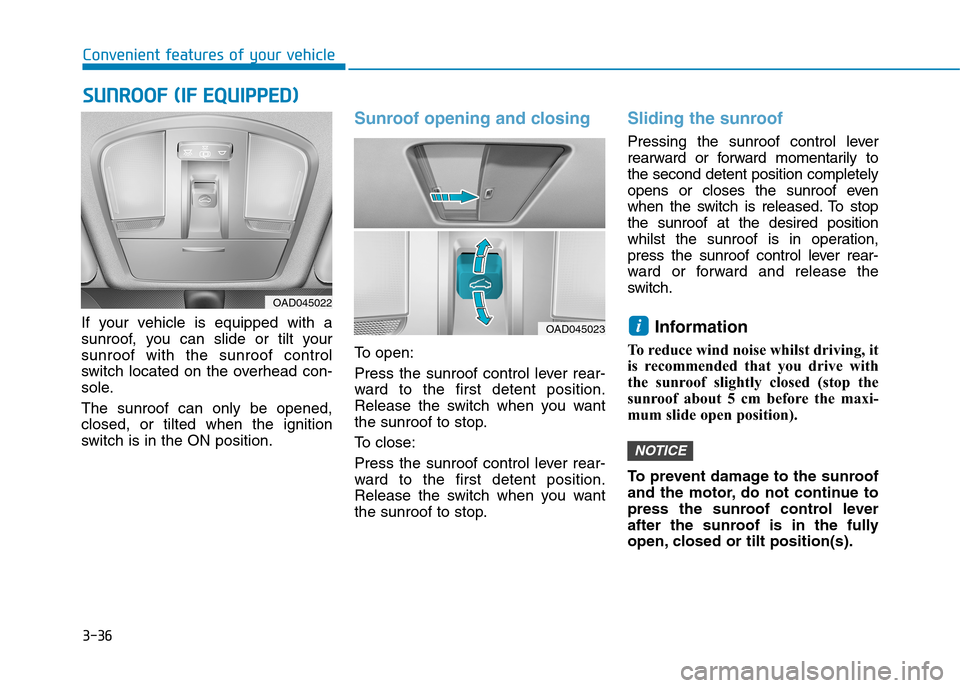
If your vehicle is equipped with a
sunroof, you can slide or tilt your
sunroof with the sunroof control
switch located on the overhead con-
sole.
The sunroof can only be opened,
closed, or tilted when the ignition
switch is in the ON position.
Sunroof opening and closing
To o p e n :
Press the sunroof control lever rear-
ward to the first detent position.
Release the switch when you want
the sunroof to stop.
To c l o s e :
Press the sunroof control lever rear-
ward to the first detent position.
Release the switch when you want
the sunroof to stop.
Sliding the sunroof
Pressing the sunroof control lever
rearward or forward momentarily to
the second detent position completely
opens or closes the sunroof even
when the switch is released. To stop
the sunroof at the desired position
whilst the sunroof is in operation,
press the sunroof control lever rear-
ward or forward and release the
switch.
Information
To reduce wind noise whilst driving, it
is recommended that you drive with
the sunroof slightly closed (stop the
sunroof about 5 cm before the maxi-
mum slide open position).
To p r e v e n t d a m a g e t o t h e s u n r o o f
and the motor, do not continue to
press the sunroof control lever
after the sunroof is in the fully
open, closed or tilt position(s).
NOTICE
i
OAD045022
OAD045023
Page 131 of 571
3-39
Convenient features of your vehicle
3
Resetting the sunroof
The sunroof needs to be reset if:
-The battery is discharged or discon-
nected or the related fuse has been
replaced or disconnected
-The one-touch sliding function of
the sunroof does not operate nor-
mally
1. Place the ignition switch in the ON
position or start the engine. It is rec-
ommended to reset the sunroof
whilst the engine is running.
2. Push the control lever forward. The
sunroof will close completely or tilt
depending on the condition of the
sunroof.
3. Release the control lever until the
sunroof does not move.
4. Push the control lever forward for
about 10 seconds.
- When the sunroof is in the close
position :
The glass will tilt and slightly move
up and down.
- When the sunroof is in the tilt posi-
tion:
The glass will slightly move up
and down.
Do not release the lever until the
operation is completed.
If you release the lever during opera-
tion, try again from step 2.
5. Within 3 seconds, push the control
lever forward until the sunroof
operates as follows:
Tilt down →Slide Open →Slide
Close.
Do not release the lever until the
operation is completed.
If you release the lever during opera-
tion, try again from step 2.
6. Release the sunroof control lever
after all operation has completed.
(The sunroof system has been
reset.)
Information
• If the sunroof does not reset when
the vehicle battery is disconnected
or discharged, or related fuse is
blown, the sunroof may not operate
normally.
• For more detailed information, we
recommend that you contact an
authorised HYUNDAI dealer.
i
Page 140 of 571
3-48
Convenient features of your vehicle
Closing the fuel filler door
1. To install the fuel tank cap, turn it
clockwise until it “clicks” one time.
2. Close the fuel filler door until it is
latched securely.
Petrol is highly flammable and
explosive. Failure to follow
these guidelines may result in
SERIOUS INJURY or DEATH:
•Read and follow all warnings
posted at the service station.
•Before refuelling, note the
location of the Emergency
Petrol Shut-Off, if available, at
the service station.
•Before touching the fuel noz-
zle, you should eliminate the
potential build-up of static
electricity by touching a metal
part of the vehicle, a safe dis-
tance away from the fuel filler
neck, nozzle, or other fuel
source, with your bare hand.
(Continued)
WA R N I N G
(Continued)
•Do not use mobile phones
whilst refuelling. Electric cur-
rent and/or electronic interfer-
ence from mobile phones can
potentially ignite fuel vapours
and cause a fire.
•Do not get back into a vehicle
once you have begun refu-
elling. You can generate a
build-up of static electricity by
touching, rubbing or sliding
against any item or fabric
capable of producing static
electricity. Static electricity
discharge can ignite fuel
vapours causing a fire. If you
must re-enter the vehicle, you
should once again eliminate
potentially dangerous static
electricity discharge by touch-
ing a metal part of the vehicle,
away from the fuel filler neck,
nozzle or other fuel source,
with your bare hand.
(Continued)
(Continued)
•When refuelling, always move
the shift lever to the P (Park)
position (for automatic trans-
mission) or first gear or R
(Reverse, for manual trans-
mission), set the parking
brake, and place the ignition
switch to the LOCK/OFF posi-
tion. Sparks produced by
electrical components related
to the engine can ignite fuel
vapours causing a fire.
•When using an approved
portable fuel container, be
sure to place the container on
the ground prior to refuelling.
Static electricity discharge
from the container can ignite
fuel vapours causing a fire.
Once refuelling has begun,
contact between your bare
hand and the vehicle should
be maintained until the filling
is complete.
(Continued)