2017 GENESIS G90 driver seat adjustment
[x] Cancel search: driver seat adjustmentPage 30 of 524

2-10
Safety system of your vehicle
Forward and rearward adjust-ment
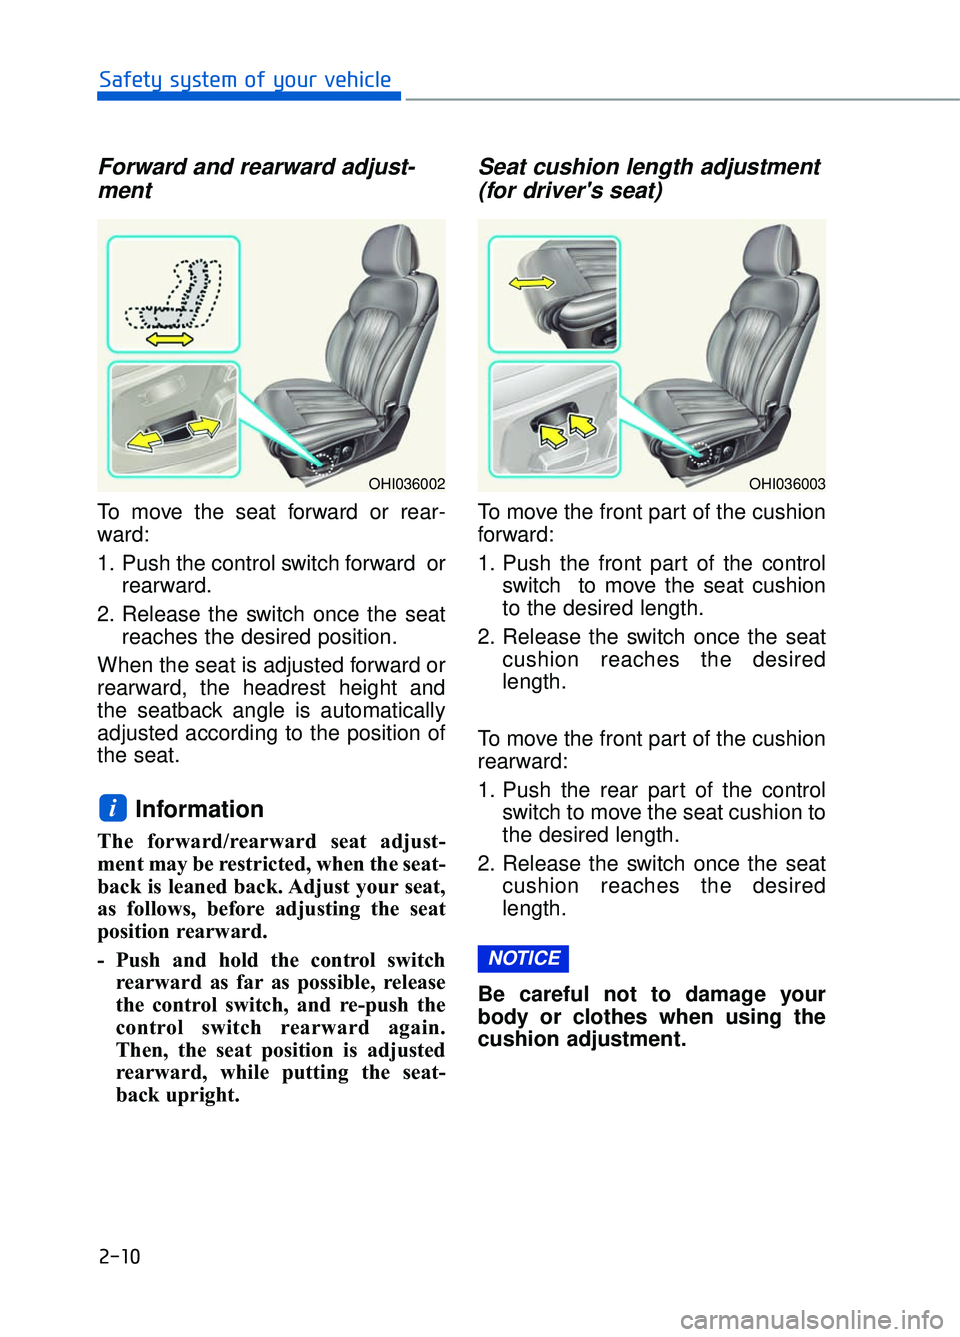
To move the seat forward or rear-
ward:
1. Push the control switch forward or
rearward.
2. Release the switch once the seat reaches the desired position.
When the seat is adjusted forward or
rearward, the headrest height and
the seatback angle is automatically
adjusted according to the position of
the seat.
Information
The forward/rearward seat adjust-
ment may be restricted, when the seat-
back is leaned back. Adjust your seat,
as follows, before adjusting the seat
position rearward.
- Push and hold the control switch rearward as far as possible, release
the control switch, and re-push the
control switch rearward again.
Then, the seat position is adjusted
rearward, while putting the seat-
back upright.
Seat cushion length adjustment(for driver's seat)
To move the front part of the cushion
forward:
1. Push the front part of the control
switch to move the seat cushion
to the desired length.
2. Release the switch once the seat cushion reaches the desired
length.
To move the front part of the cushion
rearward:
1. Push the rear part of the control switch to move the seat cushion to
the desired length.
2. Release the switch once the seat cushion reaches the desired
length.
Be careful not to damage your
body or clothes when using the
cushion adjustment.
NOTICE
i
OHI036002OHI036003
Page 31 of 524

2-11
02
Seatback angle
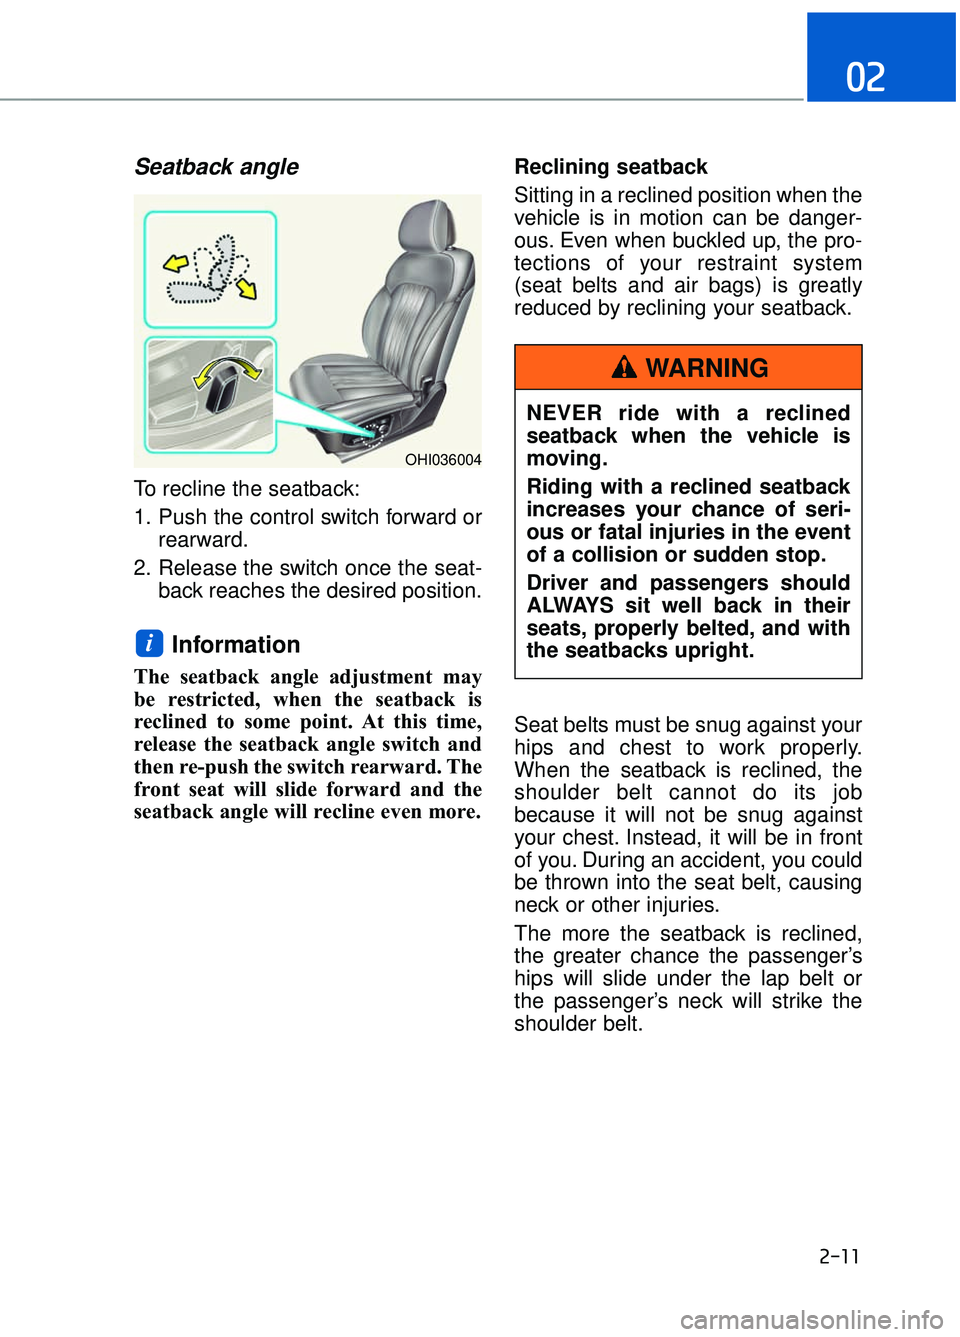
To recline the seatback:
1. Push the control switch forward orrearward.
2. Release the switch once the seat- back reaches the desired position.
Information
The seatback angle adjustment may
be restricted, when the seatback is
reclined to some point. At this time,
release the seatback angle switch and
then re-push the switch rearward. The
front seat will slide forward and the
seatback angle will recline even more. Reclining seatback
Sitting in a reclined position when the
vehicle is in motion can be danger-
ous. Even when buckled up, the pro-
tections of your restraint system
(seat belts and air bags) is greatly
reduced by reclining your seatback.
Seat belts must be snug against your
hips and chest to work properly.
When the seatback is reclined, the
shoulder belt cannot do its job
because it will not be snug against
your chest. Instead, it will be in front
of you. During an accident, you could
be thrown into the seat belt, causing
neck or other injuries.
The more the seatback is reclined,
the greater chance the passenger’s
hips will slide under the lap belt or
the passenger’s neck will strike the
shoulder belt.
i
OHI036004
NEVER ride with a reclined
seatback when the vehicle is
moving.
Riding with a reclined seatback
increases your chance of seri-
ous or fatal injuries in the event
of a collision or sudden stop.
Driver and passengers should
ALWAYS sit well back in their
seats, properly belted, and with
the seatbacks upright.
WARNING
Page 33 of 524

2-13
02
Seat shoulder adjustment(for driver's seat, if equipped)
1. Push the control switch forward or
rearward to move the shoulder
angle to the desired position.
2. Release the switch once the seat reaches the desired position.
Seat bolster adjustment(for driver's seat, if equipped)
To change the height of the seat bol-
ster:
1. Pull or push the lever.
2. Release the lever once the bolster
reaches the desired position.
Easy access switch
A front seat moves slightly rearward,
when a passenger opens a front
door with the DOOR indicator illumi-
nated.
A front seat moves slightly forward
when a passenger closes a front
door with the DOOR indicator illumi-
nated.
To deactivate the easy access func-
tion, press the DOOR switch (indica-
tor OFF).
OHI036073
OHI036082
OHI036007N
Page 44 of 524

2-24
Safety system of your vehicle
Front seat head restraints
The driver's and front passenger's
seats are equipped with adjustable
head restraints for the passengers
safety and comfort.
Forward and rearward adjustment
Push the control switch forward or
backward to move the head restraint.
Release the switch once the head
restraint reaches the desired posi-
tion.
Adjusting the height up and down
Push the control switch up to raise or
down to lower the head restraint.
Release the switch once the head
restraint reaches the desired posi-
tion.
If you recline the seatback
towards the front with the head
restraint and seat cushion raised,
the head restraint may come in
contact with the sunvisor or other
parts of the vehicle.
NOTICE
OHI036008
OHI036009
OHI036133N
OHI036010
Page 55 of 524

2-35
02
Front Seat Belt – Driver's 3-point system with emergencylocking retractor
To fasten your seat belt:
Pull the seat belt out of the retractor
and insert the metal tab (1) into the
buckle (2). There will be an audible
"click" when the tab locks into the
buckle.
The seat belt automatically adjusts to
the proper length after the lap belt por-
tion is adjusted manually so that it fits
snugly around your hips. If you lean
forward in a slow, easy motion, the belt
will extend and move with you.
If there is a sudden stop or impact,
the belt will lock into position. It will
also lock if you try to lean forward too
quickly.
Information
If you are not able to smoothly pull
enough of the seat belt out from the
retractor, firmly pull the seat belt out
and release it. After release, you will
be able to pull the belt out smoothly.
Height adjustment
You can adjust the height of the
shoulder belt anchor to one of the
three different positions for maximum
comfort and safety.
The shoulder portion should be
adjusted so it lies across your chest
and midway over your shoulder near-
est the door, not over your neck.
To adjust the height of the seat belt
anchor, lower or raise the height
adjuster into an appropriate position.
To raise the height adjuster, pull it up
(1). To lower it, push it down (3) while
pressing the height adjuster button (2).
Release the button to lock the anchor
into position. Try sliding the height
adjuster to make sure that it has
locked into position.
i
OHI036036
■ Front seat
OHI036102
Page 118 of 524

3-16
Convenient features of your vehicle
Information
Only the driver's seat position memo-
ry appears on the LCD display.
Recalling memory positions
1. Move the shift lever into P (Park)while the Engine Start/Stop button
is in the ON position.
2. Press the desired memory button (1 or 2). The system will beep once,
and then the driver's seat position,
outer side view mirror position,
steering wheel position, instrument
panel illumination intensity and
head-up display height/brightness
will automatically adjust to the stored
positions.
3.
"Driver 1(or 2) settings is applied"
will appear on the LCD display.
Information
• While recalling the "1" memory posi-tion, pressing the SET or 1 button
temporarily stops the adjustment of
the recalled memory position.
Pressing the 2 button recalls the "2"
memory position.
• While recalling the "2" memory posi- tion, pressing the SET or 2 button
temporarily stops the adjustment of
the recalled memory position.
Pressing the 1 button recalls the "1"
memory position.
• While recalling the stored positions, pressing one of the control buttons
for the driver's seat, outside rearview
mirror, steering wheel, instrument
panel illumination or head-up display
will cause the movement of that com-
ponent to stop and move in the direc-
tion that the control button is pressed.
Easy Access Function
When exiting the vehicle, the steering
wheel will move away from the driver
and the driver seat will move rear-
ward when the engine is turned off
and door is opened. When entering
the vehicle, the steering wheel will
move toward the driver and the driver
seat will move forward when the
Engine Start/Stop button is pressed
to the ACC position.
You can activate or deactivate the
Driver easy access function from the
User Settings mode on the LCD dis-
play. For more information, refer to
"LCD Display" in this chapter.
The front passenger’s seat or a rear
passenger’s seat moves backward
for his/her convenience, when a cor-
responding door is opened with the
DOOR button in the ON position.
i
i
OHI046176L/OHI046177L