2017 FORD TAURUS lock
[x] Cancel search: lockPage 252 of 504

4. Remove two bolts that attach the airfilter assembly to the front of thevehicle.
5. Remove the harness retaining clip bypulling up.
6. Do not disconnect the sensor.
7. Pull the air filter assembly up todisconnect it from the seatedgrommets located under the air filterassembly.
8. Rotate the air filter assembly 90degrees counterclockwise. Make surethe rubber hose is still connected to theair filter assembly.
9. Tighten the clamp.
You can now access the transmission fluidlevel indicator.
Checking the fluid level
Low fluid level
If the fluid level is below the MIN range ofthe dipstick, add fluid to reach the hashmark level.
Note:If the fluid level is below the MINlevel, do not drive the vehicle. An underfillcondition may cause shift or engagementconcerns or possible damage.
Correct fluid level
249
Taurus (CPH) Canada/United States of America, enUSA, First Printing
MaintenanceE173334
654 E173400 E158842 E158843
Page 256 of 504
If you see any corrosion on the battery orterminals, remove the cables from theterminals and clean with a wire brush. Youcan neutralize the acid with a solution ofbaking soda and water.
Because your vehicle’s engine iselectronically controlled by a computer,some control conditions are maintainedby power from the battery. When thebattery is disconnected or a new batteryis installed, the engine must relearn its idleand fuel trim strategy for optimumdriveability and performance. Flexible fuelvehicles (FFV) must also relearn theethanol content of the fuel for optimumdriveability and performance.
To restore the settings, do the following:
1. Apply the parking brake.
2. Shift into park (P) or neutral (N).
3. Switch off all accessories.
4. Press the brake pedal and start yourvehicle.
5. Run the engine until it reaches normaloperating temperature. While theengine is warming up, complete thefollowing: Reset the clock. See AudioSystem (page 315). Reset the powerwindows bounce-back feature. SeeWindows and Mirrors (page 78).Reset the radio station presets. SeeAudio System (page 315).
6.Allow the engine to idle for at least oneminute.
7.Drive the vehicle at least 10 mi (16 km)to completely relearn the idle trim andfuel trim strategy.
Note:If you do not allow the engine torelearn the idle and fuel trim strategy, theidle quality of your vehicle may be adverselyaffected until the engine computereventually relearns the idle trim and fueltrim strategy.
Note:For flexible fuel vehicles, if you areoperating on E85, you may experience poorstarts or an inability to start the engine anddriveability problems until the fuel trim andethanol content have been relearned.
Make sure that you dispose of old batteriesin an environmentally friendly way. Seekadvice from your local authority aboutrecycling old batteries.
If storing your vehicle for more than 30days without recharging the battery, werecommend that you disconnect thebattery cables to maintain battery chargefor quick starting.
Battery Management System (If
Equipped)
The battery management system monitorsbattery conditions and takes actions toextend battery life. If excessive batterydrain is detected, the system temporarilydisables some electrical systems toprotect the battery.
Systems included are:
•Heated rear window.
•Heated seats.
•Climate control.
•Heated steering wheel.
•Audio unit.
•Navigation system.
A message may appear in the informationdisplays to alert you that batteryprotection actions are active. Thesemessages are only for notification that anaction is taking place, and not intended toindicate an electrical problem or that thebattery requires replacement.
253
Taurus (CPH) Canada/United States of America, enUSA, First Printing
Maintenance
Page 257 of 504
After battery replacement, or in somecases after charging the battery with anexternal charger, the battery managementsystem requires eight hours of vehicle sleeptime to relearn the battery state of charge.During this time your vehicle must remainfully locked with the ignition switched off.
Note:Prior to relearning the battery stateof charge, the battery management systemmay temporarily disable some electricalsystems.
Electrical Accessory Installation
To make sure the battery managementsystem works correctly, do not connect anelectrical device ground connectiondirectly to the battery negative post. Thiscan cause inaccurate measurements ofthe battery condition and potentialincorrect system operation.
Note:If you add electrical accessories orcomponents to the vehicle, it may adverselyaffect battery performance and durability.This may also affect the performance ofother electrical systems in the vehicle.
CHECKING THE WIPER
BLADES
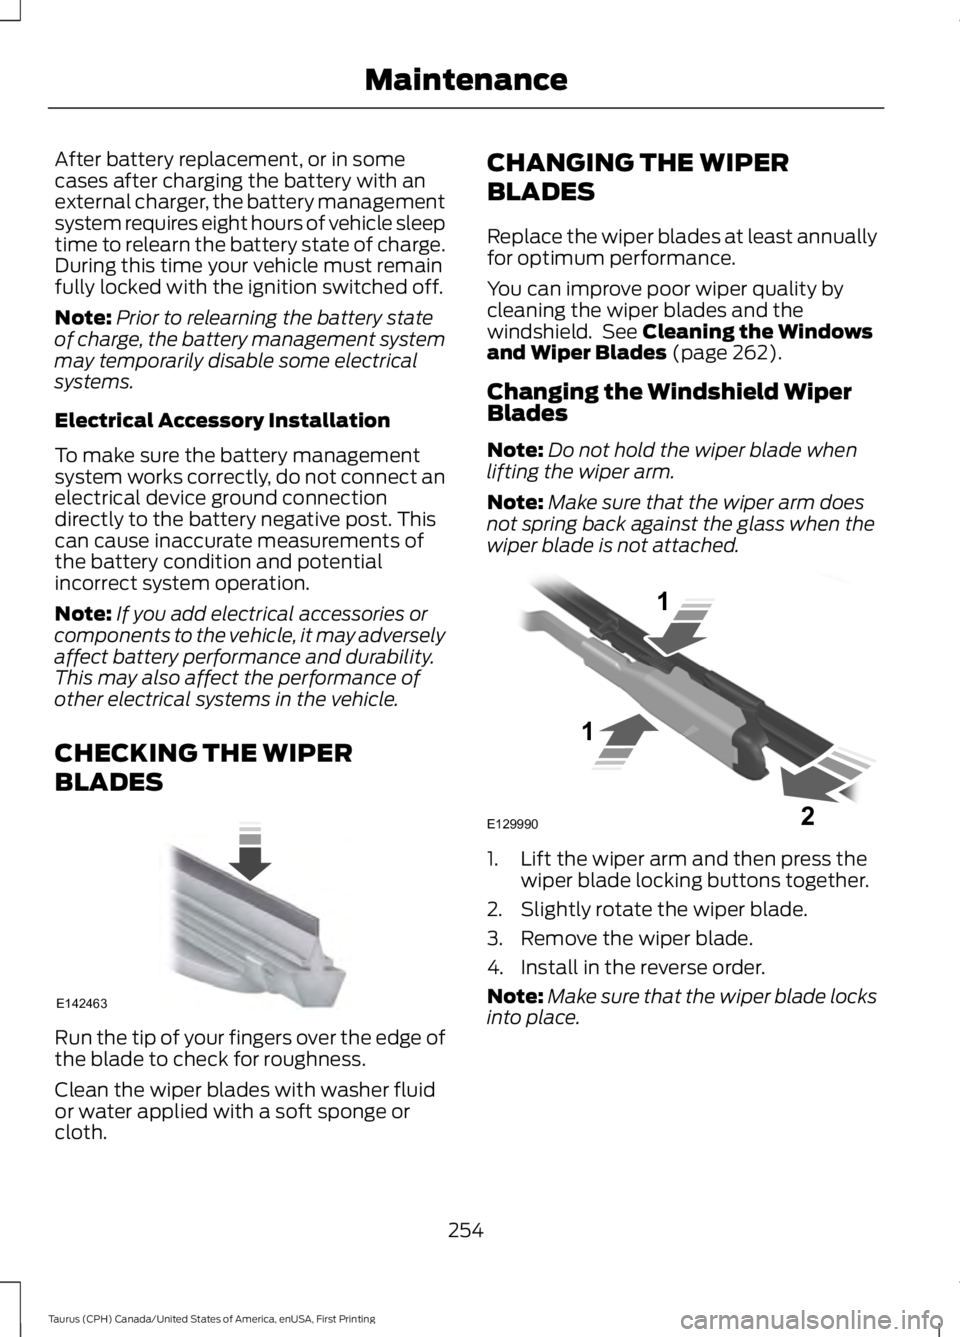
Run the tip of your fingers over the edge ofthe blade to check for roughness.
Clean the wiper blades with washer fluidor water applied with a soft sponge orcloth.
CHANGING THE WIPER
BLADES
Replace the wiper blades at least annuallyfor optimum performance.
You can improve poor wiper quality bycleaning the wiper blades and thewindshield. See Cleaning the Windowsand Wiper Blades (page 262).
Changing the Windshield WiperBlades
Note:Do not hold the wiper blade whenlifting the wiper arm.
Note:Make sure that the wiper arm doesnot spring back against the glass when thewiper blade is not attached.
1. Lift the wiper arm and then press thewiper blade locking buttons together.
2. Slightly rotate the wiper blade.
3. Remove the wiper blade.
4. Install in the reverse order.
Note:Make sure that the wiper blade locksinto place.
254
Taurus (CPH) Canada/United States of America, enUSA, First Printing
MaintenanceE142463 E129990
1
1 2
Page 258 of 504
ADJUSTING THE HEADLAMPS
Vertical Aim Adjustment
The headlamps on your vehicle areproperly aimed at the assembly plant. Ifyour vehicle has been in an accident, havethe alignment of your headlamps checkedby your authorized dealer.
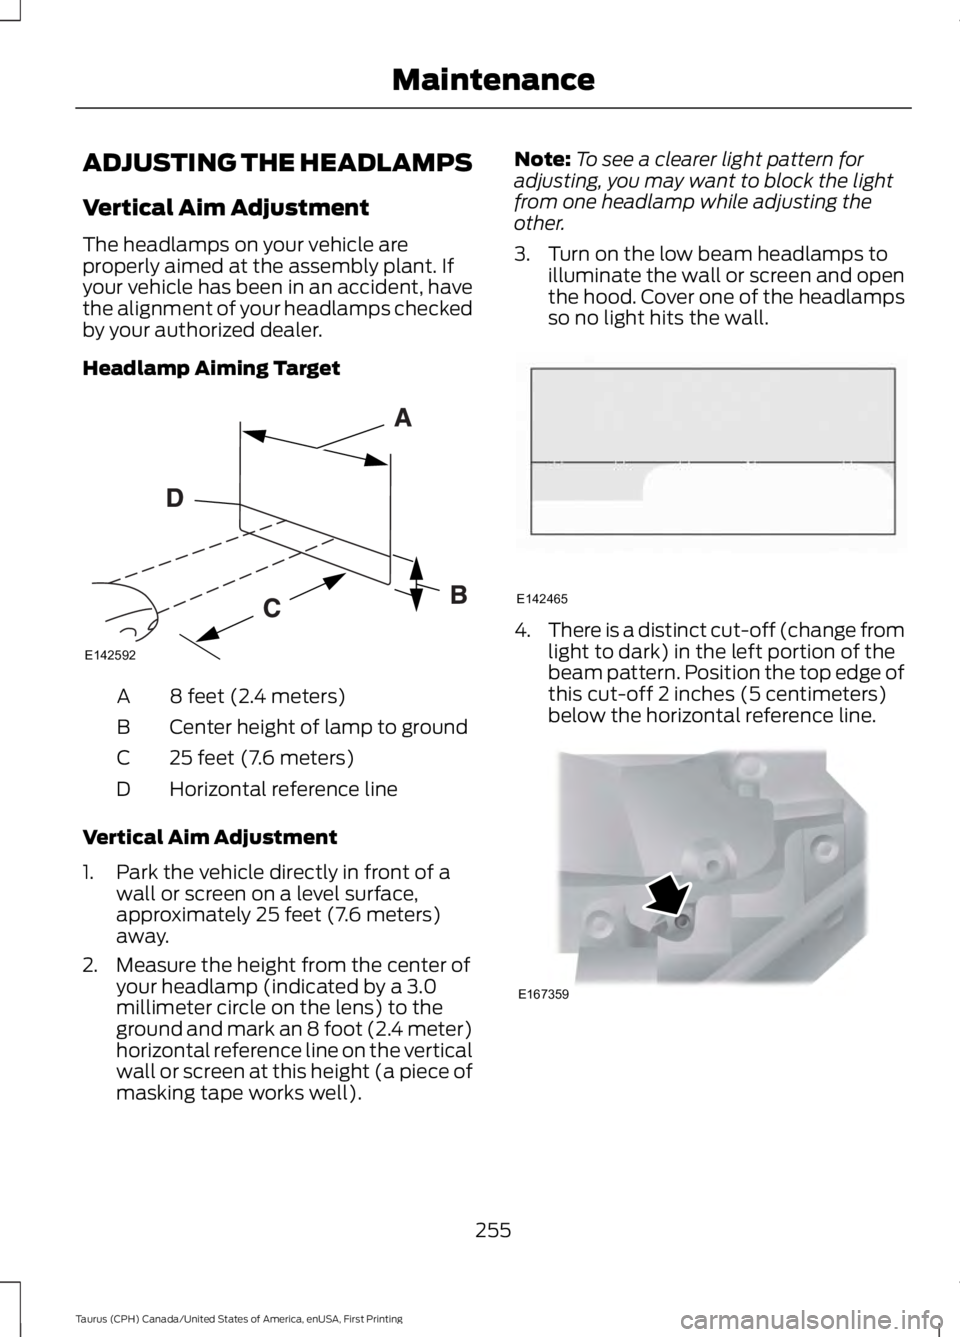
Headlamp Aiming Target
8 feet (2.4 meters)A
Center height of lamp to groundB
25 feet (7.6 meters)C
Horizontal reference lineD
Vertical Aim Adjustment
1. Park the vehicle directly in front of awall or screen on a level surface,approximately 25 feet (7.6 meters)away.
2. Measure the height from the center ofyour headlamp (indicated by a 3.0millimeter circle on the lens) to theground and mark an 8 foot (2.4 meter)horizontal reference line on the verticalwall or screen at this height (a piece ofmasking tape works well).
Note:To see a clearer light pattern foradjusting, you may want to block the lightfrom one headlamp while adjusting theother.
3. Turn on the low beam headlamps toilluminate the wall or screen and openthe hood. Cover one of the headlampsso no light hits the wall.
4.There is a distinct cut-off (change fromlight to dark) in the left portion of thebeam pattern. Position the top edge ofthis cut-off 2 inches (5 centimeters)below the horizontal reference line.
255
Taurus (CPH) Canada/United States of America, enUSA, First Printing
MaintenanceE142592 E142465 E167359
Page 259 of 504
5. Locate the vertical adjuster on eachheadlamp. Use a Phillips #2screwdriver to turn the adjuster eitherclockwise or counterclockwise toadjust the vertical aim of theheadlamp. The horizontal edge of thebrighter light should touch thehorizontal reference line.
6.Repeat Steps 3 through 7 to adjust theother headlamp.
7.Close the hood and turn off the lamps.
Horizontal Aim Adjustment
Horizontal aim is not required for thisvehicle and is not adjustable.
CHANGING A BULB
WARNINGS
Bulbs can become hot. Let the bulbcool down before removing it. Failureto do so could result in personalinjury.
Switch the lamps and the ignition off.Failure to follow this warning couldresult in serious personal injury.
Use the correct specification bulb. SeeBulb Specification Chart (page 257).
Install in the reverse order unless otherwisestated.
High-Intensity DischargeHeadlamps
These lamps operate at a high voltage. Seean authorized dealer if they fail.
Front Fog Lamp (If Equipped)
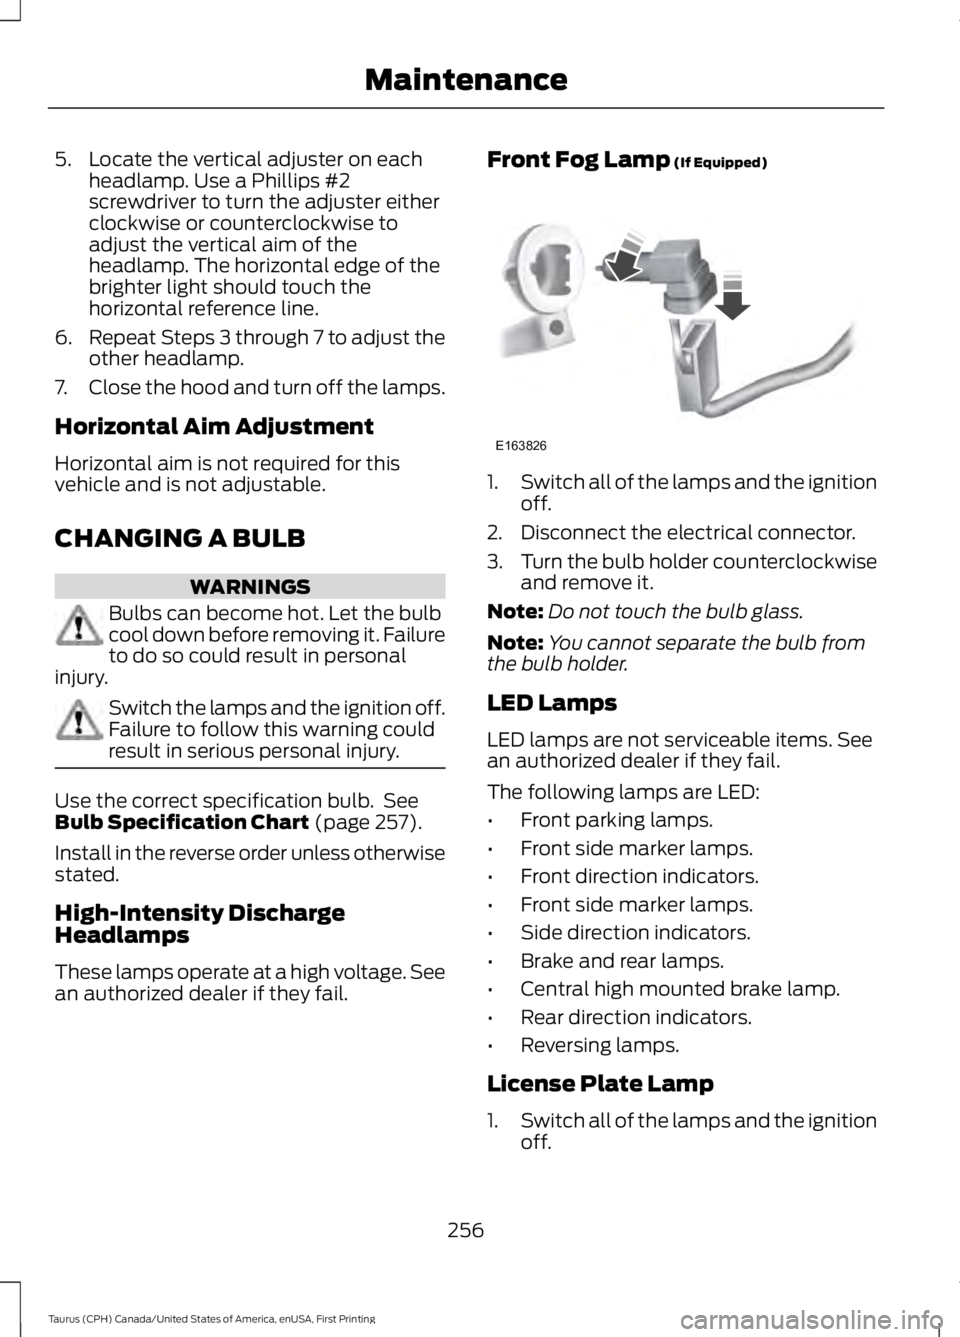
1.Switch all of the lamps and the ignitionoff.
2. Disconnect the electrical connector.
3.Turn the bulb holder counterclockwiseand remove it.
Note:Do not touch the bulb glass.
Note:You cannot separate the bulb fromthe bulb holder.
LED Lamps
LED lamps are not serviceable items. Seean authorized dealer if they fail.
The following lamps are LED:
•Front parking lamps.
•Front side marker lamps.
•Front direction indicators.
•Front side marker lamps.
•Side direction indicators.
•Brake and rear lamps.
•Central high mounted brake lamp.
•Rear direction indicators.
•Reversing lamps.
License Plate Lamp
1.Switch all of the lamps and the ignitionoff.
256
Taurus (CPH) Canada/United States of America, enUSA, First Printing
MaintenanceE163826
Page 265 of 504
•Use a quality wax that does not containabrasives.
•Follow the manufacturer’s instructionsto apply and remove the wax.
•Apply a small amount of wax in aback-and-forth motion, not in circles.
•Do not allow wax to come in contactwith any non-body (low-gloss black)colored trim. The wax will discolor orstain the parts over time.
•Roof racks.
•Bumpers.
•Grained door handles.
•Side moldings.
•Mirror housings.
•Windshield cowl area.
•Do not apply wax to glass areas.
•After waxing, your car's paint shouldfeel smooth, and be free of streaks andsmudges.
CLEANING THE ENGINE
Engines are more efficient when they areclean because grease and dirt buildup keepthe engine warmer than normal.
When washing:
•Take care when using a power washerto clean the engine. The high-pressurefluid could penetrate the sealed partsand cause damage.
•Do not spray a hot engine with coldwater to avoid cracking the engineblock or other engine components.
•Spray Motorcraft Engine Shampoo andDegreaser on all parts that requirecleaning and pressure rinse clean. InCanada, use Motorcraft EngineShampoo.
•Never wash or rinse the engine while itis hot or running; water in the runningengine may cause internal damage.
•Never wash or rinse any ignition coil,spark plug wire or spark plug well, orthe area in and around these locations.
•Cover the battery, power distributionbox, and air filter assembly to preventwater damage when cleaning theengine.
CLEANING THE WINDOWS AND
WIPER BLADES
Car wash chemicals and environmentalfallout can result in windshield and wiperblade contamination. Dirty windshield andwipers will result in poor windshield wiperoperation. Keep the windshield and wiperblades clean to maintain windshield wiperperformance.
To clean the windshield and wiper blades:
•Clean the windshield with anon-abrasive glass cleaner. Whencleaning the interior of the windshield,avoid getting any glass cleaner on theinstrument panel or door panels. Wipeany glass cleaner off these surfacesimmediately.
•For windshields contaminated withtree sap, chemicals, wax or bugs, cleanthe entire windshield using steel wool(no greater than 0000 grade) in acircular motion and rinse with water.
•Clean the wiper blades with isopropylrubbing alcohol or windshield washerconcentrate.
Note: Do not use razor blades or othersharp objects to clean or remove decalsfrom the inside of the heated rear window.The vehicle warranty does not coverdamage caused to the heated rear windowgrid lines.
262
Taurus (CPH) Canada/United States of America, enUSA, First Printing
Vehicle Care
Page 272 of 504

•When inflating a tire or other objects,use the black air hose only. Do not usethe transparent hose which is designedfor sealant application only.
•Operating the kit could cause anelectrical disturbance in radio, CD, andDVD player operation.
What to do when a Tire IsPunctured
A tire puncture within the tire tread areacan be repaired in two stages with the kit.
•In the first stage, the tire will bereinflated with a sealing compoundand air. After the tire has beenreinflated, you will need to drive thevehicle a short distance 4 mi (6 km) todistribute the sealant in the tire.
•In the second stage, you will need tocheck the tire pressure and adjust, ifnecessary, to the vehicle tire inflationpressure.
First Stage: Reinflating the Tirewith Sealing Compound and Air
WARNINGS
Do not stand directly over the kitwhile inflating the tire. If you noticeany unusual bulges or deformationsin the tire sidewall during inflation, stopand call roadside assistance.
If the tire does not inflate to therecommended tire pressure within15 minutes, stop and call roadsideassistance.
Preparation: Park the vehicle in a safe, leveland secure area, away from moving traffic.Turn the hazard lights on. Apply the parkingbrake and turn the engine off. Inspect theflat tire for visible damage.
Sealant compound contains latex. Toavoid any allergic reactions, use thenon-latex gloves located in the accessorybox on the underside of the kit housing.
Do not remove any foreign object that haspierced the tire. If a puncture is located inthe tire sidewall, stop and call roadsideassistance.
1. Remove the valve cap from the tirevalve.
2. Unwrap the clear tube from thecompressor housing.
3. Remove the tube cap and fasten themetal connector of the tube to the tirevalve, turning clockwise. Make sure theconnection is tightly fastened.
4. Plug the power cable into the 12-voltpower point in the vehicle.
5. Remove the warning sticker found onthe canister and place it on the top ofthe instrument panel or the center ofthe dash.
6. Start the vehicle only if the vehicle isoutdoors or in a well-ventilated area.
269
Taurus (CPH) Canada/United States of America, enUSA, First Printing
Wheels and TiresE144619
Page 273 of 504
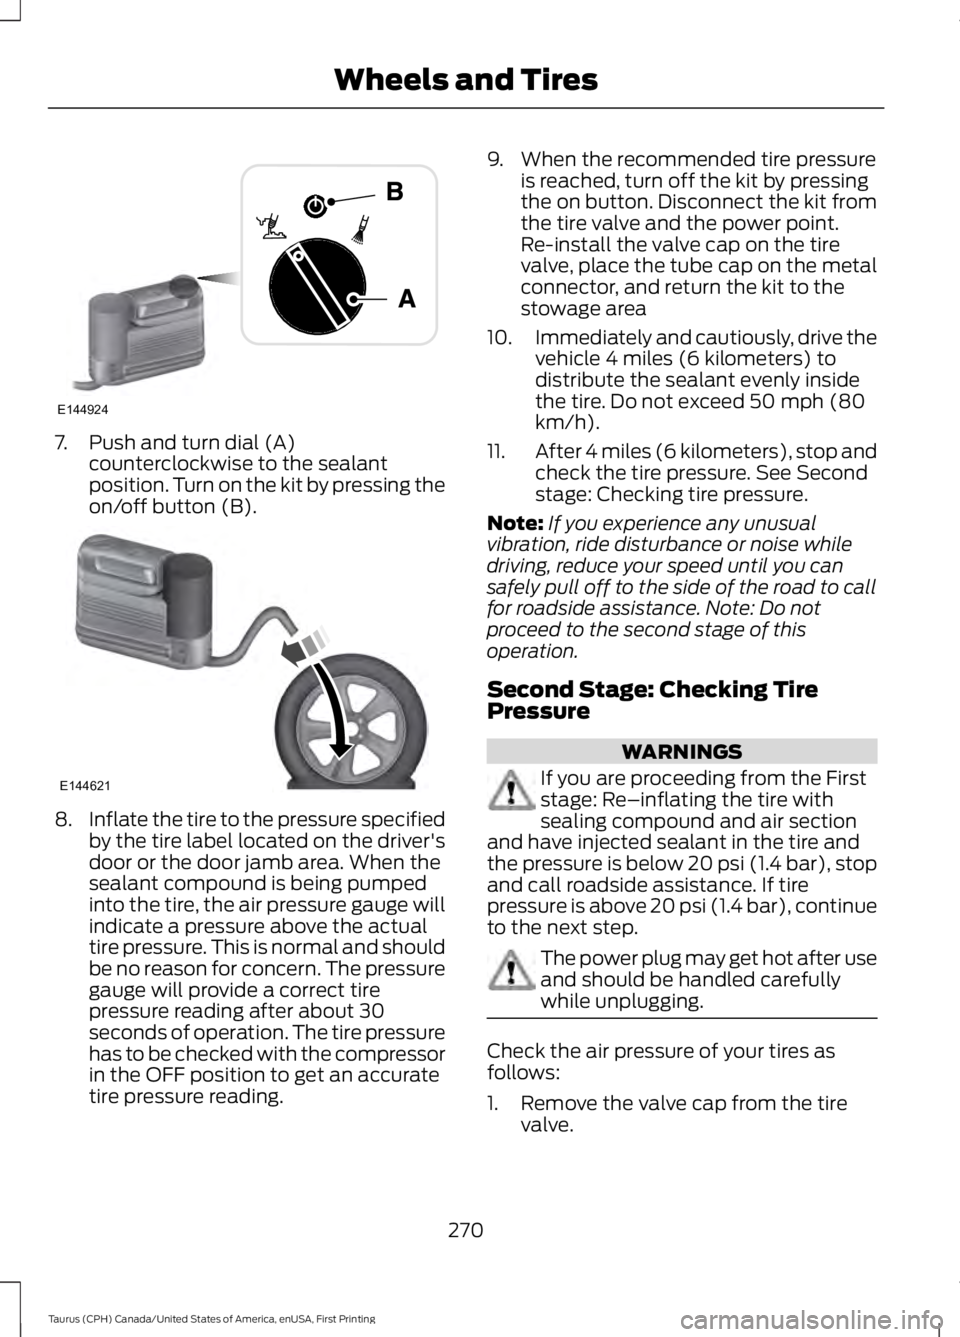
7. Push and turn dial (A)counterclockwise to the sealantposition. Turn on the kit by pressing theon/off button (B).
8.Inflate the tire to the pressure specifiedby the tire label located on the driver'sdoor or the door jamb area. When thesealant compound is being pumpedinto the tire, the air pressure gauge willindicate a pressure above the actualtire pressure. This is normal and shouldbe no reason for concern. The pressuregauge will provide a correct tirepressure reading after about 30seconds of operation. The tire pressurehas to be checked with the compressorin the OFF position to get an accuratetire pressure reading.
9. When the recommended tire pressureis reached, turn off the kit by pressingthe on button. Disconnect the kit fromthe tire valve and the power point.Re-install the valve cap on the tirevalve, place the tube cap on the metalconnector, and return the kit to thestowage area
10.Immediately and cautiously, drive thevehicle 4 miles (6 kilometers) todistribute the sealant evenly insidethe tire. Do not exceed 50 mph (80km/h).
11.After 4 miles (6 kilometers), stop andcheck the tire pressure. See Secondstage: Checking tire pressure.
Note:If you experience any unusualvibration, ride disturbance or noise whiledriving, reduce your speed until you cansafely pull off to the side of the road to callfor roadside assistance. Note: Do notproceed to the second stage of thisoperation.
Second Stage: Checking TirePressure
WARNINGS
If you are proceeding from the Firststage: Re–inflating the tire withsealing compound and air sectionand have injected sealant in the tire andthe pressure is below 20 psi (1.4 bar), stopand call roadside assistance. If tirepressure is above 20 psi (1.4 bar), continueto the next step.
The power plug may get hot after useand should be handled carefullywhile unplugging.
Check the air pressure of your tires asfollows:
1. Remove the valve cap from the tirevalve.
270
Taurus (CPH) Canada/United States of America, enUSA, First Printing
Wheels and TiresE144924 E144621