2017 FORD TAURUS lock
[x] Cancel search: lockPage 231 of 504

Protected componentsFuse amp ratingFuse or relay number
Electric fan relay 2.40A230
Electric fan relay 3.25A231
Massage control seat relay.Relay32
Right-hand cooling fan relay.Relay33
Blower motor relay.Relay34
Left-hand cooling fan Number 1 relay.Relay35
Not used.-36
Not used.-37
Not used.-38
Not used.-39
Not used.-40
Not used.-41
Passenger power seat.30A242
Anti-lock brake system valves.20A243
Not used.-44
Rain sensor.5A145
Not used.-46
Not used.-47
Not used.-48
Not used.-49
Heated mirrors.15A 150
Not used.-51
Not used.-52
Not used.-53
Not used.-54
228
Taurus (CPH) Canada/United States of America, enUSA, First Printing
Fuses
Page 233 of 504

Protected componentsFuse amp ratingFuse or relay number
Not used.-72
Not used.-73
Not used.-74
Not used.-75
Not used.-76
Not used.-77
Right high-intensity discharge headlamp.20A 178
Not used.-79
Not used.-80
Not used.-81
Not used.-82
Not used.-83
Not used.-84
Not used.-85
Powertrain control module.7.5A186Keep alive power and relay.Canister vent solenoid.
Run/start relay.5A187
Run/start relay.Relay88
Front blower relay coil.5A189Electrical power assist steering module.
Powertrain control module run/start.10A190
Adaptive cruise control module.10A191
Anti-lock brake system module.10A 192
Rear window defroster relay.5A193
Passenger compartment fuse panel run/start.30A294
230
Taurus (CPH) Canada/United States of America, enUSA, First Printing
Fuses
Page 235 of 504
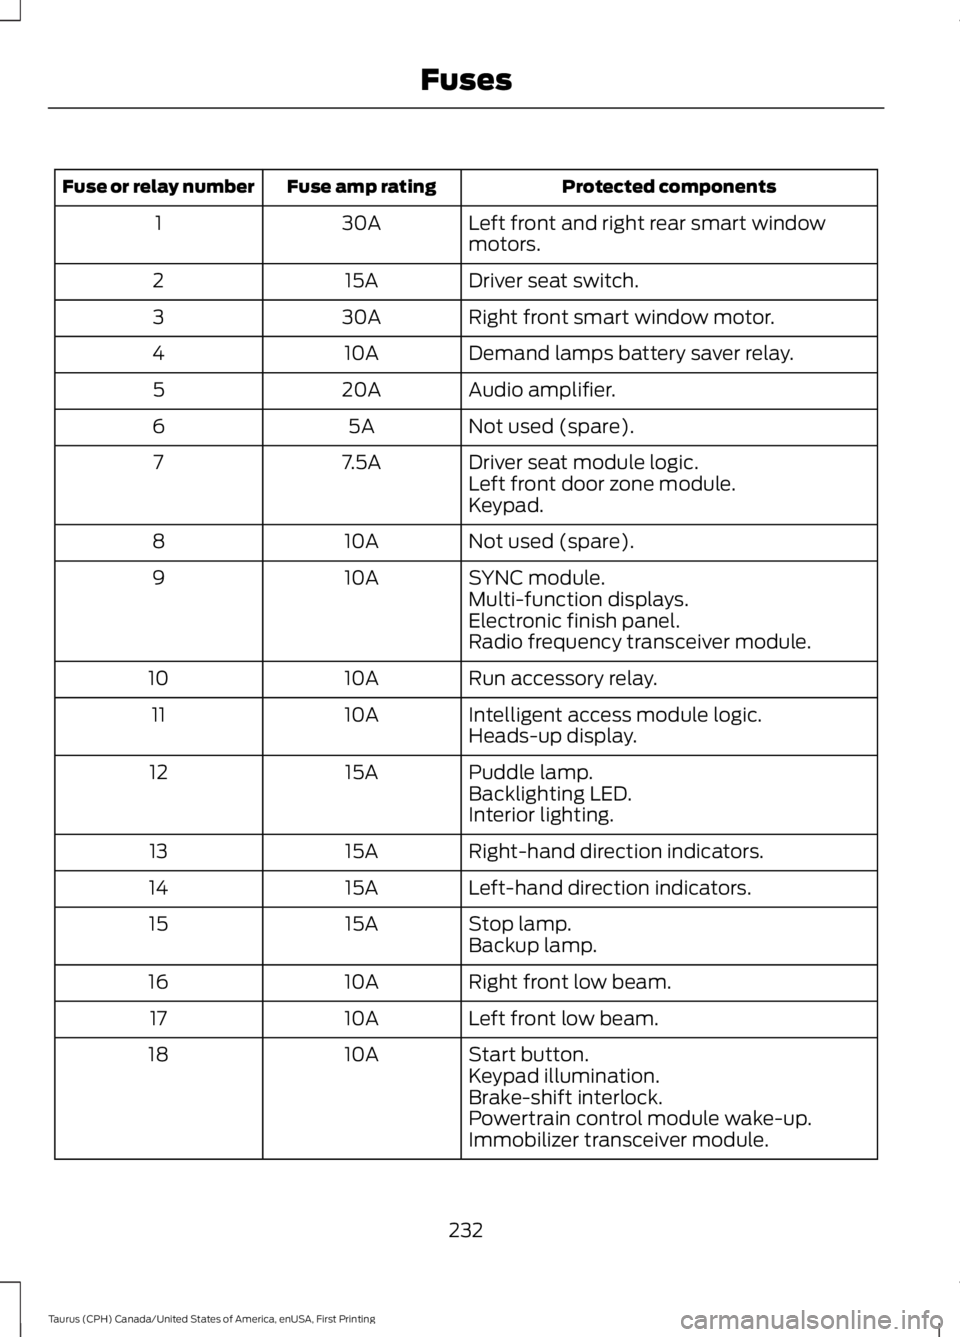
Protected componentsFuse amp ratingFuse or relay number
Left front and right rear smart windowmotors.30A1
Driver seat switch.15A2
Right front smart window motor.30A3
Demand lamps battery saver relay.10A4
Audio amplifier.20A5
Not used (spare).5A6
Driver seat module logic.7.5A7Left front door zone module.Keypad.
Not used (spare).10A8
SYNC module.10A9Multi-function displays.Electronic finish panel.Radio frequency transceiver module.
Run accessory relay.10A10
Intelligent access module logic.10A11Heads-up display.
Puddle lamp.15A12Backlighting LED.Interior lighting.
Right-hand direction indicators.15A13
Left-hand direction indicators.15A14
Stop lamp.15A15Backup lamp.
Right front low beam.10A16
Left front low beam.10A17
Start button.10A18Keypad illumination.Brake-shift interlock.Powertrain control module wake-up.Immobilizer transceiver module.
232
Taurus (CPH) Canada/United States of America, enUSA, First Printing
Fuses
Page 236 of 504

Protected componentsFuse amp ratingFuse or relay number
Audio amplifiers.20A19
All lock motor relay and coil.20A20Driver lock motor relay and coil.
Extended power module.10A21
Horn relay.20A22
Steering wheel control module logic15A23Instrument cluster.
Steering wheel control module.15A24Datalink.
Decklid release.15A25
Ignition switch.5A26Push button ignition switch.
Intelligent access module power.20A27
Not used (spare).15A28
Radio.20A29Global positioning system module.
Front park lamps.15A30
Not used (spare).5A31
Smart window motors.15A32Master window and mirror switch.Rear window power sunshade module.Lock switch illumination.
Not used (spare).10A33
Reverse park aid module.10A34Automatic high beam and lane departuremodule.Rear heated seat module.Blind spot monitor module.Rear video camera.
Motorized humidity sensor.5A35Heads-up display.Traction control switch.
Heated steering wheel.10A36
233
Taurus (CPH) Canada/United States of America, enUSA, First Printing
Fuses
Page 239 of 504
GENERAL INFORMATION
Have your vehicle serviced regularly to helpmaintain its roadworthiness and resalevalue. There is a large network ofauthorized dealers that are there to helpyou with their professional servicingexpertise. We believe that their speciallytrained technicians are best qualified toservice your vehicle properly and expertly.They are supported by a wide range ofhighly specialized tools developedspecifically for servicing your vehicle.
If your vehicle requires professional service,an authorized dealer can provide thenecessary parts and service. Check yourwarranty information to find out whichparts and services are covered.
Use only recommended fuels, lubricants,fluids and service parts conforming tospecifications. Motorcraft® parts aredesigned and built to provide the bestperformance in your vehicle.
Precautions
•Do not work on a hot engine.
•Make sure that nothing gets caught inmoving parts.
•Do not work on a vehicle with theengine running in an enclosed space,unless you are sure you have enoughventilation.
•Keep all open flames and other burningmaterial (such as cigarettes) awayfrom the battery and all fuel relatedparts.
Working with the Engine Off
1.Set the parking brake and shift to park(P).
2. Switch off the engine.
3. Block the wheels.
Working with the Engine On
WARNING
To reduce the risk of vehicle damageand/or personal burn injuries, do notstart your engine with the air cleanerremoved and do not remove it while theengine is running.
1.Set the parking brake and shift to park(P).
2. Block the wheels.
OPENING AND CLOSING THE
HOOD
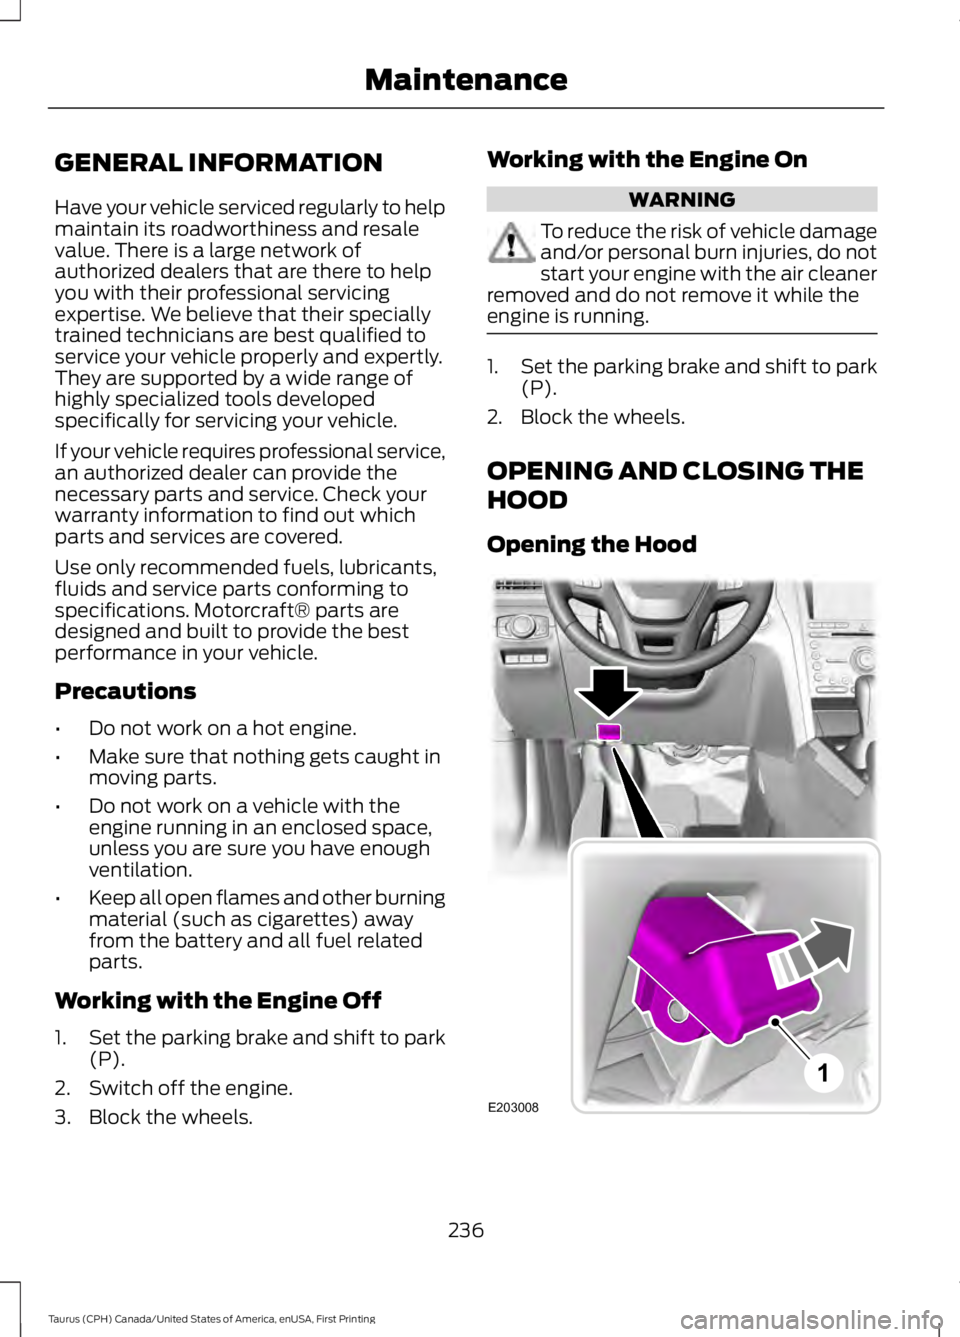
Opening the Hood
236
Taurus (CPH) Canada/United States of America, enUSA, First Printing
MaintenanceE203008
1
Page 245 of 504
4. Switch the engine off and wait 15minutes for the oil to drain into the oilpan. Checking the engine oil level toosoon after you switch the engine offmay result in an inaccurate reading.
5. Open the hood. See Opening andClosing the Hood (page 236).
6. Remove the dipstick and wipe it witha clean, lint-free cloth. See UnderHood Overview (page 240).
7. Replace the dipstick and remove itagain to check the oil level. SeeEngine Oil Dipstick (page 241).
8.Make sure that the oil level is betweenthe maximum and minimum marks. Ifthe oil level is at the minimum mark,add oil immediately. See Capacitiesand Specifications (page 304).
9. If the oil level is correct, replace thedipstick and make sure it is fully seated.
Note:Do not remove the dipstick when theengine is running.
Note: If the oil level is between themaximum and minimum marks, the oil levelis acceptable. Do not add oil.
Note:The oil consumption of new enginesreaches its normal level after approximately3,100 mi (5,000 km).
Adding Engine Oil
WARNING
Do not remove the filler cap whenthe engine is running.
Do not use supplemental engine oiladditives because they are unnecessaryand could lead to engine damage that maynot be covered by the vehicle Warranty.
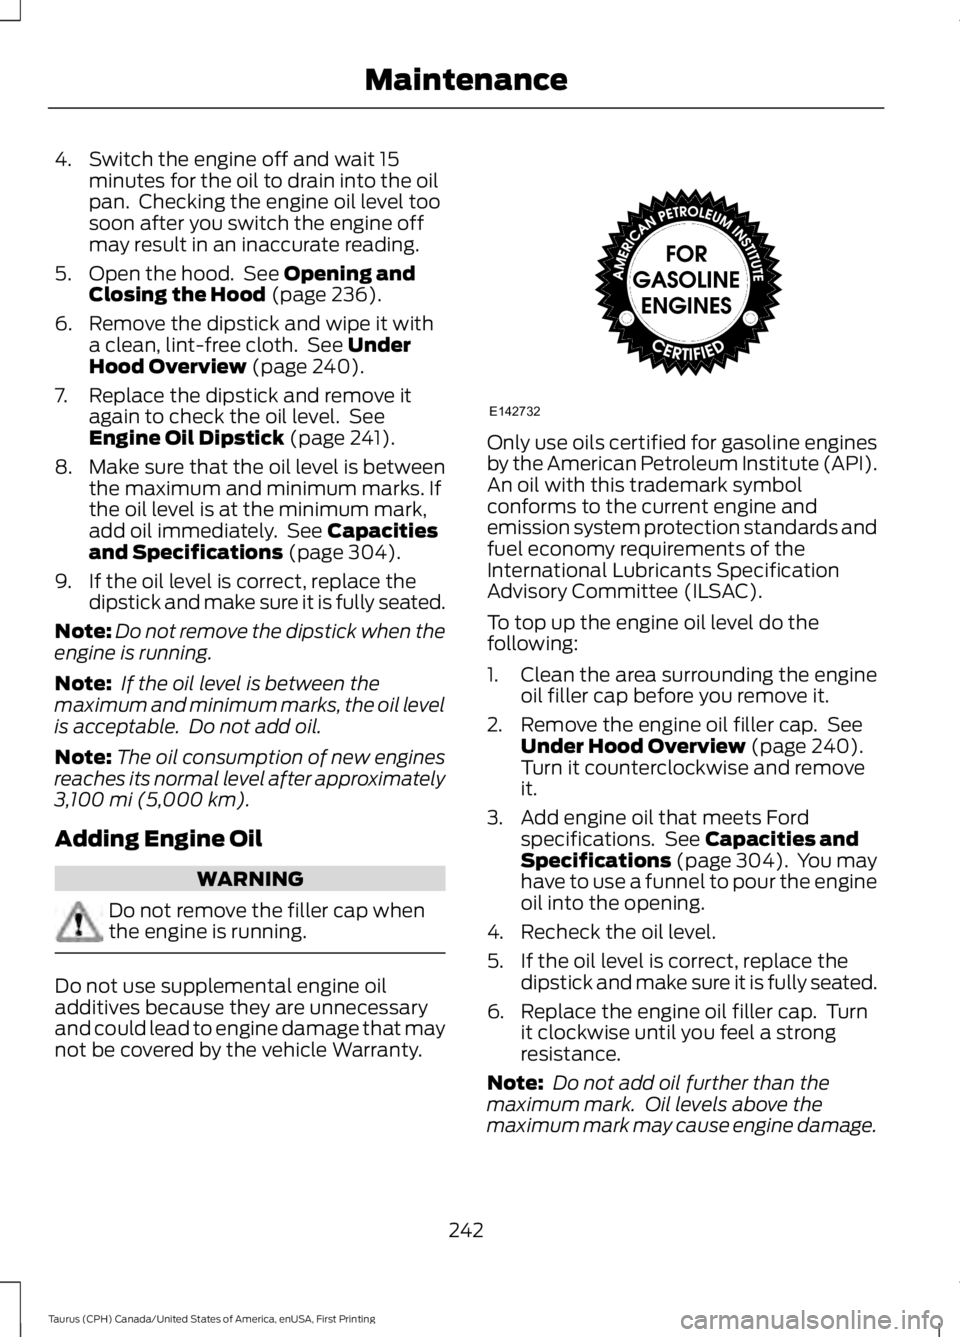
Only use oils certified for gasoline enginesby the American Petroleum Institute (API).An oil with this trademark symbolconforms to the current engine andemission system protection standards andfuel economy requirements of theInternational Lubricants SpecificationAdvisory Committee (ILSAC).
To top up the engine oil level do thefollowing:
1. Clean the area surrounding the engineoil filler cap before you remove it.
2. Remove the engine oil filler cap. SeeUnder Hood Overview (page 240).Turn it counterclockwise and removeit.
3. Add engine oil that meets Fordspecifications. See Capacities andSpecifications (page 304). You mayhave to use a funnel to pour the engineoil into the opening.
4. Recheck the oil level.
5. If the oil level is correct, replace thedipstick and make sure it is fully seated.
6. Replace the engine oil filler cap. Turnit clockwise until you feel a strongresistance.
Note: Do not add oil further than themaximum mark. Oil levels above themaximum mark may cause engine damage.
242
Taurus (CPH) Canada/United States of America, enUSA, First Printing
MaintenanceE142732
Page 247 of 504
Note: Coolant expands when it is hot. Thelevel may extend beyond the MAX mark.
Maintain coolant concentration within48% to 50%, which equates to a freezepoint between -30°F (-34°C) and -34°F(-37°C). Coolant concentration should bechecked using a refractometer. We do notrecommend the use of hydrometers orcoolant test strips for measuring coolantconcentration.
Adding Coolant
WARNING
Never remove the coolant reservoircap when the engine is running orhot.
Note: Automotive fluids are notinterchangeable. Take care not to putengine coolant in the windshield washerfluid reservoir or windshield washer fluid inthe engine coolant reservoir.
Note: Do not use stop leak pellets, coolingsystem sealants, or non-specified additivesas they can cause damage to the enginecooling or heating systems. Resultingcomponent damage may not be covered bythe vehicle Warranty.
It is very important to use predilutedcoolant approved to the correctspecification in order to avoid plugging thesmall passageways in the engine coolingsystem. See Capacities andSpecifications (page 297). Do not mixdifferent colors or types of coolant in yourvehicle. Mixing of engine coolants or usingan incorrect coolant may harm the engineor cooling system components and maynot be covered by the vehicle Warranty.
Note:If prediluted coolant is not available,use the approved concentrated coolantdiluting it to 50/50 with distilled water. SeeCapacities and Specifications (page 297).Using water that has not been deionisedmay contribute to deposit formation,corrosion and plugging of the small coolingsystem passageways.
Note:Coolants marketed for all makes andmodels may not be approved to Fordspecifications and may cause damage tothe cooling system. Resulting componentdamage may not be covered by the vehicleWarranty.
If the coolant level is at or below theminimum mark, add prediluted coolantimmediately.
To top up the coolant level do thefollowing:
1. Unscrew the cap slowly. Any pressureescapes as you unscrew the cap.
2. Add prediluted coolant approved tothe correct specification. SeeCapacities and Specifications (page297).
3. Add enough prediluted coolant toreach the correct level.
4.Replace the coolant reservoir cap, turnit clockwise until you feel a strongresistance.
5. Check the coolant level in the coolantreservoir the next few times you driveyour vehicle. If necessary, add enoughprediluted engine coolant to bring thecoolant level to the correct level.
If you have to add more than 1.1 qt (1 L) ofengine coolant per month, have yourvehicle checked as soon as possible.Operating an engine with a low level ofcoolant can result in engine overheatingand possible engine damage.
244
Taurus (CPH) Canada/United States of America, enUSA, First Printing
Maintenance
Page 251 of 504
Note:Automatic transmission fluidexpands when warmed. To obtain anaccurate fluid check, drive your vehicle untilyou warm it up, approximately 20 mi(30 km). If you operate your vehicle for anextended period at high speeds, in city trafficduring hot weather or pulling a trailer, switchyour vehicle off until it reaches normaloperating temperatures to allow the fluidto cool before checking. Depending onvehicle use, cooling times could take up to30 minutes or longer.
Refer to your scheduled maintenanceinformation for scheduled intervals for fluidchecks and changes. Your transmissiondoes not consume fluid. However, youshould check the fluid level if thetransmission is not working properly. Forexample, if the transmission slips or shiftsslowly or if you notice some sign of a fluidleak.
1. Drive your vehicle 20 mi (30 km) oruntil it reaches normal operatingtemperature.
2.Park your vehicle on a level surface andengage the parking brake.
3. With the parking brake engaged andyour foot on the brake pedal, start theengine and move the gearshift leverthrough all of the gear ranges. Allow aminimum of 10 seconds for each gearto engage.
4. Put the gearshift lever in park (P) andleave the engine running.
Note:For vehicles with the EcoBoostengine, move the air filter assembly asideto access the transmission dipstick. SeeMoving the Air Filter Assembly for moreinformation.
5. Remove the dipstick and wipe it cleanwith a dry, lint free clean rag. Ifnecessary, refer to the Under hoodoverview in this chapter for the locationof the dipstick.
6. Install the dipstick making sure youfully seat it in the filler tube by turningit to the locked position.
7. Remove the dipstick and inspect thefluid level. The fluid should be in thedesignated areas for normal operatingtemperature.
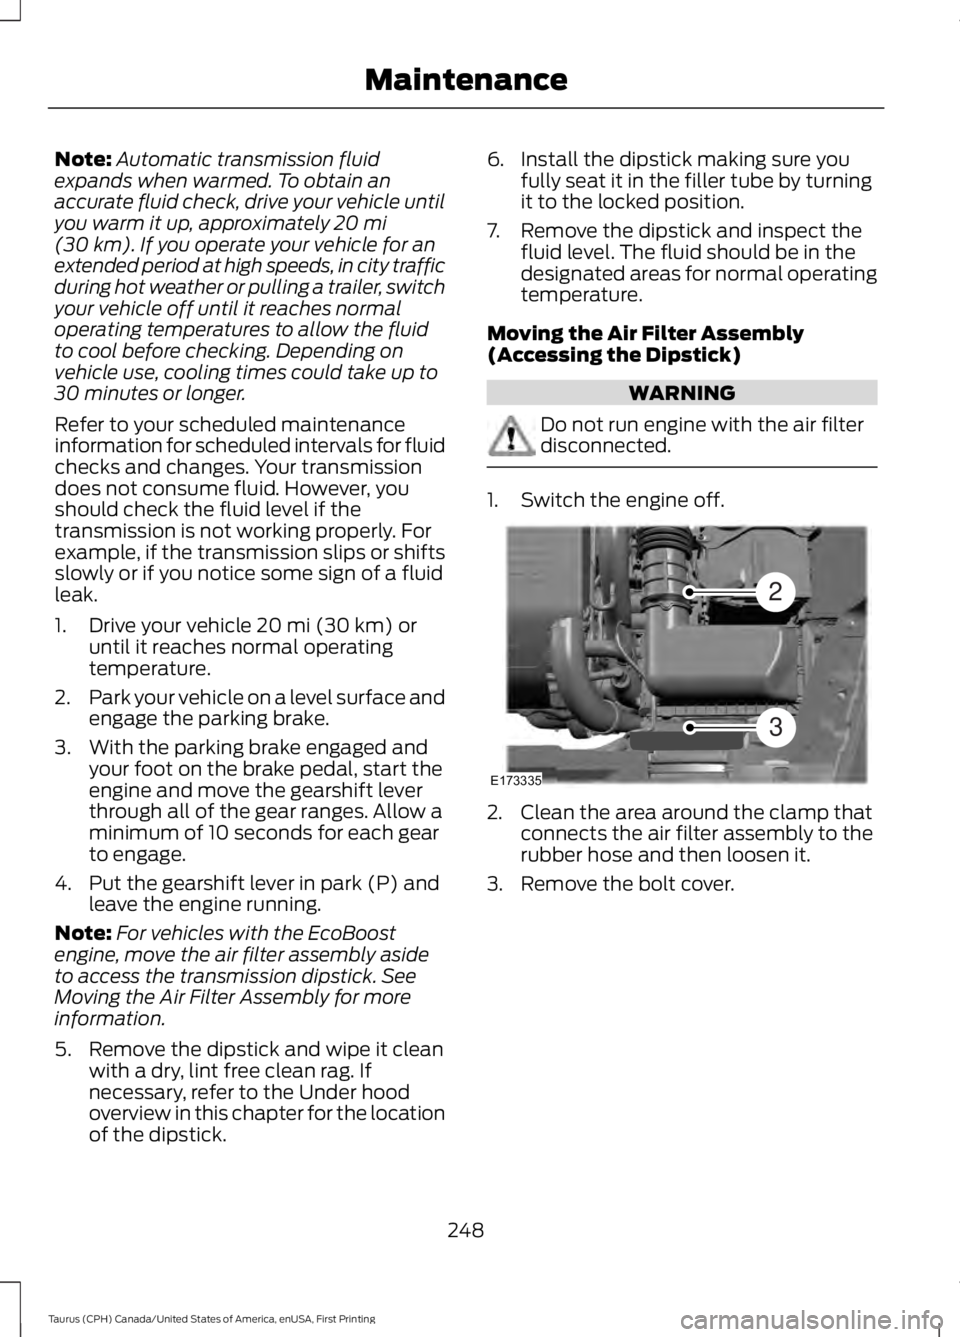
Moving the Air Filter Assembly(Accessing the Dipstick)
WARNING
Do not run engine with the air filterdisconnected.
1. Switch the engine off.
2. Clean the area around the clamp thatconnects the air filter assembly to therubber hose and then loosen it.
3. Remove the bolt cover.
248
Taurus (CPH) Canada/United States of America, enUSA, First Printing
MaintenanceE173335
2
3