2017 FORD SUPER DUTY change wheel
[x] Cancel search: change wheelPage 7 of 636

Bed Ramps....................................................265
Towing
Towing a Trailer............................................268
Trailer Reversing Aids
.................................269
Trailer Sway Control
....................................277
Recommended Towing Weights............277
Essential Towing Checks...........................281
Towing the Vehicle on Four Wheels......289
Driving Hints
Breaking-In....................................................290
Economical Driving
.....................................290
Driving Through Water................................291
Floor Mats........................................................291
Snowplowing................................................292
Roadside Emergencies
Roadside Assistance..................................295
Hazard Warning Flashers
.........................296
Fuel Shutoff - 6.2L/6.8L
...........................296
Fuel Shutoff - 6.7L Diesel.........................297
Jump Starting the Vehicle........................298
Post-Crash Alert System.........................300
Transporting the Vehicle
..........................300
Towing Points................................................301
Customer Assistance
Getting the Services You Need
..............303
In California (U.S. Only)............................304
The Better Business Bureau (BBB) Auto Line Program (U.S. Only).....................305
Utilizing the Mediation/Arbitration Program (Canada Only)
......................306
Getting Assistance Outside the U.S. and Canada.......................................................306
Ordering Additional Owner's Literature....................................................307
Reporting Safety Defects (U.S. Only)............................................................308 Reporting Safety Defects (Canada
Only)............................................................308
Fuses
Fuse Specification Chart...........................310
Changing a Fuse
...........................................318
Maintenance
General Information...................................320
Opening and Closing the Hood..............320
Under Hood Overview - 6.2L....................321
Under Hood Overview - 6.8L...................322
Under Hood Overview - 6.7L Diesel
......323
Engine Oil Dipstick
......................................324
Engine Oil Check - 6.2L/6.8L..................324
Engine Oil Check - 6.7L Diesel................325
Changing the Engine Oil and Oil Filter..............................................................326
Changing the Coalescer Filter Element.......................................................327
Oil Change Indicator Reset......................328
Engine Coolant Check - 6.2L/6.8L........329
Engine Coolant Check - 6.7L Diesel......333
Automatic Transmission Fluid Check............................................................337
Transfer Case Fluid Check.......................340
Brake Fluid Check
.......................................340
Power Steering Fluid Check......................341
Washer Fluid Check
.....................................341
Draining the Fuel Filter Water Trap - 6.7L Diesel............................................................342
Fuel Filter - 6.2L/6.8L................................343
Changing the 12V Battery.........................343
Checking the Wiper Blades.....................345
Changing the Wiper Blades.....................345
Adjusting the Headlamps........................346
Changing a Bulb
...........................................347
Bulb Specification Chart
..........................350
Changing the Engine Air Filter - 6.2L/ 6.8L...............................................................353
4
Super Duty (TFE) Canada/United States of America, enUSA, First Printing Table of Contents
Page 121 of 636
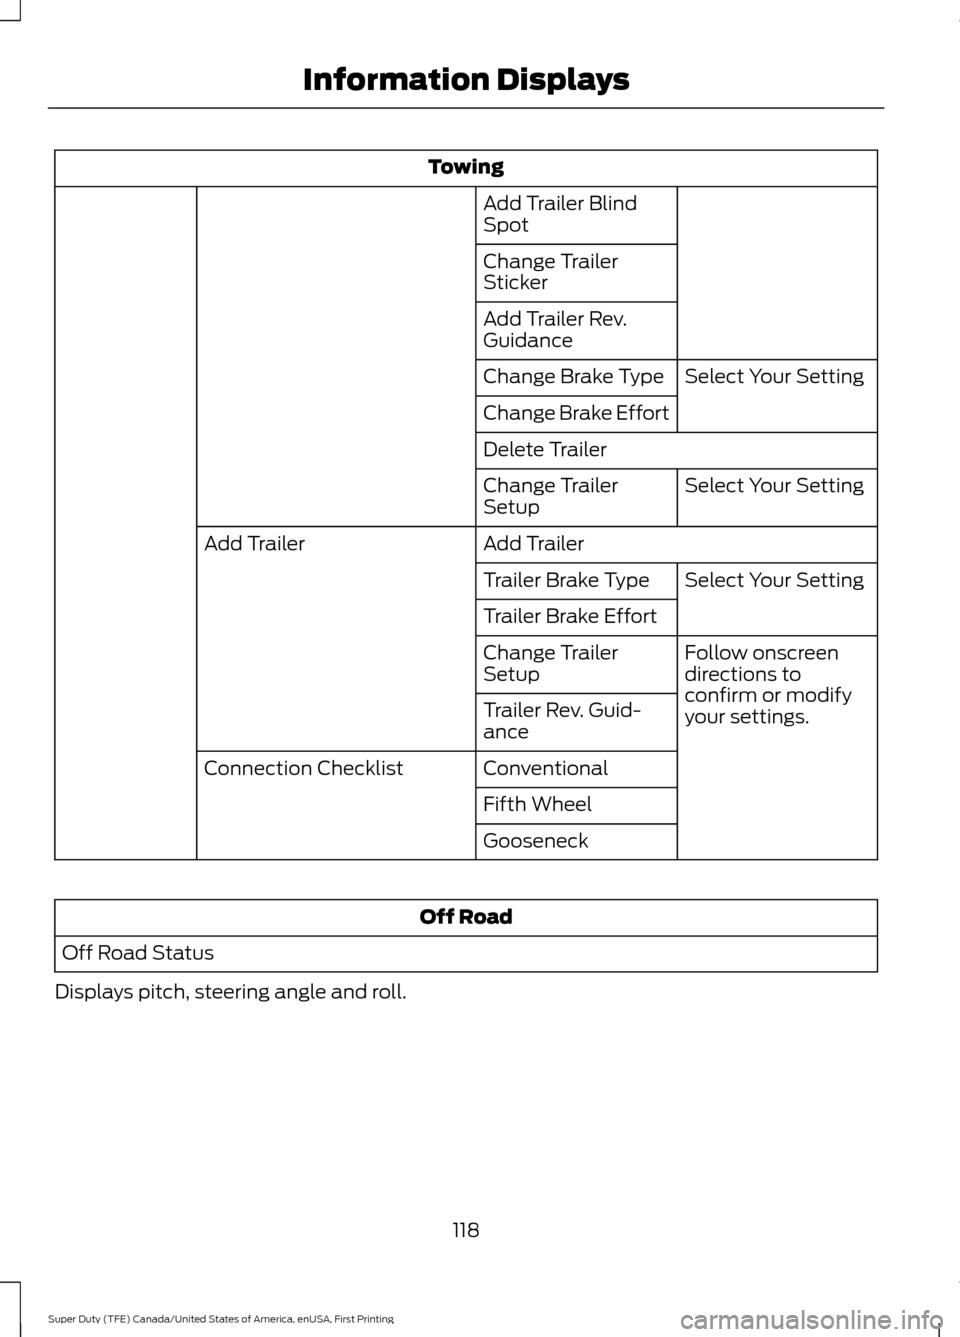
Towing
Add Trailer Blind
Spot
Change Trailer
Sticker
Add Trailer Rev.
Guidance Select Your Setting
Change Brake Type
Change Brake Effort
Delete Trailer
Select Your Setting
Change Trailer
Setup
Add Trailer
Add Trailer
Select Your Setting
Trailer Brake Type
Trailer Brake Effort
Follow onscreen
directions to
confirm or modify
your settings.
Change Trailer
Setup
Trailer Rev. Guid-
ance
Conventional
Connection Checklist
Fifth Wheel
Gooseneck Off Road
Off Road Status
Displays pitch, steering angle and roll.
118
Super Duty (TFE) Canada/United States of America, enUSA, First Printing Information Displays
Page 141 of 636
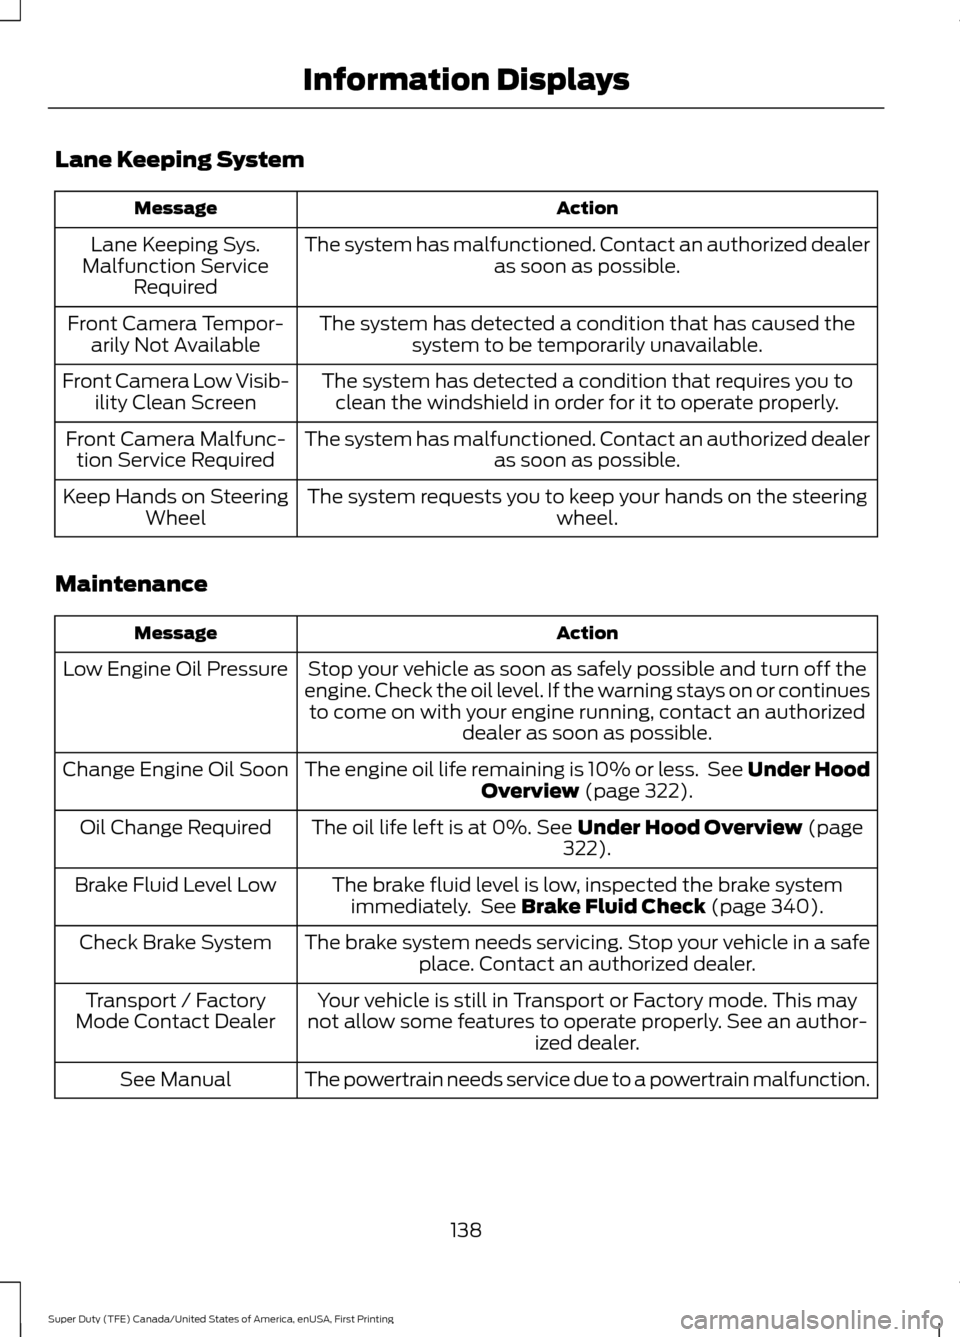
Lane Keeping System
Action
Message
The system has malfunctioned. Contact an authorized dealer as soon as possible.
Lane Keeping Sys.
Malfunction Service Required
The system has detected a condition that has caused thesystem to be temporarily unavailable.
Front Camera Tempor-
arily Not Available
The system has detected a condition that requires you toclean the windshield in order for it to operate properly.
Front Camera Low Visib-
ility Clean Screen
The system has malfunctioned. Contact an authorized dealeras soon as possible.
Front Camera Malfunc-
tion Service Required
The system requests you to keep your hands on the steering wheel.
Keep Hands on Steering
Wheel
Maintenance Action
Message
Stop your vehicle as soon as safely possible and turn off the
engine. Check the oil level. If the warning stays on or continues to come on with your engine running, contact an authorized dealer as soon as possible.
Low Engine Oil Pressure
The engine oil life remaining is 10% or less. See Under HoodOverview (page 322).
Change Engine Oil Soon
The oil life left is at 0%.
See Under Hood Overview (page
322).
Oil Change Required
The brake fluid level is low, inspected the brake systemimmediately. See
Brake Fluid Check (page 340).
Brake Fluid Level Low
The brake system needs servicing. Stop your vehicle in a safeplace. Contact an authorized dealer.
Check Brake System
Your vehicle is still in Transport or Factory mode. This may
not allow some features to operate properly. See an author- ized dealer.
Transport / Factory
Mode Contact Dealer
The powertrain needs service due to a powertrain malfunction.
See Manual
138
Super Duty (TFE) Canada/United States of America, enUSA, First Printing Information Displays
Page 204 of 636
•
Park your vehicle 10– 15 ft (3–5 m)
away from any obstructions and away
from materials that can easily combust
or melt, for example paper, leaves,
petroleum products, fuels, plastics and
other dry organic material.
• Make sure there is a minimum of 1/8
tank of fuel.
• Make sure all fluids are at proper levels.
How to Start Operator Commanded
Regeneration WARNING
Stay clear of the exhaust tailpipe
during regeneration. Hot exhaust
gases can burn you badly.
Note:
You cannot use the operator
commanded regeneration until the diesel
particulate filter load percentage has
reached 100%. The diesel particulate filter
load percentage fluctuates up and down
when driving your vehicle due to active and
passive regenerations.
Note: During the use of operator
commanded regeneration, you may observe
a light amount of white smoke. This is
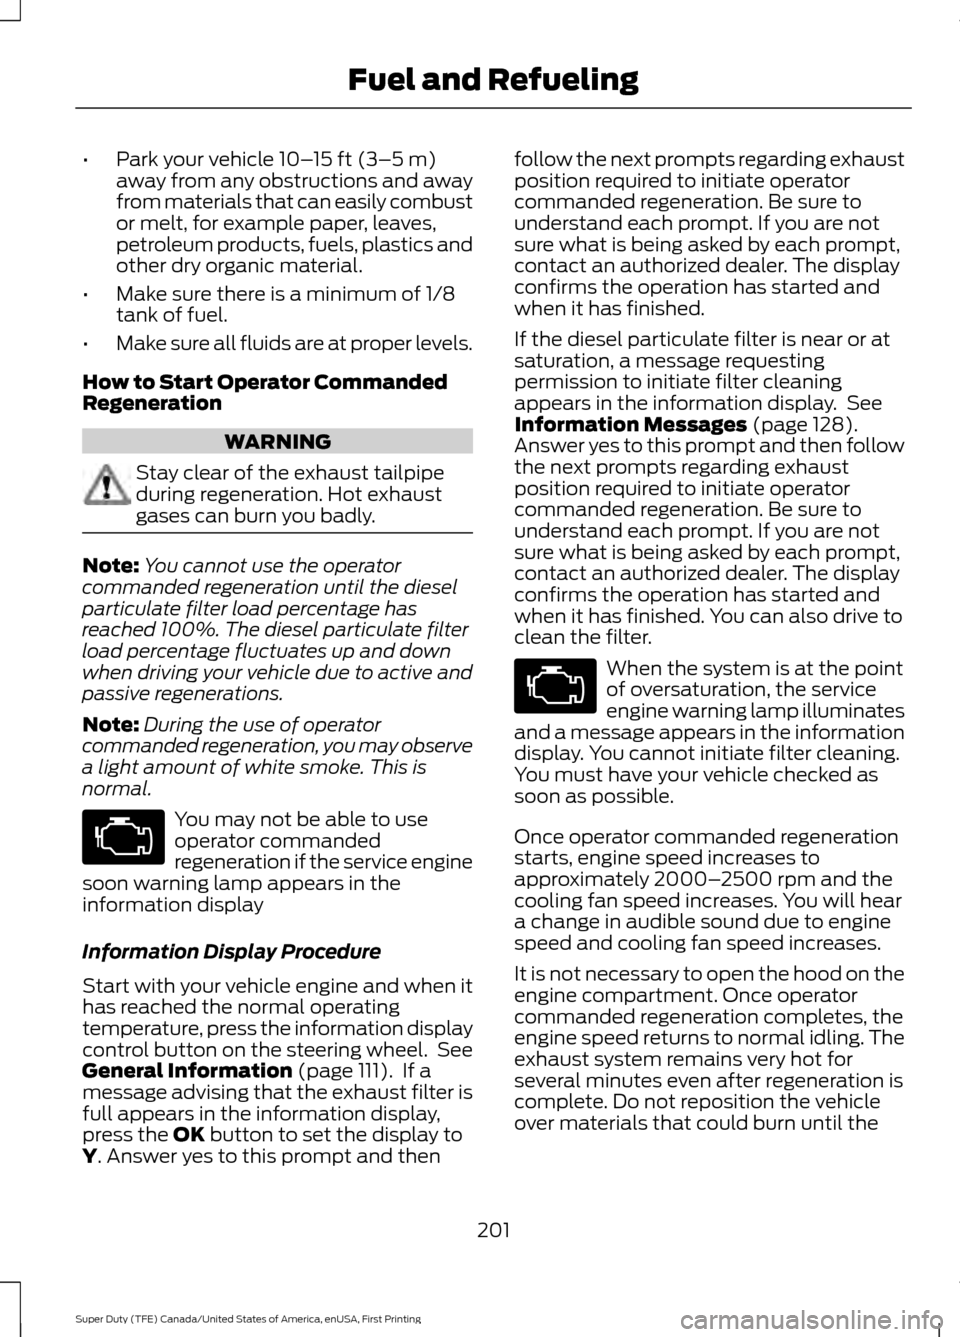
normal. You may not be able to use
operator commanded
regeneration if the service engine
soon warning lamp appears in the
information display
Information Display Procedure
Start with your vehicle engine and when it
has reached the normal operating
temperature, press the information display
control button on the steering wheel. See
General Information
(page 111). If a
message advising that the exhaust filter is
full appears in the information display,
press the
OK button to set the display to
Y. Answer yes to this prompt and then follow the next prompts regarding exhaust
position required to initiate operator
commanded regeneration. Be sure to
understand each prompt. If you are not
sure what is being asked by each prompt,
contact an authorized dealer. The display
confirms the operation has started and
when it has finished.
If the diesel particulate filter is near or at
saturation, a message requesting
permission to initiate filter cleaning
appears in the information display. See
Information Messages
(page 128).
Answer yes to this prompt and then follow
the next prompts regarding exhaust
position required to initiate operator
commanded regeneration. Be sure to
understand each prompt. If you are not
sure what is being asked by each prompt,
contact an authorized dealer. The display
confirms the operation has started and
when it has finished. You can also drive to
clean the filter. When the system is at the point
of oversaturation, the service
engine warning lamp illuminates
and a message appears in the information
display. You cannot initiate filter cleaning.
You must have your vehicle checked as
soon as possible.
Once operator commanded regeneration
starts, engine speed increases to
approximately 2000– 2500 rpm and the
cooling fan speed increases. You will hear
a change in audible sound due to engine
speed and cooling fan speed increases.
It is not necessary to open the hood on the
engine compartment. Once operator
commanded regeneration completes, the
engine speed returns to normal idling. The
exhaust system remains very hot for
several minutes even after regeneration is
complete. Do not reposition the vehicle
over materials that could burn until the
201
Super Duty (TFE) Canada/United States of America, enUSA, First Printing Fuel and Refueling
Page 208 of 636
AUTOMATIC TRANSMISSION
WARNING
Always apply the parking brake fully
and make sure you shift into park (P).
Switch the ignition off and remove
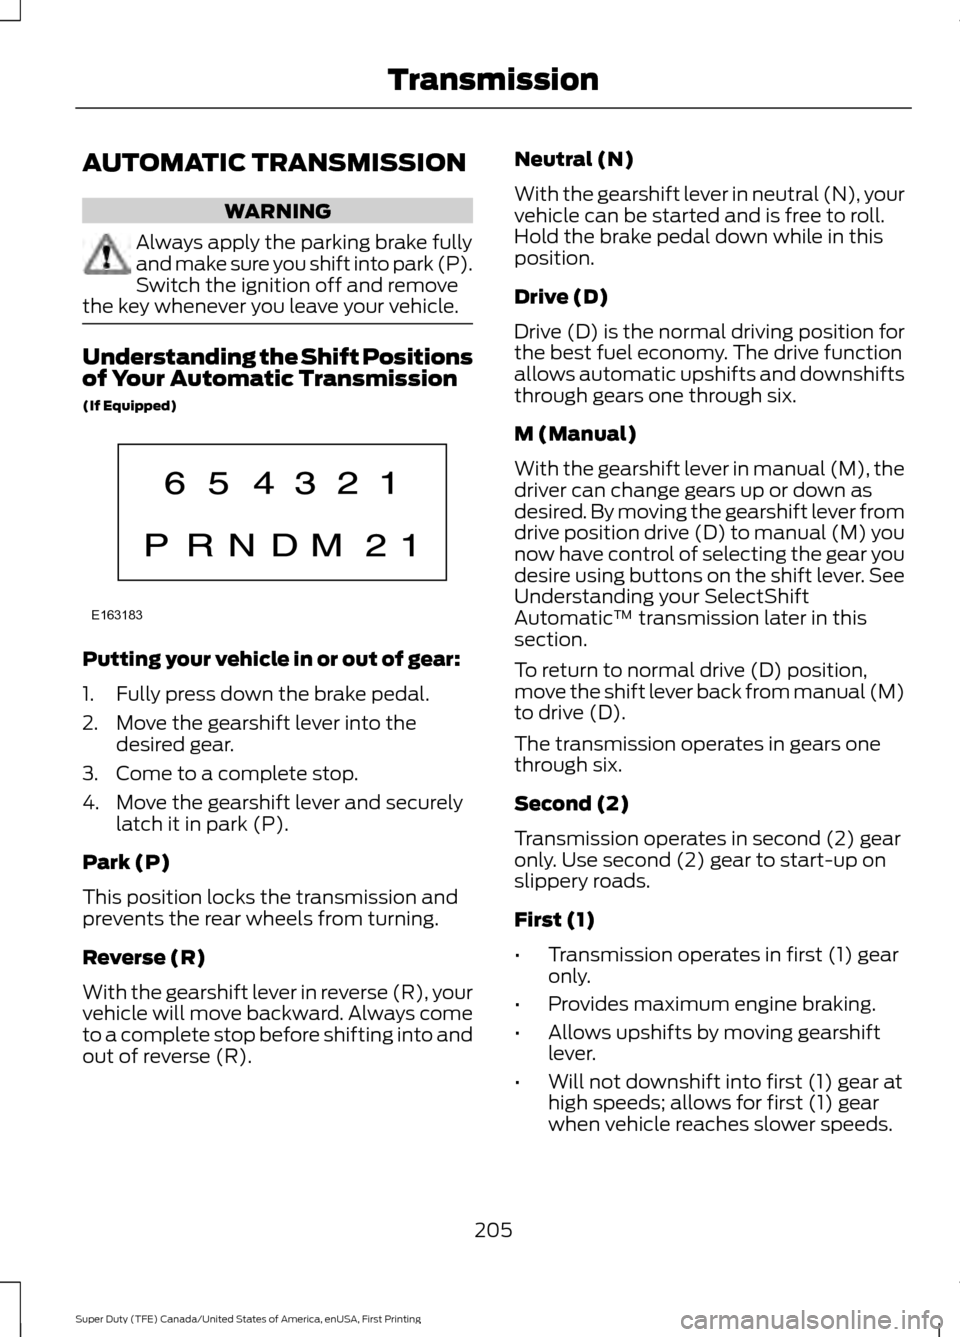
the key whenever you leave your vehicle. Understanding the Shift Positions
of Your Automatic Transmission
(If Equipped)
Putting your vehicle in or out of gear:
1. Fully press down the brake pedal.
2. Move the gearshift lever into the
desired gear.
3. Come to a complete stop.
4. Move the gearshift lever and securely latch it in park (P).
Park (P)
This position locks the transmission and
prevents the rear wheels from turning.
Reverse (R)
With the gearshift lever in reverse (R), your
vehicle will move backward. Always come
to a complete stop before shifting into and
out of reverse (R). Neutral (N)
With the gearshift lever in neutral (N), your
vehicle can be started and is free to roll.
Hold the brake pedal down while in this
position.
Drive (D)
Drive (D) is the normal driving position for
the best fuel economy. The drive function
allows automatic upshifts and downshifts
through gears one through six.
M (Manual)
With the gearshift lever in manual (M), the
driver can change gears up or down as
desired. By moving the gearshift lever from
drive position drive (D) to manual (M) you
now have control of selecting the gear you
desire using buttons on the shift lever. See
Understanding your SelectShift
Automatic
™ transmission later in this
section.
To return to normal drive (D) position,
move the shift lever back from manual (M)
to drive (D).
The transmission operates in gears one
through six.
Second (2)
Transmission operates in second (2) gear
only. Use second (2) gear to start-up on
slippery roads.
First (1)
• Transmission operates in first (1) gear
only.
• Provides maximum engine braking.
• Allows upshifts by moving gearshift
lever.
• Will not downshift into first (1) gear at
high speeds; allows for first (1) gear
when vehicle reaches slower speeds.
205
Super Duty (TFE) Canada/United States of America, enUSA, First Printing TransmissionE163183
Page 209 of 636
Forced downshifts
•
Allowed in drive (D) with the tow/haul
feature on or off.
• Press the accelerator to the floor.
• Allows transmission to select an
appropriate gear.
Tow/Haul Mode WARNING
Do not use the tow/haul feature
when driving in icy or slippery
conditions as the increased engine
braking can cause the rear wheels to slide
and your vehicle to swing around with the
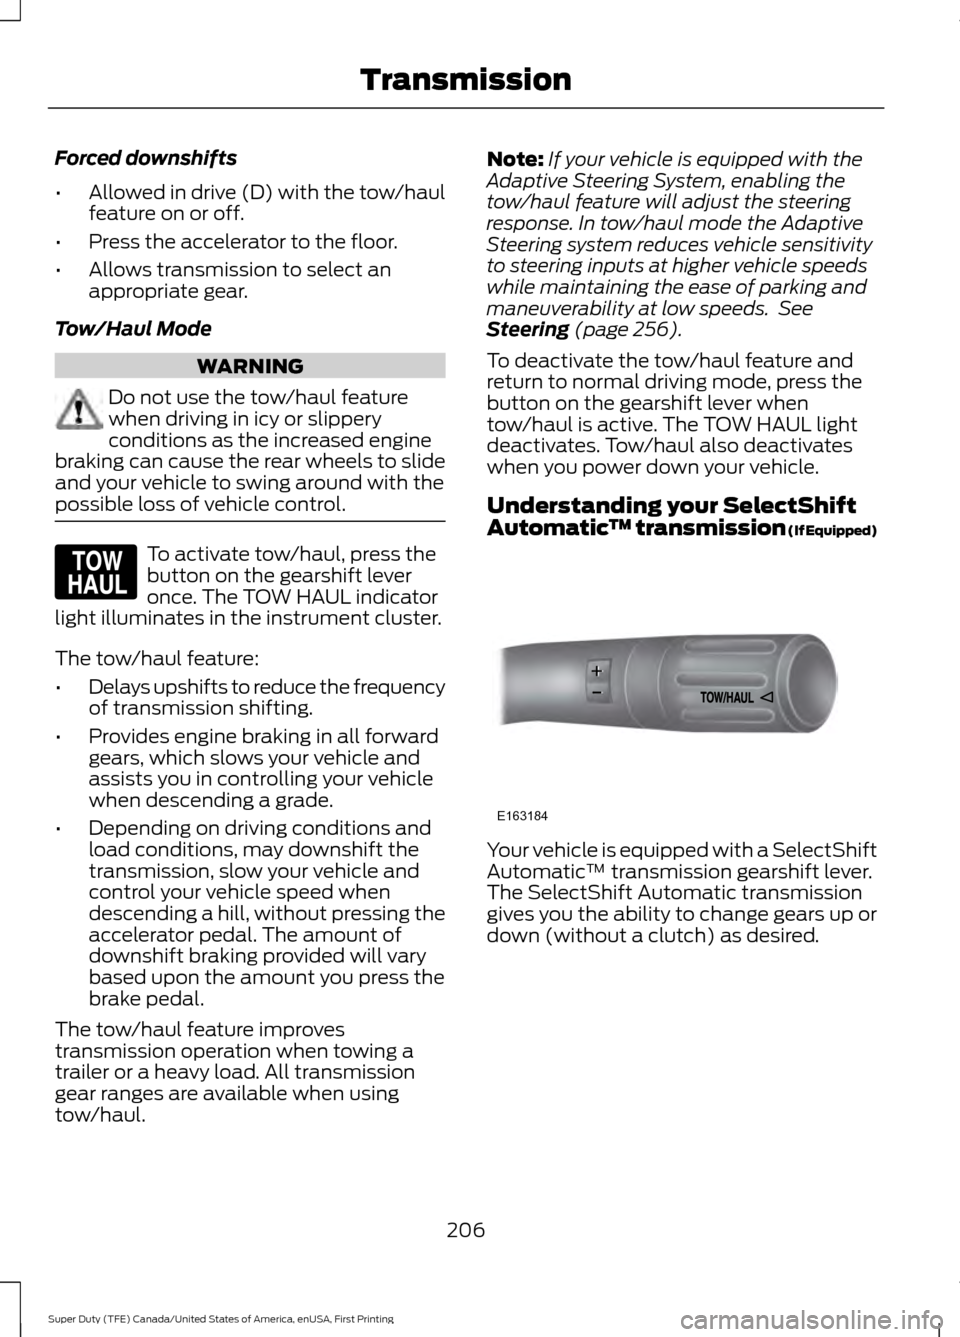
possible loss of vehicle control. To activate tow/haul, press the
button on the gearshift lever
once. The TOW HAUL indicator
light illuminates in the instrument cluster.
The tow/haul feature:
• Delays upshifts to reduce the frequency
of transmission shifting.
• Provides engine braking in all forward
gears, which slows your vehicle and
assists you in controlling your vehicle
when descending a grade.
• Depending on driving conditions and
load conditions, may downshift the
transmission, slow your vehicle and
control your vehicle speed when
descending a hill, without pressing the
accelerator pedal. The amount of
downshift braking provided will vary
based upon the amount you press the
brake pedal.
The tow/haul feature improves
transmission operation when towing a
trailer or a heavy load. All transmission
gear ranges are available when using
tow/haul. Note:
If your vehicle is equipped with the
Adaptive Steering System, enabling the
tow/haul feature will adjust the steering
response. In tow/haul mode the Adaptive
Steering system reduces vehicle sensitivity
to steering inputs at higher vehicle speeds
while maintaining the ease of parking and
maneuverability at low speeds. See
Steering (page 256).
To deactivate the tow/haul feature and
return to normal driving mode, press the
button on the gearshift lever when
tow/haul is active. The TOW HAUL light
deactivates. Tow/haul also deactivates
when you power down your vehicle.
Understanding your SelectShift
Automatic ™ transmission (If Equipped) Your vehicle is equipped with a SelectShift
Automatic
™ transmission gearshift lever.
The SelectShift Automatic transmission
gives you the ability to change gears up or
down (without a clutch) as desired.
206
Super Duty (TFE) Canada/United States of America, enUSA, First Printing TransmissionE161509 E163184
Page 217 of 636
If Shift Delayed Pull Forward appears in
the information display, transfer case gear
tooth blockage is present. To alleviate this
condition, place the transmission in a
forward gear, move the vehicle forward
approximately
5 ft (1.5 m), and shift the
transmission back to neutral to allow the
transfer case to complete the range shift.
How Your Vehicle Differs From
Other Vehicles WARNING
Vehicles with a higher center of
gravity (utility and four-wheel drive
vehicles) handle differently than
vehicles with a lower center of gravity
(passenger cars). Avoid sharp turns,
excessive speed and abrupt steering in
these vehicles. Failure to drive cautiously
increases the risk of losing control of your
vehicle, vehicle rollover, personal injury and
death. Truck and utility vehicles can differ from
some other vehicles. Your vehicle may be
higher to allow it to travel over rough
terrain without getting hung up or
damaging underbody components.
The differences that make your vehicle so
versatile also make it handle differently
than an ordinary passenger car.
Maintain steering wheel control at all
times, especially in rough terrain. Since
sudden changes in terrain can result in
abrupt steering wheel motion, make sure
you grip the steering wheel from the
outside. Do not grip the spokes.
Drive cautiously to avoid vehicle damage
from concealed objects such as rocks and
stumps. You should either know the terrain or
examine maps of the area before driving.
Map out your route before driving in the
area. To maintain steering and braking
control of your vehicle, you must have all
four wheels on the ground and they must
be rolling, not sliding or spinning.
Driving Off-Road With Truck and
Utility Vehicles
Note:
On some models, the initial shift from
two-wheel drive to four-wheel drive while
the vehicle is moving can cause some
momentary clunk and ratcheting sounds.
This is the front drivetrain coming up to
speed and the automatic locking hubs
engaging and is not cause for concern.
Note: Your vehicle may be equipped with
a front air dam that can become damaged
(due to reduced ground clearance) when
taking your vehicle off-road. This air dam
can be taken off by removing 15 bolts.
Four-wheel drive vehicles are specially
equipped for driving on sand, snow, mud
and rough terrain and have operating
characteristics that are somewhat
different from conventional vehicles, both
on and off the road.
Power is supplied to all four wheels
through a transfer case. On four-wheel
drive vehicles, the transfer case allows you
to select 4WD when necessary.
Information on transfer case operation and
shifting procedures can be found in this
chapter. Information on transfer case
maintenance can be found in the
Maintenance chapter. You should become
thoroughly familiar with this information
before you operate your vehicle.
Four-wheel drive (when you select a 4WD
mode) uses all four wheels to power the
vehicle. This increases traction, enabling
you to drive over terrain and road
conditions that a conventional two-wheel
drive vehicle cannot.
214
Super Duty (TFE) Canada/United States of America, enUSA, First Printing Four-Wheel Drive
(If Equipped)
Page 218 of 636
Basic Operating Principles
•
Drive slower in strong crosswinds which
can affect the normal steering
characteristics of your vehicle.
• When driving your vehicle on surfaces
made slippery by loose sand, water,
gravel, snow or ice proceed with care.
• Do not use 4H or 4L on dry, hard
surfaced roads. Doing so will produce
excessive noise, increase tire wear and
may damage drive components. 4H or
4L modes are only intended for
consistently slippery or loose surfaces.
If Your Vehicle leaves the Road
If your vehicle leaves the road, reduce your
vehicle speed and avoid severe braking.
When your vehicle speed has been reduced
ease your vehicle back onto the road. Do
not turn the steering wheel sharply while
returning your vehicle to the road.
It may be safer to stay on the shoulder of
the road and slow down gradually before
returning to the road. You may lose control
if you do not slow down or if you turn the
steering wheel too sharply or abruptly.
It may be less risky to strike small objects,
such as freeway reflectors, with minor
damage to your vehicle rather than
attempt a sudden return to the road which
could cause your vehicle to slide sideways
out of control or roll over. Remember, your
safety and the safety of others should be
your primary concern.
Emergency Maneuvers
In an unavoidable emergency situation
where a sudden sharp turn must be made,
remember to avoid over-driving your
vehicle (i.e. turn the steering wheel only as
rapidly and as far as required to avoid the
emergency). Excessive steering can result
in loss of vehicle control. Apply smooth
pressure to the accelerator pedal or brake
pedal when changes in vehicle speed are required. Avoid abrupt steering,
acceleration and braking. This could result
in an increased risk of vehicle roll over, loss
of vehicle control and personal injury. Use
all available road surface to bring your
vehicle to a safe direction of travel.
In the event of an emergency stop, avoid
skidding the tires and do not attempt any
sharp steering wheel movements.
If your vehicle goes from one type of
surface to another (i.e. from concrete to
gravel) there will be a change in the way
your vehicle responds to a maneuver (i.e.
steering, acceleration or braking).
Sand
When driving over sand, try to keep all four
wheels on the most solid area of the trail.
Avoid reducing the tire pressures but shift
to a lower gear and drive steadily through
the terrain. Apply the accelerator slowly
and avoid excessive wheel slip.
When driving at slow speeds in deep sand
under high outside temperatures, use a low
gear when possible. Low gear operation
will maximize the engine and transmission
cooling capability.
Avoid driving at excessive speeds, this
causes vehicle momentum to work against
you and your vehicle could become stuck
to the point that assistance may be
required from another vehicle. Remember,
you may be able to back out the way you
came if you proceed with caution.
Mud and Water
Mud
Be cautious of sudden changes in vehicle
speed or direction when you are driving in
mud. Even four-wheel drive vehicles can
lose traction in slick mud. If your vehicle
does slide, steer in the direction of the slide
until you regain control of your vehicle.
215
Super Duty (TFE) Canada/United States of America, enUSA, First Printing Four-Wheel Drive (If Equipped)