2017 FORD SUPER DUTY change wheel
[x] Cancel search: change wheelPage 293 of 636
BREAKING-IN
You need to break in new tires for
approximately 300 mi (480 km). During
this time, your vehicle may exhibit some
unusual driving characteristics.
Avoid driving too fast during the first
1,000 mi (1,600 km)
. Vary your speed
frequently and change up through the
gears early. Do not labor the engine.
Drive your new vehicle at least
1,000 mi
(1,600 km) before towing a trailer. Make
sure you use the specified engine oil. See
Capacities and Specifications
(page
418).
Do not add friction modifier compounds
or special break-in oils during the first few
thousand miles (kilometers) of operation.
These additives may prevent piston ring
seating.
ECONOMICAL DRIVING
Your fuel economy is affected by several
things, such as how you drive, the
conditions you drive under, and how you
maintain your vehicle.
You may improve your fuel economy by
keeping these things in mind:
• Accelerate and slow down in a smooth,
moderate fashion.
• Drive at steady speeds without
stopping.
• Anticipate stops; slowing down may
eliminate the need to stop.
• Combine errands and minimize
stop-and-go driving.
• Close the windows for high-speed
driving.
• Drive at reasonable speeds (traveling
at 55 mph [88 km/h] uses 15% less
fuel than traveling at 65 mph [105
km/h]). •
Keep the tires properly inflated and use
only the recommended size.
• Use the recommended engine oil.
• Perform all regularly scheduled
maintenance.
Avoid these actions; they reduce your fuel
economy:
• Sudden accelerations or hard
accelerations.
• Revving the engine before turning it off.
• Idle for periods longer than one minute.
• Warm up your vehicle on cold
mornings.
• Use the air conditioner or front
defroster.
• Use the speed control in hilly terrain.
• Rest your foot on the brake pedal while
driving.
• Drive a heavily loaded vehicle or tow a
trailer.
• Carry unnecessary weight
(approximately 1 mpg [0.4 km/L] is
lost for every 400 lb [180 kilogram] of
weight carried).
• Driving with the wheels out of
alignment.
Conditions
• Heavily loading a vehicle or towing a
trailer may reduce fuel economy at any
speed.
• Adding certain accessories to your
vehicle (for example bug deflectors,
rollbars, light bars, running boards, ski
racks or luggage racks) may reduce
fuel economy.
• To maximize the fuel economy, drive
with the tonneau cover installed (if
equipped).
• Using fuel blended with alcohol may
lower fuel economy.
290
Super Duty (TFE) Canada/United States of America, enUSA, First Printing Driving Hints
Page 296 of 636
•
Front wheel toe may require
re-adjustment to prevent premature
uneven tire wear. Specifications are in
the Ford Workshop Manual.
• Headlight aim may require
re-adjustment.
• The tire air pressures recommended
for general driving are on the vehicle ’s
Safety Certification Label. The
maximum cold inflation pressure for
the tire and associated load rating is
on the tire sidewall. Tire air pressure
may require re-adjustment within these
pressure limits to accommodate the
additional weight of the snowplow
installation.
• Federal and some local regulations
require additional exterior lamps for
snowplow-equipped vehicles. Consult
your authorized dealer for additional
information.
Operating the Vehicle with the
Snowplow Attached
Note: Do not use your vehicle for snow
removal until you have driven at least
500 mi (800 km).
Ford recommends vehicle speed does not
exceed
45 mph (72 km/h) when
snowplowing.
The attached snowplow blade restricts
airflow to the radiator, and may cause the
engine to run at a higher temperature:
Attention to engine temperature is
especially important when outside
temperatures are above freezing. Angle
the blade to maximize airflow to the
radiator and monitor engine temperature
to determine whether a left or right angle
provides the best performance.
Follow the severe duty schedule in your
Scheduled Maintenance information for
engine oil and transmission fluid change
intervals. Snowplowing with your Airbag
Equipped Vehicle WARNINGS
Do not attempt to service, repair, or
modify the airbag supplemental
restraint system (SRS) or its fuses.
Contact an authorized dealer. Additional equipment for example
snowplow equipment may affect the
performance of the airbag sensors
increasing the risk of injury. Please refer to
the Body Builders Layout Book for
instructions about the appropriate
installation of additional equipment. All occupants of the vehicle,
including the driver, should always
properly wear their seatbelt, even
when provided with an airbag
supplemental restraint system (SRS). Your vehicle is equipped with a driver and
passenger airbag supplemental restraint
system. The supplemental restraint system
will activate in certain frontal and offset
frontal collisions when the vehicle sustains
sufficient frontal deceleration.
Careless or high speed driving while
plowing snow that results in sufficient
vehicle decelerations can deploy the
airbags. Such driving also increases the risk
of accidents.
Never remove or defeat the tripping
mechanisms designed into the snow
removal equipment by its manufacturer.
Doing so may cause damage to the vehicle
and the snow removal equipment as well
as possible airbag deployment.
Engine temperature while plowing
When driving with a plow, your engine may
run at a higher temperature than normal
because the attached snowplow blade will
restrict airflow to the radiator.
293
Super Duty (TFE) Canada/United States of America, enUSA, First Printing Driving Hints
Page 331 of 636
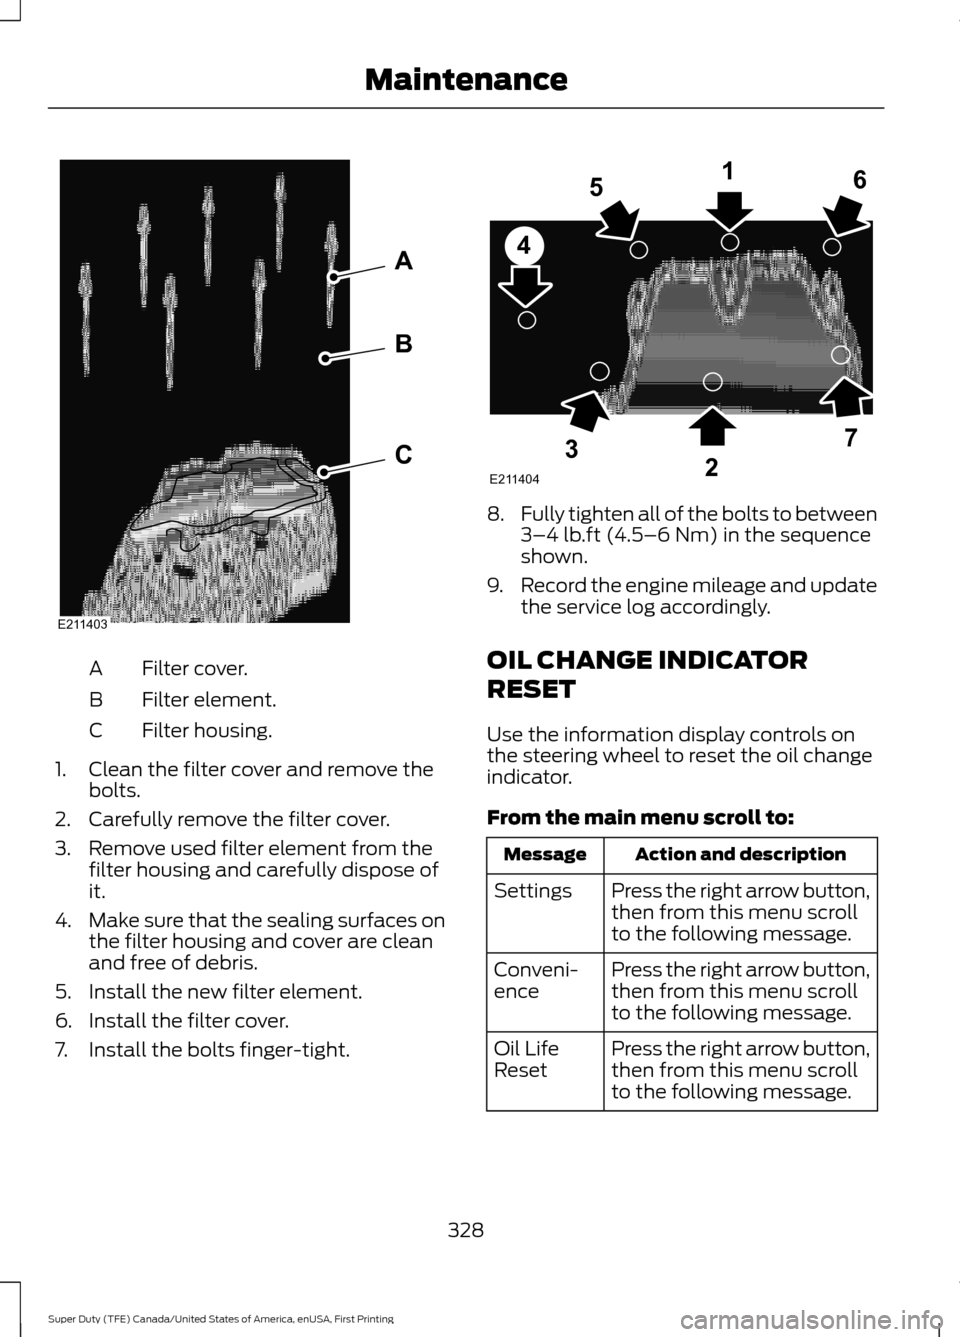
Filter cover.
A
Filter element.
B
Filter housing.
C
1. Clean the filter cover and remove the bolts.
2. Carefully remove the filter cover.
3. Remove used filter element from the filter housing and carefully dispose of
it.
4. Make sure that the sealing surfaces on
the filter housing and cover are clean
and free of debris.
5. Install the new filter element.
6. Install the filter cover.
7. Install the bolts finger-tight. 8.
Fully tighten all of the bolts to between
3–4 lb.ft (4.5–6 Nm) in the sequence
shown.
9. Record the engine mileage and update
the service log accordingly.
OIL CHANGE INDICATOR
RESET
Use the information display controls on
the steering wheel to reset the oil change
indicator.
From the main menu scroll to: Action and description
Message
Press the right arrow button,
then from this menu scroll
to the following message.
Settings
Press the right arrow button,
then from this menu scroll
to the following message.
Conveni-
ence
Press the right arrow button,
then from this menu scroll
to the following message.
Oil Life
Reset
328
Super Duty (TFE) Canada/United States of America, enUSA, First Printing MaintenanceE211403
A
B
C E211404
165
4
32
7
Page 373 of 636
GENERAL INFORMATION
Use only approved wheel and tire sizes,
using other sizes could damage your
vehicle. If you change the diameter of the
tires from that fitted at the factory, the
speedometer may not display the correct
speed. Take your vehicle to an authorized
Ford dealer to have the system
reprogrammed. If you intend to change the
size of the wheels from that fitted by the
manufacturer, you can check the suitability
with an authorized dealer.
Additional information related to the
functionality and maintenance of your tires
can be found later in this chapter. See Tire
Care (page 373).
The Ford recommended tire inflation
pressures can be found on the Tire Label,
which is located on the B-pillar or the edge
of the driver's door. This information can
also be found on the Safety Compliance
Certification Label (affixed to either the
door hinge pillar, door-latch post, or the
door edge that meets the door last post;
next to the driver ’s seating position).
Ford strongly recommends maintaining
these tire pressures at all times. Failure to
follow the tire pressure recommendations
can cause uneven treadwear patterns,
reduced fuel economy, and adversely
affect the way your vehicle handles.
Note: Check and set the tire pressure at the
ambient temperature in which you are
intending to drive your vehicle and when the
tires are cold.
Note: Check your tire pressures at least
once per month.
Set the pressure for your spare tire to the
highest value given for your vehicle and tire
size combination (if equipped). Notice to utility vehicle and truck
owners WARNINGS
Utility vehicles have a significantly
higher rollover rate than other types
of vehicles. To reduce the risk of
serious injury or death from a rollover or
other crash you must avoid sharp turns and
abrupt maneuvers, drive at safe speeds for
the conditions, keep tires inflated to Ford
recommended pressures, never overload
or improperly load your vehicle, and make
sure every passenger is properly restrained. In a rollover crash, an unbelted
person is significantly more likely to
die than a person wearing a seat belt.
All occupants must wear seat belts and
children/infants must use appropriate
restraints to minimize the risk of injury or
ejection. Do not become overconfident in the
ability of four-wheel drive vehicles.
Although a four-wheel drive vehicle
may accelerate better than a two-wheel
drive vehicle in low traction situations, it
won't stop any faster than two-wheel drive
vehicles. Always drive at a safe speed. 370
Super Duty (TFE) Canada/United States of America, enUSA, First Printing Wheels and TiresE145298
Page 379 of 636
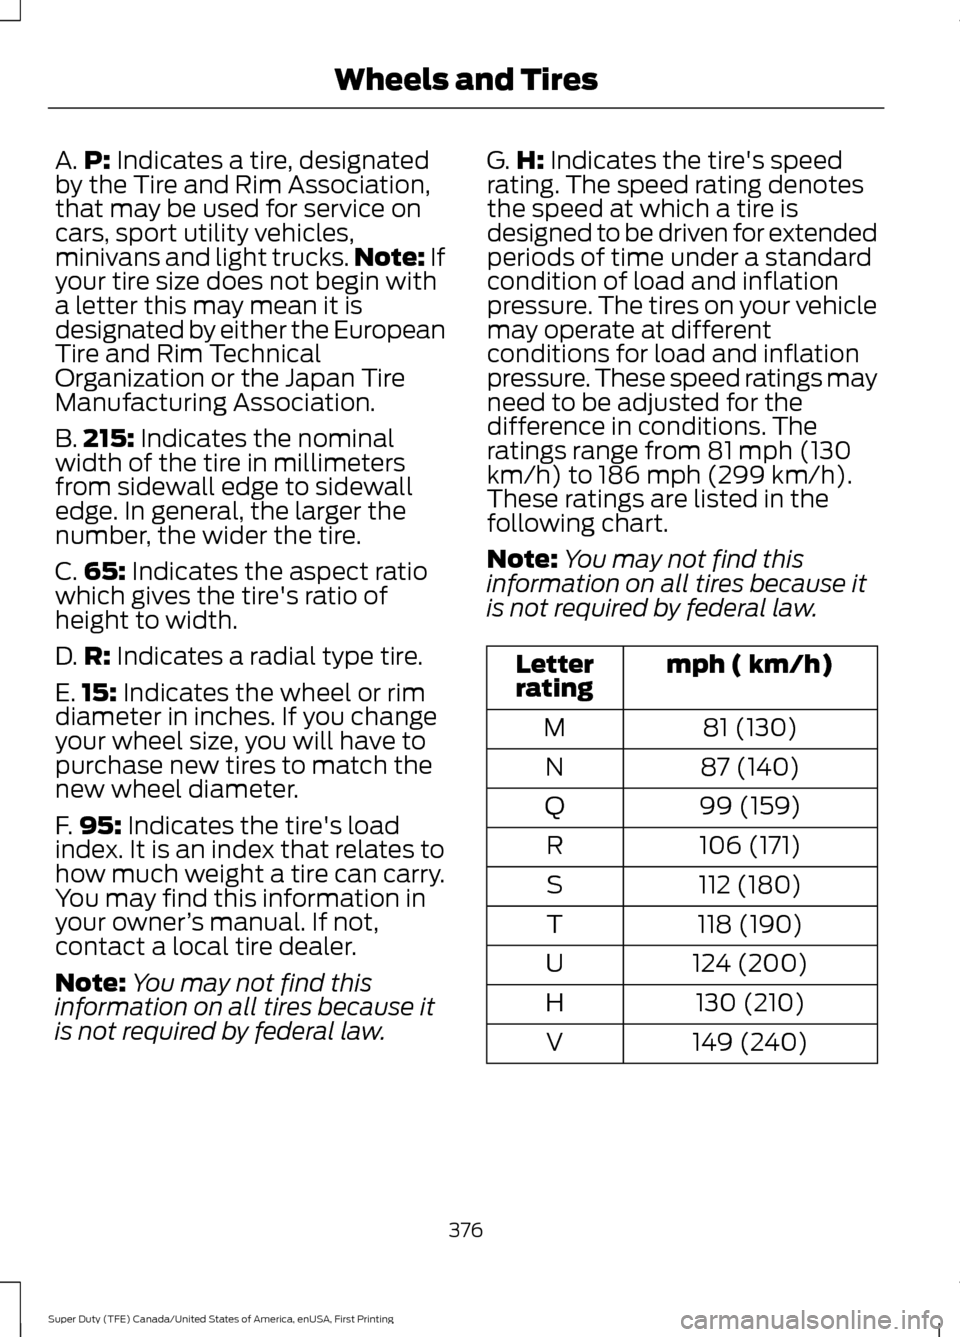
A.
P: Indicates a tire, designated
by the Tire and Rim Association,
that may be used for service on
cars, sport utility vehicles,
minivans and light trucks. Note:
If
your tire size does not begin with
a letter this may mean it is
designated by either the European
Tire and Rim Technical
Organization or the Japan Tire
Manufacturing Association.
B. 215:
Indicates the nominal
width of the tire in millimeters
from sidewall edge to sidewall
edge. In general, the larger the
number, the wider the tire.
C. 65:
Indicates the aspect ratio
which gives the tire's ratio of
height to width.
D. R:
Indicates a radial type tire.
E. 15:
Indicates the wheel or rim
diameter in inches. If you change
your wheel size, you will have to
purchase new tires to match the
new wheel diameter.
F. 95:
Indicates the tire's load
index. It is an index that relates to
how much weight a tire can carry.
You may find this information in
your owner ’s manual. If not,
contact a local tire dealer.
Note: You may not find this
information on all tires because it
is not required by federal law. G.
H:
Indicates the tire's speed
rating. The speed rating denotes
the speed at which a tire is
designed to be driven for extended
periods of time under a standard
condition of load and inflation
pressure. The tires on your vehicle
may operate at different
conditions for load and inflation
pressure. These speed ratings may
need to be adjusted for the
difference in conditions. The
ratings range from 81 mph (130
km/h) to 186 mph (299 km/h).
These ratings are listed in the
following chart.
Note: You may not find this
information on all tires because it
is not required by federal law. mph ( km/h)
Letter
rating
81 (130)
M
87 (140)
N
99 (159)
Q
106 (171)
R
112 (180)
S
118 (190)
T
124 (200)
U
130 (210)
H
149 (240)
V
376
Super Duty (TFE) Canada/United States of America, enUSA, First Printing Wheels and Tires
Page 382 of 636
D.
Maximum Load Single lb
(kg) at psi (kPa) cold: Indicates
the maximum load and tire
pressure when the tire is used as
a single; defined as two tires
(total) on the rear axle.
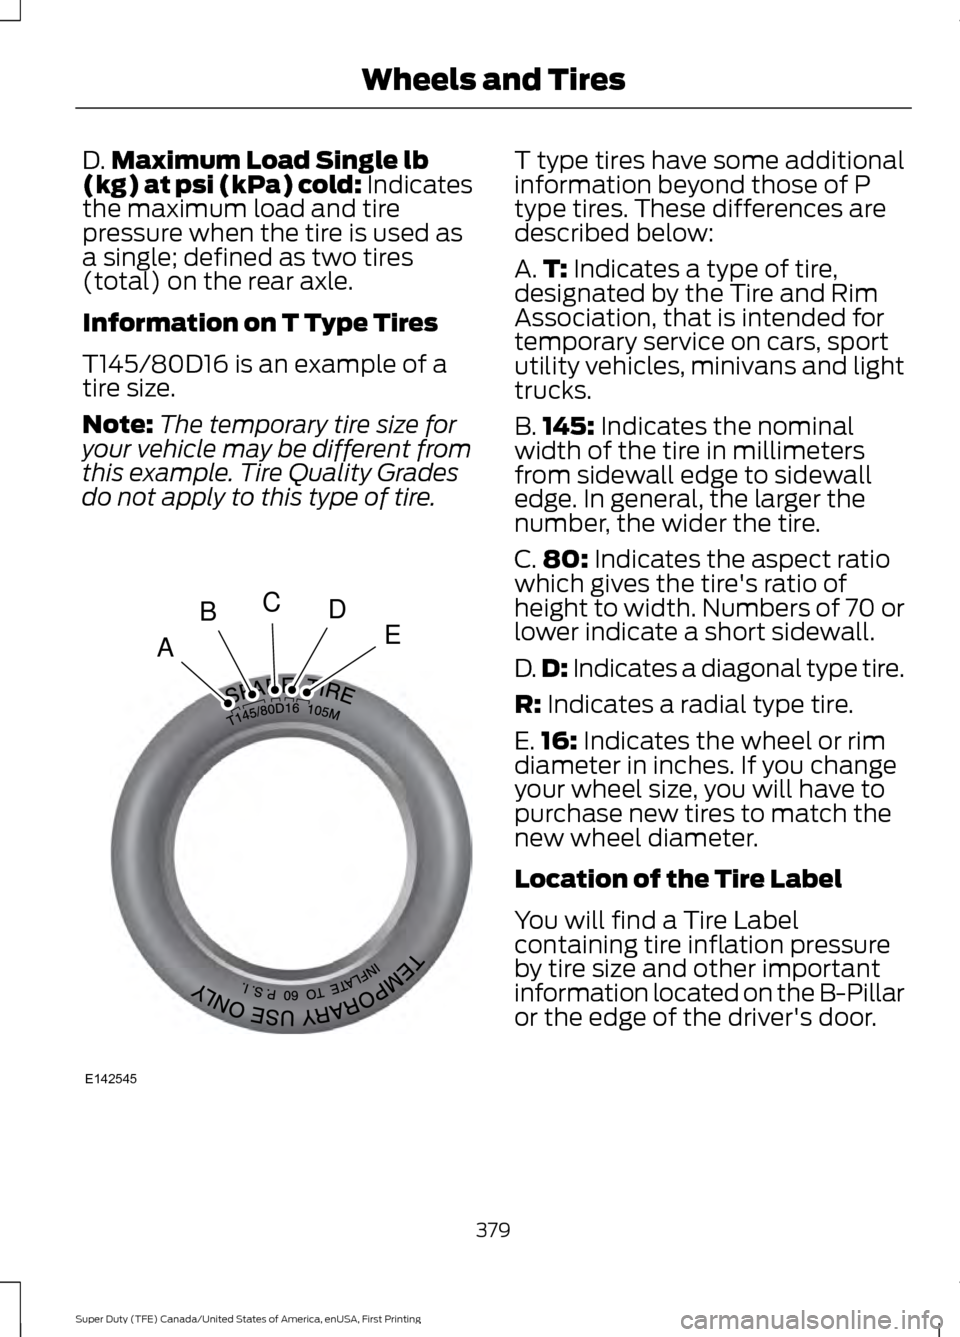
Information on T Type Tires
T145/80D16 is an example of a
tire size.
Note: The temporary tire size for
your vehicle may be different from
this example. Tire Quality Grades
do not apply to this type of tire. T type tires have some additional
information beyond those of P
type tires. These differences are
described below:
A.
T:
Indicates a type of tire,
designated by the Tire and Rim
Association, that is intended for
temporary service on cars, sport
utility vehicles, minivans and light
trucks.
B. 145:
Indicates the nominal
width of the tire in millimeters
from sidewall edge to sidewall
edge. In general, the larger the
number, the wider the tire.
C. 80:
Indicates the aspect ratio
which gives the tire's ratio of
height to width. Numbers of 70 or
lower indicate a short sidewall.
D. D:
Indicates a diagonal type tire.
R:
Indicates a radial type tire.
E. 16:
Indicates the wheel or rim
diameter in inches. If you change
your wheel size, you will have to
purchase new tires to match the
new wheel diameter.
Location of the Tire Label
You will find a Tire Label
containing tire inflation pressure
by tire size and other important
information located on the B-Pillar
or the edge of the driver's door.
379
Super Duty (TFE) Canada/United States of America, enUSA, First Printing Wheels and TiresA
BCDE
E142545
Page 384 of 636
Note:
Do not reduce tire pressure
to change the ride characteristics
of the vehicle. If you do not
maintain the inflation pressure at
the levels specified by Ford, your
vehicle may experience a condition
known as shimmy. Shimmy is a
severe vibration and oscillation in
the steering wheel after the vehicle
travels over a bump or dip in the
road that does not dampen out by
itself. Shimmy may result from
significant under-inflation of the
tires, improper tires (load range,
size, or type), or vehicle
modifications such as lift-kits. In
the event that your vehicle
experiences shimmy, you should
slowly reduce speed by either lifting
off the accelerator pedal or lightly
applying the brakes. The shimmy
will cease as the vehicle speed
decreases.
Maximum Inflation Pressure is
the tire manufacturer's maximum
permissible pressure and the
pressure at which the maximum
load can be carried by the tire. This
pressure is normally higher than
the manufacturer ’s recommended
cold inflation pressure which can
be found on the Safety
Compliance Certification Label
(affixed to either the door hinge
pillar, door-latch post, or the door
edge that meets the door-latch
post, next to the driver's seating
position), or Tire Label located on the B-pillar or the edge of the
driver's door. The cold inflation
pressure should never be set lower
than the recommended pressure
on the Safety Compliance
Certification Label or Tire Label.
When weather temperature
changes occur, tire inflation
pressures also change. A 10°F
(6°C) temperature drop can
cause a corresponding drop of 1
psi (7 kPa) in inflation pressure.
Check your tire pressures
frequently and adjust them to the
proper pressure which can be
found on the Safety Compliance
Certification Label or Tire Label.
To check the pressure in your
tire(s):
1. Make sure the tires are cool,
meaning they are not hot from
driving even a mile.
Note:
If you are checking tire
pressure when the tire is hot, (for
example, driven more than 1 mile
[1.6 kilometers]), never bleed or
reduce air pressure. The tires are
hot from driving and it is normal for
pressures to increase above
recommended cold pressures. A
hot tire at or below recommended
cold inflation pressure could be
significantly under-inflated.
381
Super Duty (TFE) Canada/United States of America, enUSA, First Printing Wheels and Tires
Page 404 of 636
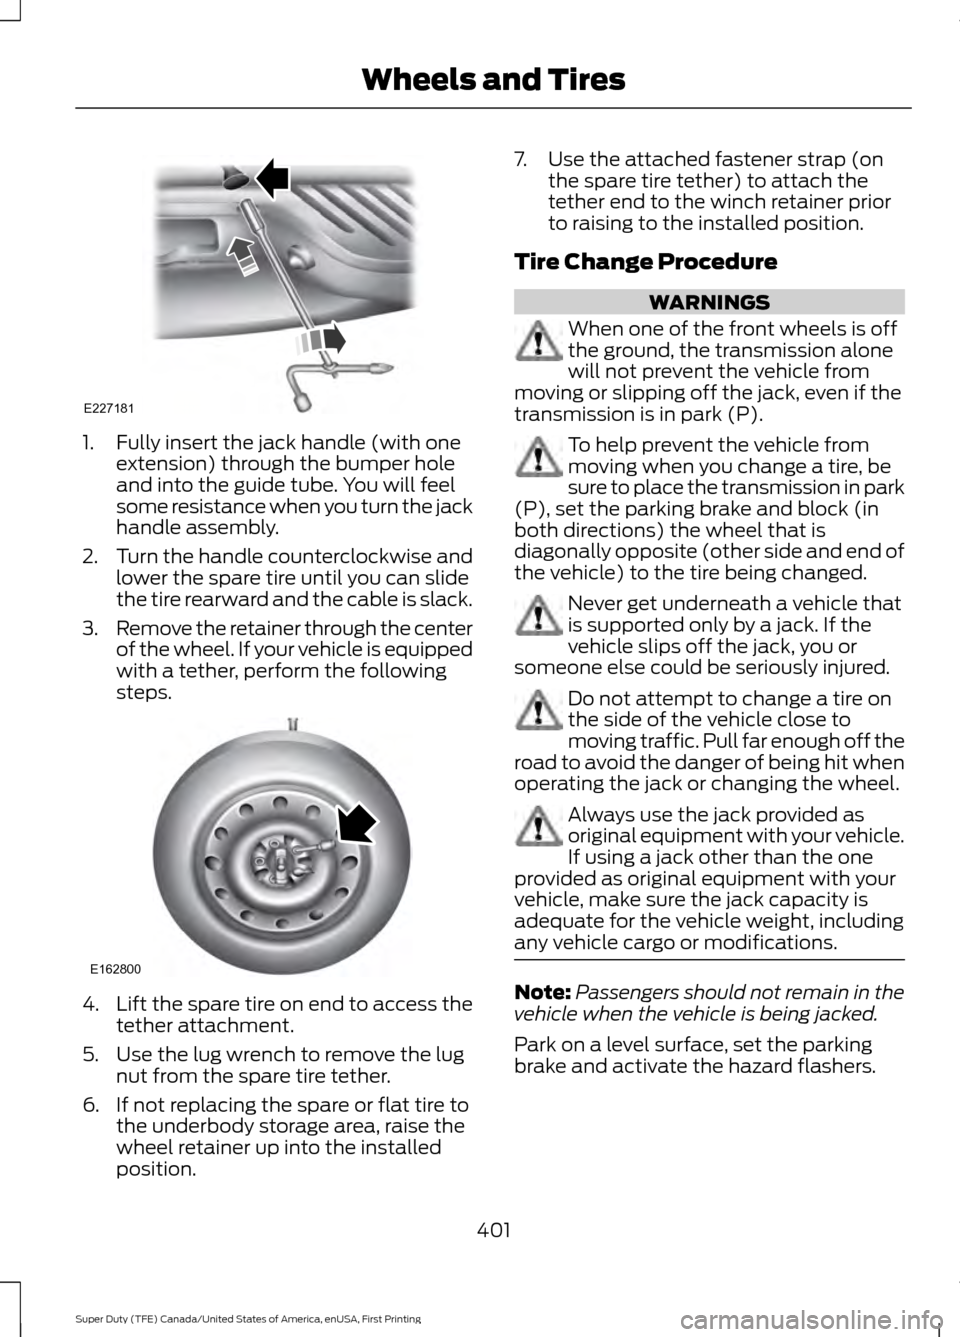
1. Fully insert the jack handle (with one
extension) through the bumper hole
and into the guide tube. You will feel
some resistance when you turn the jack
handle assembly.
2. Turn the handle counterclockwise and
lower the spare tire until you can slide
the tire rearward and the cable is slack.
3. Remove the retainer through the center
of the wheel. If your vehicle is equipped
with a tether, perform the following
steps. 4.
Lift the spare tire on end to access the
tether attachment.
5. Use the lug wrench to remove the lug nut from the spare tire tether.
6. If not replacing the spare or flat tire to the underbody storage area, raise the
wheel retainer up into the installed
position. 7. Use the attached fastener strap (on
the spare tire tether) to attach the
tether end to the winch retainer prior
to raising to the installed position.
Tire Change Procedure WARNINGS
When one of the front wheels is off
the ground, the transmission alone
will not prevent the vehicle from
moving or slipping off the jack, even if the
transmission is in park (P). To help prevent the vehicle from
moving when you change a tire, be
sure to place the transmission in park
(P), set the parking brake and block (in
both directions) the wheel that is
diagonally opposite (other side and end of
the vehicle) to the tire being changed. Never get underneath a vehicle that
is supported only by a jack. If the
vehicle slips off the jack, you or
someone else could be seriously injured. Do not attempt to change a tire on
the side of the vehicle close to
moving traffic. Pull far enough off the
road to avoid the danger of being hit when
operating the jack or changing the wheel. Always use the jack provided as
original equipment with your vehicle.
If using a jack other than the one
provided as original equipment with your
vehicle, make sure the jack capacity is
adequate for the vehicle weight, including
any vehicle cargo or modifications. Note:
Passengers should not remain in the
vehicle when the vehicle is being jacked.
Park on a level surface, set the parking
brake and activate the hazard flashers.
401
Super Duty (TFE) Canada/United States of America, enUSA, First Printing Wheels and TiresE227181 E162800