2017 FORD SUPER DUTY service indicator
[x] Cancel search: service indicatorPage 7 of 636

Bed Ramps....................................................265
Towing
Towing a Trailer............................................268
Trailer Reversing Aids
.................................269
Trailer Sway Control
....................................277
Recommended Towing Weights............277
Essential Towing Checks...........................281
Towing the Vehicle on Four Wheels......289
Driving Hints
Breaking-In....................................................290
Economical Driving
.....................................290
Driving Through Water................................291
Floor Mats........................................................291
Snowplowing................................................292
Roadside Emergencies
Roadside Assistance..................................295
Hazard Warning Flashers
.........................296
Fuel Shutoff - 6.2L/6.8L
...........................296
Fuel Shutoff - 6.7L Diesel.........................297
Jump Starting the Vehicle........................298
Post-Crash Alert System.........................300
Transporting the Vehicle
..........................300
Towing Points................................................301
Customer Assistance
Getting the Services You Need
..............303
In California (U.S. Only)............................304
The Better Business Bureau (BBB) Auto Line Program (U.S. Only).....................305
Utilizing the Mediation/Arbitration Program (Canada Only)
......................306
Getting Assistance Outside the U.S. and Canada.......................................................306
Ordering Additional Owner's Literature....................................................307
Reporting Safety Defects (U.S. Only)............................................................308 Reporting Safety Defects (Canada
Only)............................................................308
Fuses
Fuse Specification Chart...........................310
Changing a Fuse
...........................................318
Maintenance
General Information...................................320
Opening and Closing the Hood..............320
Under Hood Overview - 6.2L....................321
Under Hood Overview - 6.8L...................322
Under Hood Overview - 6.7L Diesel
......323
Engine Oil Dipstick
......................................324
Engine Oil Check - 6.2L/6.8L..................324
Engine Oil Check - 6.7L Diesel................325
Changing the Engine Oil and Oil Filter..............................................................326
Changing the Coalescer Filter Element.......................................................327
Oil Change Indicator Reset......................328
Engine Coolant Check - 6.2L/6.8L........329
Engine Coolant Check - 6.7L Diesel......333
Automatic Transmission Fluid Check............................................................337
Transfer Case Fluid Check.......................340
Brake Fluid Check
.......................................340
Power Steering Fluid Check......................341
Washer Fluid Check
.....................................341
Draining the Fuel Filter Water Trap - 6.7L Diesel............................................................342
Fuel Filter - 6.2L/6.8L................................343
Changing the 12V Battery.........................343
Checking the Wiper Blades.....................345
Changing the Wiper Blades.....................345
Adjusting the Headlamps........................346
Changing a Bulb
...........................................347
Bulb Specification Chart
..........................350
Changing the Engine Air Filter - 6.2L/ 6.8L...............................................................353
4
Super Duty (TFE) Canada/United States of America, enUSA, First Printing Table of Contents
Page 49 of 636
Passenger airbag
Passenger airbag status
indicator
Switch position
Disabled
OFF: Lit
Off
ON: Unlit Enabled
OFF: Unlit
On
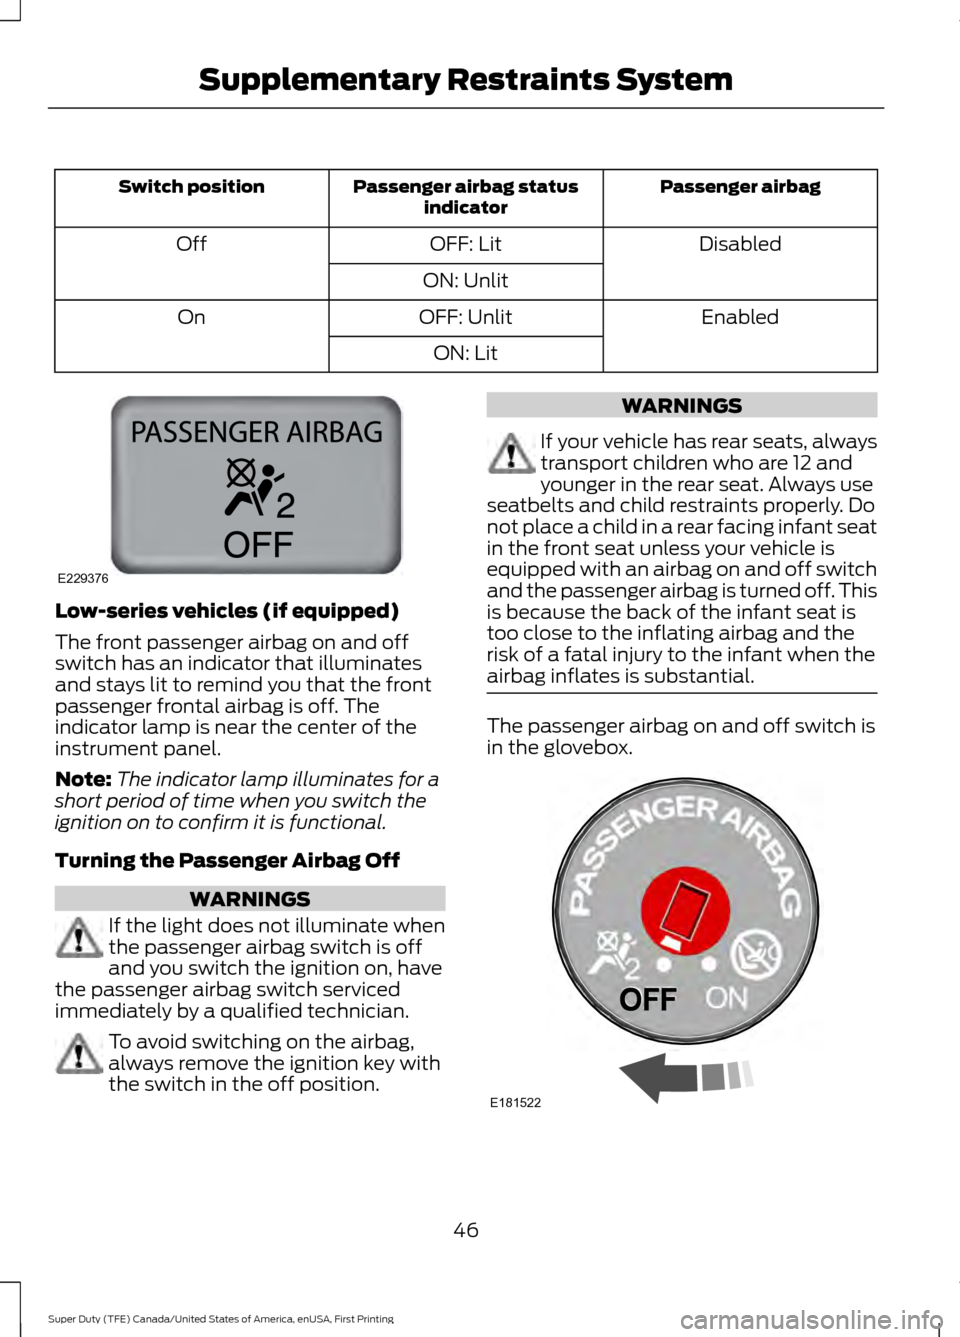
ON: LitLow-series vehicles (if equipped)
The front passenger airbag on and off
switch has an indicator that illuminates
and stays lit to remind you that the front
passenger frontal airbag is off. The
indicator lamp is near the center of the
instrument panel.
Note:
The indicator lamp illuminates for a
short period of time when you switch the
ignition on to confirm it is functional.
Turning the Passenger Airbag Off WARNINGS
If the light does not illuminate when
the passenger airbag switch is off
and you switch the ignition on, have
the passenger airbag switch serviced
immediately by a qualified technician. To avoid switching on the airbag,
always remove the ignition key with
the switch in the off position. WARNINGS
If your vehicle has rear seats, always
transport children who are 12 and
younger in the rear seat. Always use
seatbelts and child restraints properly. Do
not place a child in a rear facing infant seat
in the front seat unless your vehicle is
equipped with an airbag on and off switch
and the passenger airbag is turned off. This
is because the back of the infant seat is
too close to the inflating airbag and the
risk of a fatal injury to the infant when the
airbag inflates is substantial. The passenger airbag on and off switch is
in the glovebox.
46
Super Duty (TFE) Canada/United States of America, enUSA, First Printing Supplementary Restraints SystemE229376 E181522
Page 54 of 636
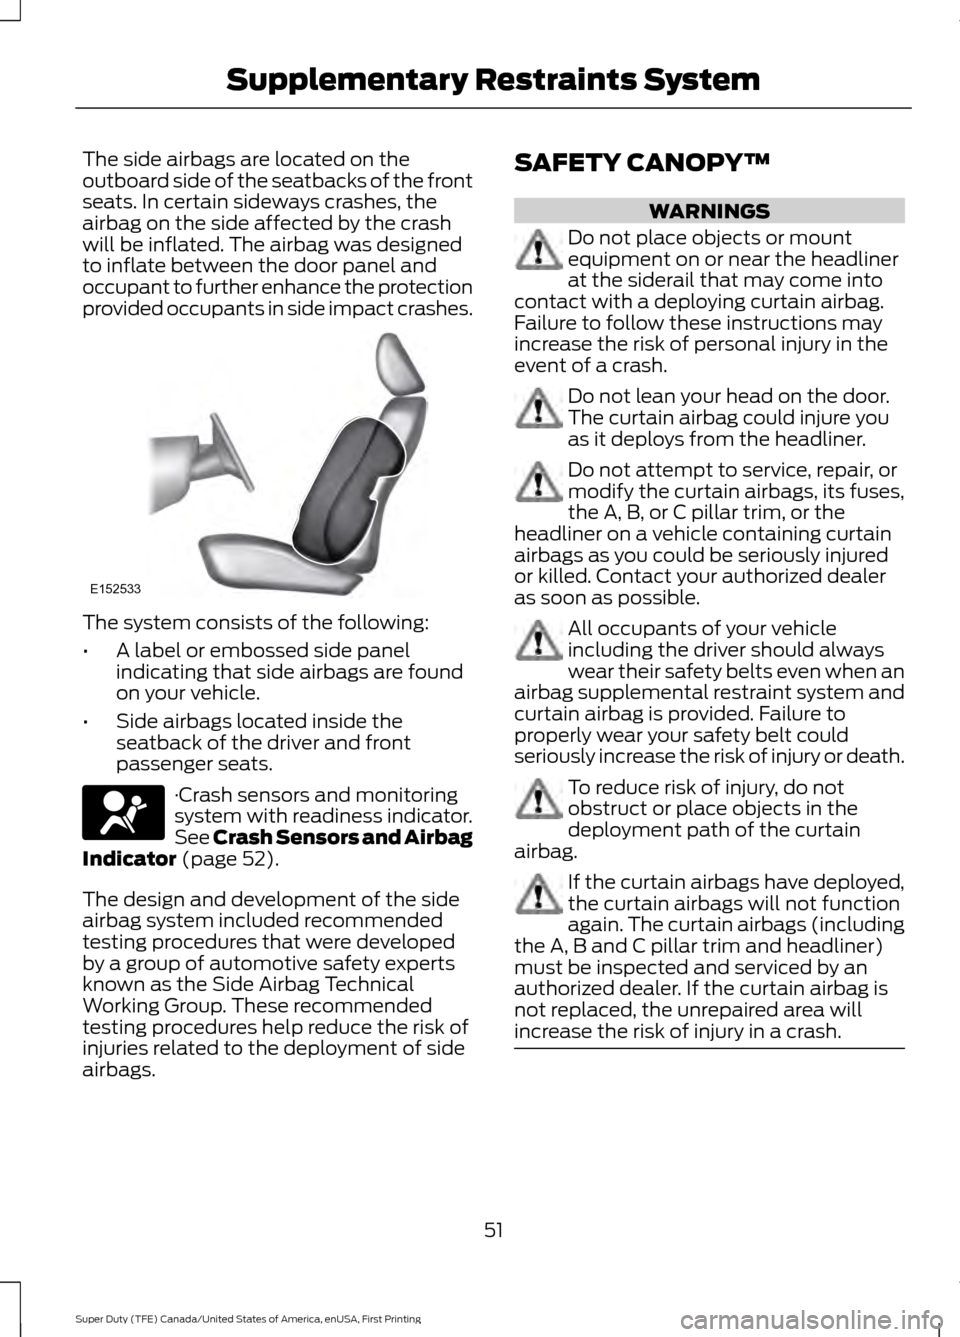
The side airbags are located on the
outboard side of the seatbacks of the front
seats. In certain sideways crashes, the
airbag on the side affected by the crash
will be inflated. The airbag was designed
to inflate between the door panel and
occupant to further enhance the protection
provided occupants in side impact crashes.
The system consists of the following:
•
A label or embossed side panel
indicating that side airbags are found
on your vehicle.
• Side airbags located inside the
seatback of the driver and front
passenger seats. ·Crash sensors and monitoring
system with readiness indicator.
See Crash Sensors and Airbag
Indicator (page 52).
The design and development of the side
airbag system included recommended
testing procedures that were developed
by a group of automotive safety experts
known as the Side Airbag Technical
Working Group. These recommended
testing procedures help reduce the risk of
injuries related to the deployment of side
airbags. SAFETY CANOPY™ WARNINGS
Do not place objects or mount
equipment on or near the headliner
at the siderail that may come into
contact with a deploying curtain airbag.
Failure to follow these instructions may
increase the risk of personal injury in the
event of a crash. Do not lean your head on the door.
The curtain airbag could injure you
as it deploys from the headliner.
Do not attempt to service, repair, or
modify the curtain airbags, its fuses,
the A, B, or C pillar trim, or the
headliner on a vehicle containing curtain
airbags as you could be seriously injured
or killed. Contact your authorized dealer
as soon as possible. All occupants of your vehicle
including the driver should always
wear their safety belts even when an
airbag supplemental restraint system and
curtain airbag is provided. Failure to
properly wear your safety belt could
seriously increase the risk of injury or death. To reduce risk of injury, do not
obstruct or place objects in the
deployment path of the curtain
airbag. If the curtain airbags have deployed,
the curtain airbags will not function
again. The curtain airbags (including
the A, B and C pillar trim and headliner)
must be inspected and serviced by an
authorized dealer. If the curtain airbag is
not replaced, the unrepaired area will
increase the risk of injury in a crash. 51
Super Duty (TFE) Canada/United States of America, enUSA, First Printing Supplementary Restraints SystemE152533
Page 56 of 636
The restraints control module also
monitors the readiness of the above safety
devices plus the crash and occupant
sensors. The readiness of the safety
system is indicated by a warning indicator
light in the instrument cluster or by a
backup tone if the warning light is not
working. See Instrument Cluster (page
102). Routine maintenance of the airbag is
not required.
A difficulty with the system is indicated by
one or more of the following: The readiness light will not
illuminate immediately after the
ignition is turned on.
• The readiness light will either flash or
stay lit.
• A series of five beeps will be heard. The
tone pattern will repeat periodically
until the problem, the light or both are
repaired.
If any of these things happen, even
intermittently, have the supplemental
restraint system serviced at an authorized
dealer immediately. Unless serviced, the
system may not function properly in the
event of a crash. The fact that the safety belt pretensioners
or front airbags did not activate for both
front seat occupants in a crash does not
mean that something is wrong with the
system. Rather, it means the restraints
control module determined the accident
conditions (crash severity, belt usage)
were not appropriate to activate these
safety devices.
•
The design of the front airbags is to
activate only in frontal and near-frontal
crashes (not rollovers, side impacts or
rear impacts) unless the crash causes
sufficient frontal deceleration.
• The design of the safety belt
pretensioners is to activate in frontal,
near-frontal and side crashes, and in
rollovers.
• The design of the side airbags is to
inflate in certain side impact crashes.
Side airbags may activate in other
types of crashes if the vehicle
experiences sufficient sideways motion
or deformation.
• The design of the Safety Canopy is to
inflate in certain side impact crashes
or rollover events. The Safety Canopy
may activate in other types of crashes
if the vehicle experiences sufficient
sideways motion or deformation, or a
certain likelihood of rollover.
AIRBAG DISPOSAL
Contact your authorized dealer as soon as
possible. Airbags must be disposed of by
qualified personnel.
53
Super Duty (TFE) Canada/United States of America, enUSA, First Printing Supplementary Restraints System
Page 62 of 636

Car Finder
Press the button twice within
three seconds. A tone sounds
and the direction indicators will
flash. We recommend you use this method
to locate your vehicle, rather than using
the panic alarm.
Sounding the Panic Alarm Press the button to sound the
panic alarm. Press the button
again or switch the ignition on to
turn it off.
Note: The panic alarm only operates when
the ignition is off.
Remote Start (If Equipped) WARNING
To avoid exhaust fumes, do not use
remote start if your vehicle is parked
indoors or in areas that are not well
ventilated. Note:
Do not use remote start if your fuel
level is low. The remote start button is on the
transmitter.
This feature allows you to start your
vehicle from the outside. The transmitter
has an extended operating range.
You can configure vehicles with automatic
climate control to turn on the automatic
climate control when you remote start your
vehicle. See Automatic Climate Control
(page
146). A manual climate control
system runs at the setting you set it to
when you switched your vehicle off.
Many states and provinces restrict the use
of remote start. Check your local and state
or provincial laws for specific requirements
regarding remote start systems. The remote start system does not work if
any of the following occur:
•
The ignition is on.
• The anti-theft alarm triggers.
• You switch off the feature.
• The hood is open.
• The transmission is not in park (P).
• The battery voltage is below the
minimum operating voltage.
• The service engine soon light is on.
Remote Control Feedback
An LED on the remote control provides
status feedback of remote start or stop
commands. Status
LED
Remote start orextension
successful
Solid green
Remote stop
successful; vehicle off
Solid red
Remote start orstop failed
Blinking red
Waiting for statusupdate
Blinking green
Remote Starting Your Vehicle
Note: You must press each button within
three seconds of each other. 59
Super Duty (TFE) Canada/United States of America, enUSA, First Printing Keys and Remote ControlsE138623 E138624 E138625 E138626
Page 107 of 636
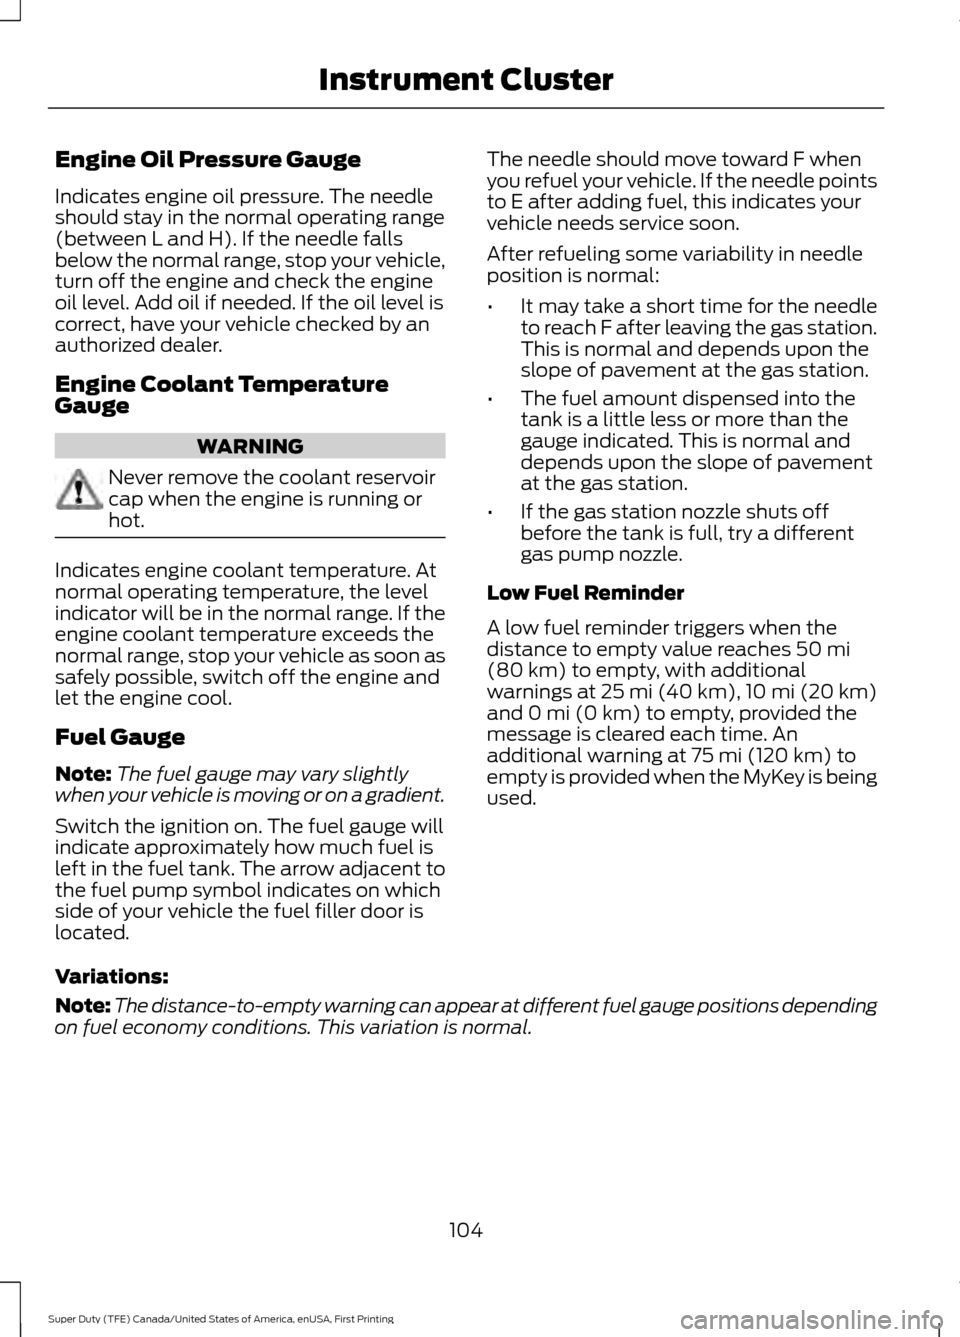
Engine Oil Pressure Gauge
Indicates engine oil pressure. The needle
should stay in the normal operating range
(between L and H). If the needle falls
below the normal range, stop your vehicle,
turn off the engine and check the engine
oil level. Add oil if needed. If the oil level is
correct, have your vehicle checked by an
authorized dealer.
Engine Coolant Temperature
Gauge
WARNING
Never remove the coolant reservoir
cap when the engine is running or
hot.
Indicates engine coolant temperature. At
normal operating temperature, the level
indicator will be in the normal range. If the
engine coolant temperature exceeds the
normal range, stop your vehicle as soon as
safely possible, switch off the engine and
let the engine cool.
Fuel Gauge
Note:
The fuel gauge may vary slightly
when your vehicle is moving or on a gradient.
Switch the ignition on. The fuel gauge will
indicate approximately how much fuel is
left in the fuel tank. The arrow adjacent to
the fuel pump symbol indicates on which
side of your vehicle the fuel filler door is
located. The needle should move toward F when
you refuel your vehicle. If the needle points
to E after adding fuel, this indicates your
vehicle needs service soon.
After refueling some variability in needle
position is normal:
•
It may take a short time for the needle
to reach F after leaving the gas station.
This is normal and depends upon the
slope of pavement at the gas station.
• The fuel amount dispensed into the
tank is a little less or more than the
gauge indicated. This is normal and
depends upon the slope of pavement
at the gas station.
• If the gas station nozzle shuts off
before the tank is full, try a different
gas pump nozzle.
Low Fuel Reminder
A low fuel reminder triggers when the
distance to empty value reaches 50 mi
(80 km) to empty, with additional
warnings at 25 mi (40 km), 10 mi (20 km)
and 0 mi (0 km) to empty, provided the
message is cleared each time. An
additional warning at
75 mi (120 km) to
empty is provided when the MyKey is being
used.
Variations:
Note: The distance-to-empty warning can appear at different fuel gauge positions depending
on fuel economy conditions. This variation is normal.
104
Super Duty (TFE) Canada/United States of America, enUSA, First Printing Instrument Cluster
Page 109 of 636
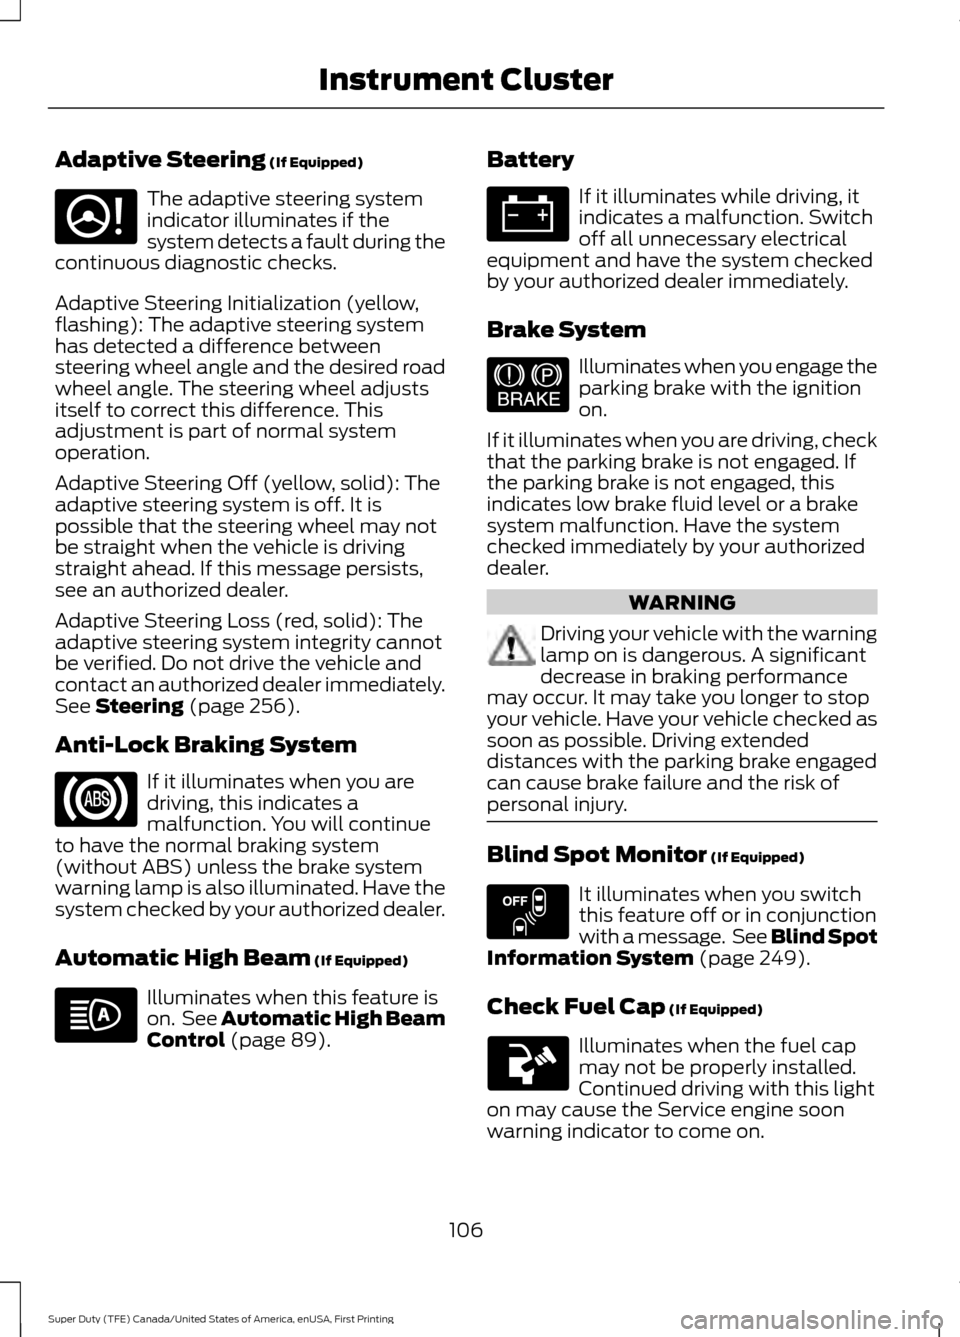
Adaptive Steering (If Equipped)
The adaptive steering system
indicator illuminates if the
system detects a fault during the
continuous diagnostic checks.
Adaptive Steering Initialization (yellow,
flashing): The adaptive steering system
has detected a difference between
steering wheel angle and the desired road
wheel angle. The steering wheel adjusts
itself to correct this difference. This
adjustment is part of normal system
operation.
Adaptive Steering Off (yellow, solid): The
adaptive steering system is off. It is
possible that the steering wheel may not
be straight when the vehicle is driving
straight ahead. If this message persists,
see an authorized dealer.
Adaptive Steering Loss (red, solid): The
adaptive steering system integrity cannot
be verified. Do not drive the vehicle and
contact an authorized dealer immediately.
See
Steering (page 256).
Anti-Lock Braking System If it illuminates when you are
driving, this indicates a
malfunction. You will continue
to have the normal braking system
(without ABS) unless the brake system
warning lamp is also illuminated. Have the
system checked by your authorized dealer.
Automatic High Beam
(If Equipped) Illuminates when this feature is
on. See
Automatic High Beam
Control (page 89). Battery If it illuminates while driving, it
indicates a malfunction. Switch
off all unnecessary electrical
equipment and have the system checked
by your authorized dealer immediately.
Brake System Illuminates when you engage the
parking brake with the ignition
on.
If it illuminates when you are driving, check
that the parking brake is not engaged. If
the parking brake is not engaged, this
indicates low brake fluid level or a brake
system malfunction. Have the system
checked immediately by your authorized
dealer. WARNING
Driving your vehicle with the warning
lamp on is dangerous. A significant
decrease in braking performance
may occur. It may take you longer to stop
your vehicle. Have your vehicle checked as
soon as possible. Driving extended
distances with the parking brake engaged
can cause brake failure and the risk of
personal injury. Blind Spot Monitor
(If Equipped)
It illuminates when you switch
this feature off or in conjunction
with a message. See Blind Spot
Information System
(page 249).
Check Fuel Cap
(If Equipped) Illuminates when the fuel cap
may not be properly installed.
Continued driving with this light
on may cause the Service engine soon
warning indicator to come on.
106
Super Duty (TFE) Canada/United States of America, enUSA, First Printing Instrument ClusterE223375 E144522 E151262
Page 111 of 636
It also illuminates momentarily when you
switch the ignition on to confirm the lamp
is functional. If it does not illuminate when
you switch the ignition on, or begins to
flash at any time, have the system checked
by your authorized dealer.
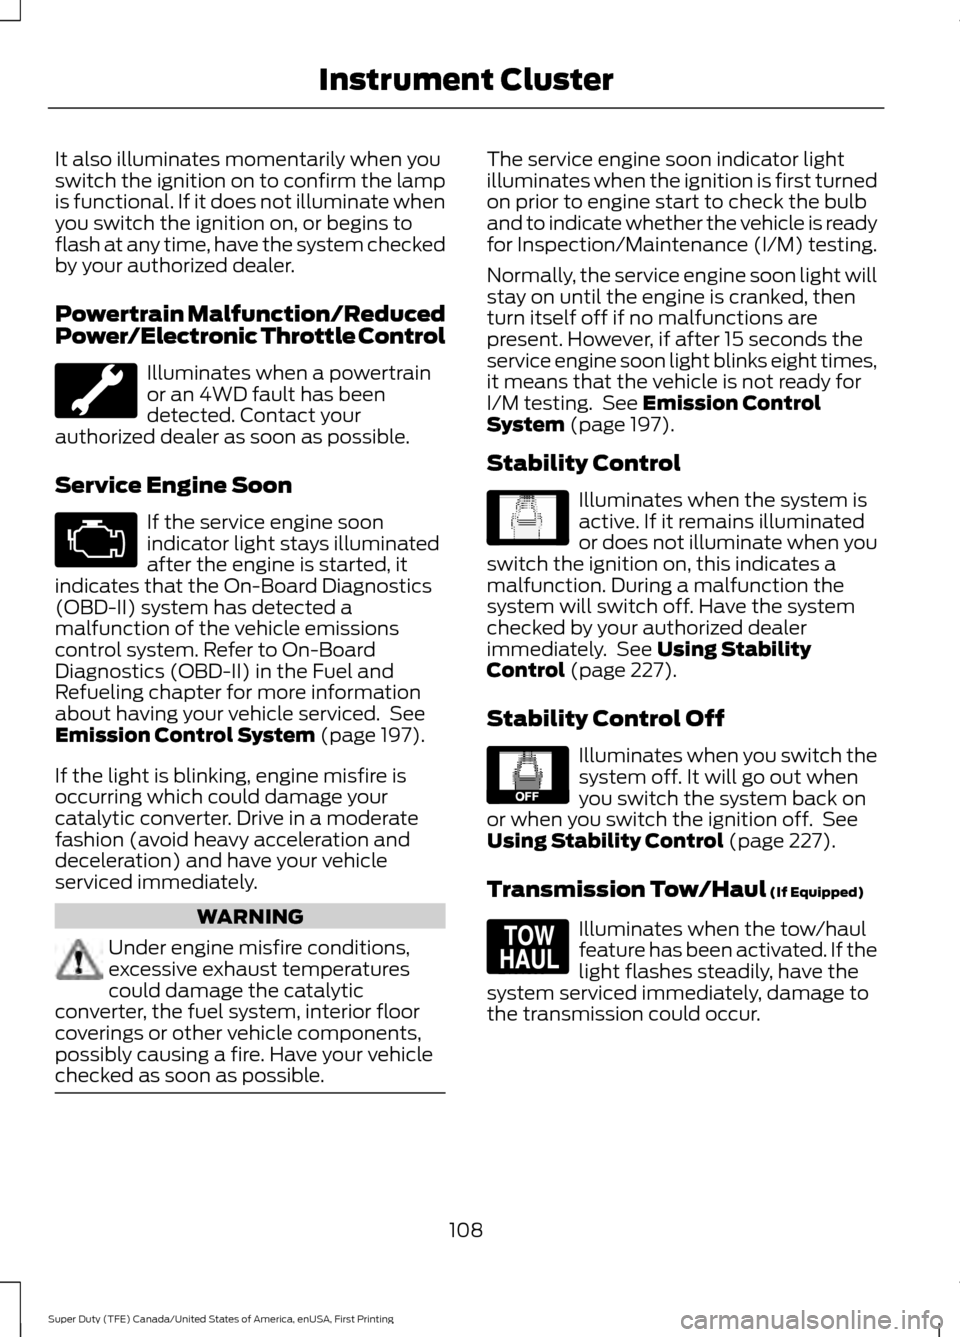
Powertrain Malfunction/Reduced
Power/Electronic Throttle Control
Illuminates when a powertrain
or an 4WD fault has been
detected. Contact your
authorized dealer as soon as possible.
Service Engine Soon If the service engine soon
indicator light stays illuminated
after the engine is started, it
indicates that the On-Board Diagnostics
(OBD-II) system has detected a
malfunction of the vehicle emissions
control system. Refer to On-Board
Diagnostics (OBD-II) in the Fuel and
Refueling chapter for more information
about having your vehicle serviced. See
Emission Control System (page 197).
If the light is blinking, engine misfire is
occurring which could damage your
catalytic converter. Drive in a moderate
fashion (avoid heavy acceleration and
deceleration) and have your vehicle
serviced immediately. WARNING
Under engine misfire conditions,
excessive exhaust temperatures
could damage the catalytic
converter, the fuel system, interior floor
coverings or other vehicle components,
possibly causing a fire. Have your vehicle
checked as soon as possible. The service engine soon indicator light
illuminates when the ignition is first turned
on prior to engine start to check the bulb
and to indicate whether the vehicle is ready
for Inspection/Maintenance (I/M) testing.
Normally, the service engine soon light will
stay on until the engine is cranked, then
turn itself off if no malfunctions are
present. However, if after 15 seconds the
service engine soon light blinks eight times,
it means that the vehicle is not ready for
I/M testing. See
Emission Control
System (page 197).
Stability Control Illuminates when the system is
active. If it remains illuminated
or does not illuminate when you
switch the ignition on, this indicates a
malfunction. During a malfunction the
system will switch off. Have the system
checked by your authorized dealer
immediately. See
Using Stability
Control (page 227).
Stability Control Off Illuminates when you switch the
system off. It will go out when
you switch the system back on
or when you switch the ignition off. See
Using Stability Control
(page 227).
Transmission Tow/Haul
(If Equipped) Illuminates when the tow/haul
feature has been activated. If the
light flashes steadily, have the
system serviced immediately, damage to
the transmission could occur.
108
Super Duty (TFE) Canada/United States of America, enUSA, First Printing Instrument Cluster E138639 E130458 E161509