2017 FORD F450 SUPER DUTY buttons
[x] Cancel search: buttonsPage 156 of 642
WARNINGS
Install the head restraint properly tohelp minimize the risk of neck injuryin the event of a crash.
Note:Adjust the seatback to an uprightdriving position before adjusting the headrestraint. Adjust the head restraint so thatthe top of it is level with the top of your headand as far forward as possible. Make surethat you remain comfortable. If you areextremely tall, adjust the head restraint toits highest position.
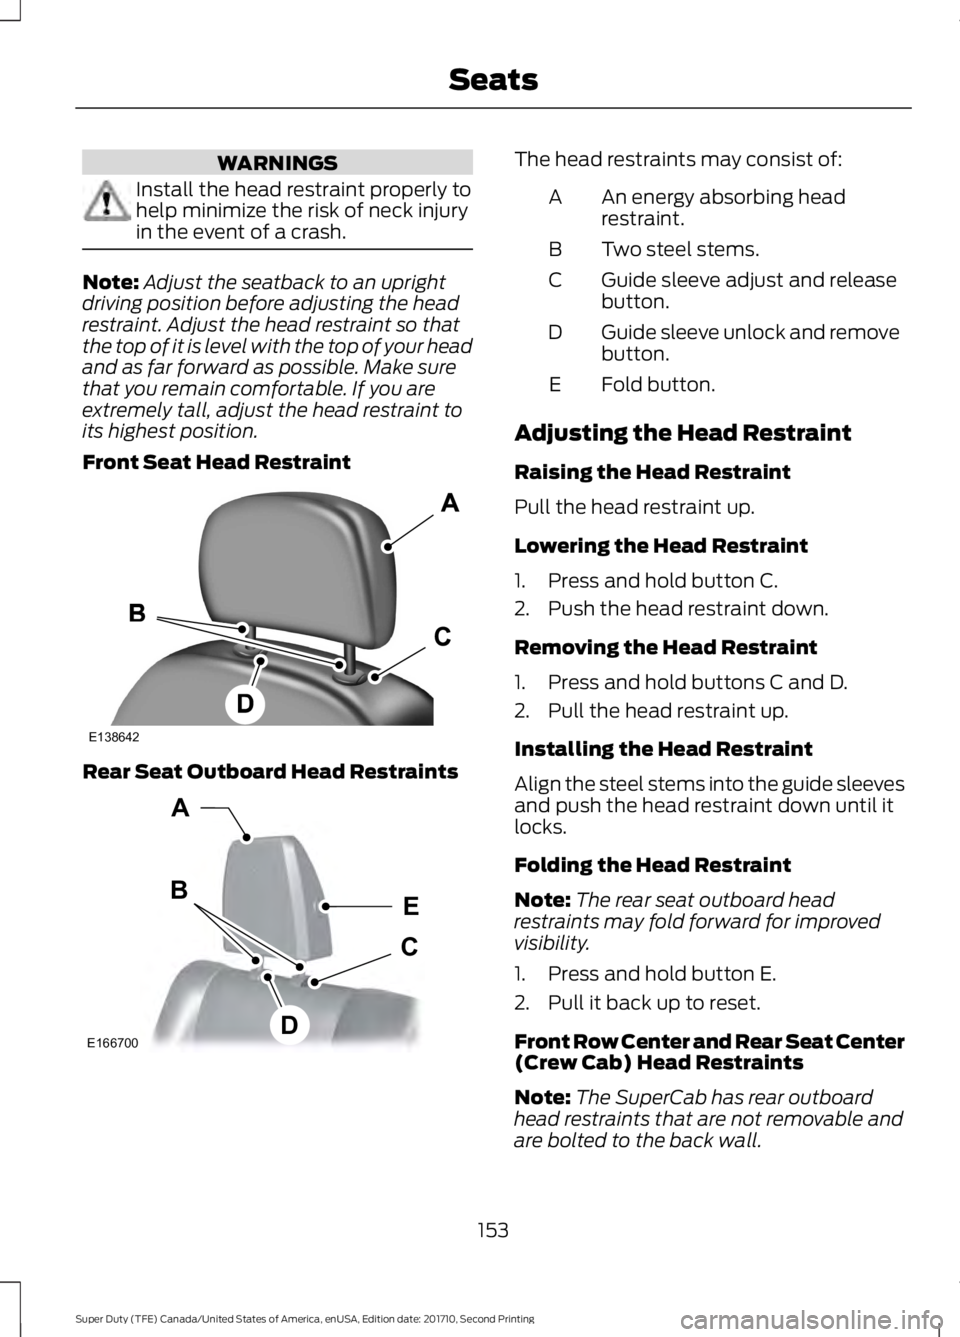
Front Seat Head Restraint
Rear Seat Outboard Head Restraints
The head restraints may consist of:
An energy absorbing headrestraint.A
Two steel stems.B
Guide sleeve adjust and releasebutton.C
Guide sleeve unlock and removebutton.D
Fold button.E
Adjusting the Head Restraint
Raising the Head Restraint
Pull the head restraint up.
Lowering the Head Restraint
1. Press and hold button C.
2. Push the head restraint down.
Removing the Head Restraint
1. Press and hold buttons C and D.
2. Pull the head restraint up.
Installing the Head Restraint
Align the steel stems into the guide sleevesand push the head restraint down until itlocks.
Folding the Head Restraint
Note:The rear seat outboard headrestraints may fold forward for improvedvisibility.
1. Press and hold button E.
2. Pull it back up to reset.
Front Row Center and Rear Seat Center(Crew Cab) Head Restraints
Note:The SuperCab has rear outboardhead restraints that are not removable andare bolted to the back wall.
153
Super Duty (TFE) Canada/United States of America, enUSA, Edition date: 201710, Second Printing
SeatsE138642 E166700
E
D
C
B
A
Page 157 of 642
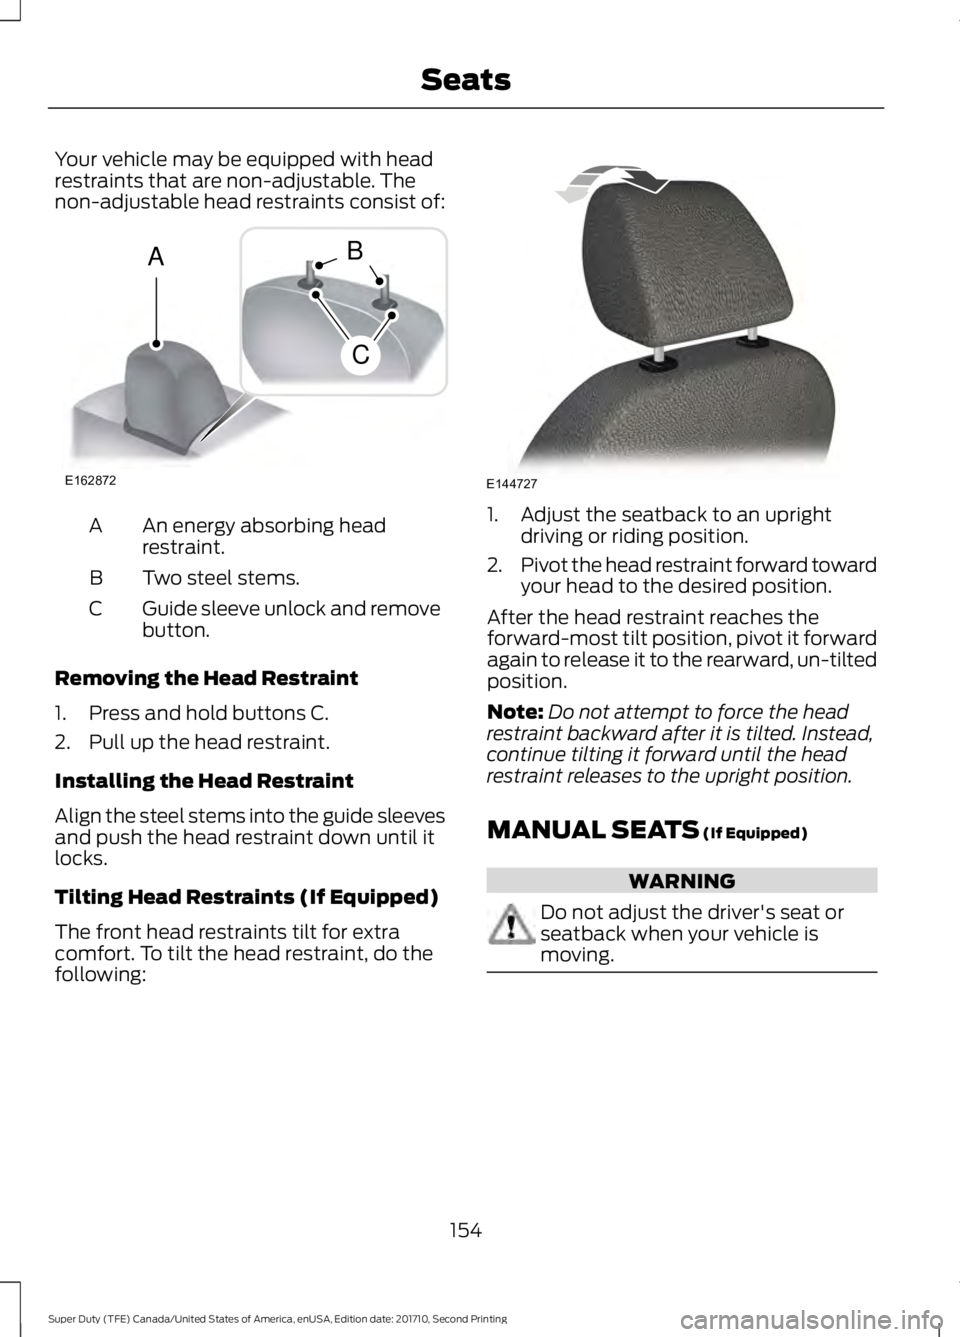
Your vehicle may be equipped with headrestraints that are non-adjustable. Thenon-adjustable head restraints consist of:
An energy absorbing headrestraint.A
Two steel stems.B
Guide sleeve unlock and removebutton.C
Removing the Head Restraint
1. Press and hold buttons C.
2. Pull up the head restraint.
Installing the Head Restraint
Align the steel stems into the guide sleevesand push the head restraint down until itlocks.
Tilting Head Restraints (If Equipped)
The front head restraints tilt for extracomfort. To tilt the head restraint, do thefollowing:
1. Adjust the seatback to an uprightdriving or riding position.
2.Pivot the head restraint forward towardyour head to the desired position.
After the head restraint reaches theforward-most tilt position, pivot it forwardagain to release it to the rearward, un-tiltedposition.
Note:Do not attempt to force the headrestraint backward after it is tilted. Instead,continue tilting it forward until the headrestraint releases to the upright position.
MANUAL SEATS (If Equipped)
WARNING
Do not adjust the driver's seat orseatback when your vehicle ismoving.
154
Super Duty (TFE) Canada/United States of America, enUSA, Edition date: 201710, Second Printing
SeatsE162872
A
C
B E144727
Page 167 of 642
HomeLink Wireless ControlSystem
WARNINGS
Make sure that the garage door andsecurity device are free fromobstruction when you areprogramming. Do not program the systemwith the vehicle in the garage.
Do not use the system with anygarage door opener that does nothave the safety stop and reversefeature as required by U.S. Federal SafetyStandards (this includes any garage dooropener manufactured before April 1, 1982).A garage door opener which cannot detectan object, signaling the door to stop andreverse, does not meet current federalsafety standards. Using a garage dooropener without these features increasesthe risk of serious injury or death.
Note:Make sure you keep the originalremote control transmitter for use in othervehicles as well as for future systemprogramming.
Note:We recommend that upon the saleor lease termination of your vehicle, youerase the programmed function buttons forsecurity reasons. See Erasing the FunctionButton Codes later in this section.
Note:You can program a maximum ofthree devices. To change or replace any ofthe three devices after it has been initiallyprogrammed, you must first erase thecurrent settings. See Erasing the FunctionButton Codes.
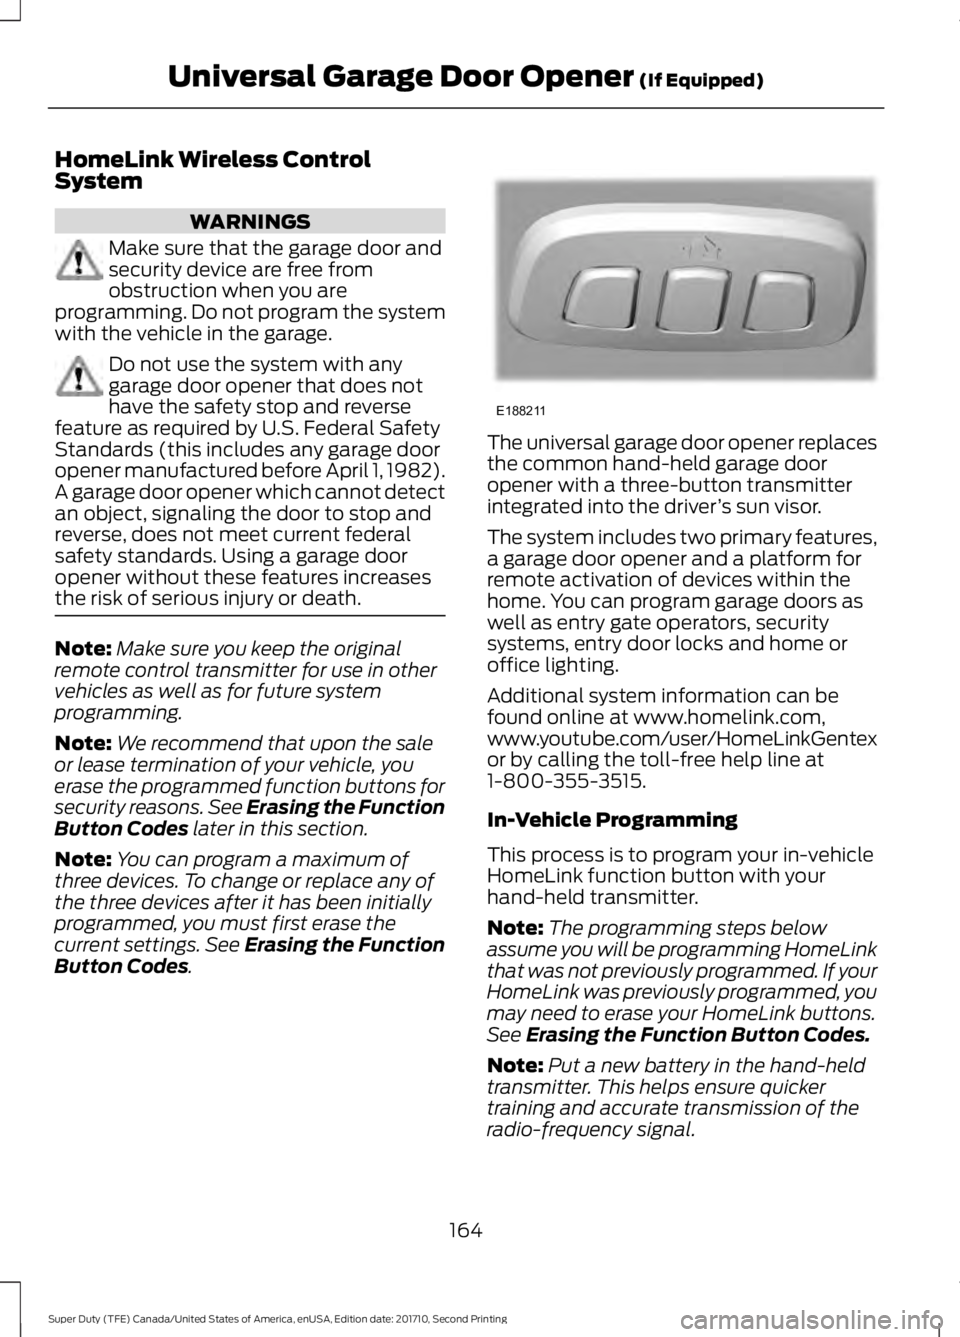
The universal garage door opener replacesthe common hand-held garage dooropener with a three-button transmitterintegrated into the driver’s sun visor.
The system includes two primary features,a garage door opener and a platform forremote activation of devices within thehome. You can program garage doors aswell as entry gate operators, securitysystems, entry door locks and home oroffice lighting.
Additional system information can befound online at www.homelink.com,www.youtube.com/user/HomeLinkGentexor by calling the toll-free help line at1-800-355-3515.
In-Vehicle Programming
This process is to program your in-vehicleHomeLink function button with yourhand-held transmitter.
Note:The programming steps belowassume you will be programming HomeLinkthat was not previously programmed. If yourHomeLink was previously programmed, youmay need to erase your HomeLink buttons.See Erasing the Function Button Codes.
Note:Put a new battery in the hand-heldtransmitter. This helps ensure quickertraining and accurate transmission of theradio-frequency signal.
164
Super Duty (TFE) Canada/United States of America, enUSA, Edition date: 201710, Second Printing
Universal Garage Door Opener (If Equipped)E188211
Page 168 of 642
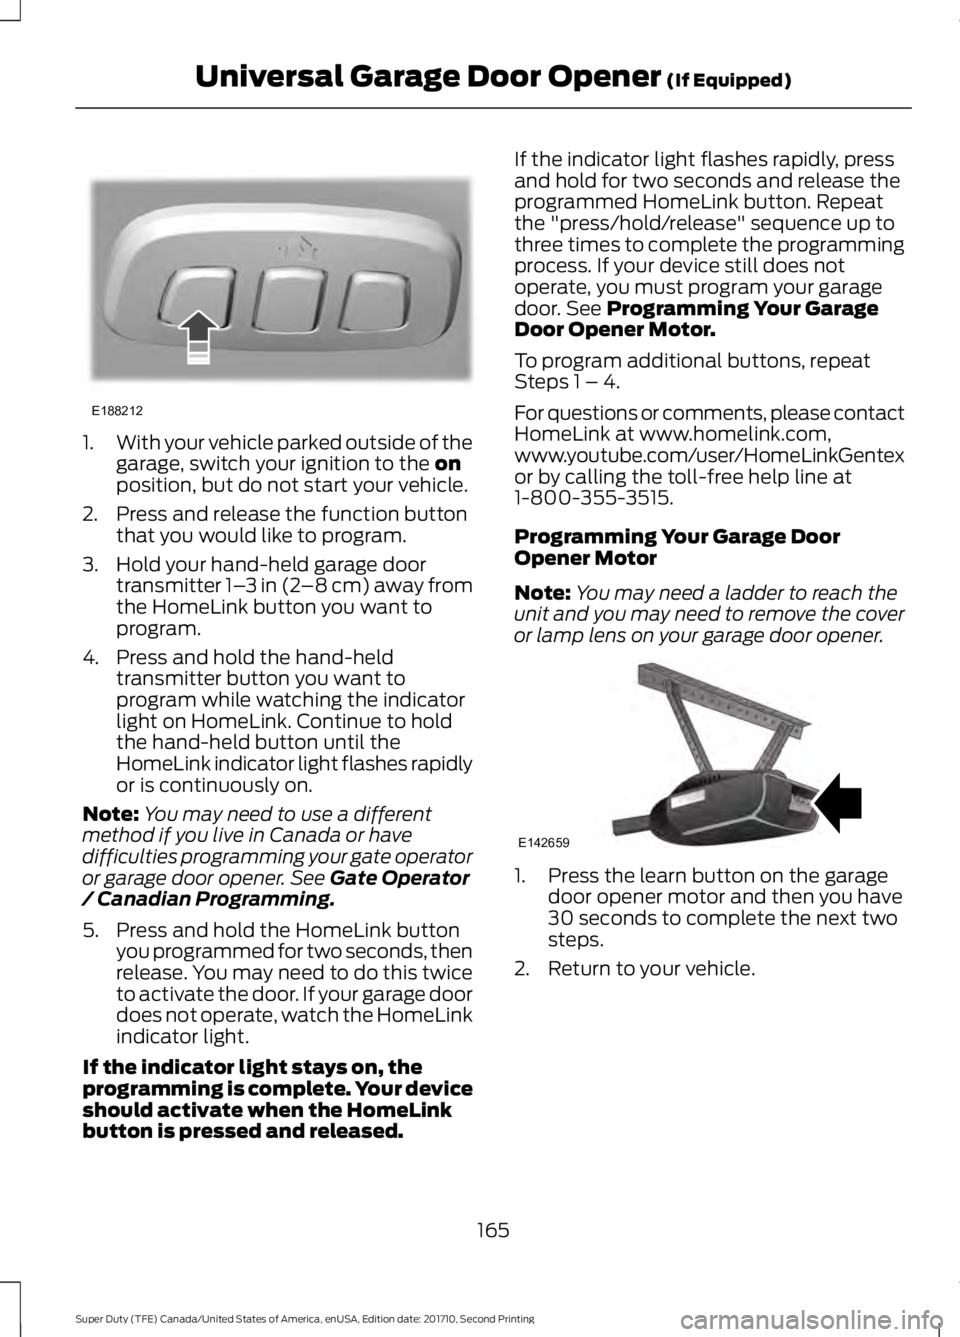
1.With your vehicle parked outside of thegarage, switch your ignition to the onposition, but do not start your vehicle.
2. Press and release the function buttonthat you would like to program.
3. Hold your hand-held garage doortransmitter 1–3 in (2–8 cm) away fromthe HomeLink button you want toprogram.
4. Press and hold the hand-heldtransmitter button you want toprogram while watching the indicatorlight on HomeLink. Continue to holdthe hand-held button until theHomeLink indicator light flashes rapidlyor is continuously on.
Note:You may need to use a differentmethod if you live in Canada or havedifficulties programming your gate operatoror garage door opener. See Gate Operator/ Canadian Programming.
5. Press and hold the HomeLink buttonyou programmed for two seconds, thenrelease. You may need to do this twiceto activate the door. If your garage doordoes not operate, watch the HomeLinkindicator light.
If the indicator light stays on, theprogramming is complete. Your deviceshould activate when the HomeLinkbutton is pressed and released.
If the indicator light flashes rapidly, pressand hold for two seconds and release theprogrammed HomeLink button. Repeatthe "press/hold/release" sequence up tothree times to complete the programmingprocess. If your device still does notoperate, you must program your garagedoor. See Programming Your GarageDoor Opener Motor.
To program additional buttons, repeatSteps 1 – 4.
For questions or comments, please contactHomeLink at www.homelink.com,www.youtube.com/user/HomeLinkGentexor by calling the toll-free help line at1-800-355-3515.
Programming Your Garage DoorOpener Motor
Note:You may need a ladder to reach theunit and you may need to remove the coveror lamp lens on your garage door opener.
1. Press the learn button on the garagedoor opener motor and then you have30 seconds to complete the next twosteps.
2. Return to your vehicle.
165
Super Duty (TFE) Canada/United States of America, enUSA, Edition date: 201710, Second Printing
Universal Garage Door Opener (If Equipped)E188212 E142659
Page 169 of 642
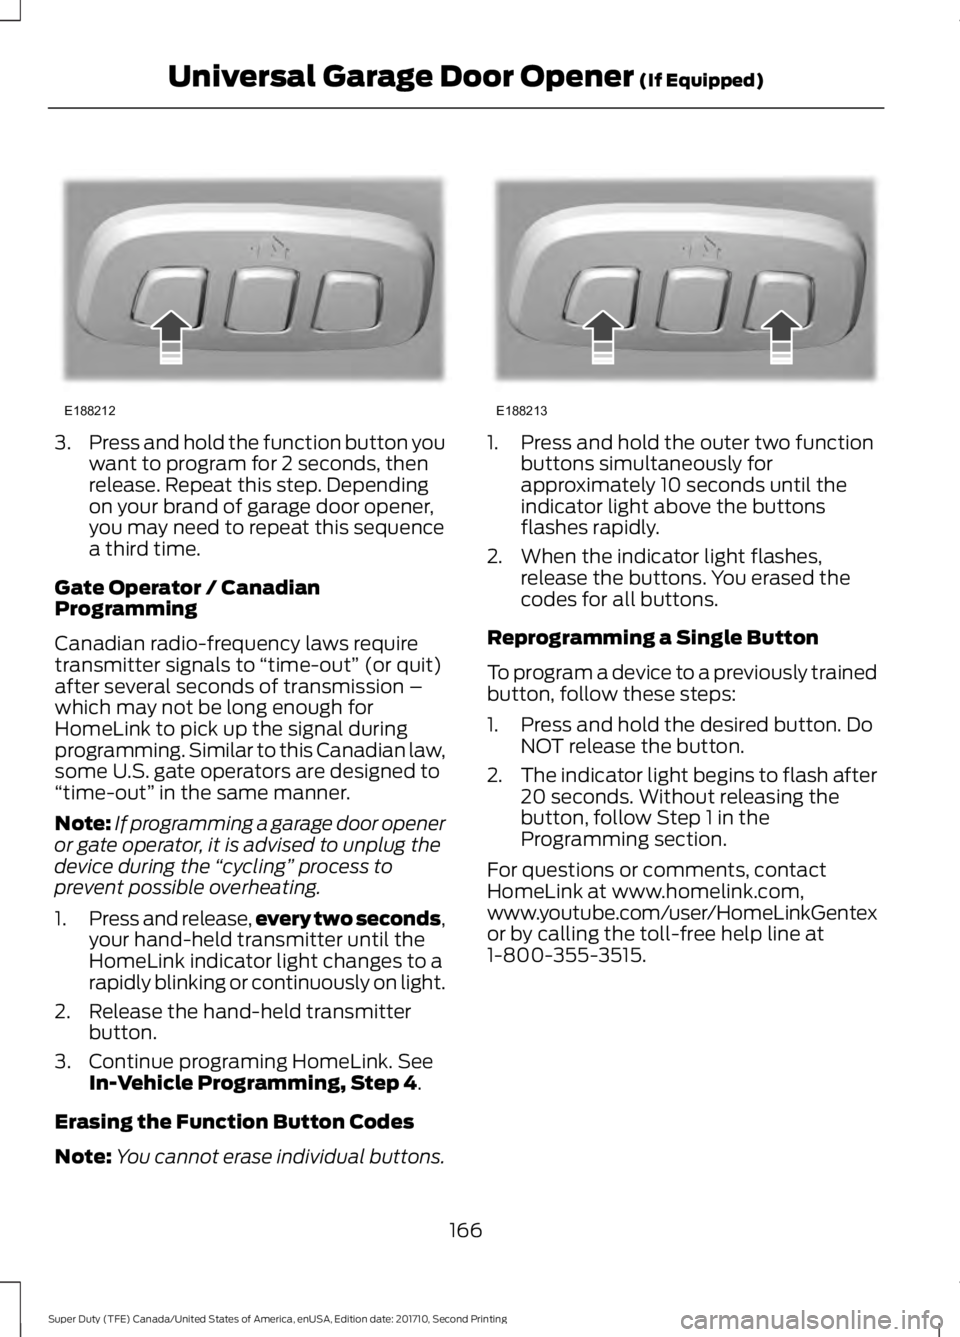
3.Press and hold the function button youwant to program for 2 seconds, thenrelease. Repeat this step. Dependingon your brand of garage door opener,you may need to repeat this sequencea third time.
Gate Operator / CanadianProgramming
Canadian radio-frequency laws requiretransmitter signals to “time-out” (or quit)after several seconds of transmission –which may not be long enough forHomeLink to pick up the signal duringprogramming. Similar to this Canadian law,some U.S. gate operators are designed to“time-out” in the same manner.
Note:If programming a garage door openeror gate operator, it is advised to unplug thedevice during the “cycling” process toprevent possible overheating.
1.Press and release,every two seconds,your hand-held transmitter until theHomeLink indicator light changes to arapidly blinking or continuously on light.
2. Release the hand-held transmitterbutton.
3. Continue programing HomeLink. SeeIn-Vehicle Programming, Step 4.
Erasing the Function Button Codes
Note:You cannot erase individual buttons.
1. Press and hold the outer two functionbuttons simultaneously forapproximately 10 seconds until theindicator light above the buttonsflashes rapidly.
2. When the indicator light flashes,release the buttons. You erased thecodes for all buttons.
Reprogramming a Single Button
To program a device to a previously trainedbutton, follow these steps:
1. Press and hold the desired button. DoNOT release the button.
2.The indicator light begins to flash after20 seconds. Without releasing thebutton, follow Step 1 in theProgramming section.
For questions or comments, contactHomeLink at www.homelink.com,www.youtube.com/user/HomeLinkGentexor by calling the toll-free help line at1-800-355-3515.
166
Super Duty (TFE) Canada/United States of America, enUSA, Edition date: 201710, Second Printing
Universal Garage Door Opener (If Equipped)E188212 E188213
Page 208 of 642
AUTOMATIC TRANSMISSION
WARNING
Always apply the parking brake fullyand make sure you shift into park (P).Switch the ignition off and removethe key whenever you leave your vehicle.
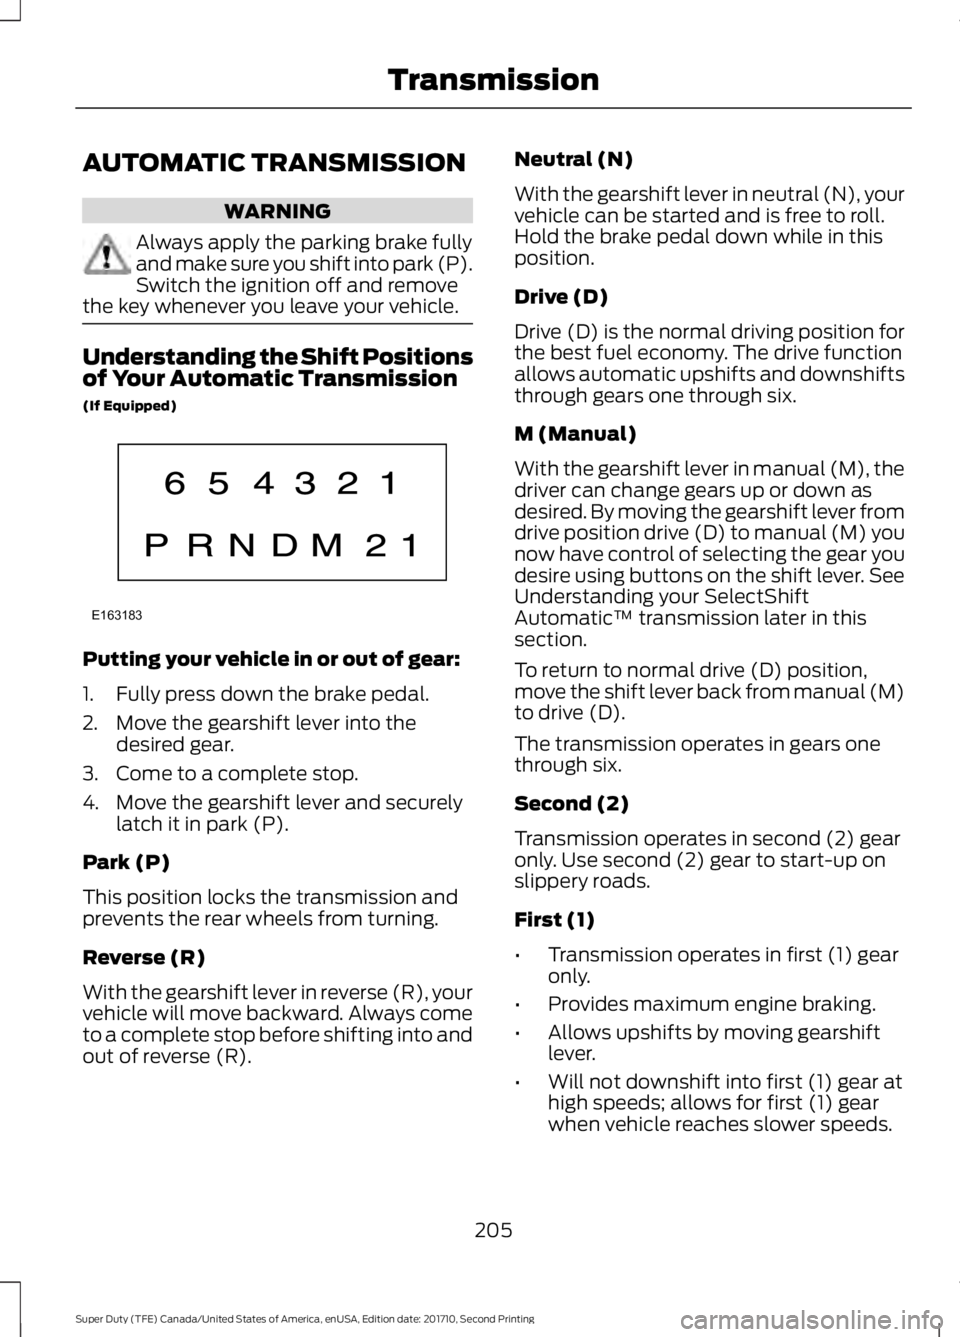
Understanding the Shift Positionsof Your Automatic Transmission
(If Equipped)
Putting your vehicle in or out of gear:
1. Fully press down the brake pedal.
2. Move the gearshift lever into thedesired gear.
3. Come to a complete stop.
4. Move the gearshift lever and securelylatch it in park (P).
Park (P)
This position locks the transmission andprevents the rear wheels from turning.
Reverse (R)
With the gearshift lever in reverse (R), yourvehicle will move backward. Always cometo a complete stop before shifting into andout of reverse (R).
Neutral (N)
With the gearshift lever in neutral (N), yourvehicle can be started and is free to roll.Hold the brake pedal down while in thisposition.
Drive (D)
Drive (D) is the normal driving position forthe best fuel economy. The drive functionallows automatic upshifts and downshiftsthrough gears one through six.
M (Manual)
With the gearshift lever in manual (M), thedriver can change gears up or down asdesired. By moving the gearshift lever fromdrive position drive (D) to manual (M) younow have control of selecting the gear youdesire using buttons on the shift lever. SeeUnderstanding your SelectShiftAutomatic™ transmission later in thissection.
To return to normal drive (D) position,move the shift lever back from manual (M)to drive (D).
The transmission operates in gears onethrough six.
Second (2)
Transmission operates in second (2) gearonly. Use second (2) gear to start-up onslippery roads.
First (1)
•Transmission operates in first (1) gearonly.
•Provides maximum engine braking.
•Allows upshifts by moving gearshiftlever.
•Will not downshift into first (1) gear athigh speeds; allows for first (1) gearwhen vehicle reaches slower speeds.
205
Super Duty (TFE) Canada/United States of America, enUSA, Edition date: 201710, Second Printing
TransmissionE163183
Page 210 of 642
In order to prevent the engine from runningat too low an RPM, which may cause it tostall, SelectShift will still automaticallymake some downshifts if it has determinedthat you have not downshifted in time.Although SelectShift will make somedownshifts for you, it will still allow you todownshift at any time as long as theSelectShift determines that damage willnot be caused to the engine fromover-revving.
SelectShift will not automatically upshift,even if the engine is approaching the RPMlimit. It must be shifted manually bypressing the + button.
Note:Engine damage may occur if youmaintain excessive engine revving withoutshifting.
The SelectShift Automatic transmissionfeature has two modes: PRS and M mode.
PRS (Progressive Range Selection)
Progressive Range Selection gives you theability to lockout gears from the automaticshifting range. This may provide you withan improved driving experience (forexample, in slippery conditions or whenexperiencing a steep grade).
With the gearshift lever in drive (D), pressthe – button to active PRS. The availableand selected gears are indicated on theinstrument cluster.
All available gears will display with thecurrent gear indicated. Press the – buttonagain to lock out gears beginning with thehighest gear. Example: press the – buttontwice to lock out 6th and 5th gears. Onlythe available gears will display and thetransmission will automatically shiftbetween the available gears. Press the +button to unlock gears to allow thetransmission to shift to higher gears. Thetransmission will shift automatically withinthe gear range you select.
Manual (M)
Moving the gearshift lever to the manual(M) position will allow you to manuallyselect the gear you desire. Only the currentgear will display. Use the buttons on thegearshift lever to manually select gears.Press the + button to upshift or the –button to downshift. Return thetransmission to a different gearshiftposition to deactivate manual control.
Recommended shift speeds
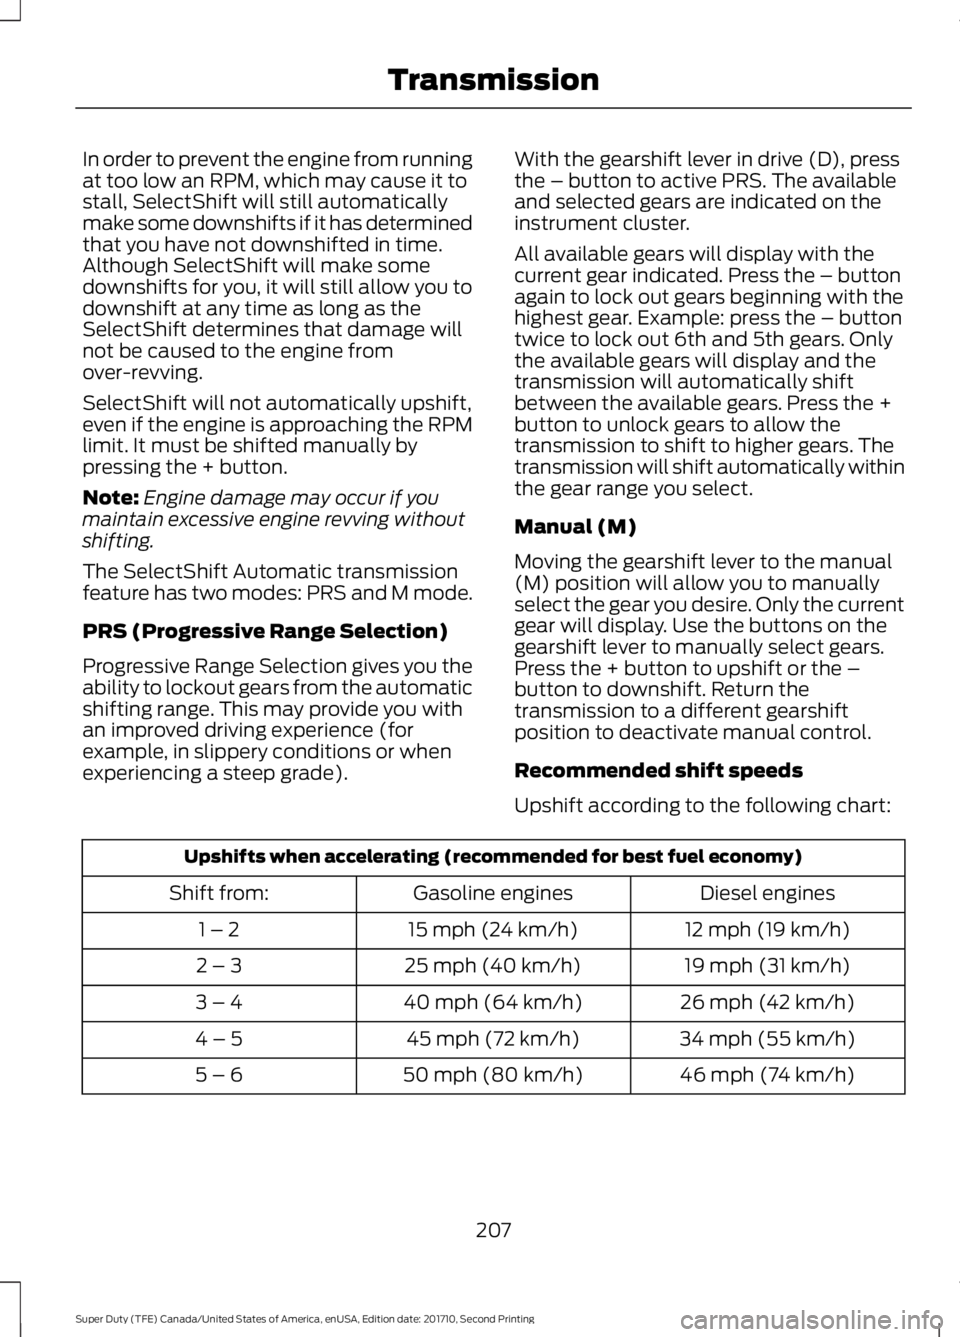
Upshift according to the following chart:
Upshifts when accelerating (recommended for best fuel economy)
Diesel enginesGasoline enginesShift from:
12 mph (19 km/h)15 mph (24 km/h)1 – 2
19 mph (31 km/h)25 mph (40 km/h)2 – 3
26 mph (42 km/h)40 mph (64 km/h)3 – 4
34 mph (55 km/h)45 mph (72 km/h)4 – 5
46 mph (74 km/h)50 mph (80 km/h)5 – 6
207
Super Duty (TFE) Canada/United States of America, enUSA, Edition date: 201710, Second Printing
Transmission
Page 255 of 642
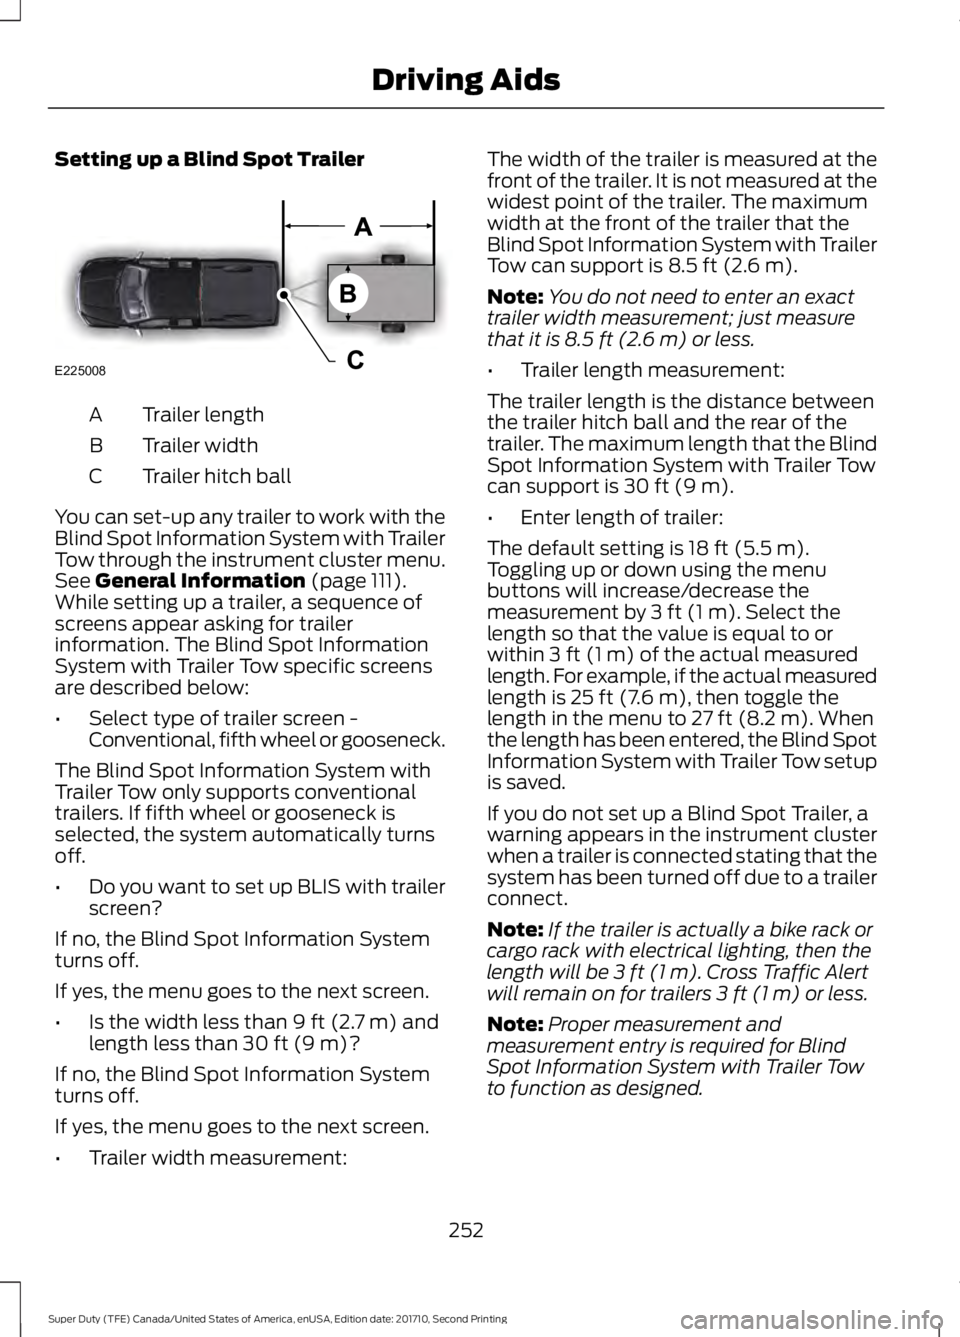
Setting up a Blind Spot Trailer
Trailer lengthA
Trailer widthB
Trailer hitch ballC
You can set-up any trailer to work with theBlind Spot Information System with TrailerTow through the instrument cluster menu.See General Information (page 111).While setting up a trailer, a sequence ofscreens appear asking for trailerinformation. The Blind Spot InformationSystem with Trailer Tow specific screensare described below:
•Select type of trailer screen -Conventional, fifth wheel or gooseneck.
The Blind Spot Information System withTrailer Tow only supports conventionaltrailers. If fifth wheel or gooseneck isselected, the system automatically turnsoff.
•Do you want to set up BLIS with trailerscreen?
If no, the Blind Spot Information Systemturns off.
If yes, the menu goes to the next screen.
•Is the width less than 9 ft (2.7 m) andlength less than 30 ft (9 m)?
If no, the Blind Spot Information Systemturns off.
If yes, the menu goes to the next screen.
•Trailer width measurement:
The width of the trailer is measured at thefront of the trailer. It is not measured at thewidest point of the trailer. The maximumwidth at the front of the trailer that theBlind Spot Information System with TrailerTow can support is 8.5 ft (2.6 m).
Note:You do not need to enter an exacttrailer width measurement; just measurethat it is 8.5 ft (2.6 m) or less.
•Trailer length measurement:
The trailer length is the distance betweenthe trailer hitch ball and the rear of thetrailer. The maximum length that the BlindSpot Information System with Trailer Towcan support is 30 ft (9 m).
•Enter length of trailer:
The default setting is 18 ft (5.5 m).Toggling up or down using the menubuttons will increase/decrease themeasurement by 3 ft (1 m). Select thelength so that the value is equal to orwithin 3 ft (1 m) of the actual measuredlength. For example, if the actual measuredlength is 25 ft (7.6 m), then toggle thelength in the menu to 27 ft (8.2 m). Whenthe length has been entered, the Blind SpotInformation System with Trailer Tow setupis saved.
If you do not set up a Blind Spot Trailer, awarning appears in the instrument clusterwhen a trailer is connected stating that thesystem has been turned off due to a trailerconnect.
Note:If the trailer is actually a bike rack orcargo rack with electrical lighting, then thelength will be 3 ft (1 m). Cross Traffic Alertwill remain on for trailers 3 ft (1 m) or less.
Note:Proper measurement andmeasurement entry is required for BlindSpot Information System with Trailer Towto function as designed.
252
Super Duty (TFE) Canada/United States of America, enUSA, Edition date: 201710, Second Printing
Driving AidsE225008