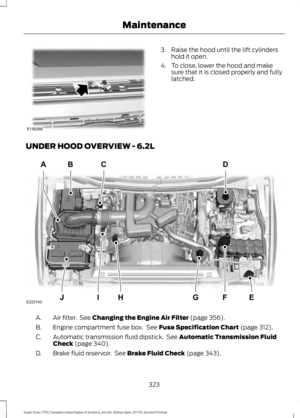
Page 209 of 642

Forced downshifts
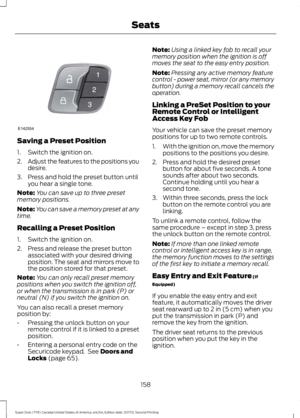
•Allowed in drive (D) with the tow/haulfeature on or off.
•Press the accelerator to the floor.
•Allows transmission to select anappropriate gear.
Tow/Haul Mode
WARNING
Do not use the tow/haul featurewhen driving in icy or slipperyconditions as the increased enginebraking can cause the rear wheels to slideand your vehicle to swing around with thepossible loss of vehicle control.
To activate tow/haul, press thebutton on the gearshift leveronce. The TOW HAUL indicatorlight illuminates in the instrument cluster.
The tow/haul feature:
•Delays upshifts to reduce the frequencyof transmission shifting.
•Provides engine braking in all forwardgears, which slows your vehicle andassists you in controlling your vehiclewhen descending a grade.
•Depending on driving conditions andload conditions, may downshift thetransmission, slow your vehicle andcontrol your vehicle speed whendescending a hill, without pressing theaccelerator pedal. The amount ofdownshift braking provided will varybased upon the amount you press thebrake pedal.
The tow/haul feature improvestransmission operation when towing atrailer or a heavy load. All transmissiongear ranges are available when usingtow/haul.
Note:If your vehicle is equipped with theAdaptive Steering System, enabling thetow/haul feature will adjust the steeringresponse. In tow/haul mode the AdaptiveSteering system reduces vehicle sensitivityto steering inputs at higher vehicle speedswhile maintaining the ease of parking andmaneuverability at low speeds. SeeSteering (page 256).
To deactivate the tow/haul feature andreturn to normal driving mode, press thebutton on the gearshift lever whentow/haul is active. The TOW HAUL lightdeactivates. Tow/haul also deactivateswhen you power down your vehicle.
Understanding your SelectShiftAutomatic™ transmission (If Equipped)
Your vehicle is equipped with a SelectShiftAutomatic™ transmission gearshift lever.The SelectShift Automatic transmissiongives you the ability to change gears up ordown (without a clutch) as desired.
206
Super Duty (TFE) Canada/United States of America, enUSA, Edition date: 201710, Second Printing
TransmissionE161509 E163184
Page 210 of 642

In order to prevent the engine from runningat too low an RPM, which may cause it tostall, SelectShift will still automaticallymake some downshifts if it has determinedthat you have not downshifted in time.Although SelectShift will make somedownshifts for you, it will still allow you todownshift at any time as long as theSelectShift determines that damage willnot be caused to the engine fromover-revving.
SelectShift will not automatically upshift,even if the engine is approaching the RPMlimit. It must be shifted manually bypressing the + button.
Note:Engine damage may occur if youmaintain excessive engine revving withoutshifting.
The SelectShift Automatic transmissionfeature has two modes: PRS and M mode.
PRS (Progressive Range Selection)
Progressive Range Selection gives you theability to lockout gears from the automaticshifting range. This may provide you withan improved driving experience (forexample, in slippery conditions or whenexperiencing a steep grade).
With the gearshift lever in drive (D), pressthe – button to active PRS. The availableand selected gears are indicated on theinstrument cluster.
All available gears will display with thecurrent gear indicated. Press the – buttonagain to lock out gears beginning with thehighest gear. Example: press the – buttontwice to lock out 6th and 5th gears. Onlythe available gears will display and thetransmission will automatically shiftbetween the available gears. Press the +button to unlock gears to allow thetransmission to shift to higher gears. Thetransmission will shift automatically withinthe gear range you select.
Manual (M)
Moving the gearshift lever to the manual(M) position will allow you to manuallyselect the gear you desire. Only the currentgear will display. Use the buttons on thegearshift lever to manually select gears.Press the + button to upshift or the –button to downshift. Return thetransmission to a different gearshiftposition to deactivate manual control.
Recommended shift speeds
Upshift according to the following chart:
Upshifts when accelerating (recommended for best fuel economy)
Diesel enginesGasoline enginesShift from:
12 mph (19 km/h)15 mph (24 km/h)1 – 2
19 mph (31 km/h)25 mph (40 km/h)2 – 3
26 mph (42 km/h)40 mph (64 km/h)3 – 4
34 mph (55 km/h)45 mph (72 km/h)4 – 5
46 mph (74 km/h)50 mph (80 km/h)5 – 6
207
Super Duty (TFE) Canada/United States of America, enUSA, Edition date: 201710, Second Printing
Transmission
Page 211 of 642

Automatic Transmission AdaptiveLearning
This feature's design is to increasedurability and provide consistent shift feelover the life of your vehicle. A new vehicleor transmission may have firm shifts, softshifts or both. This operation is normal anddoes not affect function or durability of thetransmission. Over time, the adaptivelearning process fully updates transmissionoperation. Additionally, whenever youdisconnect the battery or install a newbattery, the system must relearn thestrategy.
Brake-Shift Interlock
WARNINGS
Do not drive your vehicle until youverify that the brake lamps areworking.
When doing this procedure, you needto take the transmission out of park(P) which means your vehicle canroll freely. To avoid unwanted vehiclemovement, always fully apply the parkingbrake prior to doing this procedure. Usewheels chocks if appropriate.
If the parking brake is fully released,but the brake warning lamp remainsilluminated, the brakes may not beworking properly. Have your vehiclechecked as soon as possible.
Your vehicle is equipped with a brake-shiftinterlock feature that prevents thegearshift lever from moving from park (P)when the ignition is on and the brake pedalis not pressed.
If you cannot move the gearshift lever outof park (P) position with the ignition is onand the brake pedal pressed, a malfunctionmay have occurred. It is possible that afuse has blown or your vehicle’s brakelamps are not operating properly. SeeFuse Specification Chart (page 312).
If the fuse is not blown and the brakelamps are working properly, the followingprocedure allows you to move the gearshiftlever from park (P):
1. Apply the parking brake. Switch theignition key to 1 (off), then remove thekey.
2. Move the steering column to the fulldown and full rearward position(toward the driver’s seat).
3. Remove the gearshift lever boot.
4. Place fingers into hole where youremoved the gearshift lever boot andpull top half of shroud up and forwardto separate it from the lower half of theshroud. There is a hinge at the forwardedge of the top shroud. Roll the tophalf of the shroud upward on the hingepoint to clear the hazard flasher button,then pull straight rearward toward thedriver’s seat to remove.
5. Remove the top half of the shroud.
6. Remove the three fasteners under thecolumn that secure the lower shroudhalf to the column.
7.Pull the lock lever into the full unlockedposition and remove the lower shroudcover by pulling the lever handlethrough the slot in the cover.
8.Apply the brake. Gently lift the overridedisk and move the gearshift lever intoneutral (N).
208
Super Duty (TFE) Canada/United States of America, enUSA, Edition date: 201710, Second Printing
TransmissionE163185
Page 212 of 642

9. Start your vehicle.
Perform Steps 4 through 8 in reverse order,making sure to engage the hinge pivotsbetween the upper and lower halves of theshroud. Keep slight pressure in the forwarddirection as you rotate the halves together.
If Your Vehicle Gets Stuck In Mudor Snow
Note:Do not rock your vehicle if the engineis not at normal operating temperature ordamage to the transmission may occur.
Note:Do not rock your vehicle for morethan a minute or damage to thetransmission and tires may occur, or theengine may overheat.
If your vehicle is stuck in mud or snow, youmay rock it out by shifting between forwardand reverse gears, stopping between shiftsin a steady pattern. Press lightly on theaccelerator in each gear.
POWER TAKE-OFF
WARNING
Use of auxiliary equipment thatexceeds the maximum PowerTake-Off (PTO) load specified in theFord Truck Body Builders Layout Book canadversely affect the performance of thepowertrain system. Refer to the BodyBuilders Layout Book for instructions aboutthe appropriate installation of additionalequipment.
Auxiliary equipment called power take-off,or PTO, is often added to the engine ortransmission to operate utility equipment.Examples include a wheel-lift for towtrucks, cranes, tools for construction or tireservice, and pumping fluids. PTOapplications draw auxiliary horsepowerfrom the powertrain, often while thevehicle is stationary. In this condition, thereis limited cooling air flow through theradiator and around the vehicle thatnormally occurs when a vehicle is moving.The aftermarket PTO system installer,having the most knowledge of the finalapplication, is responsible for determiningwhether additional chassis heat protectionor powertrain cooling is required, andalerting the user to the safe and properoperation.
Ford Super Duty Vehicles are approved foruse as a stationary (including split shaftcapability) or mobile power source, withinlimits and operating guidelines detailed inthe Ford Truck Body Builders Layout Book,found at www.fleet.ford.com/truckbbas,and through the Ford Truck Body BuildersAdvisory Service.
209
Super Duty (TFE) Canada/United States of America, enUSA, Edition date: 201710, Second Printing
TransmissionE163186
Page 213 of 642

USING FOUR-WHEEL DRIVE
Note:For important information regardingthe safe operation of this type of vehicle,see General Information in the Wheels andTires chapter.
Note:Do not use 4H or 4L mode on dry,hard surfaced roads. Doing so can produceexcessive noise, increase tire wear and maydamage drive components. 4X4 mode isonly intended for consistently slippery orloose surfaces. Use of 4L mode on thesesurfaces may produce some noise (such asoccasional clunks), but will not damagedrive components.
Note:If 4X4 low is selected while thevehicle is moving above 3 mph (5 km/h),the 4WD system will not perform a shift.This is normal and should be no reason forconcern. Refer to Shifting to or from 4L (4X4Low) for proper operation.
Note:You can switch on and switch off theelectronic locking differential by pulling the4WD control (4WD vehicles) or turning theelectronic locking differential control (2WDvehicles). See Electronic LockingDifferential (page 219).
Manual Shift On Stop (MSOS)4WD system (If Equipped)
Note:The vehicle should not be driven in4X4 High or 4X4 Low modes with the hublocks set to FREE as this condition maydamage driveline system components.
The 4WD system is engaged or disengagedby rotating the control for both front wheelhub locks from the FREE or LOCK position,then manually engaging or disengaging thetransfer case with the floor-mountedshifter. For increased fuel economy in 2WD,rotate both hub locks to the FREE position.
Electronic Shift-On-the-Fly(ESOF) 4WD system (If Equipped)
Note:If 4X4 Low is selected while thevehicle is moving above 3 mph (5 km/h),the 4WD system will not perform a shift.This is normal and should be no reason forconcern. Refer to Shifting to or from 4L (4X4Low) for proper system operation.
Note:Auto-manual hub locks can bemanually overridden by rotating the hub lockcontrol from AUTO to LOCK.
210
Super Duty (TFE) Canada/United States of America, enUSA, Edition date: 201710, Second Printing
Four-Wheel Drive (If Equipped)LOC K
EERF
E163187 LOC K
OTUA
E163188
Page 214 of 642

For proper operation, make sure that eachhub is fully engaged and that both hublocks are set to the same position (bothset to LOCK or both set to AUTO). Toengage LOCK, turn the hub lockscompletely clockwise; to engage AUTO,turn the hub locks completelycounterclockwise.
The ESOF 4WD system:
•provides 4x4 High engagement anddisengagement while the vehicle ismoving.
•is operated by a rotary control locatedon the instrument panel that allowsyou select 4x2, 4x4 High or 4x4 Lowoperation.
•uses auto-manual hub locks that canbe engaged and disengagedautomatically based on the 4x4 modeselected.
•will increase fuel economy when usedin the hub lock's recommended AUTOmode.
4WD Indicator Lights
Note:When a 4X4 system fault is present,the system will typically remain in whichever4X4 mode was selected prior to the faultcondition occurring. It will not default to 4X2in all circumstances. When this warning isdisplayed, have your vehicle serviced by anauthorized dealer.
4X2
Momentarily illuminates when2H is selected.
4X4 HIGH
Continuously illuminates when4H is selected.
4X4 LOW
Continuously illuminates when4L is selected.
CHECK 4X4
Displays when a 4X4 fault ispresent.
Using a Manual Shift On Stop(MSOS) 4WD system (If Equipped)
Note:High shift efforts may be encounteredwhen attempting to shift into and out of 4x4modes. It is recommended to allow thevehicle to roll at a speed below 3 mph(5 km/h) when shifting between modes.
2H (4X2)
For general on-road driving. Sends powerto the rear wheels only and should be usedfor street and highway driving. Providesoptimal smoothness and fuel economy athigh speeds
4H (4X4 High)
Used for extra traction such as in snow oricy roads or in off road situations. Thismode is not intended for use on drypavement.
211
Super Duty (TFE) Canada/United States of America, enUSA, Edition date: 201710, Second Printing
Four-Wheel Drive (If Equipped)E163173 E181779 E181780 E233846
Page 215 of 642

N (Neutral)
Only used when towing the vehicle. Nopower to front or rear wheels.
4L (4X4 Low)
Uses extra gearing to provide maximumpower to all four wheels at reducedspeeds. Intended only for off roadapplications such as deep sand, steepgrades or pulling heavy objects.
Shifting between system modes
Note:Do not perform these operations ifthe rear wheels are slipping or whenapplying the accelerator pedal.
Note:Some noise may be heard as the 4x4system shifts or engages. This is normal. Inorder to reduce engagement noise, it isrecommended that all shifts be performedat speeds below3 mph (5 km/h).
Note:The vehicle should not be driven in4X4 High with the hub locks disengaged asthis condition may damage driveline systemcomponents.
Engage the locking hubs by rotating thehub lock control from FREE to LOCK, thenmove the transfer case lever from 2H to4H at a stop or a vehicle speed below3 mph (5 km/h).
Move the transfer case lever from 4H to2H at a stop or a vehicle speed below3 mph (5 km/h), then disengage thelocking hubs (optional) by rotating the hublock control from LOCK to FREE.
For proper operation, make sure that bothhubs are set to either FREE or LOCK.
Shifting to or from 4L (4X4 Low)
1. Bring the vehicle to a stop or a speedbelow 3 mph (5 km/h).
2. Place the transmission in N (Neutral).
3. Move the transfer case shift leverthrough N (Neutral) directly to thedesired position.
4. If the transfer case does not, or onlypartially moves to the desired position,perform a shift with the transmissionin N (Neutral) and the vehicle rolling ata speed below 3 mph (5 km/h).
5. If shifting to 2H with the vehicle at acomplete stop, disengage the lockinghubs (optional) by rotating the hublock control from LOCK to FREE.
Using the N (Neutral) position
WARNING
Always set the parking brake andleave your vehicle with thetransmission in park (P).
The transfer case neutral position overridesthe transmission and puts the vehicle inneutral regardless of transmission gearshiftlever position. The vehicle can moveforward or backwards.
This position should only be used whentowing the vehicle.
212
Super Duty (TFE) Canada/United States of America, enUSA, Edition date: 201710, Second Printing
Four-Wheel Drive (If Equipped)E233846
Page 216 of 642

Using the Electronic Shift on theFly 4WD system (If Equipped)
2H (4X2)
For general on-road driving. Sends powerto the rear wheels only and should be usedfor street and highway driving. Providesoptimal smoothness and fuel economy athigh speeds.
4H (4X4 HIGH)
Provides mechanically locked four-wheeldrive power to both the front and rearwheels for use in off-road or winterconditions such as deep snow, sand ormud. This mode is not for use on drypavement.
4L (4X4 LOW)
Provides mechanically locked four-wheeldrive power to both the front and rearwheels for use on low traction surfaces,but does so with additional gearing forincreased torque multiplication. Intendedonly for off-road applications such as deepsand, steep grades, or pulling heavyobjects. 4L (4X4 low) will not engage whileyour vehicle is moving above 3 mph(5 km/h); this is normal and should be noreason for concern. Refer to Shifting to orfrom 4L (4X4 low) for proper operation.
Shifting between system modes
Note:Momentarily releasing the acceleratorpedal when a shift in progress messagedisplays improves engagement ordisengagement performance.
Note:Do not perform this operation if therear wheels are slipping or when applyingthe accelerator pedal.
Note:Some noise may be heard as thesystem shifts or engages; this is normal.
Note:4X4 high mode is not intended foruse on dry pavement.
You can move the control from 2H or 4Hat a stop or while driving. The informationdisplay may display a message indicatinga 4X4 shift is in progress. Once the shift iscomplete the message center will thendisplay the system mode selected.
Shifting to or from 4L (4X4 low)
Note:Some noise may be heard as thesystem shifts or engages; this is normal.
Note:4x4 low mode is not intended for useon dry pavement.
1. Bring the vehicle to a speed of 3 mph(5 km/h) or less.
2. Place the transmission in N (Neutral).
3. Move the 4WD control to the desiredposition.
The information display will display amessage indicating a 4X4 shift is inprogress. The information display will thendisplay the system mode selected. If anyof the above shift conditions are not met,the shift will not occur and the informationdisplay will display information guiding thedriver through the proper shiftingprocedures.
213
Super Duty (TFE) Canada/United States of America, enUSA, Edition date: 201710, Second Printing
Four-Wheel Drive (If Equipped)E191851