Page 297 of 642

WARNINGS
Never place floor mats or any othercovering on top of already installedfloor mats. Floor mats should alwaysrest on top of vehicle carpeting surface andnot another floor mat or other covering.Additional floor mats or any other coveringwill reduce the pedal clearance andpotentially interfere with pedal operation.
Check attachment of floor mats ona regular basis. Always properlyreinstall and secure floor mats thathave been removed for cleaning orreplacement.
Always make sure that objectscannot fall into the driver foot wellwhile the vehicle is moving. Objectsthat are loose can become trapped underthe pedals causing a loss of vehicle control.
Failure to properly follow floor matinstallation or attachmentinstructions can potentially causeinterference with pedal operation causinga loss of vehicle control.
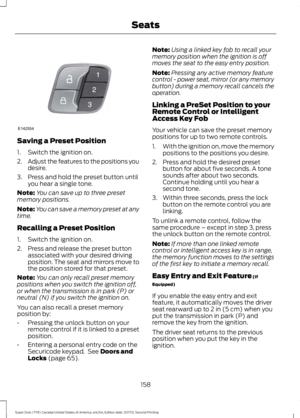
To install floor mats, position the floor matso that the eyelet is over the retention postand press down to lock in.
To remove the floor mat, reverse theinstallation procedure.
SNOWPLOWING
Ford recommends that the Super DutyF-Series used for snow removal includethe snowplow package option.
Installing the Snowplow
Weight limits and guidelines for selectingand installing the snowplow are in the FordTruck Body Builders Layout Book,snowplow section, found atwww.fleet.ford.com/truckbbas. A typicalinstallation affects the following:
•Certification to government safety lawssuch as occupant protection and airbagdeployment, braking, and lighting. Lookfor an Alterer’s Label on the vehiclefrom the snowplow installer certifyingthat the installation meets allapplicable Federal Motor VehicleSafety Standards (FMVSS).
•The Total Accessory Reserve Capacity(TARC) is on the lower right side of thevehicle’s Safety ComplianceCertification Label. This applies toFord-completed vehicles of 10,000 lb(4,536 kg) GVWR or less. This is theweight of permanently-attachedauxiliary equipment, such as snowplowframe-mounting hardware, that canbe added to the vehicle and satisfyFord compliance certification toFMVSS. Exceeding this weight mayrequire the auxiliary equipment installeradditional safety certificationresponsibility. The Front AccessoryReserve Capacity (FARC) is forcustomer convenience.
•Rear ballast weight behind the rearaxle may be required to preventexceeding the FGAWR, and providefront-to-rear weight balance for properbraking and steering.
294
Super Duty (TFE) Canada/United States of America, enUSA, Edition date: 201710, Second Printing
Driving HintsE142666
Page 298 of 642

•Front wheel toe may requirere-adjustment to prevent prematureuneven tire wear. Specifications are inthe Ford Workshop Manual.
•Headlight aim may requirere-adjustment.
•The tire air pressures recommendedfor general driving are on the vehicle’sSafety Certification Label. Themaximum cold inflation pressure forthe tire and associated load rating ison the tire sidewall. Tire air pressuremay require re-adjustment within thesepressure limits to accommodate theadditional weight of the snowplowinstallation.
•Federal and some local regulationsrequire additional exterior lamps forsnowplow-equipped vehicles. Consultyour authorized dealer for additionalinformation.
Operating the Vehicle with theSnowplow Attached
Note:Do not use your vehicle for snowremoval until you have driven at least500 mi (800 km).
Ford recommends vehicle speed does notexceed 45 mph (72 km/h) whensnowplowing.
The attached snowplow blade restrictsairflow to the radiator, and may cause theengine to run at a higher temperature:Attention to engine temperature isespecially important when outsidetemperatures are above freezing. Anglethe blade to maximize airflow to theradiator and monitor engine temperatureto determine whether a left or right angleprovides the best performance.
Follow the severe duty schedule in yourScheduled Maintenance information forengine oil and transmission fluid changeintervals.
Snowplowing with your AirbagEquipped Vehicle
WARNINGS
Do not attempt to service, repair, ormodify the airbag supplementalrestraint system (SRS) or its fuses.Contact an authorized dealer.
Additional equipment for examplesnowplow equipment may affect theperformance of the airbag sensorsincreasing the risk of injury. Please refer tothe Body Builders Layout Book forinstructions about the appropriateinstallation of additional equipment.
All occupants of the vehicle,including the driver, should alwaysproperly wear their seatbelt, evenwhen provided with an airbagsupplemental restraint system (SRS).
Your vehicle is equipped with a driver andpassenger airbag supplemental restraintsystem. The supplemental restraint systemwill activate in certain frontal and offsetfrontal collisions when the vehicle sustainssufficient frontal deceleration.
Careless or high speed driving whileplowing snow that results in sufficientvehicle decelerations can deploy theairbags. Such driving also increases the riskof accidents.
Never remove or defeat the trippingmechanisms designed into the snowremoval equipment by its manufacturer.Doing so may cause damage to the vehicleand the snow removal equipment as wellas possible airbag deployment.
Engine temperature while plowing
When driving with a plow, your engine mayrun at a higher temperature than normalbecause the attached snowplow blade willrestrict airflow to the radiator.
295
Super Duty (TFE) Canada/United States of America, enUSA, Edition date: 201710, Second Printing
Driving Hints
Page 299 of 642
•If you are driving more than 15 mi(24 km) at temperatures abovefreezing, angle the plow blade eitherfull left or full right to providemaximum airflow to the radiator.
•If you are driving less than 15 mi(24 km) at speeds up to 45 mph(72 km/h) in cold weather, you will notneed to worry about blade position toprovide maximum airflow.
Transmission operation whileplowing
WARNING
Do not spin the wheels at over34 mph (55 km/h). The tires may failand injure a passenger or bystander.
•Shift transfer case to 4L (4WD Low)when plowing in small areas at speedsbelow 5 mph (8 km/h).
•Shift transfer case to 4H (4WD High)when plowing larger areas or light snowat higher speeds. Do not exceed 15 mph(24 km/h).
•Do not shift the transmission from aforward gear to R (Reverse) until theengine is at idle and the wheels havestopped.
296
Super Duty (TFE) Canada/United States of America, enUSA, Edition date: 201710, Second Printing
Driving Hints
Page 300 of 642

ROADSIDE ASSISTANCE
Vehicles Sold in the United States:Getting Roadside Assistance
To fully assist you should you have avehicle concern, Ford Motor Companyoffers a complimentary roadsideassistance program. This program isseparate from the New Vehicle LimitedWarranty. The service is available:
•24 hours a day, seven days a week.
•For the coverage period listed on theRoadside Assistance Card included inyour Owner's Manual portfolio.
Roadside Assistance covers:
•A flat tire change with a good spare, ifprovided with the vehicle (exceptvehicles supplied with a tire inflationkit).
•Battery jump start.
•Lock-out assistance (key replacementcost is the customer's responsibility).
•Fuel delivery — independent servicecontractors, if not prohibited by state,local or municipal law, shall deliver upto 2 gal (7.6 L) of gasoline or 5 gal(18.9 L) of diesel fuel to a disabledvehicle. Roadside Assistance limits fueldelivery service to two no-chargeoccurrences within a 12-month period.
•Winch out — available within 100 ft(30.5 m) of a paved or countymaintained road, no recoveries.
•Towing — independent servicecontractors, if not prohibited by state,local or municipal law, shall tow Fordeligible vehicles to an authorized dealerwithin 35 mi (56 km) of thedisablement location or to the nearest
authorized dealer. If a memberrequests a tow to an authorized dealerthat is more than 35 mi (56 km) fromthe disablement location, the membershall be responsible for any mileagecosts in excess of 35 mi (56 km).
Roadside Assistance includes up to $200for a towed trailer if the disabled eligiblevehicle requires service at the nearestauthorized dealer. If the towing vehicle isoperational but the trailer is not, then thetrailer does not qualify for any roadsideservices.
Vehicles Sold in the United States:Using Roadside Assistance
Complete the roadside assistanceidentification card and place it in yourwallet for quick reference. This card is inthe owner's information portfolio in theglove compartment.
United States Ford vehicle customers whorequire Roadside Assistance, call1-800-241-3673.
If you need to arrange roadside assistancefor yourself, Ford Motor Companyreimburses a reasonable amount fortowing to the nearest dealership within35 mi (56 km). To obtain reimbursementinformation, United States Ford vehiclecustomers call 1-800-241-3673.Customers need to submit their originalreceipts.
Vehicles Sold in Canada: GettingRoadside Assistance
To fully assist you should you have avehicle concern, Ford Motor Company ofCanada, Limited offers a complimentaryroadside assistance program. This programis eligible within Canada or the continentalUnited States.
297
Super Duty (TFE) Canada/United States of America, enUSA, Edition date: 201710, Second Printing
Roadside Emergencies
Page 301 of 642

This program is separate from the NewVehicle Limited Warranty, but the coverageis concurrent with the powertrain coverageperiod of your vehicle.
Canadian customers who require roadsideassistance, call 1-800-665-2006.
Vehicles Sold in Canada: UsingRoadside Assistance
Complete the roadside assistanceidentification card and place it in yourwallet for quick reference.
In Canada, this card is found in theWarranty Guide in the glove compartmentof your vehicle.
Vehicles Sold in Canada: RoadsideAssistance Program Coverage
The service is available 24 hours a day,seven days a week.
Canadian roadside coverage and benefitsmay differ from the U.S. coverage.
For complete program coverage detailsyou may contact your dealer, you can callus in Canada at 1-800-665-2006, or visitour website at www.ford.ca.
HAZARD FLASHERS
Note:The hazard flashers operate whenthe ignition is in any position, or if the key isnot in the ignition. If used when the vehicleis not running, the battery loses charge. Asa result, there may be insufficient power torestart your vehicle.
The flasher control is on theinstrument panel. Use yourhazard flashers when yourvehicle is creating a safety hazard for othermotorists.
•Press the flasher control and all frontand rear direction indicators flash.
•Press the button again to switch themoff.
FUEL SHUTOFF - 6.2L/6.8L
Note:If your vehicle is involved in a crash,have a qualified technician check the fuelsystem.
Note: When you try to restart your vehicleafter a fuel shutoff, the vehicle makes surethat various systems are safe to restart.Once the vehicle determines the systemsare safe, then the vehicle allows you torestart.
Note: In the event that your vehicle doesnot restart after your third attempt, contacta qualified technician.
The fuel pump shutoff stops the flow offuel to the engine in the event of amoderate to severe crash. Not everyimpact causes a shutoff.
If your vehicle has a key system:
1. Switch off the vehicle.
2. Switch on the vehicle.
3. Repeat steps 1 and 2 to re-enable thefuel pump.
FUEL SHUTOFF - 6.7L DIESEL
WARNING
Failure to inspect and, if necessary,repair fuel leaks after a collision mayincrease the risk of fire and seriousinjury. Ford Motor Company recommendsthat the fuel system be inspected by anauthorized dealer after any collision.
298
Super Duty (TFE) Canada/United States of America, enUSA, Edition date: 201710, Second Printing
Roadside Emergencies
Page 302 of 642

Note:When you try to restart your vehicleafter a fuel shutoff, your vehicle makes surethat various systems are safe to restart.Once your vehicle determines that thesystems are safe, then your vehicle willallow you to restart.
In the event of a moderate to severecollision, your vehicle is equipped with afuel pump shut-off feature that stops theflow of fuel to the engine. Not every impactwill cause a shutoff.
After an accident, if the engine cranks butdoes not start, this switch may have beenactivated.
This switch is located on the passenger’sside of the instrument panel. Open thefront passenger door and remove the smallaccess panel.
The switch has a red button on top of it.
To reset the switch:
1. Turn the ignition off.
2. Check the fuel system for leaks.
3. If no leaks are apparent, reset theswitch by pushing in on the resetbutton.
4. Turn the ignition on.
5.Wait a few seconds and return the keyto off.
6. Make another check for leaks.
Running Out Of DEF (DieselExhaust Fluid)
If your vehicle runs out of DEF, it will enterinto a speed limited mode and can alsoenter into an idle-only mode. Normalvehicle operation will not resume until DEFis refilled. See Selective CatalyticReduction System (page 188).
Contact roadside assistance for help infinding a retailer that sells DEF. SeeCustomer Assistance (page 305).
JUMP STARTING THE VEHICLE
WARNINGS
Batteries normally produce explosivegases which can cause personalinjury. Therefore, do not allowflames, sparks or lighted substances tocome near the battery. When working nearthe battery, always shield your face andprotect your eyes. Always provide correctventilation.
299
Super Duty (TFE) Canada/United States of America, enUSA, Edition date: 201710, Second Printing
Roadside EmergenciesE163366 E163367
Page 303 of 642

WARNINGS
Keep batteries out of reach ofchildren. Batteries contain sulfuricacid. Avoid contact with skin, eyes orclothing. Shield your eyes when workingnear the battery to protect against possiblesplashing of acid solution. In case of acidcontact with skin or eyes, flushimmediately with water for a minimum of15 minutes and get prompt medicalattention. If acid is swallowed, call aphysician immediately.
Use only adequately sized cableswith insulated clamps.
Preparing Your Vehicle
Do not attempt to push-start yourautomatic transmission vehicle.
Note:Attempting to push-start a vehiclewith an automatic transmission may causetransmission damage.
Note:Use only a 12-volt supply to start yourvehicle.
Note:Do not disconnect the battery of thedisabled vehicle as this could damage thevehicle electrical system.
Park the booster vehicle close to the hoodof the disabled vehicle, making sure thetwo vehicles do not touch.
Connecting the Jumper Cables
WARNINGS
Do not attach the cables to fuel lines,engine rocker covers, the intakemanifold or electrical componentsas grounding points. Stay clear of movingparts. To avoid reverse polarityconnections, make sure that you correctlyidentify the positive (+) and negative (-)terminals on both the disabled and boostervehicles before connecting the cables.
WARNINGS
Do not attach the end of the positivecable to the studs or L-shaped eyeletlocated above the positive (+)terminal of your vehicle’s battery. Highcurrent may flow through and causedamage to the fuses.
Do not connect the end of thesecond cable to the negative (-)terminal of the battery to be jumped.A spark may cause an explosion of thegases that surround the battery.
Note:In the illustration, the bottom vehiclerepresents the booster vehicle.
1.Connect the positive (+) jumper cableto the positive (+) terminal of thedischarged battery.
300
Super Duty (TFE) Canada/United States of America, enUSA, Edition date: 201710, Second Printing
Roadside Emergencies4
2
1
3
E142664
Page 304 of 642

2. Connect the other end of the positive(+) cable to the positive (+) terminalof the booster vehicle battery.
3. Connect the negative (-) cable to thenegative (-) terminal of the boostervehicle battery.
4. Make the final connection of thenegative (-) cable to an exposed metalpart of the stalled vehicle's engine,away from the battery and the fuelinjection system, or connect thenegative (-) cable to a groundconnection point if available.
Jump Starting
1.Start the engine of the booster vehicleand rev the engine moderately, or pressthe accelerator gently to keep yourengine speed between 2000 and 3000RPM, as shown in your tachometer.
2.Start the engine of the disabled vehicle.
3. Once the disabled vehicle has beenstarted, run both vehicle engines for anadditional three minutes beforedisconnecting the jumper cables.
Removing the Jumper Cables
Remove the jumper cables in the reverseorder that they were connected.
1. Remove the negative (-) jumper cablefrom the disabled vehicle.
2. Remove the jumper cable on thenegative (-) terminal of the boostervehicle battery.
3. Remove the jumper cable from thepositive (+) terminal of the boostervehicle battery.
4. Remove the jumper cable from thepositive (+) terminal of the disabledvehicle battery.
5.Allow the engine to idle for at least oneminute.
301
Super Duty (TFE) Canada/United States of America, enUSA, Edition date: 201710, Second Printing
Roadside Emergencies4
1
3
2
E142665