2017 FORD EXPEDITION EL reset
[x] Cancel search: resetPage 128 of 500
2. Continue pressing the control until itreaches the end of the seat track.
3.Continue pressing the control for abouttwo seconds. You will feel the seatbounce back slightly.
Power Lumbar (If Equipped)
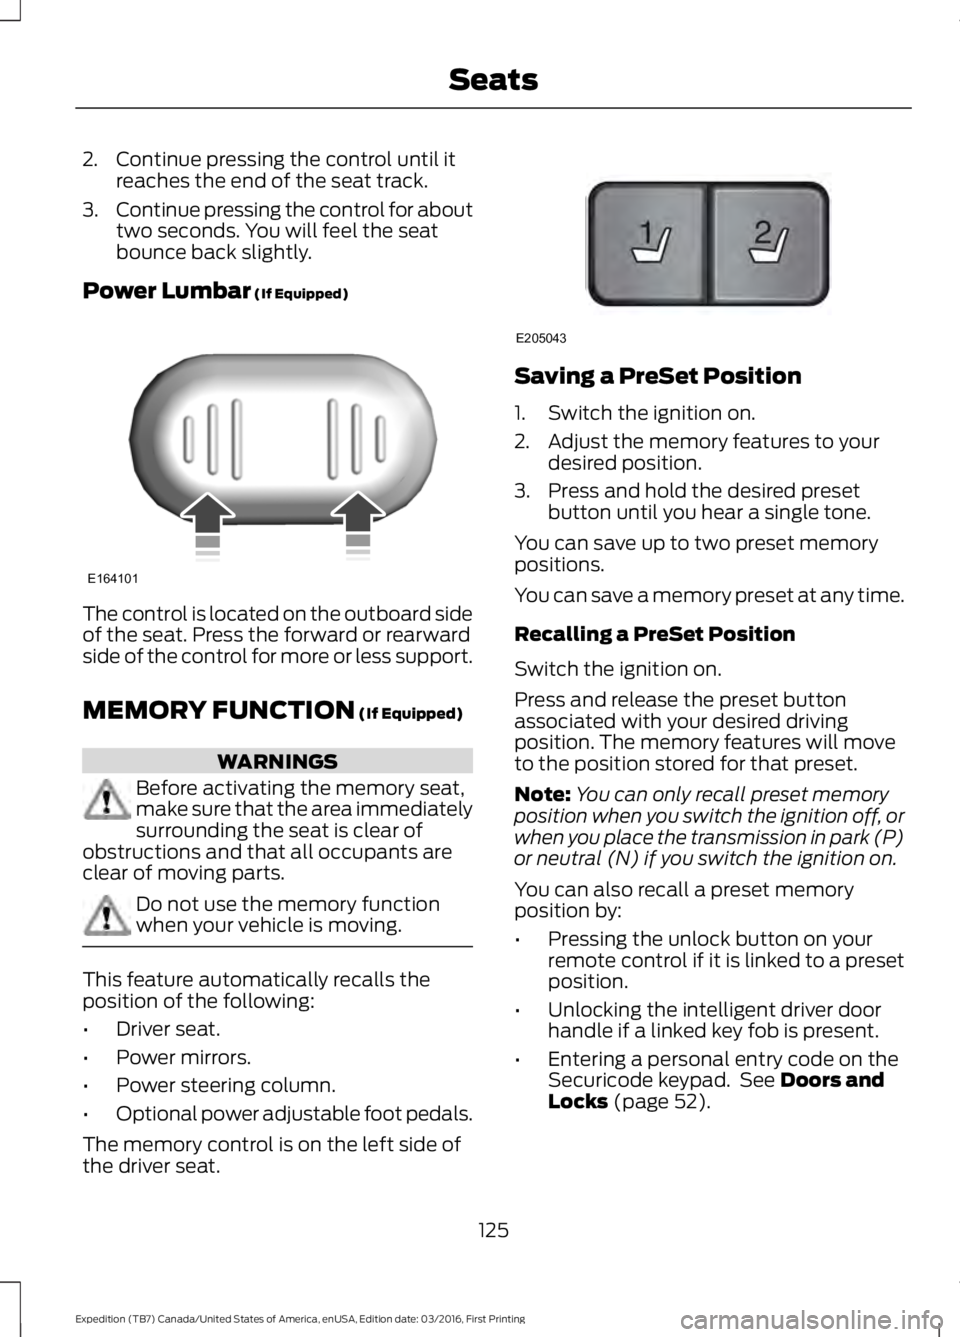
The control is located on the outboard sideof the seat. Press the forward or rearwardside of the control for more or less support.
MEMORY FUNCTION (If Equipped)
WARNINGS
Before activating the memory seat,make sure that the area immediatelysurrounding the seat is clear ofobstructions and that all occupants areclear of moving parts.
Do not use the memory functionwhen your vehicle is moving.
This feature automatically recalls theposition of the following:
•Driver seat.
•Power mirrors.
•Power steering column.
•Optional power adjustable foot pedals.
The memory control is on the left side ofthe driver seat.
Saving a PreSet Position
1. Switch the ignition on.
2. Adjust the memory features to yourdesired position.
3. Press and hold the desired presetbutton until you hear a single tone.
You can save up to two preset memorypositions.
You can save a memory preset at any time.
Recalling a PreSet Position
Switch the ignition on.
Press and release the preset buttonassociated with your desired drivingposition. The memory features will moveto the position stored for that preset.
Note:You can only recall preset memoryposition when you switch the ignition off, orwhen you place the transmission in park (P)or neutral (N) if you switch the ignition on.
You can also recall a preset memoryposition by:
•Pressing the unlock button on yourremote control if it is linked to a presetposition.
•Unlocking the intelligent driver doorhandle if a linked key fob is present.
•Entering a personal entry code on theSecuricode keypad. See Doors andLocks (page 52).
125
Expedition (TB7) Canada/United States of America, enUSA, Edition date: 03/2016, First Printing
SeatsE164101 21
E205043
Page 129 of 500
Note:Using a linked key fob to recall yourmemory position when the ignition is offmoves the seat and steering column to theEasy Entry position.
Note:Pressing any active memory featurecontrol - power seat, mirror (or steeringcolumn switch) (or any memory button)during a memory recall cancels theoperation.
Linking a PreSet Position to yourRemote Control or Intelligent AccessKey Fob
Your vehicle can save the preset memorypositions for up to two remote controls.
1.With the ignition on, move the memorypositions to the desired positions.
2. Press and hold the desired presetbutton for about five seconds. A tonesounds after about two seconds.Continue holding until you hear asecond tone.
3. Within three seconds, press the lockbutton on the remote control you arelinking.
To unlink a remote control, follow thesame procedure – except in step 3, pressthe unlock button on the remote control.
Note:If more than one linked remotecontrol or intelligent access key is in range,the memory function moves to the settingsof the first key to initiate a memory recall.
Easy Entry and Exit Feature (If
Equipped)
This feature adjusts the position of the seatand steering column to allow easier exitand entry to the vehicle.
The driver seat automatically moves 2inches (5 centimeters) rearward when thetransmission is in park (P) and you removethe key from the ignition or you switch theignition off.
The driver seat returns to the previousposition when you put the key in theignition or switch the ignition on.
You can enable or disable this feature inthe information display. See InformationDisplays (page 91).
REAR SEATS
Folding Down the Second Row40% Seat
WARNINGS
Use caution when folding theseatback to the flat back position asthe system will move forward whenyou lift the release handle.
Before returning the seatback to itsoriginal position, make sure thatcargo or any objects are not trappedbehind the seatback. After returning theseatback to its original position, pull on theseatback to make sure that it has fullylatched. An unlatched seat may becomedangerous in the event of a sudden stopor crash.
Make sure that the head restraint is in thedown position and no objects such asbooks, purses or briefcases are on the floorin front of the second row seats beforefolding them down.
Move the front passenger seat forward sothat the second row seat head restraintclears the front seat.
126
Expedition (TB7) Canada/United States of America, enUSA, Edition date: 03/2016, First Printing
Seats
Page 137 of 500
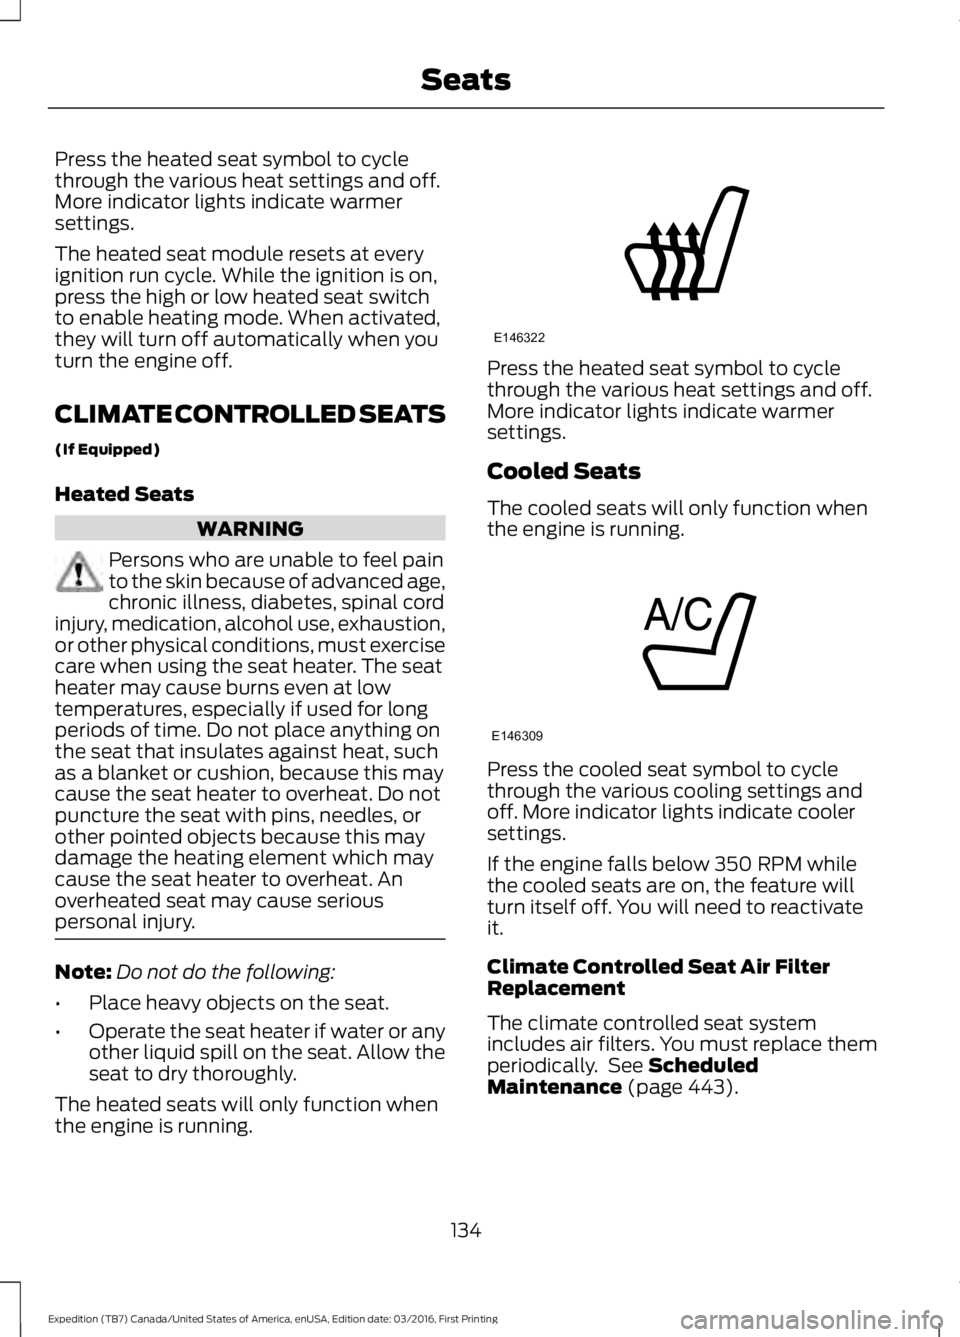
Press the heated seat symbol to cyclethrough the various heat settings and off.More indicator lights indicate warmersettings.
The heated seat module resets at everyignition run cycle. While the ignition is on,press the high or low heated seat switchto enable heating mode. When activated,they will turn off automatically when youturn the engine off.
CLIMATE CONTROLLED SEATS
(If Equipped)
Heated Seats
WARNING
Persons who are unable to feel painto the skin because of advanced age,chronic illness, diabetes, spinal cordinjury, medication, alcohol use, exhaustion,or other physical conditions, must exercisecare when using the seat heater. The seatheater may cause burns even at lowtemperatures, especially if used for longperiods of time. Do not place anything onthe seat that insulates against heat, suchas a blanket or cushion, because this maycause the seat heater to overheat. Do notpuncture the seat with pins, needles, orother pointed objects because this maydamage the heating element which maycause the seat heater to overheat. Anoverheated seat may cause seriouspersonal injury.
Note:Do not do the following:
•Place heavy objects on the seat.
•Operate the seat heater if water or anyother liquid spill on the seat. Allow theseat to dry thoroughly.
The heated seats will only function whenthe engine is running.
Press the heated seat symbol to cyclethrough the various heat settings and off.More indicator lights indicate warmersettings.
Cooled Seats
The cooled seats will only function whenthe engine is running.
Press the cooled seat symbol to cyclethrough the various cooling settings andoff. More indicator lights indicate coolersettings.
If the engine falls below 350 RPM whilethe cooled seats are on, the feature willturn itself off. You will need to reactivateit.
Climate Controlled Seat Air FilterReplacement
The climate controlled seat systemincludes air filters. You must replace themperiodically. See ScheduledMaintenance (page 443).
134
Expedition (TB7) Canada/United States of America, enUSA, Edition date: 03/2016, First Printing
SeatsE146322 E146309
Page 145 of 500

When the indicator light on the power pointis:
•On: The power point is working, theignition is on and a device is pluggedin.
•Off: The power point is off, the ignitionis off or no device is plugged in.
•Flashing: The power point is in faultmode.
The power outlet temporarily turns offpower when in fault mode if the deviceexceeds the 150 watt limit. Unplug yourdevice and switch the ignition off. Switchthe ignition back on, but do not plug yourdevice back in. Let the system cool off andswitch the ignition off to reset the faultmode. Switch the ignition back on andmake sure the indicator light remains on.
Do not use the power point for certainelectric devices, including:
•Cathode-ray, tube-type televisions.
•Motor loads, such as vacuum cleaners,electric saws and other electric powertools or compressor-drivenrefrigerators.
•Measuring devices, which processprecise data, such as medicalequipment or measuring equipment.
•Other appliances requiring anextremely stable power supply such asmicrocomputer-controlled electricblankets or touch-sensor lamps.
142
Expedition (TB7) Canada/United States of America, enUSA, Edition date: 03/2016, First Printing
Auxiliary Power Points
Page 150 of 500
Within 20 seconds of switching the engineoff, press the brake pedal and press thepush button ignition switch. After 20seconds, you can no longer start yourvehicle if it does not detect a valid passivekey.
Once your vehicle starts, it remains runninguntil you press the push button ignitionswitch, even if your vehicle does not detecta valid passive key. If you open and closea door while your vehicle is running, thesystem searches for a valid passive key.You cannot start your vehicle if the systemdoes not detect a valid passive key within20 seconds.
Failure to Start
If you cannot start the engine after threeattempts, wait 10 seconds and follow thisprocedure:
1. Fully press the brake pedal.
2. Shift into park (P).
3. Fully press the accelerator pedal andhold it there.
4. Start the engine.
Automatic Engine Shutdown
For vehicles with a keyless ignition, thisfeature automatically shuts down theengine if it has been idling for an extendedperiod. The ignition also turns off in orderto save battery power. Before your vehicleshuts down, a message appears in theinformation display showing a timercounting down from 30 seconds. If you donot intervene within 30 seconds, yourvehicle shuts down. Another messageappears in the information display toinform you that your vehicle has shut downto save fuel. Start your vehicle as younormally do.
Automatic Engine Shutdown Override
Note:You cannot permanently switch offthe automatic shutdown feature. When youswitch it off temporarily, it turns on at thenext ignition cycle.
You can stop the shutdown, or reset thetimer, at any point before the 30-secondcountdown has expired by doing any of thefollowing:
•You can reset the timer by interactingwith your vehicle, for example pressingthe brake or accelerator pedal.
•You can temporarily switch off theshutdown feature any time the ignitionis on using the information display. SeeInformation Displays (page 91). Thefeature only remains off for the currentignition cycle.
•During the 30-second countdown, thesystem prompts you to press OK orRESET to temporarily switch thefeature off for the current ignition cycleonly.
Stopping the Engine When YourVehicle is Stationary
Vehicles with an Ignition Key
1. Shift into park (P).
2. Switch the ignition off.
3. Apply the parking brake.
Vehicles with Keyless Start
1. Shift into park (P).
2. Press the push button ignition switch.
3. Apply the parking brake.
Note:The ignition, all electrical circuits andall warning lamps and indicators will beturned off.
Note:If the engine is idling for 30 minutes,the ignition and engine automatically shutdown.
147
Expedition (TB7) Canada/United States of America, enUSA, Edition date: 03/2016, First Printing
Starting and Stopping the Engine
Page 158 of 500
5. Insert a fuel pump nozzle or the fuelfiller funnel provided with your vehiclein to the fuel tank filler pipe opening.This action should dislodge any debristhat may be preventing the fuel fillerinlet from fully closing.
Note: If this action corrects the problemthe message may not reset immediately. Ifthe message remains and the service enginesoon warning lamp appears in theinformation display, have your vehiclechecked as soon as possible.
FUEL CONSUMPTION
Empty reserve is the amount of fuelremaining in the tank after the fuel gaugeindicates empty. The amount of usablefuel in the empty reserve varies and shouldnot be relied upon to increase driving range.
•The usable capacity of the fuel tank isthe amount of fuel that you can add tothe fuel tank when the fuel gaugeindicates empty, before the first fuelfiller nozzle automatic shutoff event.
•The advertised capacity is equal to thevolumetric difference between actualfuel fill before the first fuel filler nozzleautomatic shutoff event and the fuelquantity when the fuel gauge indicatesempty. See Capacities andSpecifications (page 304). It is theusable capacity minus the emptyreserve.
•Due to the empty reserve, you may beable to add more fuel than theadvertised capacity of the fuel tankwhen the fuel gauge indicates empty.
Filling the Fuel Tank
For consistent results when refueling:
•Turn the ignition off before fueling; aninaccurate reading results if the engineis left running.
•Use the same fill rate(low-medium-high) each time the tankis filled.
•Allow no more than one automaticshut-off when refueling.
Results are most accurate when the fillingmethod is consistent.
Calculating Fuel Economy
Do not measure fuel economy during thefirst 1,000 mi (1,600 km) of driving (this isyour engine’s break-in period). A moreaccurate measurement is obtained after2,000 mi (3,200 km) to 3,000 mi(4,800 km). Also, fuel expense, frequencyof fill ups or fuel gauge readings are notaccurate ways to measure fuel economy.
1.Fill the fuel tank completely and recordthe initial odometer reading.
2. Each time you fill the fuel tank, recordthe amount of fuel added.
3. After at least three fill ups, fill the fueltank and record the current odometerreading.
4. Subtract your initial odometer readingfrom the current odometer reading.
To calculate L/100 km (liters per 100kilometers) fuel consumption, multiply theliters used by 100, then divide by kilometerstraveled. To calculate MPG (miles pergallon) fuel consumption, divide milestraveled by gallons used.
155
Expedition (TB7) Canada/United States of America, enUSA, Edition date: 03/2016, First Printing
Fuel and Refueling
Page 195 of 500

When the blockage is removed, the systemcan be reset in two ways: 1) when at leasttwo objects are detected while driving, or2) turn the ignition key from on to off, then
back on. If the blockage is still present afterthe key cycle, the system senses again thatit is blocked after driving in traffic.
Reasons for messages being displayed
Clean the fascia area in front of the radaror remove the obstruction.The radar surface is dirty or obstructed
Drive normally in traffic for a few minutesto allow the radar to detect passingvehicles so it can clear the blocked state.
The radar surface is not dirty or obstructed
No action required. The system automatic-ally resets to an unblocked state once therainfall/snowfall rate decreases or stops.Do not use the Blind Spot InformationSystem or Cross Traffic Alert in theseconditions.
Heavy rainfall/snowfall interferes with theradar signals
System Limitations
The Blind Spot Information and CrossTraffic Alert systems do have theirlimitations; situations such as severeweather conditions or debris build-up onthe sensor area may limit vehicle detection.
The following are other situations that maylimit the Blind Spot Information System:
•Certain maneuvering of vehiclesentering and exiting the blind zone.
•Vehicles passing through the blind zoneat very fast rates.
•When several vehicles forming aconvoy pass through the blind zone.
The following are other situations that maylimit the Cross Traffic Alert:
•Adjacently parked vehicles or objectsobstructing the sensors.
•Approaching vehicles passing atspeeds greater than 15 mph (24 km/h).
•Driving in reverse faster than 3 mph(5 km/h).
•Backing out of an angled parking spot.
False Alerts
Note:If you connected a trailer to yourvehicle, the Blind Spot Information Systemmay detect the trailer causing a false alert.To avoid false alerts you may want to turnthe system off manually.
There may be certain instances wheneither the Blind Spot Information or CrossTraffic Alert systems illuminate the alertindicator with no vehicle in the coveragezone; this is known as a false alert. Someamount of false alerts are normal; they aretemporary and self-correct.
System Errors
If the system senses a problem with theleft or right sensor, the telltale willilluminate and a message will appear inthe information display. See InformationMessages (page 102).
192
Expedition (TB7) Canada/United States of America, enUSA, Edition date: 03/2016, First Printing
Driving Aids
Page 236 of 500
FUSE SPECIFICATION CHART
Power Distribution Box
WARNINGS
Always disconnect the battery beforeservicing high current fuses.
To reduce risk of electrical shock,always replace the cover to thepower distribution box beforereconnecting the battery or refilling fluidreservoirs.
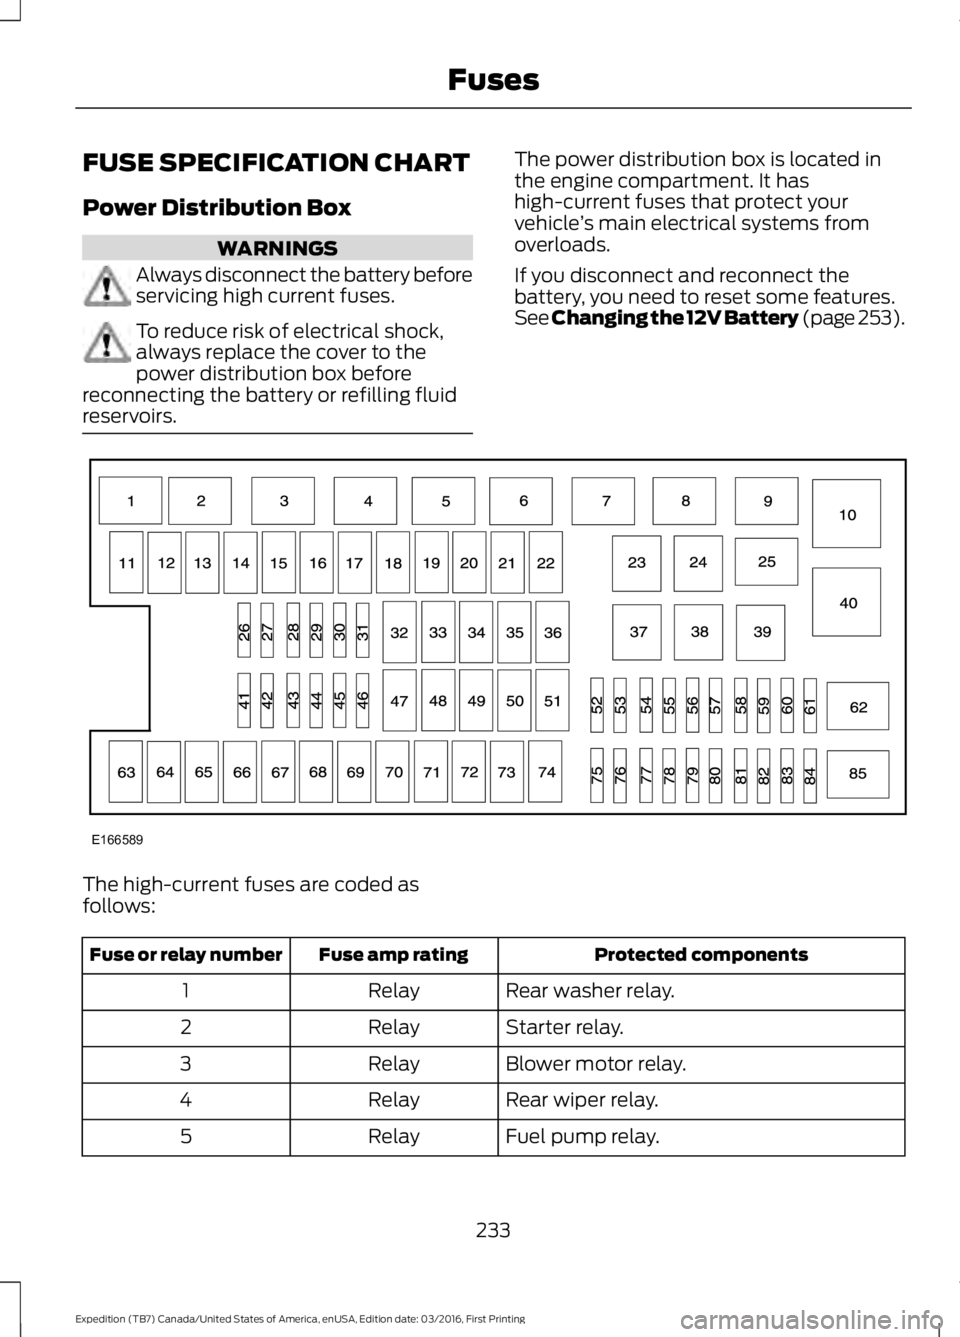
The power distribution box is located inthe engine compartment. It hashigh-current fuses that protect yourvehicle’s main electrical systems fromoverloads.
If you disconnect and reconnect thebattery, you need to reset some features.See Changing the 12V Battery (page 253).
The high-current fuses are coded asfollows:
Protected componentsFuse amp ratingFuse or relay number
Rear washer relay.Relay1
Starter relay.Relay2
Blower motor relay.Relay3
Rear wiper relay.Relay4
Fuel pump relay.Relay5
233
Expedition (TB7) Canada/United States of America, enUSA, Edition date: 03/2016, First Printing
FusesE166589