Page 190 of 346
Chevrolet Express Owner Manual (GMNA-Localizing-U.S./Canada/Mexico-9967827) - 2017 - crc - 5/6/16
Driving and Operating 189
Using ABS
Do not pump the brakes. Just holdthe brake pedal down firmly and letABS work. You may hear the ABSpump or motor operating and feelthe brake pedal pulsate. This isnormal.
Braking in Emergencies
ABS allows you to steer and brakeat the same time. In manyemergencies, steering can helpmore than even the very bestbraking.
Parking Brake
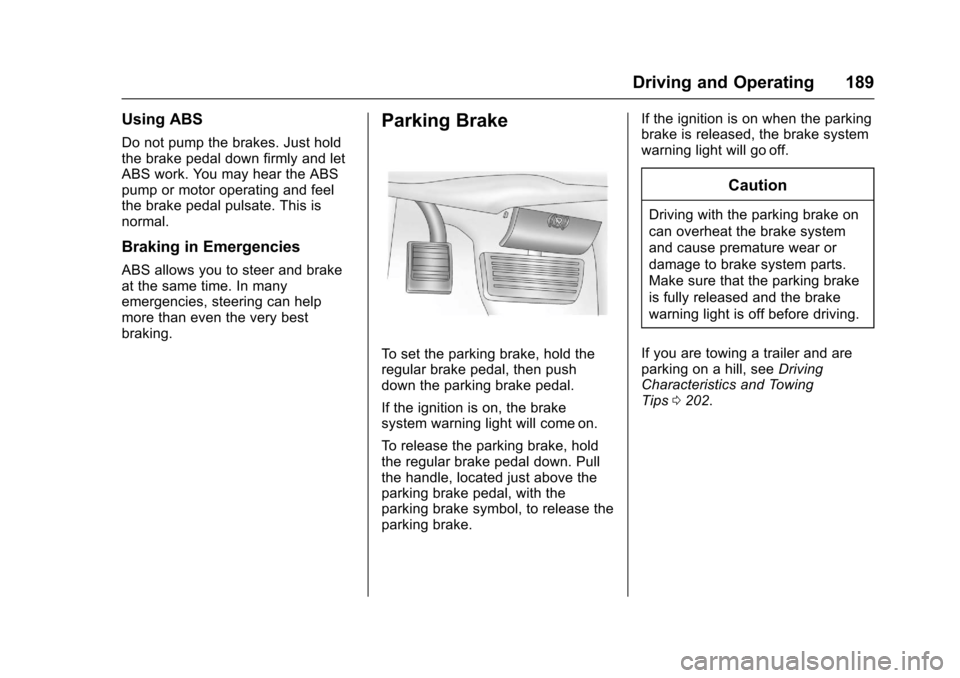
To s e t t h e p a r k i n g b r a k e , h o l d t h eregular brake pedal, then pushdown the parking brake pedal.
If the ignition is on, the brakesystem warning light will come on.
To r e l e a s e t h e p a r k i n g b r a k e , h o l dthe regular brake pedal down. Pullthe handle, located just above theparking brake pedal, with theparking brake symbol, to release theparking brake.
If the ignition is on when the parkingbrake is released, the brake systemwarning light will go off.
Caution
Driving with the parking brake on
can overheat the brake system
and cause premature wear or
damage to brake system parts.
Make sure that the parking brake
is fully released and the brake
warning light is off before driving.
If you are towing a trailer and areparking on a hill, seeDrivingCharacteristics and TowingTips0202.
Page 206 of 346
Chevrolet Express Owner Manual (GMNA-Localizing-U.S./Canada/Mexico-9967827) - 2017 - crc - 5/6/16
Driving and Operating 205
If parking the rig on a hill:
1. Press the brake pedal, but donot shift into P (Park) yet. Turnthe wheels into the curb iffacing downhill or into traffic iffacing uphill.
2. Have someone place chocksunder the trailer wheels.
3. When the wheel chocks are inplace, release the regularbrakes until the chocks absorbthe load.
4. Reapply the brake pedal. Thenapply the parking brake andshift into P (Park).
5. Release the brake pedal.
Leaving After Parking on a Hill
1. Apply and hold the brakepedal.
2. Start the engine.
3. Shift into a gear.
4. Release the parking brake.
5. Let up on the brake pedal.
6. Drive slowly until the trailer isclear of the chocks.
7. Stop and have someone pickup and store the chocks.
Maintenance when Trailer
Towing
The vehicle needs service moreoften when pulling a trailer. SeeMaintenance Schedule0297.Things that are especially importantin trailer operation are automatictransmission fluid, engine oil, axlelubricant, belts, cooling system, andbrake system. It is a good idea toinspect these before and duringthe trip.
Check periodically to see that allhitch nuts and bolts are tight.
Trailer Towing
If the vehicle has a diesel engine,see the Duramax dieselsupplement.
{Warning
The driver can lose control when
pulling a trailer if the correct
equipment is not used or the
vehicle is not driven properly. For
example, if the trailer is too heavy
or the trailer brakes are
inadequate for the load, the
vehicle may not stop as expected.
The driver and passengers could
be seriously injured. The vehicle
may also be damaged; the
resulting repairs would not be
covered by the vehicle warranty.
Pull a trailer only if all the steps in
this section have been followed.
Ask your dealer for advice and
information about towing a trailer
with the vehicle.
Page 236 of 346
Chevrolet Express Owner Manual (GMNA-Localizing-U.S./Canada/Mexico-9967827) - 2017 - crc - 5/2/16
Vehicle Care 235
Warning (Continued)
Add brake fluid only when work is
done on the brake hydraulic
system.
When the brake fluid falls to a lowlevel, the brake warning light comeson. SeeBrake System WarningLight0104.
Brake fluid absorbs water over time.Replace brake fluid at the specifiedintervals to prevent increasedstopping distance. SeeMaintenanceSchedule0297.
Checking Brake Fluid
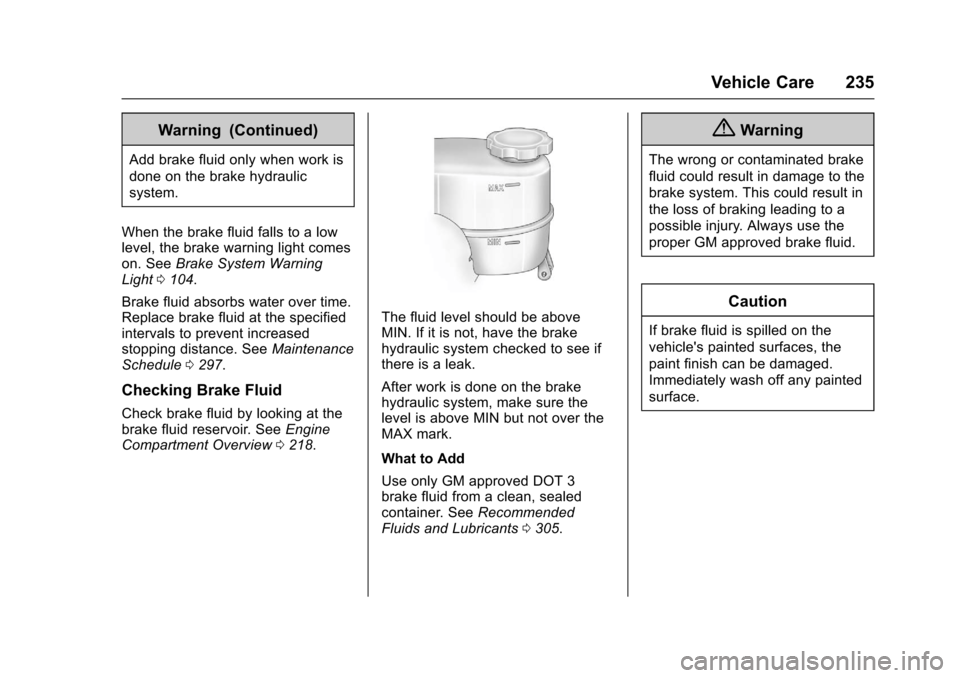
Check brake fluid by looking at thebrake fluid reservoir. SeeEngineCompartment Overview0218.
The fluid level should be aboveMIN. If it is not, have the brakehydraulic system checked to see ifthere is a leak.
After work is done on the brakehydraulic system, make sure thelevel is above MIN but not over theMAX mark.
What to Add
Use only GM approved DOT 3brake fluid from a clean, sealedcontainer. SeeRecommendedFluids and Lubricants0305.
{Warning
The wrong or contaminated brake
fluid could result in damage to the
brake system. This could result in
the loss of braking leading to a
possible injury. Always use the
proper GM approved brake fluid.
Caution
If brake fluid is spilled on the
vehicle's painted surfaces, the
paint finish can be damaged.
Immediately wash off any painted
surface.
Page 242 of 346
Chevrolet Express Owner Manual (GMNA-Localizing-U.S./Canada/Mexico-9967827) - 2017 - crc - 5/2/16
Vehicle Care 241
Headlamps
Composite Headlamp
1. High-Beam Headlamp
2. Low-Beam Headlamp
To r e m o v e t h e h e a d l a m p a s s e m b l yfrom the vehicle and access thebulbs:
1. Open the hood. SeeHood0217.
2. Remove the two bolts from theheadlamp assembly.
3. Lift the headlamp assembly torelease the lower tabs from theradiator support.
4. Turn the headlamp forward andupward to remove it from thegrille.
5. Disconnect the electricalconnector.
6. Turn the bulb counterclockwiseone-quarter turn to remove itfrom the headlamp assembly.
7. Install the new bulb into theheadlamp assembly andconnect the electricalconnector.
8. Reverse the steps to reinstallthe headlamp assembly.
To p r e v e n t h e a d l a m p v i b r a t i o nand shortened bulb life, besure to insert the headlamp
Page 243 of 346
Chevrolet Express Owner Manual (GMNA-Localizing-U.S./Canada/Mexico-9967827) - 2017 - crc - 5/2/16
242 Vehicle Care
assembly tabs in the slots atthe lower portion of thehousing.
Sealed-Beam Headlamp
1. Headlamp Retainer Screws
2. Headlamp Retainer
3. Sealed-BeamHeadlamp Bulb
To r e p l a c e o n e o f t h e s e b u l b s :
1. Remove the four screws (1)from the headlamp retainer (2).
Pull the retainer (2) out and setit aside.
2. Pull the bulb (3) forward to gainaccess to the electricalconnector.
3. Disconnect the electricalconnector (2) and remove theheadlamp bulb (1).
4. Reverse Steps 1–3toreinstallthe headlamp.
Front Turn Signal,
Sidemarker, and Parking
Lamps
1. Front Parking and TurnSignal Lamp
2. Front Sidemarker Lamp
To r e p l a c e t h e f r o n t t u r n s i g n a l ,sidemarker, and/or parking lampbulb(s):
Page 248 of 346
Chevrolet Express Owner Manual (GMNA-Localizing-U.S./Canada/Mexico-9967827) - 2017 - crc - 5/2/16
Vehicle Care 247
The vehicle may not be equippedwith all of the fuses, relays, andfeatures shown.
Fuses Usage
1ABSmotor
2ABSmodule
Fuses Usage
3Righttrailerstoplamp/Turnlamp
4–
5–
6Fuelsystemcontrolmodule/Ignition
7Bodycontrolmodule 5
8Bodycontrolmodule 7
9Bodycontrolmodule 4
10 Instrument cluster
11 Tr a i l e r w i r i n g
12 Interior rear visioncamera module
13–
14 Windshield washer
16 Horn
17 Transmission
18 A/C
Page 279 of 346
Chevrolet Express Owner Manual (GMNA-Localizing-U.S./Canada/Mexico-9967827) - 2017 - crc - 5/2/16
278 Vehicle Care
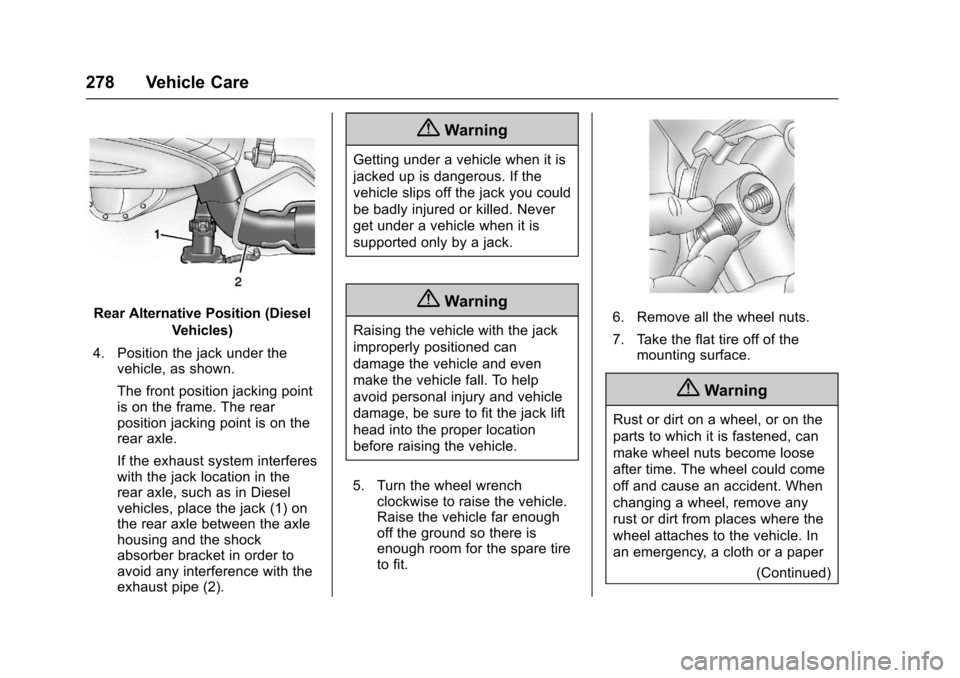
Rear Alternative Position (Diesel
Vehicles)
4. Position the jack under thevehicle, as shown.
The front position jacking pointis on the frame. The rearposition jacking point is on therear axle.
If the exhaust system interfereswith the jack location in therear axle, such as in Dieselvehicles, place the jack (1) onthe rear axle between the axlehousing and the shockabsorber bracket in order toavoid any interference with theexhaust pipe (2).
{Warning
Getting under a vehicle when it is
jacked up is dangerous. If the
vehicle slips off the jack you could
be badly injured or killed. Never
get under a vehicle when it is
supported only by a jack.
{Warning
Raising the vehicle with the jack
improperly positioned can
damage the vehicle and even
make the vehicle fall. To help
avoid personal injury and vehicle
damage, be sure to fit the jack lift
head into the proper location
before raising the vehicle.
5. Turn the wheel wrenchclockwise to raise the vehicle.Raise the vehicle far enoughoff the ground so there isenough room for the spare tireto fit.
6. Remove all the wheel nuts.
7. Take the flat tire off of themounting surface.
{Warning
Rust or dirt on a wheel, or on the
parts to which it is fastened, can
make wheel nuts become loose
after time. The wheel could come
off and cause an accident. When
changing a wheel, remove any
rust or dirt from places where the
wheel attaches to the vehicle. In
an emergency, a cloth or a paper
(Continued)
Page 289 of 346
Chevrolet Express Owner Manual (GMNA-Localizing-U.S./Canada/Mexico-9967827) - 2017 - crc - 5/2/16
288 Vehicle Care
Appearance Care
Exterior Care
Locks
Locks are lubricated at the factory.Use a de-icing agent only whenabsolutely necessary, and have thelocks greased after using. SeeRecommended Fluids andLubricants0305.
Washing the Vehicle
To p r e s e r v e t h e v e h i c l e ' s f i n i s h ,wash it often and out of directsunlight.
Caution
Do not use petroleum-based,
acidic, or abrasive cleaning
agents as they can damage the
vehicle's paint, metal, or plastic
parts. If damage occurs, it would
not be covered by the vehicle
warranty. Approved cleaning
products can be obtained from
(Continued)
Caution (Continued)
your dealer. Follow all
manufacturer directions regarding
correct product usage, necessary
safety precautions, and
appropriate disposal of any
vehicle care product.
Caution
Avoid using high-pressure
washes closer than 30 cm (12 in)
to the surface of the vehicle. Use
of power washers exceeding
8,274 kPa (1,200 psi) can result
in damage or removal of paint
and decals.
Caution
Do not power wash any
component under the hood that
has thisesymbol.
(Continued)
Caution (Continued)
This could cause damage that
would not be covered by the
vehicle warranty.
If using an automatic car wash,follow the car wash instructions. Thewindshield wiper and rear windowwiper, if equipped, must be off.Remove any accessories that maybe damaged or interfere with the carwash equipment.
Rinse the vehicle well, beforewashing and after, to remove allcleaning agents completely. If theyare allowed to dry on the surface,they could stain.
Dry the finish with a soft, cleanchamois or an all-cotton towel toavoid surface scratches and waterspotting.
Finish Care
Application of aftermarket clearcoatsealant/wax materials is notrecommended. If painted surfacesare damaged, see your dealer to