2017 AUDI TT ROADSTER horn
[x] Cancel search: hornPage 9 of 314

co
co
.... N
" N .... 0
" "' c:o
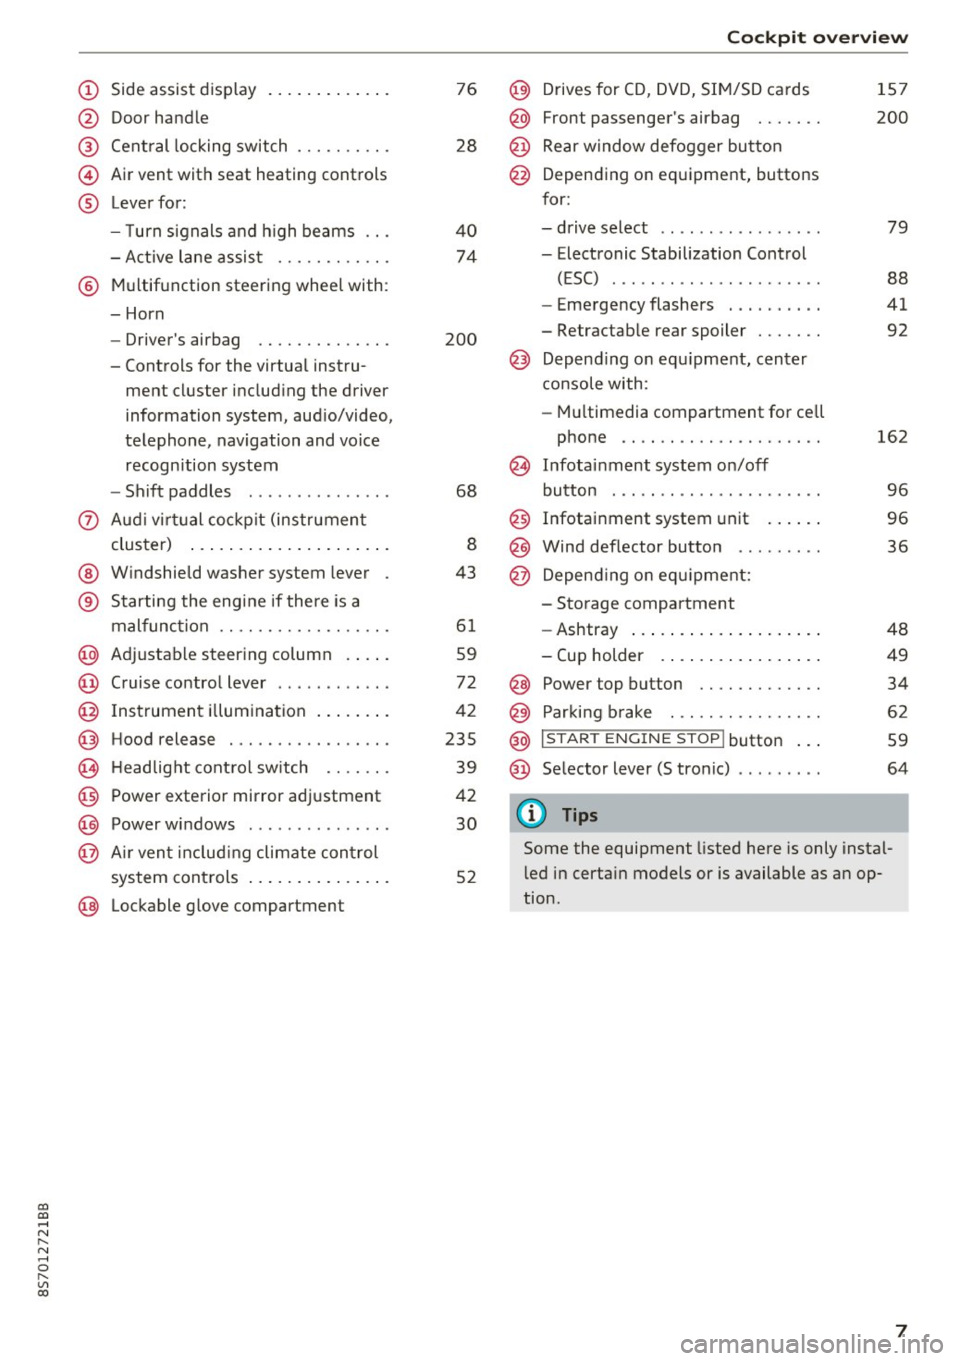
(!) Side assist display ..... ... .. .. .
@ Door handle
®
©
®
Cent ral locking switch
Air vent with seat heating controls
Lever for:
- T urn s ignals and h igh beams .. .
- Active lane assis t ......... .. .
® Multifunction steering wheel with :
- Horn
- Driver's ai rbag .. ......... .. .
- Controls for the virtual instru-
ment cluster includ ing the driver
information system, aud io/video,
telephone, navigation and voice
recogn ition system
- Shift paddles . .... ..... ... . .
0 Aud i v ir tu al co ckpit (instrument
cluster) ... .... .. .... ... .. .. .
@ W indshield washer system lever
® S tarting the engi ne if the re is a
mal func tion .. ........... .. .. .
@ Adjustab le st eering column . ... .
@ Cruise co ntrol lever .. ..... ... . .
@ Ins trument i llum ination ... .. .. .
@ Hood release . .... ......... .. .
0 H eadlight cont rol sw itch .... .. .
@ Power exterior mirror adjustment
@ Power windows . .... ..... ... . .
@ A ir ven t incl uding climate con trol
system controls ... .... ... .. .. .
@ Lockable g love compartment
76
28
40
74
200
68
8
43
6 1
59
72
42
235
39
42
30
52
Coc kpit o ve rv iew
@) Drives for CD, DVD, SI M/SD cards
@ Front passenger's ai rbag ...... .
@ Rear window defogger bu tton
@ Depending on equipment, buttons
for:
- drive select .. .. ............ .
- Electronic Stabilization Control
(ESC) ..... .. .. ............ .
- Emergency flashers . ...... .. .
- Retractab le rear spoiler ...... .
@ Depend ing on equ ipment , center
co nsole with:
- Mu ltimedia compartment for cell
phone .... .. .............. .
~ Infotai nment system on/off
button . .. .. .. .. ............ .
@ Infotainment system unit ... .. .
@ Wind deflector button ........ .
@ Depending o n eq uipment:
- Storage compartment
- Ashtray ... .. ... .. .. ..... .. .
- Cup holder .. ... .. .. ..... .. .
@ Power top button ............ .
@ Parking b rake . .. ............ .
@ I S TAR T ENGINE ST OP I butto n ...
@ Selector lever (S tronic)
@ Tips
1S7
200
79
88
41
92
162
9 6
96
36
48
49
34
62
59
64
Some the equipment listed here is only instal
l ed in certa in models or is available as an op
tion.
7
Page 28 of 314

Opening and clo sin g
LED and batteries in the remote control key
fr=-~=;;;;- --~
I
Fig . 15 Re mote contro l key : rem ov ing the ba ttery h olde r
F ig. 16 Re mote cont ro l key (re ar side ): re m ovi ng the bat
tery ho lder
LED in the remote control k ey
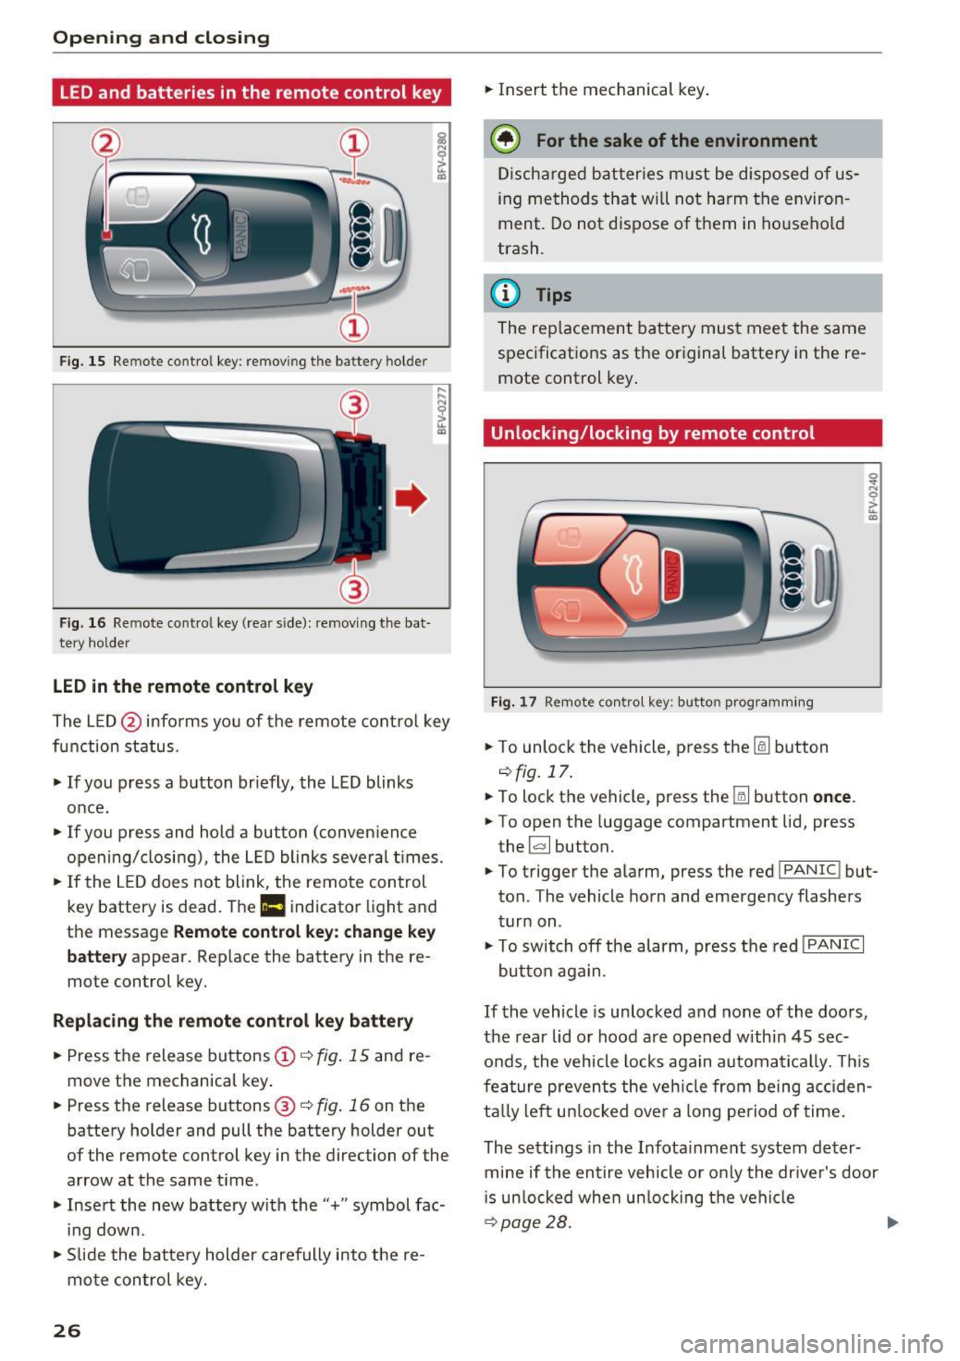
The LE D @ info rms you of the remote control key
function status .
.,. If you press a b utton briefly, the LED blinks
once.
.,. If you press and hold a button (conven ience
opening/closing), the LED blinks several t imes .
.,. If the L ED does not blink , the remote control
key battery is dead . The
Ill indicator light and
th e m essag e
Rem ote control key : cha nge ke y
b att ery
appea r. Rep lace the battery in the re
mote con trol key.
R eplacing th e remot e co ntrol k ey batt ery
.,. Press the release buttons@¢ fig. 15 and re
move the mechanical key .
.,. Pre ss the r ele as e buttons @¢
fig. 16 on th e
battery holder and pull the battery holde r out
of the remo te control key in the dire ction o f the
arrow at the same t ime .
.,. Insert the new battery with the"+" symbol fac·
ing down .
.,. Slide the batte ry holder carefully into the re
mote control key.
26 .,.
Insert the mechanical key .
@ For the sake of the environment
Discharged batter ies m ust be disposed of us
ing methods that wi ll not harm the environ
ment. Do not dispose of them in ho usehold
trash.
(D Tips
The rep lacement battery must meet the same
spec ificat ions as the or iginal battery in the re
mote control key .
Unlocking/locking by remote control
Fig. 17 Remot e con tro l key: butt on programming
.,. To unlock the vehicle , pr ess the lil button
¢fig.17 .
.,. To lock the vehicle, press th e Iii button once .
.,. To open the luggage compartment lid, press
the ~ button.
.,. To trigger the alarm, press the red
!PAN IC! but·
ton . The vehicle horn and emergency flashers
turn on .
.,. To switch off the alarm, press the red
! PANIC I
button aga in .
If the vehicle is unlocked and none of the doors,
the rear lid or hood are opened within 45 sec
onds, the vehicle locks again automatically . T his
fea ture prevents the veh icle from being acc iden
ta lly left un locked over a long period of time .
The sett ings in the Infota inment system deter·
mine if the entire vehicle o r only the dr iver's door
i s un locked whe n un locking the veh icle
¢ page 28. .,.
Page 34 of 314

Opening and closing
the equipment. Peop le can be injured or prop
erty can be damaged if struck when closing.
(D Tips
- For secu rity reasons, we recommend that
you clear the programmed buttons before
selling the vehicle.
- For additional information about Homelink,
v is it
www .homelink .com.
- For the Declaration of Conformity with the
provisions from the FCC in the United States
and Industry Canada, see¢
page 296 .
Operation
Applies to: ve hicles w ith garage doo r opener (Homeli nk)
Fig. 26 Contro l pa nel above the inter io r rearview mirror
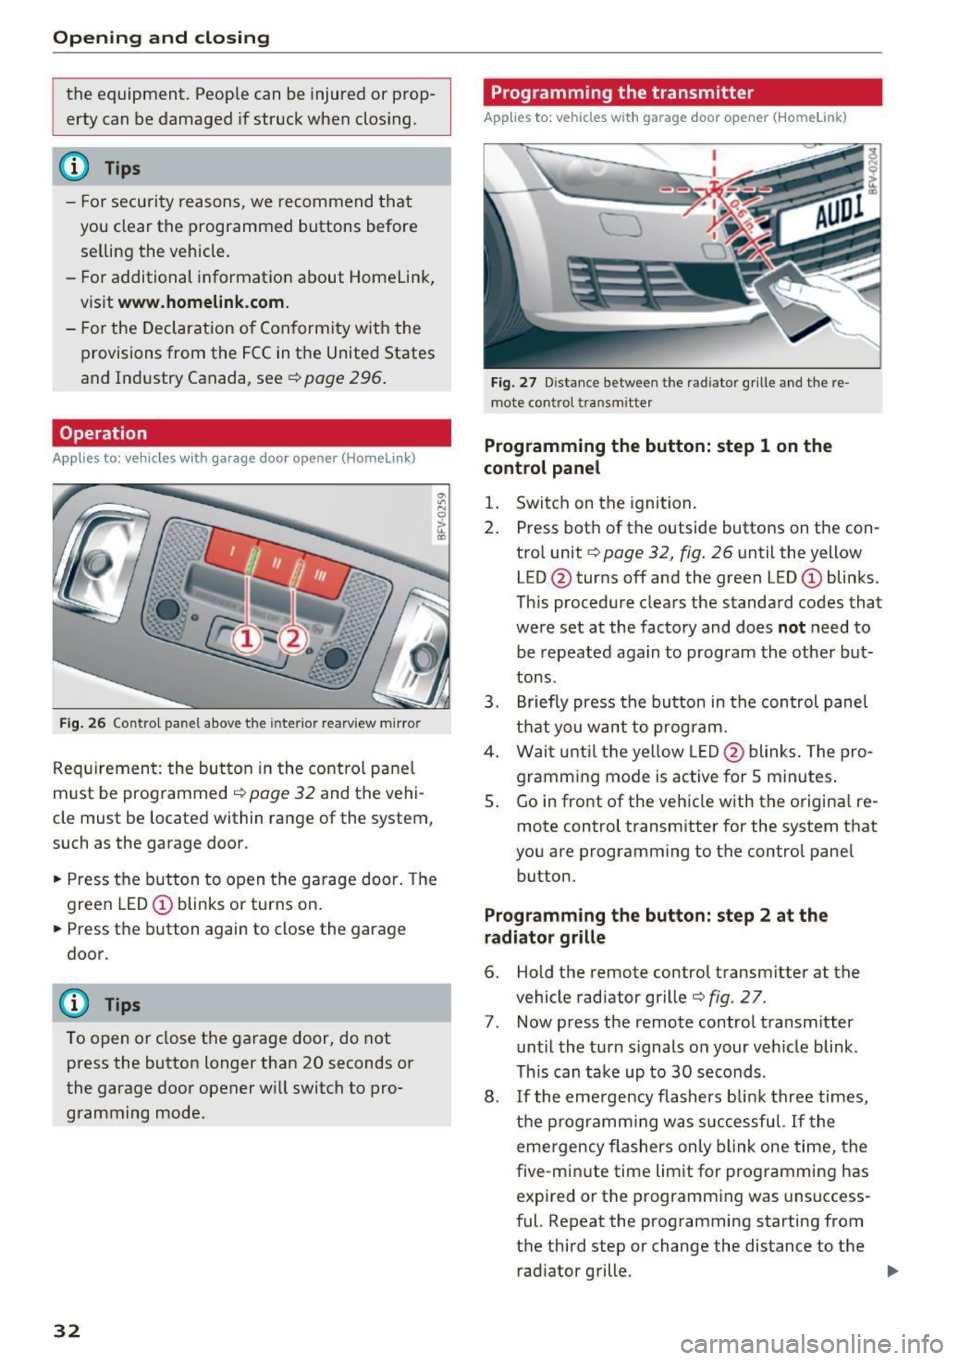
Requirement: the but ton in the control panel
m ust be programmed
i:!> page 32 and the vehi
cle must be located within range of the system,
such as the garage door .
.. Press the button to open the garage door. The
green LED
CD blinks or turns on.
.. Press the button again to close the garage
door.
(D} Tips
To open or close the garage door, do not
press the button longer than 20 seconds or
the garage door opener w ill switch to pro
gramming mode.
32
Programming the transmitter
App lies to : vehicles wit h garage door o pener (Horne link)
Fig. 27 D istance between the rad iator g rille and the re
mote contro l transm itter
Programming the button: step 1 on the
control panel
1. Switch on the ignition.
2. Press both of the outside buttons on the con
trol unit ¢
page 32, fig. 26 until the yellow
LED @turns off and the green LED
CD blinks.
This procedure clears the standard codes that
were set at the factory and does
not need to
be repeated again to program the other but
tons.
3. Briefly press the button in the control panel
that you want to program.
4. Wait until the yellow LED@blinks. The pro
gramming mode is active for S minutes.
5. Go in front of the vehicle w ith the origina l re
mote control transmitter for the system that
you are programming to the control panel button .
Programming the button: step 2 at the
radiator grille
6. Hold the remote control transmitter at the
vehicle radiator grille¢
fig. 27.
7 . Now press the remote control transm itter
until the turn signals on your veh icle blink .
This can take up to 30 seconds .
8. If the eme rgency flashers blink three times,
the programming was successful. If the
emergency flashers only blink one time, the
five -min ute time limit for programming has
expired or the programming was unsuccess
ful. Repeat the programming starting from
the third step or change the distance to the radiator grille.
Page 212 of 314

Airbag syste m
the system inspected immediately by your
authorized Audi dealer. It is possible that
the airbag will inflate when it is not sup
posed to, or will not inflate when it should.
A WARNING
If the front airbag inflates, a child without a
child restra int, or in a rearward-facing child
safety seat, or in a forward-facing child re
straint that has not been properly installed
w ill be seriously injured and can be killed.
- If you must install a rearward-fac ing child
seat on the front passenger seat because of
exceptional c ircumstances and the
PA SSEN
G ER AIR BAG OFF,;;
light does not appear
and stay on, have the airbag system inspect
ed by your Audi dealer.
- If, in exceptional circumstances, you must
install a forward-facing chi ld restraint on
the front passenger seat, always move the
seat into its rearmost pos ition in the seat's
fore and aft adjustment range, as far away
from the airbag as possible. The backrest
must be adjusted to an upright posit ion.
Make s ure that the PASSENGER AI R BAG
OFF ,;;
light comes on and stays on a ll the
t ime whenever the ignition is switched on.
A WARNING
If the PAS SENGER AIR BAG OFF~; light does
not go out when an adult is s itting on the
front passenger seat afte r taking the steps
described above, have the airbag system in
spected by your Audi dealer before transport
ing anyone on the front passenger seat.
(D Tips
If the capacitive passenger detection system
determines that the front passenger seat is
empty, the frontal airbag on the passenger
side w ill be turned off, and the
PA SSENGER
AIR BA G OFF ~;
light will stay on.
Repair, care and disposal of the airbags
Parts of the a irbag system are installed at many
d ifferent places on your Aud i. Instal ling, remov-
210
ing, servicing or repairing a part in an area of the
vehicle can damage a part of an airbag system
and prevent that system from work ing properly
i n a coll is ion.
There are some important things you have to know to make sure that the effectiveness of the
system will not be impaired and that discarded
components do not cause injury or pollute the
environment.
A WARNING
Improper care, servicing and repair proce
dures can increase the risk of personal injury
and death by preventing an airbag from de
p loying when needed or deploy ing an a irbag
unexpectedly:
-
- Never cover, obstruct, or change the steer
ing wheel ho rn pad or airbag cover or the in
strumen t panel or modify them in any way.
- Never attach any objects such as cup ho lde rs
or telephone mountings to the surfaces cov
ering the a irbag un its.
- For cleaning the horn pad or instr ument
panel, use only a soft, dry doth or one mois
tened w ith plain water. Solvents or cleaners
could damage the airbag cover or change
the st iffness or strength of the material so
that the airbag cannot deploy and protect proper ly.
- Never repair, ad just, or change any parts of
the airbag system.
- All work on the steering wheel, inst rument
panel, front seats or e lectr ica l system (in
cluding the installation of audio equ ipment,
cellular te lephones and CB radios, etc.)
m ust be perfo rmed by a qualified techn ician
who has the training and spec ial equipment
necessary.
- For any work on the airbag system, we
strong ly recommend tha t you see you r au
thori zed A udi dealer or qualified wo rkshop.
- Never modify the front bumper or pa rts of
the vehicle body.
- Always make sure that the side a irbag can
inflate w ithout interfe rence:
Page 285 of 314

CD
CD
.... N
" N .... 0 r--. V, co
Left engine compartment fuse assignment
Fig. 209 Engine compartment: fuse ass ignment
No. Equipment
Fl ESC control module
F2 ESC control module
F3 Engine control module
Engine cooling, engine components, auxili -
F4 ary heater coil re lay ( 1+2), secondary air
injection pump relay
FS E
ngine components, tank system
F6 Brake light sensor
F7 Engine components
F8 Oxygen sensor
F9 Engine components, exhaust door, glow
time control module
FlO Fuel injectors, fuel control module
Fll Auxiliary heater heating element 2
F 12 Auxiliary heater heating e
lement 3
F13 Automatic transmission cont rol module
FlS Horn
F16 Ignition coil
F17 ESC control module
, engine control mod-
ule
F18 Term inal 30 (reference voltage)
Fuses and bulbs
No . Equipment
Fl9 Windshield wipers
F20 Horn
F22 Terminal SO diagnos
is
F23 Starter
F24 Auxiliary heater heating element 1
F3 2 LED headlights
Bulbs
Message
Your vehicle is equ ipped with maintenance-free
headlights and tail lights . However, if a light bulb
needs to be replaced, p lease contact yo ur author
ized Audi dea ler or authorized Audi Service Facili
ty.
283
Page 304 of 314

Index
Fueling Fuel filler door emergency release . . . . . . 234
Fuel gauge . . . . . . . . . . . . . . . . . . . . . . . . . . . 8
Fuel tank capacity . . . . . . . . . . . . . . . . . . . 291
Opening the fuel filler door . . . . . . . . . . . . 233
With reserve canister (emergency fueling) 234
Fuses Assignment . . . . . . . . . . . . . . . . . . . . . . . . 282
Replacing . . . . . . . . . . . . . . . . . . . . . . . . . . 281
G
Garage door opener (Home link) . . . . . . . . . . 31
Garment hooks . . . . . . . . . . . . . . . . . . . . . . . . 49
Gasoline . . . . . . . . . . . . . . . . . . . . . . . . . . . . 231
Octane rating . . . . . . . . . . . . . . . . . . . . . . . 231
Recommendation ................ ... . 231
Generator (indicator light) . . . . . . . . . . . . . . . 13
Global commands (voice recognition
system) . . . . . . . . . . . . . . . . . . . . . . . . . . . . . 109
Glossary of tire and loading terminology . . 248
Glove compartment . . . . . . . . . . . . . . . . . . . . 49
Gross Vehicle Weight Rat ing (GVWR) . . . . . 290
H
Handsfree . . . . . . . . . . . . . . . . . . . . . . . . . . . 114
Headlight range control system . . . . . . . . . . 39
Headlight range control system (indicator
light) . . . . . . . . . . . . . . . . . . . . . . . . . . . . . . . . 16
Headlights . . . . . . . . . . . . . . . . . . . . . . . . . . . 40
Cleaning . . . . . . . . . . . . . . . . . . . . . . . . . . . 267
H eadlight range control system . . . . . . . . . 39
Washer system . . . . . . . . . . . . . . . . . . . . . . 43
Heated exterior mirrors . . . . . . . . . . . . . . . . . . . . . . 42
Rear window . . . . . . . . . . . . . . . . . . . . . . . . . 54
Seats . . . . . . . . . . . . . . . . . . . . . . . . . . . . . . . 54
Washer nozzles . . . . . . . . . . . . . . . . . . . . . . 43
Heating and ventilation system
Adjusting a ir vents . . . . . . . . . . . . . . . . . . . . 54
Hex socket . . . . . . . . . . . . . . . . . . . . . . . . . . . 272
High voltage warn ing label . . . . . . . . . . . . . 290
Hill descent control . . . . . . . . . . . . . . . . . . . . 68
Hill hold assist . . . . . . . . . . . . . . . . . . . . . . . . 63
also refer to Hill hold assist . . . . . . . . . . . . 63
Hold assist (hill) . . . . . . . . . . . . . . . . . . . . . . . 63
302
Home address . . . . . . . . . . . . . . . . . . . . 138, 142
Homelink (garage door opener) . . . . . . . . . . 31
Horn . . . . . . . . . . . . . . . . . . . . . . . . . . . . . . . . . 6
How many airbags does my vehicle have? . . 203
How safety belt pretensioners work . . . . . . 194
I
Ignition (indicator light) . . . . . . . . . . . . . . . . 13
Imbalance (wheels) . . . . . . . . . . . . . . . . . . . 254
Immobilizer . . . . . . . . . . . . . . . . . . . . . . . . . . 24
Important things to do before driving . . . . 181
Importing and exporting (contacts) . . . . . . 123
Improperly worn safety belts . . . . . . . . . . . 194
Indicator lights . . . . . . . . . . . . . . . . . . . . . . . . . 9
Airbag system . . . . . . . . . . . . . . . . . . . . . . 208
PASSENGER AIR BAG . . . . . . . . . . . . . . . . . 208
Infant seats . . . . . . . . . . . . . . . . . . . . . . . . . 223
Inflation pressure (tires) . . . . . . . . . . . . . . . 256
Input Using the MMI touch . . . . . . . . . . . . . . . 98, 99
Using the speller . . . . . . . . . . . . . . . . . . . . 102
Input level (media) . . . . . . . . . . . . . . . . . . . . 167
Inspection interval . . . . . . . . . . . . . . . . . . . . 245
Installing child safety seats Safety be lts . . . . . . . . . . . . . . . . . . . . . . . . 227
Instrument cluster . . . . . . . . . . . . . . . . . . . . . . 8
Instruments . . . . . . . . . . . . . . . . . . . . . . . . . . . 8
Adjusting the lighting . . . . . . . . . . . . . . . . . 42
Interior lighting . . . . . . . . . . . . . . . . . . . . . . . 41
Intermittent (windshield w ipers) . . . . . . . . . 43
Internet
refer to Audi connect . . . . . . . . . . . . . . . . . 12 7
Internet radio . . . . . . . . . . . . . . . . . . . . . . . . 161
iPod
refer to Aud i m usic interface . . . . . . . . . . . 162
iTunes tagging . . . . . . . . . . . . . . . . . . . . . . . 151
J
Joystick function (MMI)
101
Jukebox . . . . . . . . . . . . . . . . . . . . . . . . . . . . . 158
Jump -starting . . . . . . . . . . . . . . . . . . . . . . . . 284
Jumper cables . . . . . . . . . . . . . . . . . . . . . . . . 285