Page 49 of 266
a:,
a:,
...... N r--. N ...... 0
0
LL 00
~ Pull the power top headliner to the side in the
area by the rear head restraints
r:!> fig. 52.
~ Insert the short end of the emergency release
lever in the yellow sleeve on the power top sup
port
r:!> fig. 52.
~ Turn the emergency release key in the direction
of the arrow@ until the support is locked .
~ Put the emergency release key away@
r:!> page 44, fig. 42.
Power top
47
Page 50 of 266

Lights and Vision
Lights and Vision
Exterior lighting
Switching the lights on and off
Fig. 53 Instrument panel : headlig ht co ntrol switch
Light switch ·'t/;
T u rn the switch c::> fig. 53 to the co rresponding
position . When the lights are switched on, the :
00
:
symbo l turns on.
O -The lights are off or the daytime r unning
lights are on :
-USA mode ls: The daytime running lig hts are
activated when the light switch
c:) fig . 53 is in
the
O pos it ion or the AUTO position (only in
daylight cond it ions) . The daytime runn ing
l ights fu nction can be turned on a nd off in the
r ad io or MM I* menu
Exterior lighting
c:) page 49, c::> & .
-Canada mo del s: T he daytime runn ing lights are
activ ated when t he lig ht switch
c:) fig . 53 is in
t h e
o pos it ion, :oo : position or the AUTO pos i
tion (only in daylight condit ions). The dayt ime
runn ing lights fu nction cannot be tur ned off
c> & .
AUTO * -Automatic headlights switch on and off
depending on brightness, for example in twilight,
du ring ra in or i n tunne ls
c::> & .
;o o: -Side marker lights
fD -Low beam headlights
Fog lights /rear fog light (s)*
Press the appropriate button c::> fig. 53 :
}0 -Fog lights
O* -Rear fog light(s)
48 adaptive light*
When switched on
, adap tive ligh t ad ap ts to
curves in the roa d depending on the vehicle
speed and the steering ang le. Th is prov ides bet
ter light ing th rough th e curv e. The system oper
ates at speeds between approximately 6 mph (10 km/h) and 68 mph (110 km/h).
Static cornering light* (vehicles with adaptive
li ght) -the corne ring light switches on at spe eds
up to approximately 25 mph (40 km/h) when a
ce rtain steering wheel angle is reached or when a
turn signal is act ivated . The area to the side of
the veh icle is illuminated better when turning .
T he adaptive light and the cornering light only
funct ion when the switc h is in the AUTO position
(automat ic head lights*) .
A WARNING
- Daytime r unning lights and au tomatic head
lights* are o nly intended to ass ist the d river .
They do not relieve the d rive r of his res pon
sibility to check t he headlights and to tur n
t hem on m anually accordi ng to the curren t
light and visibili ty cond itions. For example,
fog cannot be detected by the light sen
sors*. So a lways switch on the headlights
io
unde r these weather conditions and when
driving in the dark .
- Crashes can happen when you cannot see
the road ahead and when you cannot be
seen by ot her motorists. Always tur n on the
headlights so that yo u can see ahead a nd so
that others can see yo ur ca r from the back .
- Please obey all laws w hen us ing the lighting
sys tems described here.
(D Note
The rear fog lights* shou ld only be turned on
i n accordance with traffic regu lation, as the
lights are bright for following traff ic.
{!) Tips
- The light sensor* for headlight contro l is lo
cated in the rear view m irror mount. You
should the refore not apply any stickers to .,.
Page 51 of 266

a:,
a:,
...... N
" N ...... 0
0
LL co
the windshield in this area in order to
prevent malfunctions or failures .
- Some exterior lighting functions can be ad
justed
c:, page 49.
- When you remove your key from the igni
tion while the vehicle's lights are turned on,
a buzzer sounds as long as the driver's door
is open.
- In cool or damp weather, the inside of the
headlights, turn signals and tail lights can
fog over due to the temperature difference
between the inside and outside. They will
clear shortly after switching them on. This does not affect the serv ice life of the light
ing .
- In the event of a light sensor malfunction,
the driver is notified in the instrument clus
ter display
c:, page 19.
Turn signals and high beam lever
The lever operates the turn signals, the high
beams and the headlight flasher.
Fig . 54 Turn signal and high beam lever
Turn signals¢¢
g N
0
~ CD
The turn signals activate when you move the lev
er into a turn signal position when the ignition is
switched on.
@ -right turn signal
@-left turn signal
The turn signal blinks three times if you just tap
the lever.
High beams and headlight flasher ~D
Move the lever to the corresponding position:
@ -high beams on
Lights and Vision
@-high beams off or headlight flasher
The indicator light
II in the instrument cluster
turns on.
Notes on these features
-The turn signals only work with the ignition
turned on. The indicator lights . or
II in the
instrument cluster also blink.
- After you have turned a corner, the turn signal
switches off automatically.
- The
high beam works only when the headlights
are on. The indicator light
II in the instrument
cluster illuminates when the high beams are
on.
- The
headlight flasher works only as long as you
hold the lever -even if there are no lights
switched on . The indicator light
II in the in
strument cluster illuminates when you use the
headlight flasher.
WARNING
Do not use the high beam or headlight flasher
if you know that these could blind oncoming
traffic.
Adjusting exterior lighting
The functions are selected in the radio or MMI* .
.,. Select: !CAR I function button> Exterior light
ing .
Or
.,. Select: 1-C~A ~ R-.l function button > Car systems*
control button > Vehicle settings > Exterior
lighting .
Coming home (light when leaving car)*,
Leaving home (light when unlocking car)*
The coming home function illuminates the area
around the vehicle when the ignition is switched
off and the driver's door is opened. Depending on
vehicle equipment, the function can be switched on and off or the length of time the lights remain
on* can be adjusted .
The
leaving home function illuminates the area
around the vehicle when unlocking it. This func-
tion can be switched on and off.
ll>
49
Page 52 of 266

Lights and Vision
The co ming home and leaving h ome functions
only operate when it is dark and t he light switch
is in the AUTO position
~ page 48, fig. 53.
Auto headlights*
W hen the light swi tch is in the A UTO ~ page 48
position, the sw itch-on po int of the lights can be
cha nged in the automatic driving light function.
Daytime running lights
USA models :
You can switch the daytime r unning
lights
on and off .
Canada models: The funct ion cannot be tu rned
off .
It is activated automatically each t ime the ig
n ition is switched on.
Tra vel mode*
The headlight beam is asymmetrical. This pro
vides stronger illumination on the side of the
road on which you are driving.
If you are driving
in a cou ntry that dr ives on the opposite side of
the road from you r own country, this will cause
g lar e fo r oncom ing dr ive rs . To p revent glare:
- Travel mode must be selected in veh icles w ith
Xenon headlights* .
- In vehicles with halogen headlights, certain
areas of the headlight lenses must be cove red
with waterproof adhesive covers that prev ent
l ight from passing through. For more informa
tion, ple ase see you r auth orized Audi dea le r or
a uthorized repair fa ci lity .
When travel mode is ac tiva ted, a disp lay in
t he dr ive r inf orm ation sys tem in dicates this
e ach t ime yo u sw itch the ignition on .
50
Emergency flashers
Fig. 55 Center console: emergency flashe r switc h
The emergency flashers makes other motorists
aware that you or your ve hicle are in an emergen
cy situat io n .
.. Press the switch~¢
fig. 55 to turn the emer-
gency flashers on or off .
When the emergency flashers are on, all four
turn s ignals b link at the same time. The turn sig
nal indicator lights
RB i n the instrument clus
ter, as well as the light in t he emergency flasher
switch
IA] blink likewise .
You can indicate a lane change or a turn when the
emergency flashers are switched on by using the
turn signal lever . The emergency flashers stop
tempora rily .
The emergency flashe rs a lso work when the igni
tion is turned off.
The emergency flashers will turn on automatical
l y if you a re in an accident where the airbag has
deployed .
@ Tips
You should turn on the emergency flashers
when:
-you are the last vehicle standi ng in a traffic
jam so that any other vehicles com ing can
see yo u, or when
- yo ur ve hicle has broken down or yo u are in
an eme rge ncy sit uat ion, or w hen
-your vehicle is be ing towed by a tow tru ck or
if yo u are towing another vehicle behin d
you.
Page 53 of 266

a:,
a:,
...... N
" N ...... 0
0
LL co
Interior Lighting
Front/rear interior lights
Fig. 56 Fro nt headliner: interio r lighting controls
Fig. 57 Re ar headliner: rear reading lights
@Interio r ligh ts
Press the button @. The LED in the button illu
minates.
If the LED i lluminates, the interior lighting is
controlled automatically.
@ Front /rear read ing light s
To turn a reading light on/off, press the b utton
~ <=>fig. 56 or <=>fig. 57.
Lights and V ision
Instrument illumination
Th e basic brightness of the illumination for the
instruments, the center console and the display
can be adjusted .
Fig. 58 Instrument ill umina tion
• Press the knob to release it.
• Turn the knob toward"- " or"+" to reduce or in
crease the brightness.
• Press the knob again to return it to its original
position .
@ Tips
The instrument illumination (for dials and
needles) lights on when the ignition
is switch
ed on and the vehicle lights are turned off. As
the daylight fades, the illumination of the di
a ls likewise dims automatically and will go
out completely when the outside light is very
low. This featu re is meant to remind yo u to
switch on the headlights when outside light
conditions become poor.
Vision
Adjusting the exterior mirrors
Fig. 59 Driver's door: knob for the exterior mirro rs
Turn the knob to the desired position :
51
Page 54 of 266

Lights and Vision
Q/P -Adjusting the left/right exterior mirror.
Move the knob in the desired direction.
4ill -Heat ing the m irro r glass depending on the
ou tside temperat ure*.
.9 -Folding exterior mirrors* . In the Infotain
men t system, you can select if the mirrors fold in
automatically when you lock the veh icle
¢page 32.
Front passenger's ext erior mirror tilt
function*
To help you see the c urb when ba cking in to a
p ar king space, the surface of the mirror tilts
slightly. Fo r this to happen, the knob must be in
the posit ion for the front passenger's outs ide
mirror.
You can adjust the ti lted mi rror sur fa ce by turn
ing the knob in the desired direction. When you
move out of reverse and into another gear, the
new mirror position is stored and assigned to the
key yo u are us ing.
The mirror goes back into its original position
once yo u drive forward faster than 9 mph
(15 km/h) or tu rn the ignition
off .
A WARNING
Curved mir ror surfaces (convex or spherical *)
increase your f ield of view. Remember that
vehicles o r other objects will appear sma ller
and farther away than when seen in a flat mir
ror. If you use t his mirror to est imate d istan
ces of following vehicles whe n cha nging
lanes, yo u co uld estimate incor rec tly and
c ause an accident .
(D Note
-If the mir ror housing was moved by force
(fo r example, by r unning into an object
when maneuvering the vehi cle), the mirror
must be folded all the way in using the pow
er fold ing function . The mirror housing
must not be moved back into place by hand
beca use this would impair the f unction o f
the mirro r mechan ism.
- If you wash the ve hicle in an automatic car
wash, you m ust fold the exterior mi rrors in
52
to reduce the r isk o f damage to the m irrors .
Never fold power folding exterior mirrors*
by hand . On ly fold them in and out using
the power controls.
(D Tips
- If the power adjusting function malfunc
tions, the glass in both mirrors can be ad
justed by pressing on the edge of it by hand.
- The e xterior m irro r settings are sto red w it h
the memory funct ion *¢
page 61.
Dimming the mirrors
Fig. 60 Automatic dim ming rearview m ir ror *
Manual dimming rearview mirror
.,. Pull the lever on the bot tom of the m irror bac k.
Automat ic dimming rearvi ew mirror*
.,. Press the button@¢ fig. 60. The indicator
light @ turns on . The rea rview and ex ter ior*
m irrors d im au tomat ically when light shines on
them, for examp le from headlights on a veh icle
t o the rea r.
~ WARNING
Electrolyte fluid can leak from automatic d im
ming mirrors if the glass is broken . Electro
lyte fluid can irritate sk in, eyes and respirato
ry system.
- Repeated or prolonged exposure to electro
lyte can cause irritat ion to the resp iratory
system, especially among people with ast h
ma or other respiratory conditions. Get
fresh air immediate ly by leaving the vehicle
or, if that is not possible, open windows a nd
d oors all the way.
llll>
Page 55 of 266

a:,
a:,
...... N
" N ...... 0
0
LL co
-If electrolyte gets into the eyes, flush them
thoroughly with large amounts of clean wa
ter for at least 15 minutes; med ical atten
t ion is recommended .
- If electrolyte contacts skin, flush affected
area with clean water for at least 15 mi nutes and then wash affected area w ith
soap and water; medical attention is recom
mended. Thoroughly wash affected clothing
and shoes before reuse.
- If swallowed and person is conscious, rinse mouth with water for at least 15 m inutes.
Do not induce vomiting unless instructed to
do so by medical profession al. Get medical
attent ion immed iate ly.
(D Note
Liquid elect rolyte leaking from broken m irror
glass will damage any p lastic surfaces it
comes in co ntact wi th. C lean up sp illed ele c
t rolyte immediately with clean water and a
sponge .
@ Tips
-Switch ing off the dimming f unction of the
i nside rear v iew mirror also deactivates the
automatic dimming function of the exterior
mirrors.
- Automat ic dimming for the mirror on ly op
erates properly if the light striking the in
s ide mirror is not hindered by other objects.
- The automatic dimming mirrors do not dim
when the interior lighting is turned on or
the reverse gear is selected.
Sun visors
T.__~l
F ig . 61 Dr ive r's side: su n visor
Lights and V ision
The sun visors for the driver and passenger can
be pulled out of their brackets in the center of
the vehicle and turned towards the doors(!).
T he m irror light switches on when the cover ove r
the vanity mirror @opens.
Windshield wipers
Switching the windshield wipers on
®
Fig . 62 W inds hield w iper leve r
Move the windshield wiper lever to the corre
sponding position:
@ -Windshield wiper off
(!) -Interval mode. To extend/shorten the w iper
in tervals, move the switch @to the left/right. In
vehicles with a rain sensor* the wipers tu rn on in
the rain once the vehicle speed exceeds approxi mately 2 mph (4 km/h) . The higher the sensitivi
ty of the rain sensor* is set (switch @to the
right), the earlier the windshield wipers react to
moisture on the w indshield. In some models, you
can switch ra in sensor mode off and switch inter
mittent mode on in the MM I* . Select :
ICARI func
t ion button
> Car system s* control button > Driv
er assist > Rain sen sor.
In intermittent mode,
yo u can adjust the interval time using the@
switch.
@ -S low w ip ing
@ -Fast w iping
@ -Single wipe
® -Clean the w indshie ld. To eliminate wate r
droplets , the w indshield wiper performs one af
terwipe operation after several seconds whi le
driving. You can switch this function off by mov-
ing the lever to position ® within 10 seconds of ..,.
53
Page 56 of 266

Lights and Vi sion
the afterwipe operation . The afterwipe function
is reactivated the next time the ignition is switch
ed on.
Clean ing the headlights*. The headlight washer
system* operates on ly when the headlights are
on. If you move the lever to position @, the
headlights are washed in intervals .
A WARNING
-The rain sensor is only intended to assist the
dr iver. The driver is still responsib le for
ma nually switching the wipers o n accord ing
to the v is ibility conditions.
- The w indshield may not be treated with wa
ter-repelling windsh ield coating agents . Un
favorable conditions, such as wetness, dark ness, low sun, can result in increased glare.
Wiper b lade chatter is also possible.
- Properly f unctioning windsh ie ld wiper
blades are required for a clear view and safe
dr iv ing¢
page 54, Replacing windshield
wiper blades.
(D Note
- In the case of frost, check whethe r th e
windsh ie ld wiper b lades are froze n to the
windsh ield. Sw itching on the winds hield
wipers can damage the wiper blades!
- Prior to using a ca r w ash, the win dshi eld
wiper system m ust be switched o ff (lever in
pos ition @). This helps to p revent uninten
tiona l switching on and damage to the
windshie ld wiper system .
@ Tips
-The windshield wipers are switched off
when the ignition is turned off. Activate the
windsh ie ld wipers after the ign ition is
switched back on by moving the windsh ield
wiper leve r to any pos it ion.
- Wo rn or dirty windshield wiper blades result
i n streak ing. This can affect the ra in sensor*
funct ion. Check your windshield wiper
blades regularly .
- The washe r fluid nozzles of the windshield
washer system are heated at low tempera
tures when the ignition is on .
54
-When stopping temporari ly, (e.g. at a traf
fic light) the set speed of the windshield
wipers is automatically reduced by one
speed.
Cleaning windshield wiper blades
Clean the windshie ld w iper blades when they be
gin to leave streaks. Use a soft cloth and glass
cleaner to clean t he windsh ie ld w iper blades .
.,. Place the windshie ld w iper arms in the service
position. Refer to¢
page 54.
.,. Lift the w iper arm away from the front w indow.
'
A WARNING
Di rty windshie ld w iper blades can impa ir yo ur
v iew. This can lead to accidents.
Replacing windshield wiper blades
F ig. 63 Re moving w indsh ield w ipe r blade
Wiper serv ice position /blade replacement
posit ion
0, ... M 9
~ m
.,. Switch the ignit io n off and move the w indshield
w iper lever to position©¢
page 53, fig. 62.
The windsh ie ld wipers move in to the service po
si tion.
.,. To br ing the wipers back into the origina l posi
tion, switch the ignition on and press the wind
shie ld wiper lever .
You can also turn the se rvice posit ion on o r off in
the radio/ MM!* :
.,. Switch the windshie ld w ipers off (posit ion @
¢ page 53, fig . 62).
.,. Select: !CAR ! function button> Win dshiel d
wipers
> Ser vice position > on /off . Or
 1
1 2
2 3
3 4
4 5
5 6
6 7
7 8
8 9
9 10
10 11
11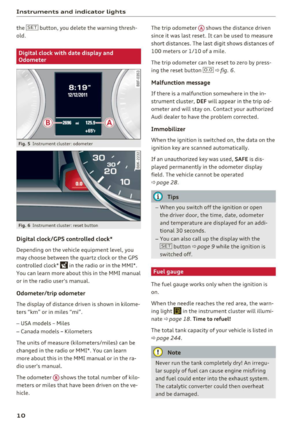 12
12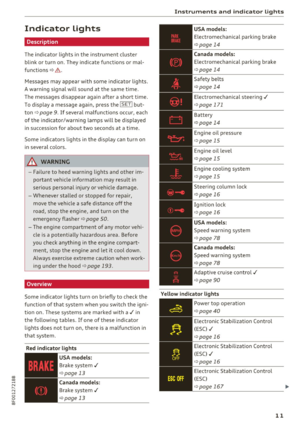 13
13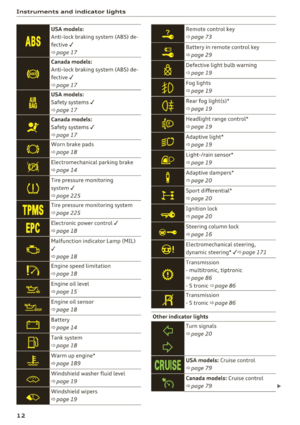 14
14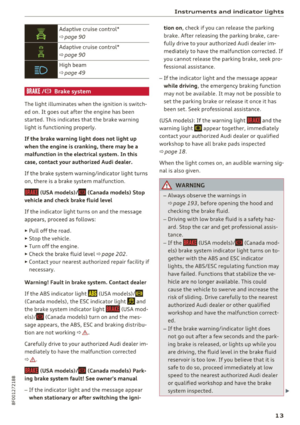 15
15 16
16 17
17 18
18 19
19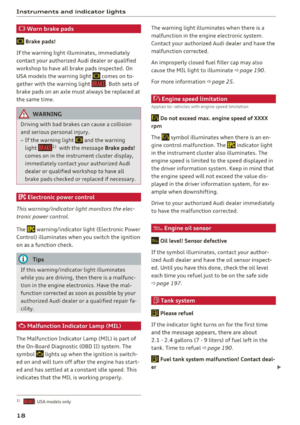 20
20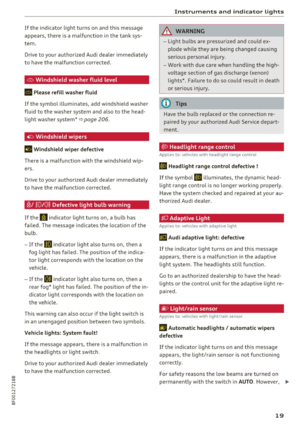 21
21 22
22 23
23 24
24 25
25 26
26 27
27 28
28 29
29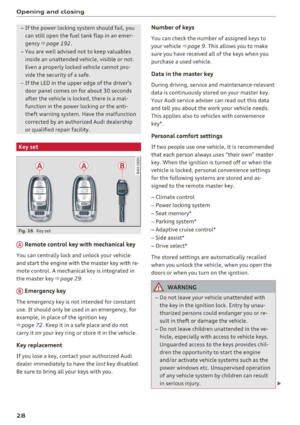 30
30 31
31 32
32 33
33 34
34 35
35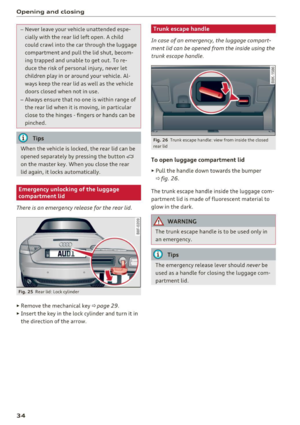 36
36 37
37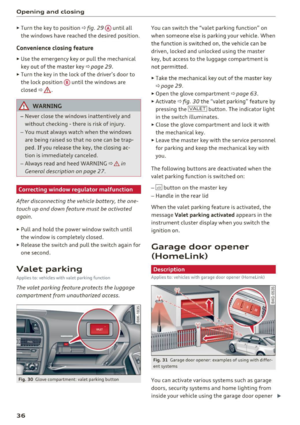 38
38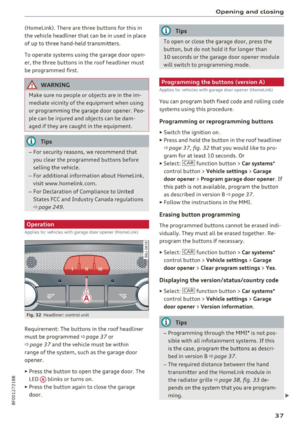 39
39 40
40 41
41 42
42 43
43 44
44 45
45 46
46 47
47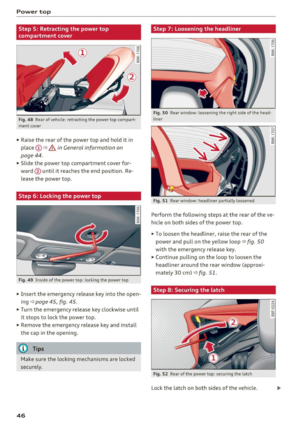 48
48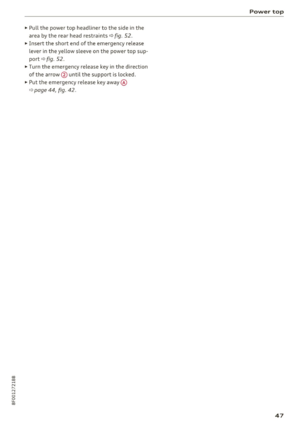 49
49 50
50 51
51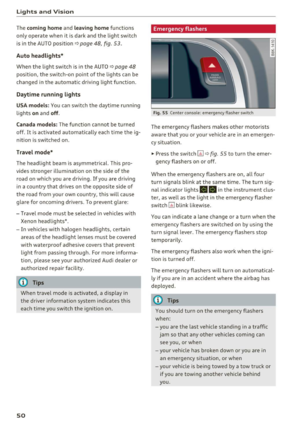 52
52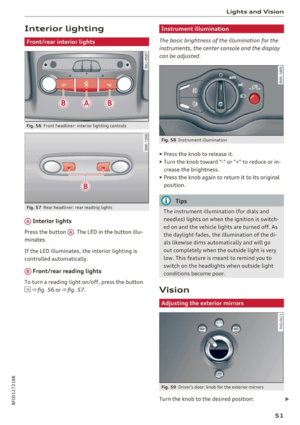 53
53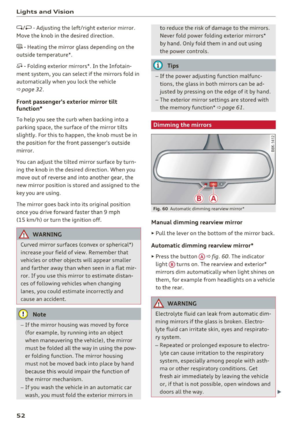 54
54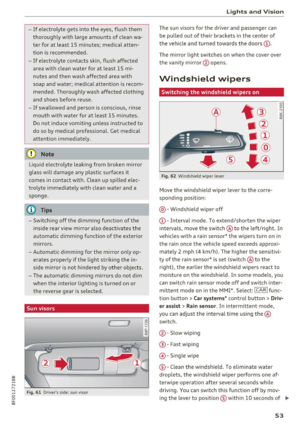 55
55 56
56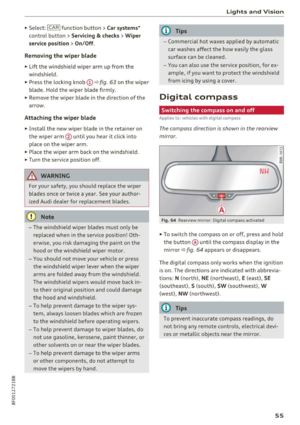 57
57 58
58 59
59 60
60 61
61 62
62 63
63 64
64 65
65 66
66 67
67 68
68 69
69 70
70 71
71 72
72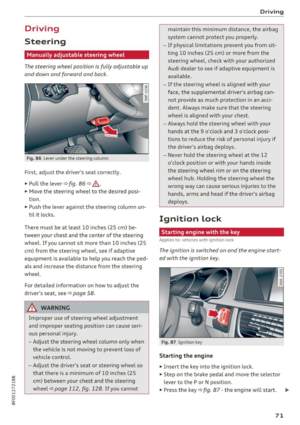 73
73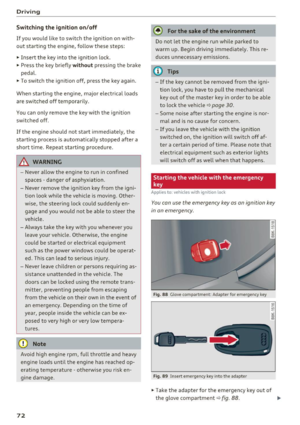 74
74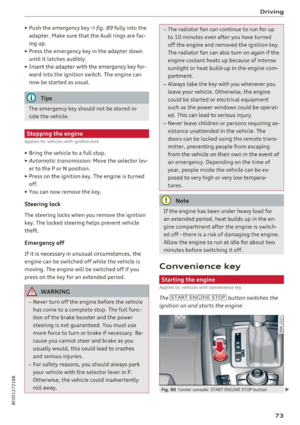 75
75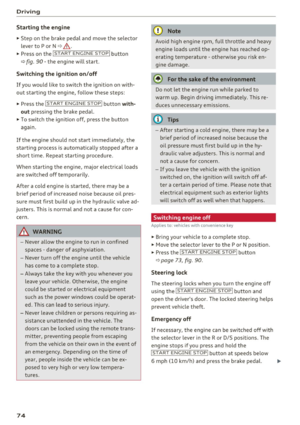 76
76 77
77 78
78 79
79 80
80 81
81 82
82 83
83 84
84 85
85 86
86 87
87 88
88 89
89 90
90 91
91 92
92 93
93 94
94 95
95 96
96 97
97 98
98 99
99 100
100 101
101 102
102 103
103 104
104 105
105 106
106 107
107 108
108 109
109 110
110 111
111 112
112 113
113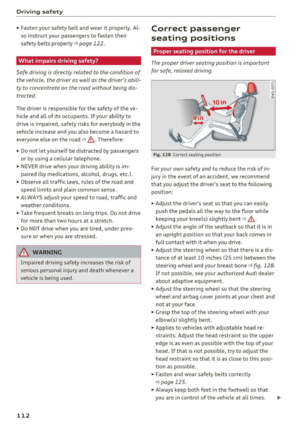 114
114 115
115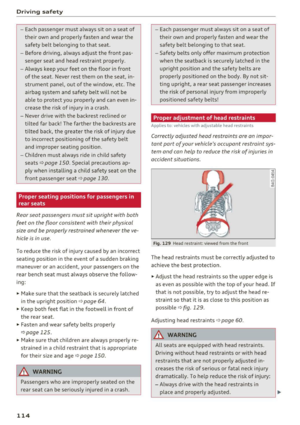 116
116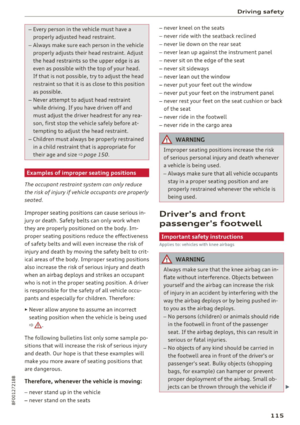 117
117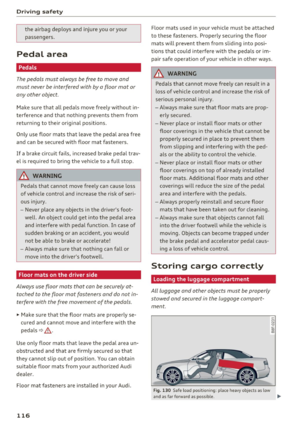 118
118 119
119 120
120 121
121 122
122 123
123 124
124 125
125 126
126 127
127 128
128 129
129 130
130 131
131 132
132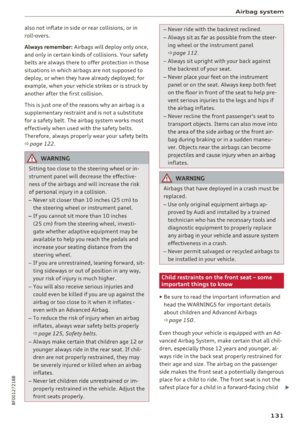 133
133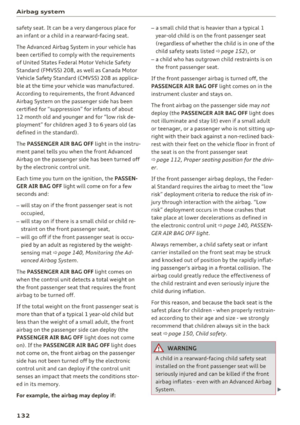 134
134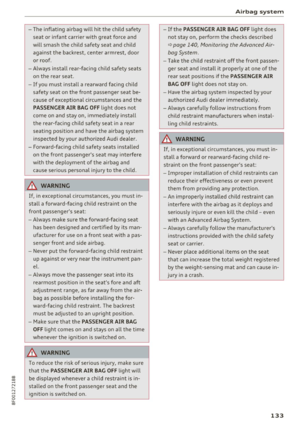 135
135 136
136 137
137 138
138 139
139 140
140 141
141 142
142 143
143 144
144 145
145 146
146 147
147 148
148 149
149 150
150 151
151 152
152 153
153 154
154 155
155 156
156 157
157 158
158 159
159 160
160 161
161 162
162 163
163 164
164 165
165 166
166 167
167 168
168 169
169 170
170 171
171 172
172 173
173 174
174 175
175 176
176 177
177 178
178 179
179 180
180 181
181 182
182 183
183 184
184 185
185 186
186 187
187 188
188 189
189 190
190 191
191 192
192 193
193 194
194 195
195 196
196 197
197 198
198 199
199 200
200 201
201 202
202 203
203 204
204 205
205 206
206 207
207 208
208 209
209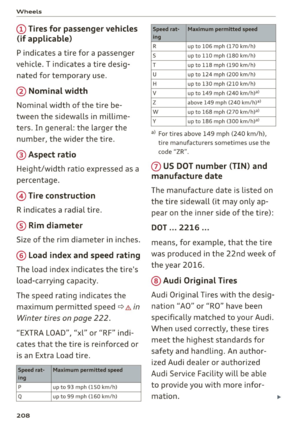 210
210 211
211 212
212 213
213 214
214 215
215 216
216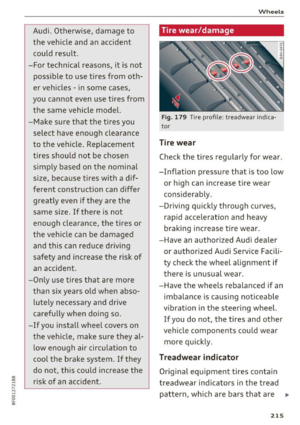 217
217 218
218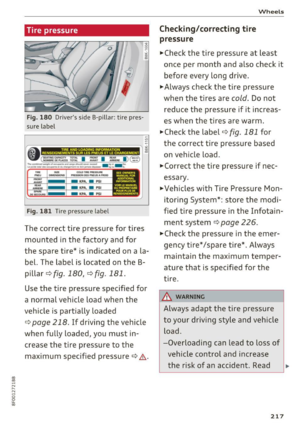 219
219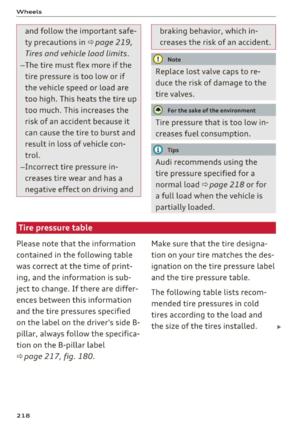 220
220 221
221 222
222 223
223 224
224 225
225 226
226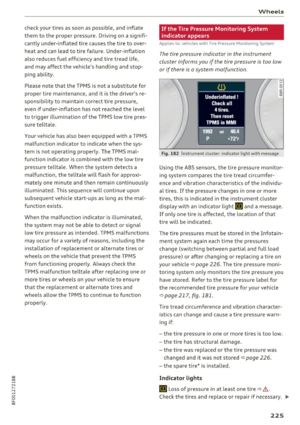 227
227 228
228 229
229 230
230 231
231 232
232 233
233 234
234 235
235 236
236 237
237 238
238 239
239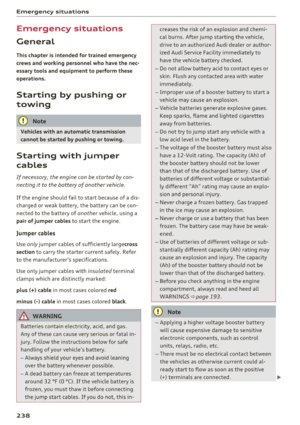 240
240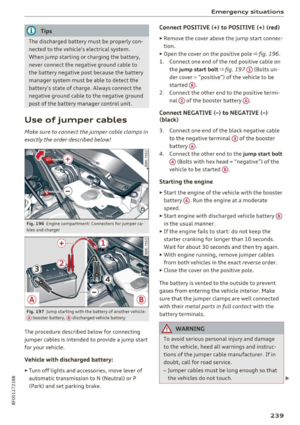 241
241 242
242 243
243 244
244 245
245 246
246 247
247 248
248 249
249 250
250 251
251 252
252 253
253 254
254 255
255 256
256 257
257 258
258 259
259 260
260 261
261 262
262 263
263 264
264 265
265