Page 65 of 289
MIRRORS
Inside Day/Night Mirror
A single ball joint mirror is provided in the vehicle. It is
a twist on mirror that has a fixed position at the
windshield. The mirror installs on the windshield but-
ton with a counterclockwise rotation and requires no
tools for mounting. The mirror head can be adjusted up,
down, left, and right for various drivers. The mirror
should be adjusted to center on the view through the
rear window.
Headlight glare from vehicles behind you can be re-
duced by moving the small control under the mirror to
the night position (toward the rear of the vehicle). The
mirror should be adjusted while the small control under
the mirror is set in the day position (toward the
windshield).
Adjusting Rearview Mirror
3
UNDERSTANDING THE FEATURES OF YOUR VEHICLE 63
Page 66 of 289

Outside Mirrors
To receive maximum benefit, adjust the outside mirrors
to center on the adjacent lane of traffic and a slight
overlap of the view obtained from the inside mirror.
NOTE:The passenger side convex outside mirror will
give a much wider view to the rear, and especially of the
lane next to your vehicle.
WARNING!
Vehicles and other objects seen in the passenger
side convex mirror will look smaller and farther
away than they really are. Relying too much on your
passenger side mirror could cause you to collide
with another vehicle or other object. Use your
inside mirror when judging the size or distance of a
vehicle seen in the passenger side mirror.
Power Mirrors
The power mirror controls are located on the center
console.
The power mirror controls consist of mirror select knob
and a four-way mirror control switch. To adjust a
mirror, turn the power mirror control knob to the left or
right to select the mirror that you want to adjust.
Using the mirror control switch, push on any of the four
arrows for the direction that you want the mirror to
move.
Power Mirror Control
64 UNDERSTANDING THE FEATURES OF YOUR VEHICLE
Page 67 of 289

Folding Mirrors
The exterior mirrors are hinged to allow the mirror to
pivot forward or rearward to help avoid damage. The
mirror has three detent positions: full forward, full
rearward and normal.
Heated Mirrors
These mirrors are heated to melt frost or ice.
This feature can be activated whenever you
turn on the mirror defroster. The Door
Demist/Defrost button is located in the
switch bank above the Climate Controls.
SEATS
Seats are a part of the Occupant Restraint System of the
vehicle.
WARNING!
• It is dangerous to ride in a cargo area, inside or
outside of a vehicle. In a collision, people riding
in these areas are more likely to be seriously
injured or killed.
• Do not allow people to ride in any area of your
vehicle that is not equipped with seats and seat
belts. In a collision, people riding in these areas
are more likely to be seriously injured or killed.
• Be sure everyone in your vehicle is in a seat and
using a seat belt properly.
Folding Mirrors
3
UNDERSTANDING THE FEATURES OF YOUR VEHICLE 65
Page 68 of 289

Manual Seats
Forward And Rearward Adjustment
The adjusting bar is at the front of the driver seat, near
the floor. Pull the bar upward to move the seat forward
or rearward. Release the bar once the seat is in the
desired position. Then, using body pressure, move
forward and rearward on the seat to be sure that the
seat adjusters have latched.
Seat Height Adjustment
In order to achieve the ideal driving position, the height
of the seats can also be adjusted. Tools are required to
make this height adjustment. Contact your authorized
dealership.
Recliner Adjustment
The recliner lever is located on the outboard side of the
seat. To recline the seat, lean forward slightly, pull the
recliner lever upward, lean backward until the seat is in
the desired position, and release the lever. To return the
seat to its full upright position, lean forward, pull the
recliner lever upward and hold it until the seat returns
to its full upright position.
Seat Adjustment Bar
66 UNDERSTANDING THE FEATURES OF YOUR VEHICLE
Page 69 of 289

WARNING!
•Adjusting a seat while driving may be dangerous.
Moving a seat while driving could result in loss of
control which could cause a collision and serious
injury or death.
•Seats should be adjusted before fastening the seat
belts and while the vehicle is parked. Serious
injury or death could result from a poorly adjusted
seat belt.
(Continued)
WARNING! (Continued)
•Do not ride with the seatback reclined so that the
shoulder belt is no longer resting against your chest.
In a collision you could slide under the seat belt,
which could result in serious injury or death.
Non-Adjustable Head Restraints
The non-adjustable head restraints are form fitted into
the upper structure of the seatback and are designed to
reduce the risk of injury by restricting head movement
in the event of a rear impact. The seatback should be
properly adjusted to an upright position where the head
restraint is positioned as close as possible to the back of
your head.
WARNING!
Be certain that the seatback is locked securely into
position. Otherwise, the seat will not provide the
proper stability for passengers. An improperly
latched seatback could cause serious injury.
Recline Lever
3
UNDERSTANDING THE FEATURES OF YOUR VEHICLE 67
Page 70 of 289
TO OPEN AND CLOSE THE DECKLID
CAUTION!
•To prevent possible damage, do not slam the
decklid to close it. Use a firm downward push at
the center of the decklid to ensure the decklid
latch is fully engaged.
• During normal vehicle operation, the luggage
compartment (located rear of the engine) can
reach temperatures above 149 °F (65 °C). Do not
transport objects in the luggage compartment that
may be damaged at such temperatures. Do not
place aerosol cans in the luggage compartment.
To open the decklid:
1. Open the drivers side door. 2. Pull the decklid release lever located on the rear of
the drivers door sill.
Decklid Release Lever
68 UNDERSTANDING THE FEATURES OF YOUR VEHICLE
Page 71 of 289
3. Move to the rear of the vehicle and lift the decklid. 4. Lift upward on the decklid prop rod to release itfrom the stowage retainer.
Decklid Lift Point Location
Decklid Prop Rod Location
1 — Decklid Prop Rod
2 — Stowage Retainer Location
3
UNDERSTANDING THE FEATURES OF YOUR VEHICLE 69
Page 72 of 289

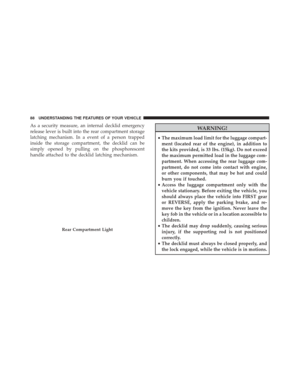
5. Place the decklid prop rod in the decklid slot tosecure the decklid in the open position.WARNING!
•The maximum load limit for the luggage compart-
ment, in addition to the kits provided, is 33.1 lbs.
(15kg). Do not exceed the maximum permitted
load in the luggage compartment. When accessing
the rear luggage compartment, do not come into
contact with engine, or other components, that
may be hot and could burn you if touched.
• Access the luggage compartment only with the
vehicle stationary. Before exiting the vehicle, you
should always place the vehicle into FIRST gear
or REVERSE, apply the parking brake, and re-
move the key from the ignition. Never leave the
key fob in the vehicle or in a location accessible to
children.
• The decklid may drop suddenly, causing serious
injury, if the supporting rod is not positioned
correctly.
• The decklid must always be closed properly, and
the lock engaged, while the vehicle is in motions.
Decklid Prop Rod Slot
70 UNDERSTANDING THE FEATURES OF YOUR VEHICLE