2016 VOLVO XC90 T8 door lock
[x] Cancel search: door lockPage 383 of 546

STARTING AND DRIVING
}}
381
Press in the rear section of the door and release it.
Open the door.
Pull off the charging socket's protective cover and place it in the holder on the insideof the door. Be sure that the protective cov-er's rubber plug faces down to help keep thecover from falling out of the holder.
Put the cover back in position and close the doorin reverse order.
Stopping hybrid battery charging
Stop hybrid battery charging by unlocking the vehicle, disconnecting the charging cable fromthe vehicle's charging socket and then unplug-ging the cable from the 120-/240-volt socket.
NOTE
Always unlock the vehicle to stop the charg- ing process before disconnecting the charg-ing cable from the vehicle's charging socketand then unplugging it from the120-/240-volt socket. The cable must be disconnected from the vehicle's charging socket before it isunplugged from the 120-/240-volt socketto help prevent damage to the chargingsystem.
Unlock the vehicle with the remote key.
Press the release button on the charge cou- pler to release it and disconnect the couplerfrom the vehicle's charging socket. Removethe cable from the vehicle. Put the socket'scover back in place and close the chargerdoor.
Disconnect the cable from the 120-/240-volt socket. Stow the cable in the storage compartment under the cargo area floor.
Page 385 of 546

STARTING AND DRIVING
}}
383
4. The charging cable's coupler will lock onto
the charging socket and charging will begin within approx. 10 seconds. The approximateremaining charging time and charging statuswill be displayed in the instrument panel. Seealso the article "Hybrid battery charge sta-tus." Charging will be temporarily interrupted if the vehicle is unlocked: •If a door is opened, charging will restart within 2 minutes.
• if no door is opened, the vehicle will auto-matically relock and charging will restartafter 1 minute.
NOTE
Charging status is shown in the instrument panel, which goes dark after a period of time.Reactivate the instrument panel by: •pressing the brake pedal
• opening one of the doors
• putting the ignition in mode
I ( without
pressing the brake pedal , turn the start
knob to START and release it).
CAUTION
Never disconnect the charging cable from the 120-/240-volt socket while charging is inprogress. This could damage the socket. Always stop the charging process (by unlock- ing the vehicle) and disconnect the chargingcable from the vehicle's charging socket before disconnecting the other end from the
120-/240-volt socket being used.
During the charging process, condensation may form under the vehicle, which is normal and iscaused by cooling the hybrid battery.
Related information
• Hybrid battery charge status (p. 385)
• Charging the hybrid battery (p. 383)
• Hybrid battery charging cable (p. 375)
• Stopping hybrid battery charging (p. 381)
Charging the hybrid battery In addition to the conventional fuel tank, the XC90 T8 Twin Engine Plug-in Hybrid is alsoequipped with a rechargeable lithium-ion hybridbattery.
The hybrid battery is recharged using a charging cable located in a storage compartment underthe floor of the cargo area. See also the article"Charging cable."
WARNING
The hybrid electrical system in your vehicle uses high voltage electrical current. Any dam-age to this system or to the hybrid batterymay result in the danger of overheating, fire,or serious injury. If the vehicle is involved in acollision or is subjected to flooding, fires, etc.,have it inspected by a trained and qualifiedVolvo service technician. Prior to this inspec-tion, the vehicle should be parked outdoors ata safe distance from any building or poten-tially flammable materials.
The hybrid battery's charging time depends on the charging current used.
Page 387 of 546

STARTING AND DRIVING
}}
385
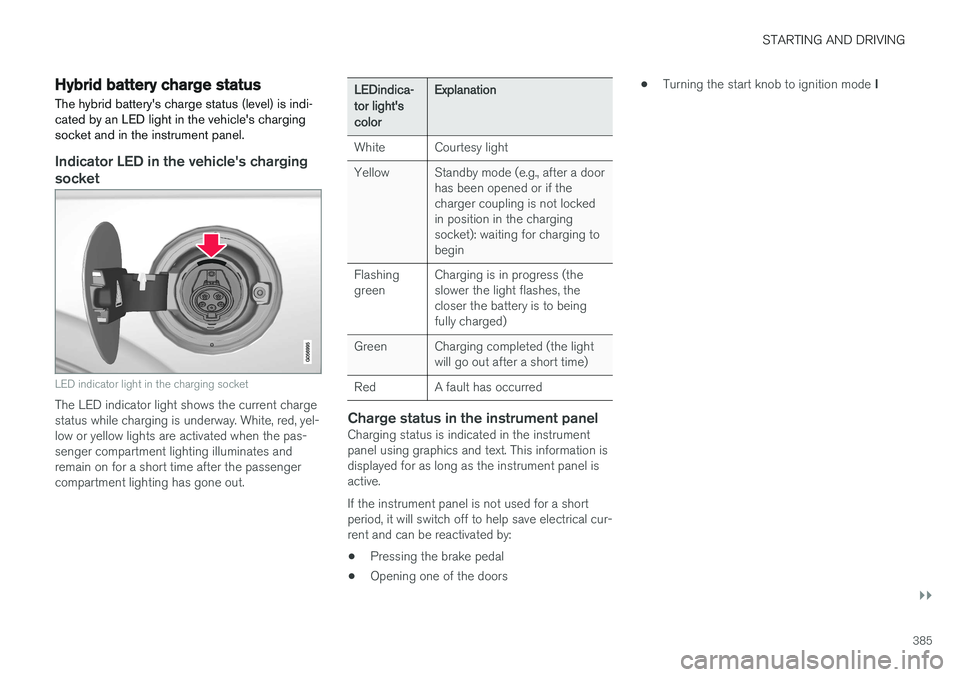
Hybrid battery charge status The hybrid battery's charge status (level) is indi- cated by an LED light in the vehicle's chargingsocket and in the instrument panel.
Indicator LED in the vehicle's charging socket
LED indicator light in the charging socket
The LED indicator light shows the current charge status while charging is underway. White, red, yel-low or yellow lights are activated when the pas-senger compartment lighting illuminates andremain on for a short time after the passengercompartment lighting has gone out.
LEDindica- tor light'scolorExplanation
WhiteCourtesy light
YellowStandby mode (e.g., after a door has been opened or if thecharger coupling is not lockedin position in the chargingsocket): waiting for charging tobegin
Flashing greenCharging is in progress (the slower the light flashes, thecloser the battery is to beingfully charged)
GreenCharging completed (the light will go out after a short time)
RedA fault has occurred
Charge status in the instrument panelCharging status is indicated in the instrument panel using graphics and text. This information isdisplayed for as long as the instrument panel isactive. If the instrument panel is not used for a short period, it will switch off to help save electrical cur-rent and can be reactivated by:
• Pressing the brake pedal
• Opening one of the doors •
Turning the start knob to ignition mode
I
Page 399 of 546

STARTING AND DRIVING
}}
397
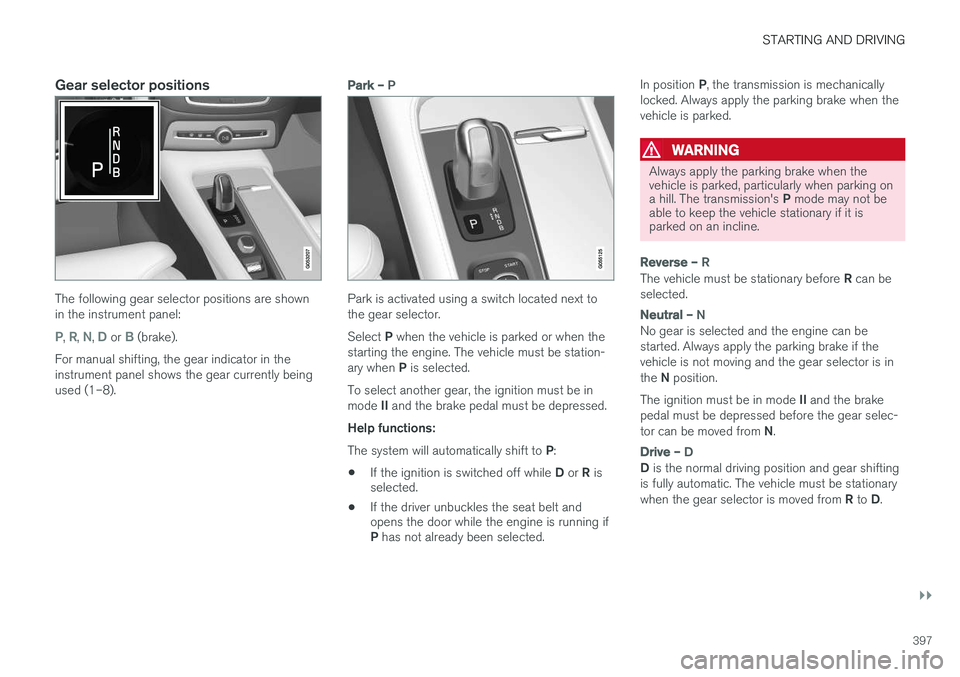
Gear selector positions
The following gear selector positions are shown in the instrument panel:
P, R, N, D or B (brake).
For manual shifting, the gear indicator in the instrument panel shows the gear currently beingused (1–8).
Park – P
Park is activated using a switch located next to the gear selector. Select P when the vehicle is parked or when the
starting the engine. The vehicle must be station- ary when P is selected.
To select another gear, the ignition must be inmode II and the brake pedal must be depressed.
Help functions: The system will automatically shift to P:
• If the ignition is switched off while
D or R is
selected.
• If the driver unbuckles the seat belt and opens the door while the engine is running if P
has not already been selected. In position
P, the transmission is mechanically
locked. Always apply the parking brake when the vehicle is parked.
WARNING
Always apply the parking brake when the vehicle is parked, particularly when parking on a hill. The transmission's P mode may not be
able to keep the vehicle stationary if it is parked on an incline.
Reverse – R
The vehicle must be stationary before R can be
selected.
Neutral – N
No gear is selected and the engine can be started. Always apply the parking brake if thevehicle is not moving and the gear selector is in the N position.
The ignition must be in mode II and the brake
pedal must be depressed before the gear selec-tor can be moved from N.
Drive – D
D is the normal driving position and gear shifting
is fully automatic. The vehicle must be stationary when the gear selector is moved from R to D.
Page 506 of 546

MAINTENANCE AND SERVICING
504
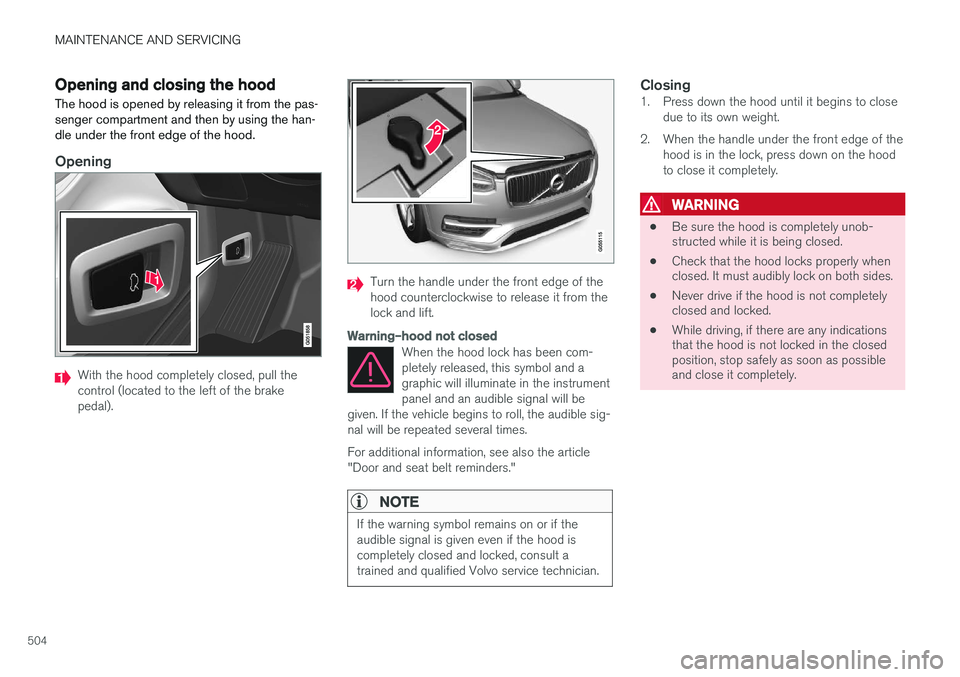
Opening and closing the hood The hood is opened by releasing it from the pas- senger compartment and then by using the han-dle under the front edge of the hood.
Opening
With the hood completely closed, pull the control (located to the left of the brakepedal).
Turn the handle under the front edge of the hood counterclockwise to release it from thelock and lift.
Warning–hood not closed
When the hood lock has been com- pletely released, this symbol and agraphic will illuminate in the instrumentpanel and an audible signal will be
given. If the vehicle begins to roll, the audible sig-nal will be repeated several times. For additional information, see also the article "Door and seat belt reminders."
NOTE
If the warning symbol remains on or if the audible signal is given even if the hood iscompletely closed and locked, consult atrained and qualified Volvo service technician.
Closing1. Press down the hood until it begins to close due to its own weight.
2. When the handle under the front edge of the hood is in the lock, press down on the hood to close it completely.
WARNING
• Be sure the hood is completely unob- structed while it is being closed.
• Check that the hood locks properly whenclosed. It must audibly lock on both sides.
• Never drive if the hood is not completelyclosed and locked.
• While driving, if there are any indicationsthat the hood is not locked in the closedposition, stop safely as soon as possibleand close it completely.
Page 514 of 546

||
MAINTENANCE AND SERVICING
512•
Wash off the dirt from the underside (wheel housings, fenders, etc).
• In areas of high industrial fallout, more fre-quent washing is recommended.
CAUTION
• During high pressure washing, the spray mouthpiece must never be closer to thevehicle than 13" (30 cm). Do not sprayinto the locks.
• Dirt, snow, etc., on the headlights canreduce lighting capacity considerably.Clean the headlights regularly, for exam-ple when refueling.
Special laminated panoramic roof cau-
tions:
• Always close the laminated panoramicroof and sun shade before washing yourvehicle.
• Never use abrasive cleaning agents onthe laminated panoramic roof.
• Never use wax on the rubber sealsaround the laminated panoramic roof.
NOTE
When washing the car, remember to remove dirt from the drain holes in the doors and sills.
Automatic car washes
•We do NOT recommend washing your car in an automatic wash during the first fewmonths (because the paint will not havehardened sufficiently).
• An automatic wash is a simple and quick wayto clean your car, but it is worth rememberingthat it may not be as thorough as when youyourself go over the car with sponge andwater. Keeping the underbody clean is mostimportant, especially in the winter. Someautomatic washers do not have facilities forwashing the underbody.
NOTE
Condensation may form temporarily on the inside of the lenses of exterior lights such asheadlights or taillights. This is normal and thelights are designed to withstand moisture.Normally, condensation will dissipate after thelights have been on for a short time.
CAUTION
When using an automatic car wash in which the vehicle has to be able to roll freely, theauto-hold brake function must be deactivated.If this is not done, the brakes will automati-cally be applied when the vehicle is stationary. To deactivate this function:
1. Drive the vehicle into the car wash
2. Turn off the auto-hold function using the
control on the center console
3. Turn off the parking brake's automatic function in the center display's Top view (tap
Settings, tap My CarElectric
Parking Brake and deselect Auto
Activate Parking Brake)
4. Put the gear selector in N
5. Switch off the ignition by turning the start knob to STOP and holding it in this posi-
tion for at least 4 seconds
The vehicle will then be able to roll freely.
Page 540 of 546

INDEX
538
L
Labelslist of 522
location of 521
Laminated panoramic roof 106, 107 Lane Departure Warning settings 340
Lane Departure Warning (LDW) 338, 342
Lane Keeping Aid 338, 340, 342 settings 340
LATCH anchors 78
Leather care 513
Lighting panel 140
Load anchoring eyelets 220
Loading the vehicle 208, 215, 449
Locking 242, 243
Locks and alarm 226
Low beam bulb, replacing 498
Low beams 142, 143
Low Speed Control 399
M
Maintenance 472 hoisting the vehicle 502
performed by the owner 472
Malfunction indicator light 125
Manual front seat adjustment 162
Media player 420, 421 compatible file formats 429
Media player (infotainment system) 424Menus instrument panel 151, 153, 154, 156
Mirrors defroster 195
power door 105
retractable 105
Mirrors, rearview mirror 110
Modem 437Motor oil checking 506, 507
MP3 files 429
Multifunctional front seats 165, 166
MY CAR 111, 112
N
Navigation system voice commands 124
Net cargo 217
O
Occupant safety 60
Occupant weight sensor 84
Octane recommendations 362
Odometer 96Oilchecking 506, 507
Oil quality 530
On-board diagnostics 472
On-board Diagnostic socket 26
On Call Roadside Assistance 14
Opening the hood 504
Options 26
Outside temperature sensor 116
Overhead courtesy lighting 148
Overheating, engine 357
Page 542 of 546

INDEX
540Registering child restraints 70
Remote key 235, 240
immobilizer 231
range 235
replacing the battery 232
Remote updates 475
Replacing bulbs 496
Replacing fuses 483, 484, 489, 493
Reporting safety defects 61
Roadside Assistance 14
Road sign information (RSI) 304, 305, 306
Rollover Protection System (ROPS) 327
Roll Stability Control (RSC) 327
S
Safety, occupant 60
Safety defects, reporting 61
Safety locks, child 228
Safety mode 87Seat adjusting the passenger's seat from the
driver's seat 164
Seat belt reminder 67
Seat beltsAutomatic locking retractor/Emergency
locking retractor 70
buckling 65
pretensioners 64, 65
reminder 67
securing child restraint systems 72, 74, 77
unbuckling 65
use during pregnancy 62
using 64
Seats rear 169
Sensus 22 Service connected service booking 475
Settings view categories 112
resetting 115
system settings 114
Shiftlock override 396
Side door mirrors 105
Side impact airbags 93 SiriusXM ®
Satellite radio
traffic information 411, 412, 413
Snow chains 451
Snow tires 451Sound settings media 428
ringtones 419
Sound settings, audio system 404, 428 Specifications bulbs 501
Speed camera alert 305
Speed limiter 298, 299, 304 automatic 300, 302
deactivating/reactivating 303
starting/activating 299
Spin control 323
Stability system 323 sport mode 324
Start and lock system type designations 230
Starting and driving 346
Starting the engine 372Starting the vehicle after a crash (crash mode) 87, 88
Start inhibitor (immobilizer) 231
Steel grid in cargo area 219
Steering wheel 160 adjusting 161
heated 197
horn 160
keypad 160