2016 VOLVO XC90 T8 phone
[x] Cancel search: phonePage 157 of 546
INSTRUMENTS AND CONTROLS
155
Handling a saved message
In expanded form, some messages have two but- tons for booking service or reading the owner'smanual. Booking service:
–With the message in expanded form, tapRequest appoint./Call to make
Appointment13 to book a service/repair
appointment. >
Request appoint.: the Appointmentstab will open in the app and create a request for a service/repair appointment.
Call to make Appointment: the phone
app will start and initiate a call to your pre- ferred retailer to make a service/repairappointment.
Reading the owner's manual:
–With the message in expanded form, tapOwner's manual to read the section of the
owner's manual related to the message.
> The owner's manual will open in the cen- ter display and provide information related to the message.
Messages stored in the app will be erased auto-matically each time the engine is started.
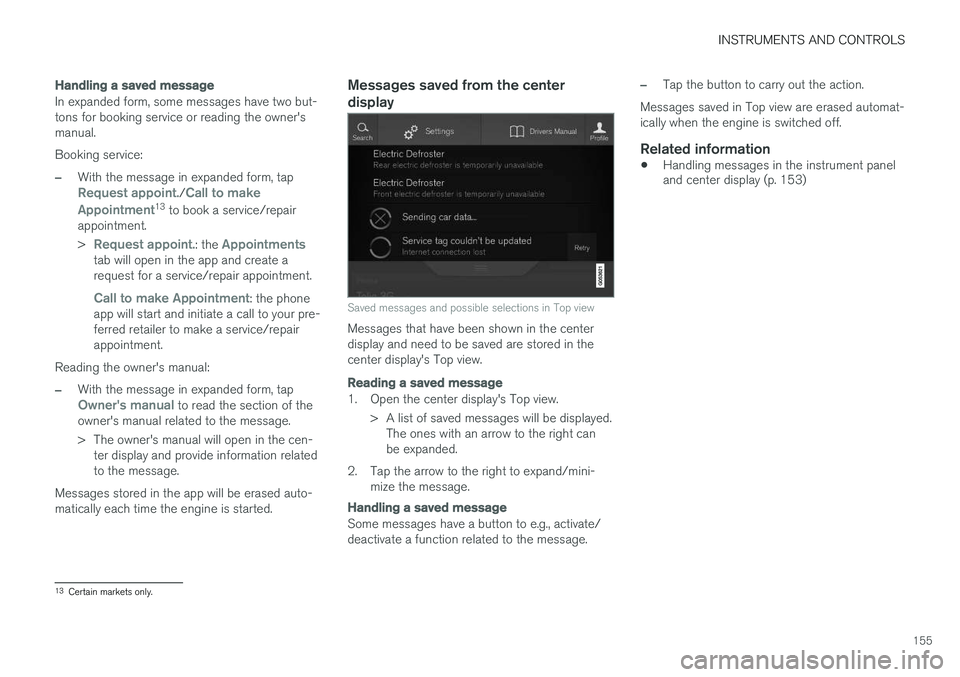
Messages saved from the center display
Saved messages and possible selections in Top view
Messages that have been shown in the center display and need to be saved are stored in thecenter display's Top view.
Reading a saved message
1. Open the center display's Top view. > A list of saved messages will be displayed.The ones with an arrow to the right can be expanded.
2. Tap the arrow to the right to expand/mini- mize the message.
Handling a saved message
Some messages have a button to e.g., activate/ deactivate a function related to the message.
–Tap the button to carry out the action.
Messages saved in Top view are erased automat- ically when the engine is switched off.
Related information
• Handling messages in the instrument panel and center display (p. 153)
13
Certain markets only.
Page 162 of 546
INSTRUMENTS AND CONTROLS
* Option/accessory, for more information, see Introduction.
160
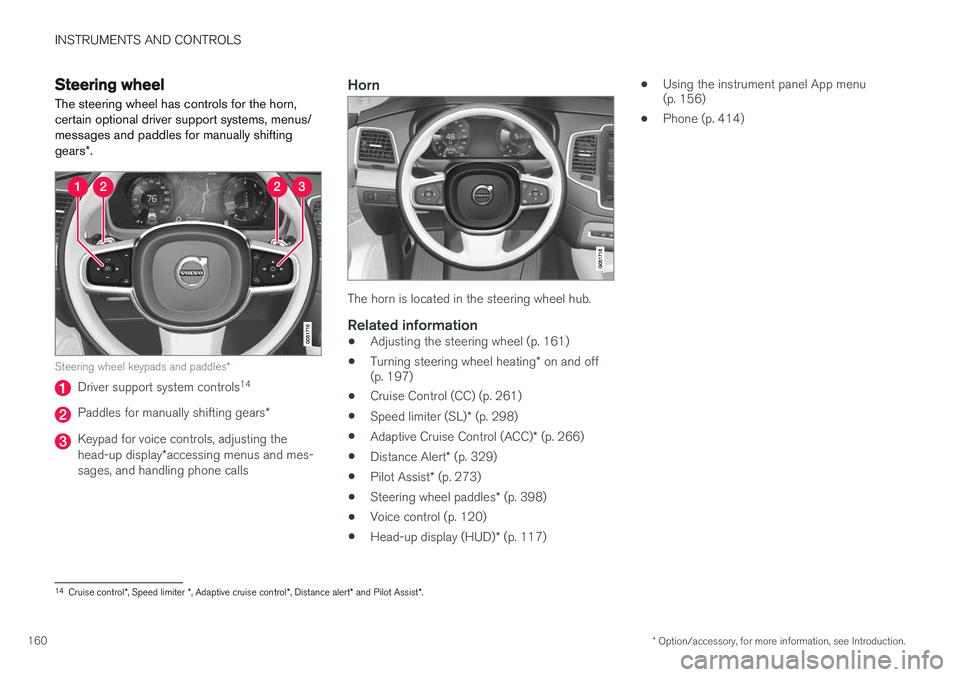
Steering wheel The steering wheel has controls for the horn, certain optional driver support systems, menus/messages and paddles for manually shifting gears *.
Steering wheel keypads and paddles *
Driver support system controls14
Paddles for manually shifting gears
*
Keypad for voice controls, adjusting the head-up display*accessing menus and mes-
sages, and handling phone calls
Horn
The horn is located in the steering wheel hub.
Related information
• Adjusting the steering wheel (p. 161)
• Turning steering wheel heating
* on and off
(p. 197)
• Cruise Control (CC) (p. 261)
• Speed limiter (SL)
* (p. 298)
• Adaptive Cruise Control (ACC)
* (p. 266)
• Distance Alert
* (p. 329)
• Pilot Assist
* (p. 273)
• Steering wheel paddles
* (p. 398)
• Voice control (p. 120)
• Head-up display (HUD)
* (p. 117) •
Using the instrument panel App menu (p. 156)
• Phone (p. 414)
14
Cruise control *, Speed limiter *, Adaptive cruise control *, Distance alert * and Pilot Assist *.
Page 186 of 546

CLIMATE
* Option/accessory, for more information, see Introduction.
184
Starting and stopping preconditioning
Preconditioning heats/cools the passenger com- partment prior to driving. Please note that thecharging cable must be connected.
Starting/stopping from the centerdisplay
The preconditioning button in the Parking climate tab
in Climate view.
1. Open Climate view in the center display. 2. Tap
Parking climate .
The window for seat/steering wheel heating in Climate view's Parking climate tab
3. Tap the boxes to select if seat/steering
wheel heating is to be activated/deactivated when preconditioning starts.
4. Tap
Preconditioning.
> Preconditioning starts/stops and the indi- cator lights in the buttons will be on/off.
NOTE
Full preconditioning is only possible when the vehicle's charging cable is connected. In other cases, the passenger compartment can be cooled for 3 minutes in warm weather. This function is started from the
Parking
climate tab in the center display's Climate
view.
The vehicle's doors and windows should be closed during preconditioning.
Starting from a cell phone *Starting preconditioning and checking the cur-rent settings can be done from a cell phone withthe Volvo On Call mobile app. Preconditioningheats the passenger compartment to a comforta-ble temperature or cools the compartment to thecurrent ambient temperature. If the vehicle is equipped with the optional Engine Remote Start (ERS), the air conditioningcan be used to pre-cool the passenger compart-ment to a comfortable temperature.
Related information
•Setting the parking climate (preconditioning) timer (p. 182)
• Activating/deactivating the parking climatetimer (p. 181)
• Hybrid battery charging cable (p. 375)
Page 211 of 546
LOADING AND STORAGE
}}
209
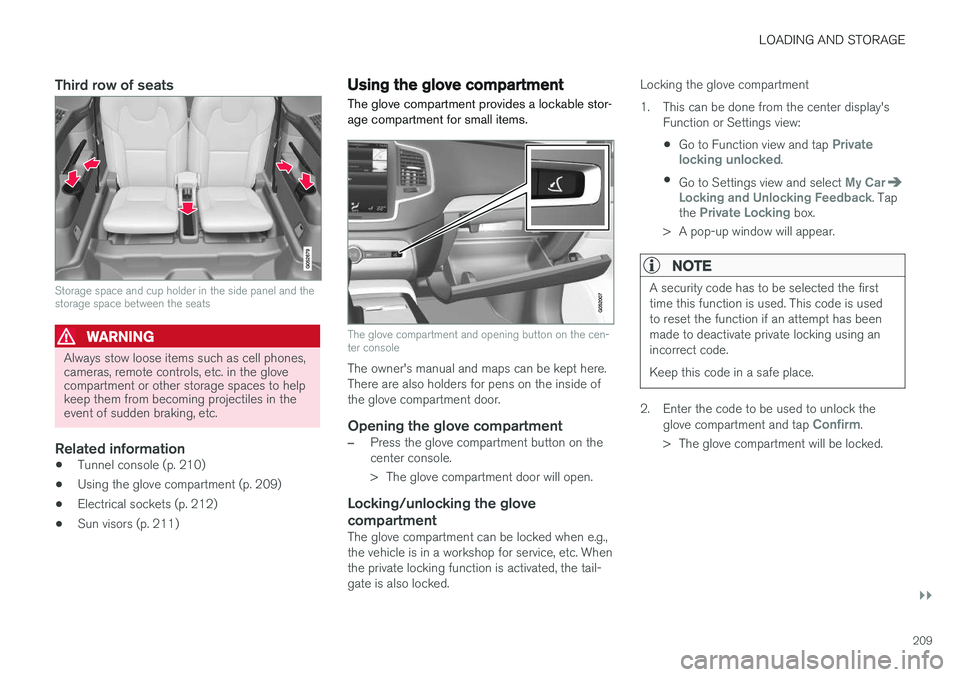
Third row of seats
Storage space and cup holder in the side panel and the storage space between the seats
WARNING
Always stow loose items such as cell phones, cameras, remote controls, etc. in the glovecompartment or other storage spaces to helpkeep them from becoming projectiles in theevent of sudden braking, etc.
Related information
•Tunnel console (p. 210)
• Using the glove compartment (p. 209)
• Electrical sockets (p. 212)
• Sun visors (p. 211)
Using the glove compartment
The glove compartment provides a lockable stor- age compartment for small items.
The glove compartment and opening button on the cen- ter console
The owner's manual and maps can be kept here. There are also holders for pens on the inside ofthe glove compartment door.
Opening the glove compartment
–Press the glove compartment button on the center console.
> The glove compartment door will open.
Locking/unlocking the glove compartment
The glove compartment can be locked when e.g., the vehicle is in a workshop for service, etc. Whenthe private locking function is activated, the tail-gate is also locked. Locking the glove compartment
1. This can be done from the center display's
Function or Settings view:
• Go to Function view and tap
Private
locking unlocked.
• Go to Settings view and select
My CarLocking and Unlocking Feedback. Tap
the Private Locking box.
> A pop-up window will appear.
NOTE
A security code has to be selected the first time this function is used. This code is usedto reset the function if an attempt has beenmade to deactivate private locking using anincorrect code. Keep this code in a safe place.
2. Enter the code to be used to unlock the glove compartment and tap Confirm.
> The glove compartment will be locked.
Page 216 of 546
||
LOADING AND STORAGE
214
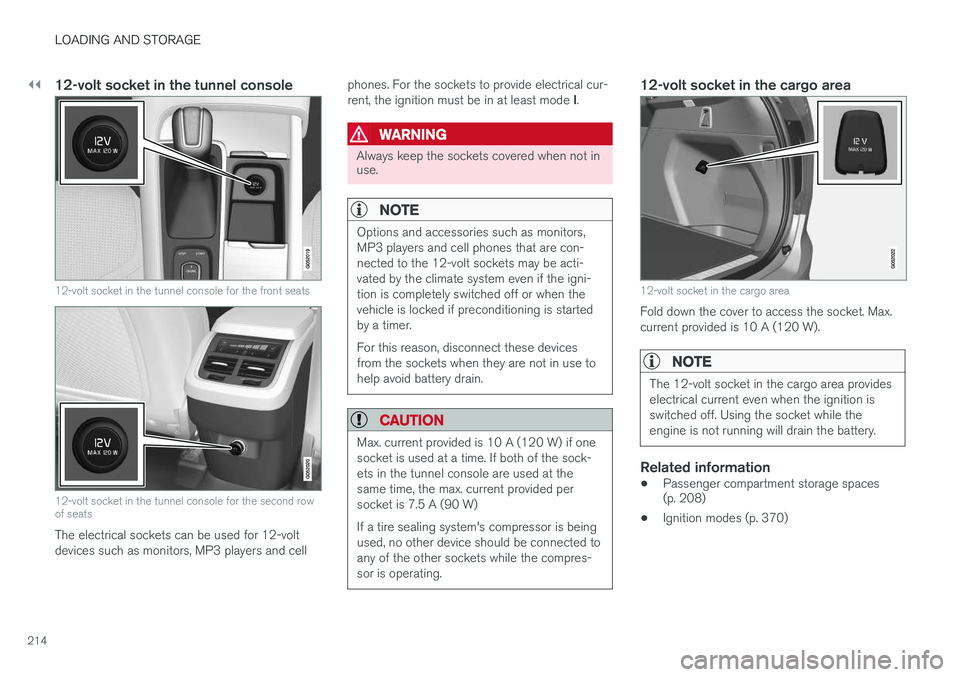
12-volt socket in the tunnel console
12-volt socket in the tunnel console for the front seats
12-volt socket in the tunnel console for the second row of seats
The electrical sockets can be used for 12-volt devices such as monitors, MP3 players and cellphones. For the sockets to provide electrical cur- rent, the ignition must be in at least mode
I.
WARNING
Always keep the sockets covered when not in use.
NOTE
Options and accessories such as monitors, MP3 players and cell phones that are con-nected to the 12-volt sockets may be acti-vated by the climate system even if the igni-tion is completely switched off or when thevehicle is locked if preconditioning is startedby a timer. For this reason, disconnect these devices from the sockets when they are not in use tohelp avoid battery drain.
CAUTION
Max. current provided is 10 A (120 W) if one socket is used at a time. If both of the sock-ets in the tunnel console are used at thesame time, the max. current provided persocket is 7.5 A (90 W) If a tire sealing system's compressor is being used, no other device should be connected toany of the other sockets while the compres-sor is operating.
12-volt socket in the cargo area
12-volt socket in the cargo area
Fold down the cover to access the socket. Max. current provided is 10 A (120 W).
NOTE
The 12-volt socket in the cargo area provides electrical current even when the ignition isswitched off. Using the socket while theengine is not running will drain the battery.
Related information
• Passenger compartment storage spaces (p. 208)
• Ignition modes (p. 370)
Page 238 of 546
||
LOCKS AND ALARM
* Option/accessory, for more information, see Introduction.
236
NOTE
Avoid placing the remote key closer than approx. (4-6 in.) (10-15 cm) to any metallicobjects or electronic devices such as cellphones, tablets, laptops or chargers.
If interference persists, unlock the vehicle with the detachable key blade and place the remotekey in the backup key reader in the tunnel con-sole cup holder to disarm the alarm.
WARNING
Always remove the remote key from the pas- senger compartment when leaving the vehicle and ensure that the ignition in mode 0, espe-
cially if there are children in the vehicle.
Ordering new keysTwo remote keys are provided with the vehicle (a Key Tag 6
is also included for vehicles equipped
with the optional Passive Entry system). Addi- tional keys (a total of 12) can be ordered andused with the vehicle.
Loss of a remote keyIf a remote key is lost, the others should be takenwith the vehicle to a Volvo retailer. As an anti-theft measure, the code of the lost remote keymust be erased from the system. The number of registered keys for the vehicle can be found inthe center display's Top view.
NOTE
Additional or duplicate remote control keys can be obtained from any authorized Volvoretailer. You can also obtain additional or duplicate remote control keys from certain independentrepair facilities and locksmiths that are quali-fied to make remote control keys. Each keymust be programmed to work with your vehi-cle. A list of independent repair facilities and/or locksmiths known to Volvo that can cut andcode replacement keys can be found: •
on the Volvo website, www.volvocars.com/us
• by calling Volvo Customer Care at1-800-458-1552.
Key TagIn addition to the two remote keys provided, a smaller third key, called a Key Tag, is also provi-ded for vehicles equipped with the optionalPassive Entry system. This key functions in the same way as a standard remote key but does not have a detachable key blade and its battery cannot be replaced; a newKey Tag has to be ordered.
The remote key's buttons
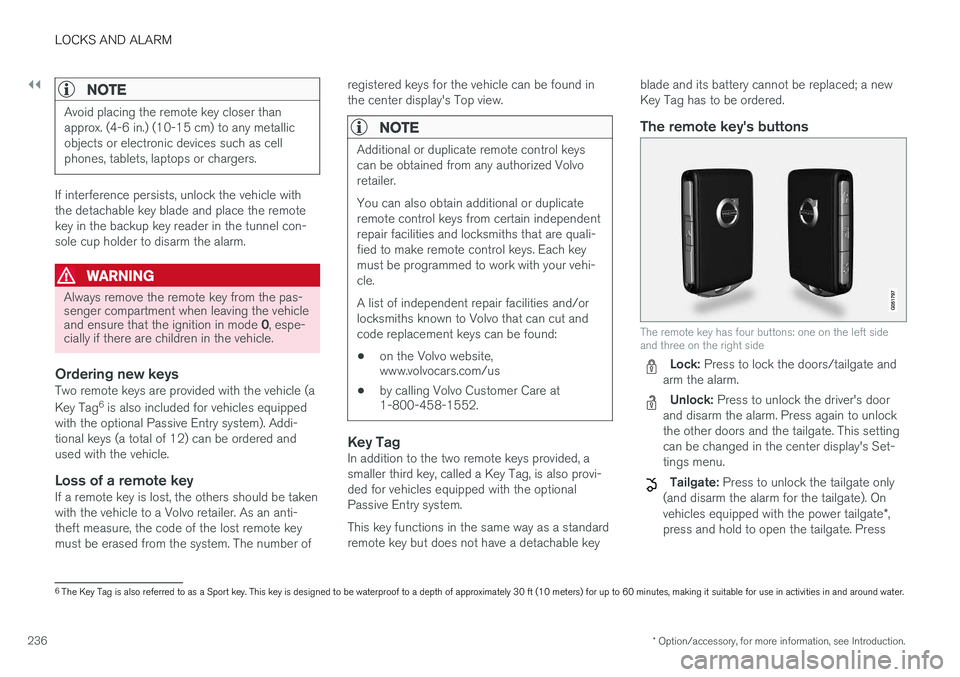
The remote key has four buttons: one on the left side and three on the right side
Lock: Press to lock the doors/tailgate and
arm the alarm.
Unlock: Press to unlock the driver's door
and disarm the alarm. Press again to unlock the other doors and the tailgate. This settingcan be changed in the center display's Set-tings menu.
Tailgate: Press to unlock the tailgate only
(and disarm the alarm for the tailgate). On vehicles equipped with the power tailgate *,
press and hold to open the tailgate. Press
6 The Key Tag is also referred to as a Sport key. This key is designed to be waterproof to a depth of approximately 30 ft (10 meters) for up to 60 minutes, making it suitable for use in activities in and around water.
Page 239 of 546
LOCKS AND ALARM
}}
237
and hold to close an open tailgate (an audi- ble warning signal will sound).
Panic alarm: Press to attract attention dur-
ing emergency situations. To activate, press
and hold this button for at least 3 seconds or press it twice within 3 seconds to activate the turn signals and horn. To deactivate,
wait approximately 5 seconds and press the button again (the panic alarm will also deac-tivate automatically after several minutes).
InterferenceMetallic objects or electromagnetic fields mayinterfere with the remote key's function. Avoidplacing the remote key within 4-6 in. (10-15 cm)of a cell phone or a metallic object. If interference persists, use the remote key's detachable key blade to unlock the vehicle andplace the remote key in the backup key reader inthe tunnel console cup holder.
Loss of a remote keyIf a remote keys is lost, a new one can beordered. The other keys should be taken with thevehicle to a Volvo retailer or authorized independ-ent locksmith. As an anti-theft measure, the codeof the lost remote key must be erased from thesystem. The number of registered keys for thevehicle can be found in the center display's Topview.
Related information
• Remote key's range (p. 235)
• Detachable key blade (p. 237)
• Changing the remote key's battery (p. 232)
Detachable key blade Your vehicle's remote key contains a detachable key blade that can be used to unlock the driver'sdoor, etc. A Volvo retailer can provide you with the key blade's unique code.
Using the detachable key bladeThe remote key's detachable key blade can be used to:
• Unlock the driver's door if the central locking system cannot be activated using the remotekey
• Lock all doors
• Activate/deactivate the mechanical childsafety locks in the rear doors
The Key Tag 7
does not have a detachable key
blade.
7 Models with the optional Passive Entry system only.
Page 365 of 546
STARTING AND DRIVING
}}
363
Use of AdditivesWith the exception of gas line antifreeze during winter months, do not add solvents, thickeners, orother store-bought additives to your vehicle'sfuel, cooling, or lubricating systems. Overuse maydamage your engine, and some of these additivescontain organically volatile chemicals. Do notneedlessly expose yourself to these chemicals.
WARNING
Never carry a cell phone that is switched on
while refueling your vehicle. If the phone rings, this may cause a spark that could ignite gaso-line fumes, resulting in fire and injury.
WARNING
Carbon monoxide is a poisonous, colorless, and odorless gas. It is present in all exhaustgases. If you ever smell exhaust fumes insidethe vehicle, make sure the passenger com-partment is ventilated, and immediately returnthe vehicle to a trained and qualified Volvoservice technician for correction.
Related information
• Fuel (p. 361)
Opening/closing the fuel filler door The fuel tank has a filling system that does not have a cover.
Opening/closing the fuel filler doorAn arrow next to the fuel pump symbol in the instrument panelindicates the side of the vehiclewhere the fuel filler door islocated.
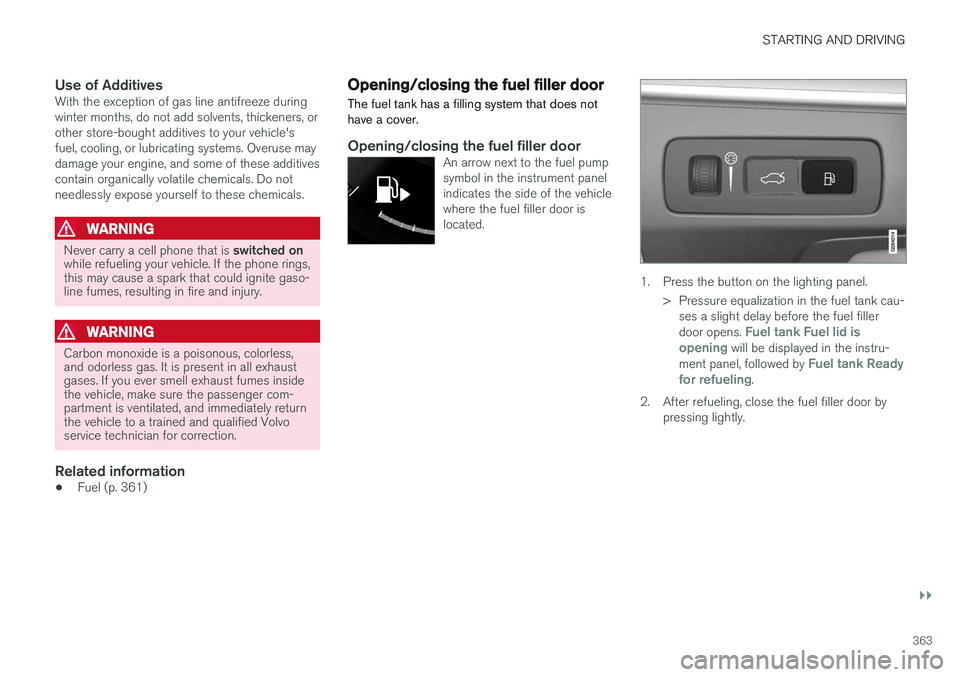
1. Press the button on the lighting panel.
> Pressure equalization in the fuel tank cau-ses a slight delay before the fuel filler door opens.
Fuel tank Fuel lid is
opening will be displayed in the instru-
ment panel, followed by Fuel tank Ready
for refueling.
2. After refueling, close the fuel filler door by pressing lightly.