2016 VOLVO XC90 T8 remote control
[x] Cancel search: remote controlPage 72 of 546
||
SAFETY
* Option/accessory, for more information, see Introduction.
70
WARNING
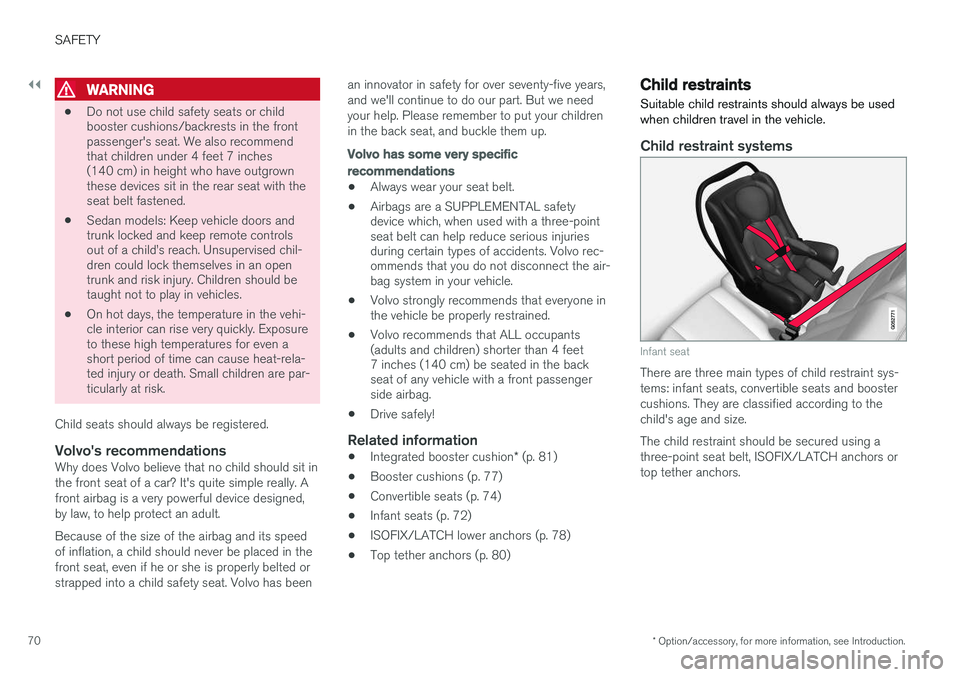
• Do not use child safety seats or child booster cushions/backrests in the frontpassenger's seat. We also recommendthat children under 4 feet 7 inches(140 cm) in height who have outgrownthese devices sit in the rear seat with theseat belt fastened.
• Sedan models: Keep vehicle doors andtrunk locked and keep remote controlsout of a child
Page 103 of 546
INSTRUMENTS AND CONTROLS
}}
101
3. Press and hold the button on the original
remote control that is to be programmed on HomeLink ®
and observe the HomeLink ®
indicator light. Hold the button until the indi- cator light has changed from flashing yellowonce a second to either flashing green 10times a second or by glowing steadily green. When the HomeLink ®
indicator light flashes
or glows steadily green, the button on the original remote control can be released. Note : for certain remote controls, the
instructions listed under "Gate operators/ Canadian programming" at the end of thisarticle should be used instead of step 3. 4.
Press the programmed HomeLink ®
button
and check the indicator light. Indicator light glows steadily green: pro-
gramming has been completed. The garage door, gate, etc., should now be activatedwhen the programmed button is pressed. Indicator light flashes 10 times a second: press the HomeLink ®
button that is being
programmed. Hold it for 2 seconds and release it. Repeat the “press/hold/release”sequence a second time, and, depending onthe brand of the garage door opener, repeatthis sequence a third time to complete theprogramming process. Programming shouldnow be completed and the garage door,gate, etc., should now be activated when theprogrammed button is pressed. If the garage door, etc. still does not react: continue with steps 6-8 to complete
programming.
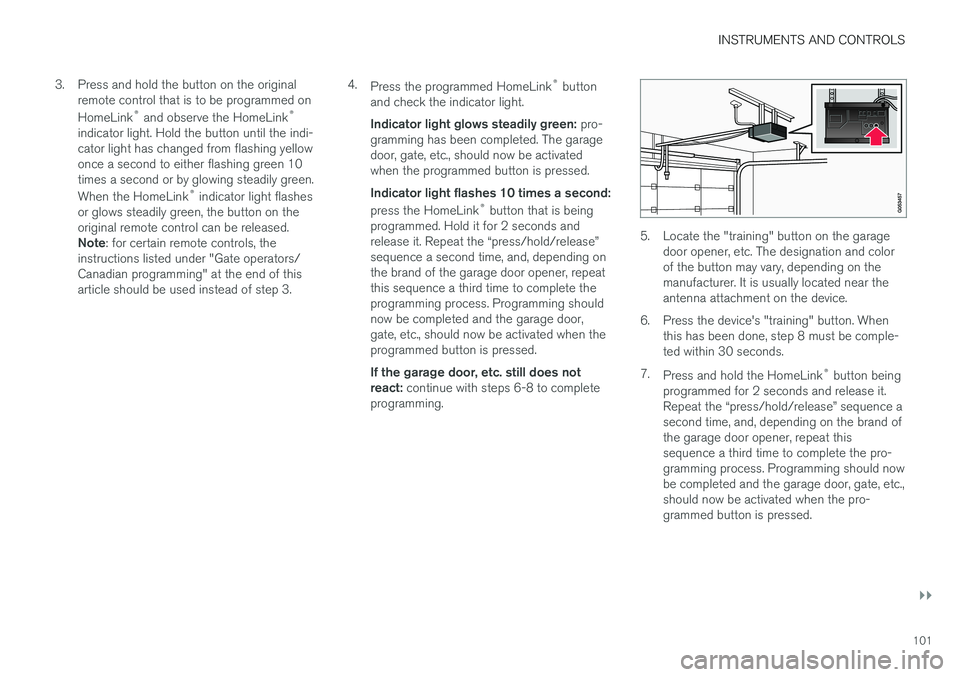
5. Locate the "training" button on the garage door opener, etc. The designation and color of the button may vary, depending on themanufacturer. It is usually located near theantenna attachment on the device.
6. Press the device's "training" button. When this has been done, step 8 must be comple-ted within 30 seconds.
7. Press and hold the HomeLink ®
button being
programmed for 2 seconds and release it.Repeat the “press/hold/release” sequence asecond time, and, depending on the brand ofthe garage door opener, repeat thissequence a third time to complete the pro-gramming process. Programming should nowbe completed and the garage door, gate, etc.,should now be activated when the pro-grammed button is pressed.
Page 104 of 546
||
INSTRUMENTS AND CONTROLS
102
Gate Operator/Canadian Programming
Canadian radio-frequency laws require transmit- ter signals to “time-out” (or quit) after severalseconds of transmission – which may not be longenough for HomeLink to pick up the signal dur-ing programming. Similar to this Canadian law,some U.S. gate operators are designed to “time-out” in the same manner. If you live in Canada or you are having difficulties programming a gate operator or garage dooropener by using the “Programming” procedures, replace “Programming HomeLink” step 3 with the following:
• Continue to press and hold the HomeLink button while you
press and release - every
two seconds (“cycle”) your hand-held trans-
mitter until the HomeLink indicator light changes from a slow to a rapidly blinkinglight. Now you may release both the Home-Link and hand-held transmitter buttons.
Proceed with “Programming” step 4 to complete.
Using HomeLink ®When programming has been completed, HomeLink
®
can be used instead of the original
remote controls. To operate, press and hold the programmed HomeLink ®
button until the trained device begins
to operate 3
(this may take several seconds). The indicator light will glow steadily or flash when the button has been pressed. Activation will nowoccur for the trained device (i.e., garage dooropener, gate operator, security system, entry doorlock, home/office lighting, etc.).
NOTE
If the ignition is switched off, HomeLink will function for 30 minutes after the driver's doorhas been opened.
For convenience, the hand-held transmitter of the device may also be used at any time. In the event that there are still programming diffi- culties or questions, contact HomeLink at:www.HomeLink.com, www.youtube.com/HomeLinkGentex or by phoning the hotline at 1–800–355–3515.
Resetting HomeLink
®
buttonsUse the following procedure to reset (erase pro- gramming) from the three HomeLink ®
buttons
(individual buttons cannot be reset but can be “reprogrammed” as outlined in the following sec-tion): 1. Press and hold HomeLink ®
buttons 1 and 3
for approx. 10 seconds until the indicator light begins to flash green. 2. Release both buttons.
>HomeLink ®
is now in the training (or
learning) mode and can be programmedat any time beginning with “To program HomeLink ®
" above.
Reprogramming a single HomeLink ®
button
To reprogram an individual HomeLink ®
button:
1. Press and hold the desired HomeLink ®
but-
ton. DO NOT release the button.
2. The yellow indicator light will begin to flash after 20 seconds. Without releasing the HomeLink button, proceed with “To program HomeLink ®
" step 1 above.
For questions or comments, contact HomeLink at: www.HomeLink.com, www.youtube.com/HomeLinkGentex or by phoning the hotline at 1–800–355–3515.
FCC (USA) and IC (Canada)This device complies with FCC rules part 15 andIndustry Canada RSS-210. Operation is subjectto the following two conditions: (1) This devicemay not cause harmful interference, and (2) Thisdevice must accept any interference that may bereceived including interference that may causeundesired operation. WARNING: The transmitterhas been tested and complies with FCC and IC
3 Do not hold the button for more than 20 seconds as this will clear the programming of the button.
Page 107 of 546
INSTRUMENTS AND CONTROLS
}}
* Option/accessory, for more information, see Introduction.105
Adjusting the power door mirrors
The control on the driver's door is used to adjust the position of the door mirrors.
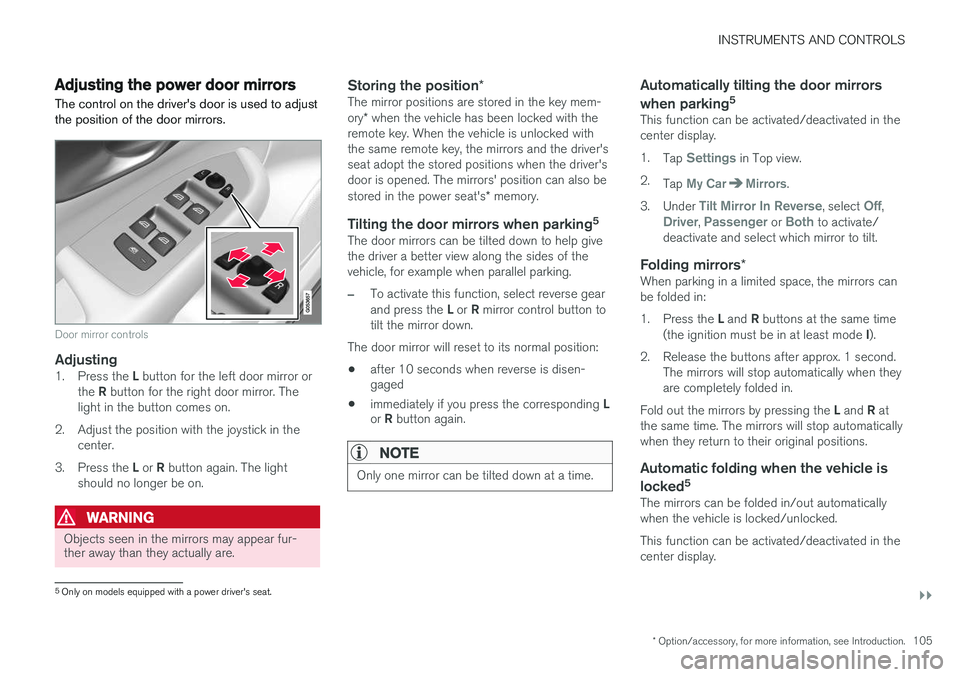
Door mirror controls
Adjusting1. Press the L button for the left door mirror or
the R button for the right door mirror. The
light in the button comes on.
2. Adjust the position with the joystick in the center.
3. Press the L or R button again. The light
should no longer be on.
WARNING
Objects seen in the mirrors may appear fur- ther away than they actually are.
Storing the position *The mirror positions are stored in the key mem- ory* when the vehicle has been locked with the
remote key. When the vehicle is unlocked with the same remote key, the mirrors and the driver'sseat adopt the stored positions when the driver'sdoor is opened. The mirrors' position can also be stored in the power seat's * memory.
Tilting the door mirrors when parking 5The door mirrors can be tilted down to help give the driver a better view along the sides of thevehicle, for example when parallel parking.
–To activate this function, select reverse gear and press the
L or R mirror control button to
tilt the mirror down.
The door mirror will reset to its normal position:
• after 10 seconds when reverse is disen- gaged
• immediately if you press the corresponding
L
or R button again.
NOTE
Only one mirror can be tilted down at a time.
Automatically tilting the door mirrors when parking 5
This function can be activated/deactivated in the center display. 1.
Tap
Settings in Top view.
2. Tap
My CarMirrors.
3. Under
Tilt Mirror In Reverse, select Off,Driver, Passenger or Both to activate/
deactivate and select which mirror to tilt.
Folding mirrors *When parking in a limited space, the mirrors can be folded in: 1.
Press the L and R buttons at the same time
(the ignition must be in at least mode I).
2. Release the buttons after approx. 1 second. The mirrors will stop automatically when they are completely folded in.
Fold out the mirrors by pressing the L and R at
the same time. The mirrors will stop automaticallywhen they return to their original positions.
Automatic folding when the vehicle is
locked 5
The mirrors can be folded in/out automaticallywhen the vehicle is locked/unlocked. This function can be activated/deactivated in the center display.
5
Only on models equipped with a power driver's seat.
Page 109 of 546
INSTRUMENTS AND CONTROLS
}}
* Option/accessory, for more information, see Introduction.107
CAUTION
•Remove ice and snow before opening the laminated panoramic roof.
• Do not operate the laminated panoramicroof if it is frozen closed.
• Never place heavy objects on the lamina-ted panoramic roof.
Wind blocker
The laminated panoramic roof is equipped with a wind blocker that folds up when the roof is open.
Related information
•
Operating the laminated panoramic roof
*
(p. 107)
Operating the laminated panoramic roof *
When opened automatically, the sun shade and roof open completely. In the ventilation position, the rear edge of the front section of the roof is raised.
Operation
WARNING
• During manual closing, if the laminated panoramic roof is obstructed, immediatelyopen it again.
• Never open or close the laminated panor-amic roof if it is obstructed in any way.
• Never allow a child to operate the lamina-ted panoramic roof.
• Never leave a child alone in a vehicle.
• When leaving the vehicle, ensure that the ignition is in mode
0. Never leave a
remote key in the vehicle.
• Never extend any object or body part though the open laminated panoramicroof, even if the vehicle's ignition is com-pletely switched off.
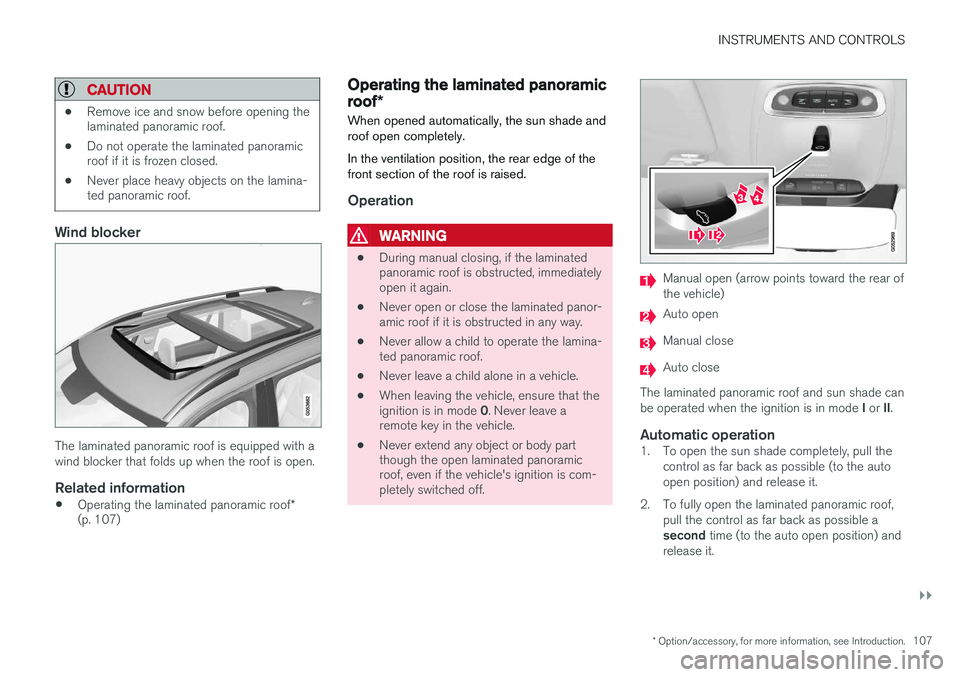
Manual open (arrow points toward the rear of the vehicle)
Auto open
Manual close
Auto close
The laminated panoramic roof and sun shade can be operated when the ignition is in mode I or II.
Automatic operation1. To open the sun shade completely, pull the
control as far back as possible (to the auto open position) and release it.
2. To fully open the laminated panoramic roof, pull the control as far back as possible a second time (to the auto open position) and
release it.
Page 150 of 546

INSTRUMENTS AND CONTROLS
* Option/accessory, for more information, see Introduction.
148
Approach lighting
Approach lighting activates the parking lights, outer door handle lights *, license plate lighting,
courtesy lighting and footwell lighting when you approach the vehicle.
This function is activated by unlocking the car. The time interval for this lighting can be set on the center display. The function can be deactivated/activated in the center display: 1. Tap
Settings in Top view.
2. Tap
My CarLightsExterior Lights.
3. Deselect/select
Welcome Light.
Related information
• Settings view (p. 111)
• Home safe lighting (p. 148)
• Remote key (p. 235)
Home safe lighting
The home safe lighting function illuminates the area in front of the vehicle in dark conditions.
This function turns on the headlights, parking lights, outer door handle lights *, license plate
lights, front ceiling lighting and footwell lighting for a set amount of time. The length of time that these lights remain illumi- nated can be set in the center display: 1. Tap
Settings in Top view.
2. Tap
My CarLightsExterior LightsHome Safety Lights.
3. Select
Off, 30 sec, 60 sec or 90 sec.
To activate home safe lighting: 1. Switch off the ignition (mode 0).
2. Push the turn signal lever as far as possible towards the dashboard and release it.
3. Exit the vehicle and lock the doors.
Related information
• Using the center display (p. 49)
• Settings view (p. 111)
Passenger compartment lighting
The passenger compartment lighting is con- trolled using the buttons in the ceiling above thefront and rear seats.
All passenger compartment lighting can be turned on and off manually within 30 minutesafter:
• the vehicle is unlocked but the engine has not been started
• the engine is switched off and the ignition is in mode
0.
Front interior lighting
Controls in the ceiling console for front reading lights and courtesy lighting
Driver's side reading light
Courtesy lighting
Page 165 of 546
INSTRUMENTS AND CONTROLS
* Option/accessory, for more information, see Introduction.163
Power front seats*
The power front seats offer a number of adjust- ment possibilities to help maximize comfort andergonomics.
The power seats have an overload protector that
activates if a seat is blocked by any object. If this occurs, put the ignition in mode I or 0 and wait
for a short period before operating the seat again. The power seat(s) can be adjusted for a short period after unlocking the door with the remotekey without switching the ignition on. Seat adjust-ment can always be made when the engine isrunning.
Related information
• Multifunctional front seats
* (p. 165)
• Adjusting power front seats
* (p. 163)
• Using the power seat memory function
*
(p. 164)
• Manually operated front seats (p. 162)
• Turning seat heating
* on and off (p. 199)
• Turning front seat ventilation
* on and off
(p. 200)
• Easy access to and from the driver seat (p. 169)
Adjusting power front seats
*
The power front seat(s) can be adjusted to many positions to help improve comfort and ergonom-ics.
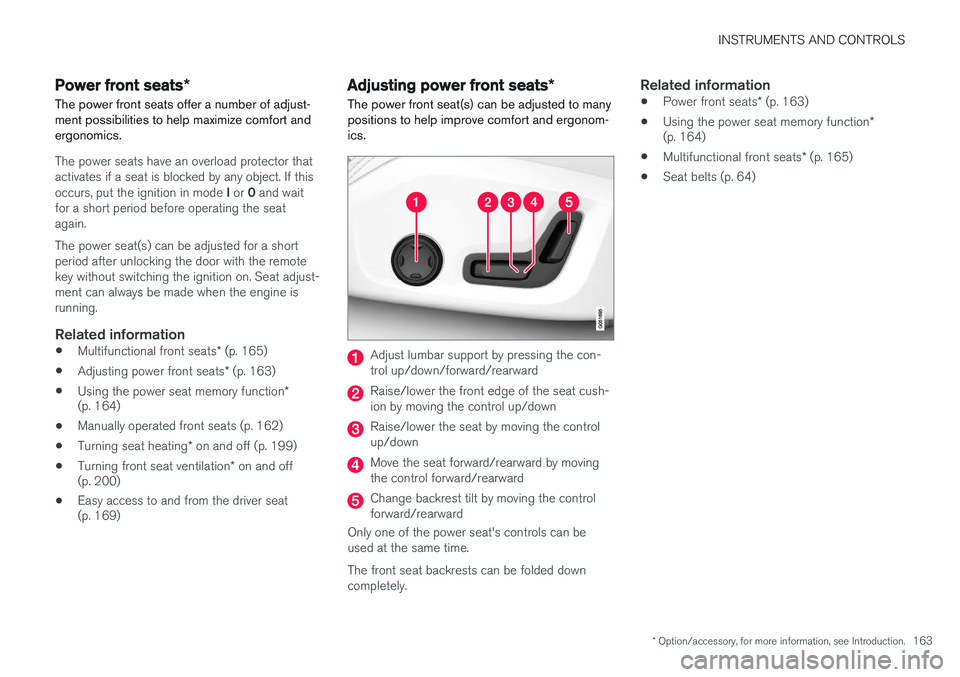
Adjust lumbar support by pressing the con- trol up/down/forward/rearward
Raise/lower the front edge of the seat cush- ion by moving the control up/down
Raise/lower the seat by moving the control up/down
Move the seat forward/rearward by moving the control forward/rearward
Change backrest tilt by moving the control forward/rearward
Only one of the power seat's controls can beused at the same time. The front seat backrests can be folded down completely.
Related information
• Power front seats
* (p. 163)
• Using the power seat memory function
*
(p. 164)
• Multifunctional front seats
* (p. 165)
• Seat belts (p. 64)
Page 211 of 546
LOADING AND STORAGE
}}
209
Third row of seats
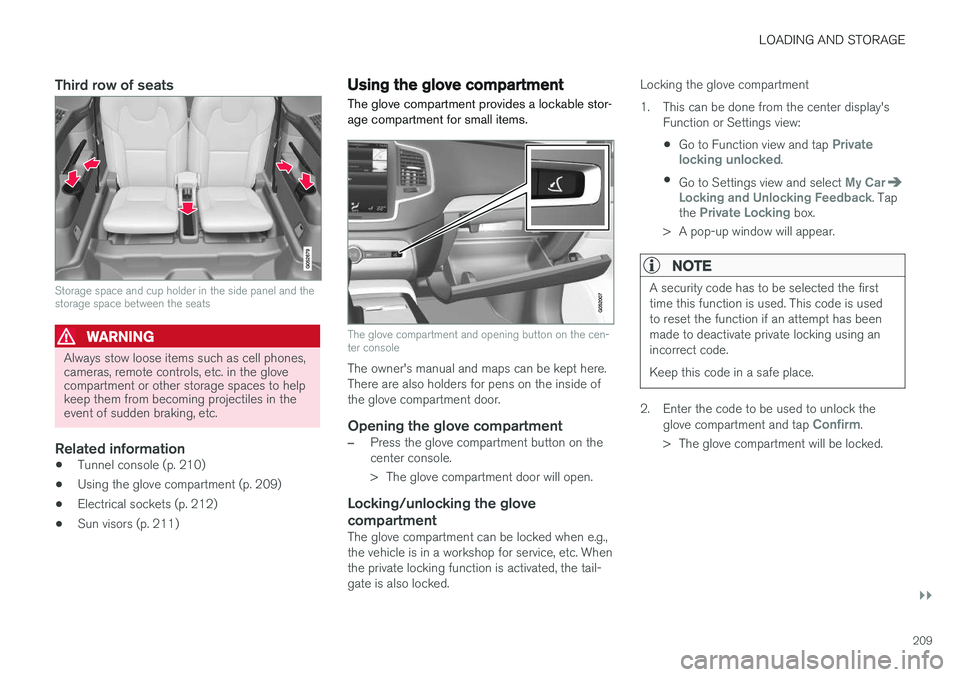
Storage space and cup holder in the side panel and the storage space between the seats
WARNING
Always stow loose items such as cell phones, cameras, remote controls, etc. in the glovecompartment or other storage spaces to helpkeep them from becoming projectiles in theevent of sudden braking, etc.
Related information
•Tunnel console (p. 210)
• Using the glove compartment (p. 209)
• Electrical sockets (p. 212)
• Sun visors (p. 211)
Using the glove compartment
The glove compartment provides a lockable stor- age compartment for small items.
The glove compartment and opening button on the cen- ter console
The owner's manual and maps can be kept here. There are also holders for pens on the inside ofthe glove compartment door.
Opening the glove compartment
–Press the glove compartment button on the center console.
> The glove compartment door will open.
Locking/unlocking the glove compartment
The glove compartment can be locked when e.g., the vehicle is in a workshop for service, etc. Whenthe private locking function is activated, the tail-gate is also locked. Locking the glove compartment
1. This can be done from the center display's
Function or Settings view:
• Go to Function view and tap
Private
locking unlocked.
• Go to Settings view and select
My CarLocking and Unlocking Feedback. Tap
the Private Locking box.
> A pop-up window will appear.
NOTE
A security code has to be selected the first time this function is used. This code is usedto reset the function if an attempt has beenmade to deactivate private locking using anincorrect code. Keep this code in a safe place.
2. Enter the code to be used to unlock the glove compartment and tap Confirm.
> The glove compartment will be locked.