2016 VOLVO XC90 T8 lights
[x] Cancel search: lightsPage 150 of 546

INSTRUMENTS AND CONTROLS
* Option/accessory, for more information, see Introduction.
148
Approach lighting
Approach lighting activates the parking lights, outer door handle lights *, license plate lighting,
courtesy lighting and footwell lighting when you approach the vehicle.
This function is activated by unlocking the car. The time interval for this lighting can be set on the center display. The function can be deactivated/activated in the center display: 1. Tap
Settings in Top view.
2. Tap
My CarLightsExterior Lights.
3. Deselect/select
Welcome Light.
Related information
• Settings view (p. 111)
• Home safe lighting (p. 148)
• Remote key (p. 235)
Home safe lighting
The home safe lighting function illuminates the area in front of the vehicle in dark conditions.
This function turns on the headlights, parking lights, outer door handle lights *, license plate
lights, front ceiling lighting and footwell lighting for a set amount of time. The length of time that these lights remain illumi- nated can be set in the center display: 1. Tap
Settings in Top view.
2. Tap
My CarLightsExterior LightsHome Safety Lights.
3. Select
Off, 30 sec, 60 sec or 90 sec.
To activate home safe lighting: 1. Switch off the ignition (mode 0).
2. Push the turn signal lever as far as possible towards the dashboard and release it.
3. Exit the vehicle and lock the doors.
Related information
• Using the center display (p. 49)
• Settings view (p. 111)
Passenger compartment lighting
The passenger compartment lighting is con- trolled using the buttons in the ceiling above thefront and rear seats.
All passenger compartment lighting can be turned on and off manually within 30 minutesafter:
• the vehicle is unlocked but the engine has not been started
• the engine is switched off and the ignition is in mode
0.
Front interior lighting
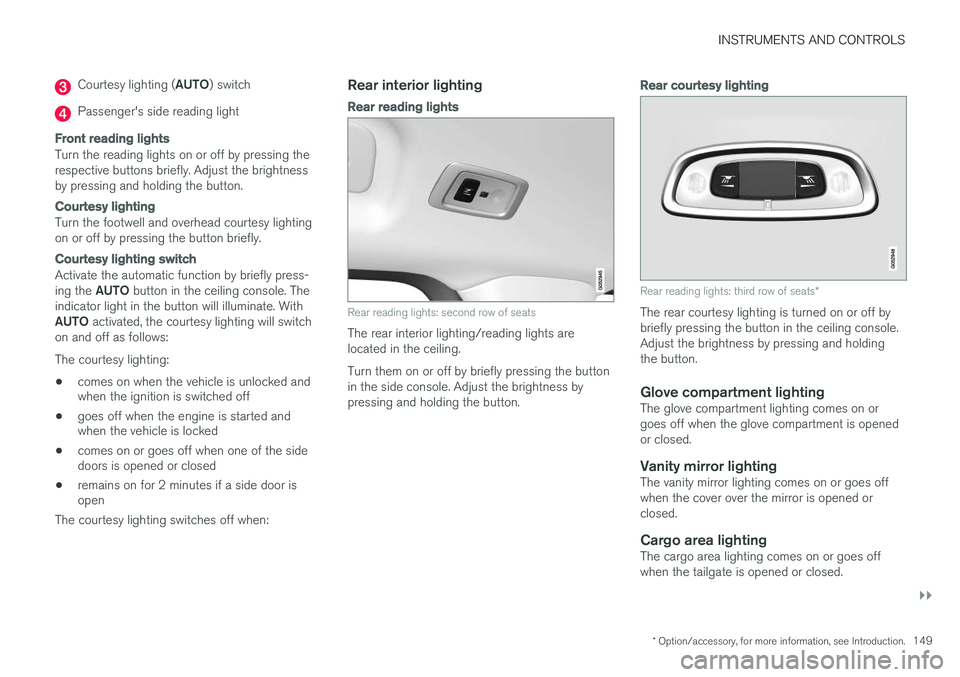
Controls in the ceiling console for front reading lights and courtesy lighting
Driver's side reading light
Courtesy lighting
Page 151 of 546

INSTRUMENTS AND CONTROLS
}}
* Option/accessory, for more information, see Introduction.149
Courtesy lighting (AUTO) switch
Passenger's side reading light
Front reading lights
Turn the reading lights on or off by pressing the respective buttons briefly. Adjust the brightnessby pressing and holding the button.
Courtesy lighting
Turn the footwell and overhead courtesy lighting on or off by pressing the button briefly.
Courtesy lighting switch
Activate the automatic function by briefly press- ing the AUTO button in the ceiling console. The
indicator light in the button will illuminate. WithAUTO activated, the courtesy lighting will switch
on and off as follows: The courtesy lighting: • comes on when the vehicle is unlocked and when the ignition is switched off
• goes off when the engine is started andwhen the vehicle is locked
• comes on or goes off when one of the sidedoors is opened or closed
• remains on for 2 minutes if a side door isopen
The courtesy lighting switches off when:
Rear interior lighting
Rear reading lights
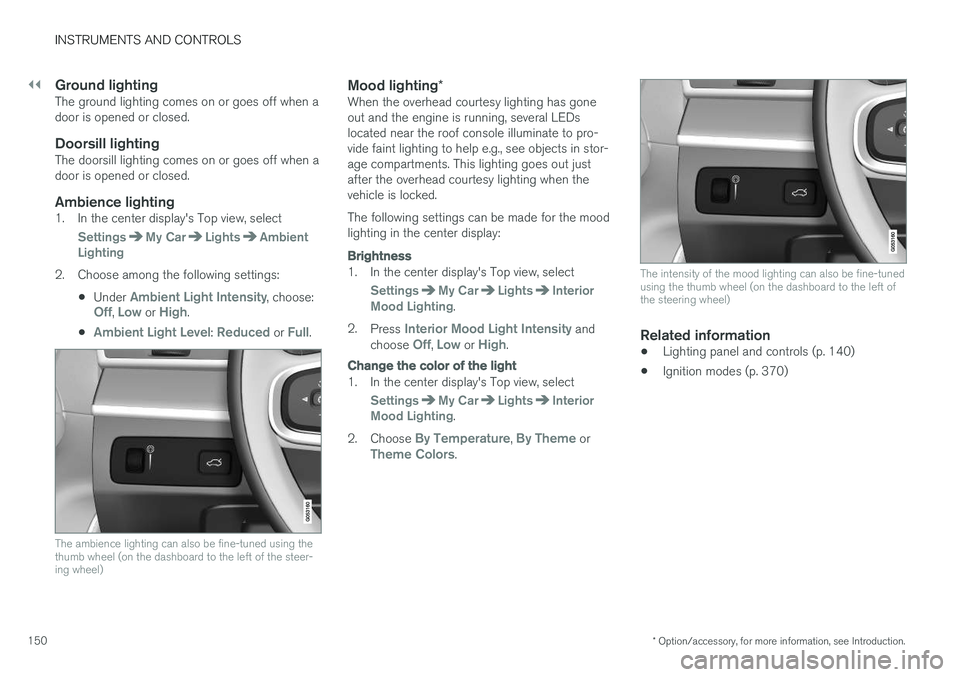
Rear reading lights: second row of seats
The rear interior lighting/reading lights are located in the ceiling. Turn them on or off by briefly pressing the button in the side console. Adjust the brightness bypressing and holding the button.
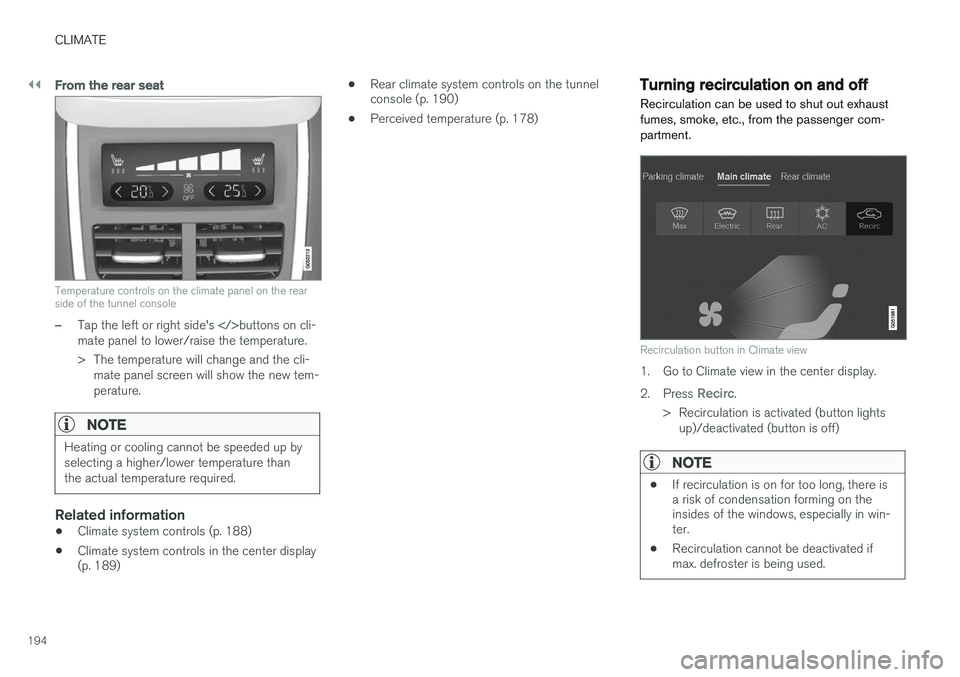
Rear courtesy lighting
Rear reading lights: third row of seats *
The rear courtesy lighting is turned on or off by briefly pressing the button in the ceiling console.Adjust the brightness by pressing and holdingthe button.
Glove compartment lightingThe glove compartment lighting comes on orgoes off when the glove compartment is openedor closed.
Vanity mirror lightingThe vanity mirror lighting comes on or goes offwhen the cover over the mirror is opened orclosed.
Cargo area lightingThe cargo area lighting comes on or goes offwhen the tailgate is opened or closed.
Page 152 of 546

||
INSTRUMENTS AND CONTROLS
* Option/accessory, for more information, see Introduction.
150
Ground lightingThe ground lighting comes on or goes off when a door is opened or closed.
Doorsill lightingThe doorsill lighting comes on or goes off when adoor is opened or closed.
Ambience lighting1. In the center display's Top view, select
SettingsMy CarLightsAmbient
Lighting
2. Choose among the following settings:
•Under
Ambient Light Intensity, choose:Off, Low or High.
•
Ambient Light Level: Reduced or Full.
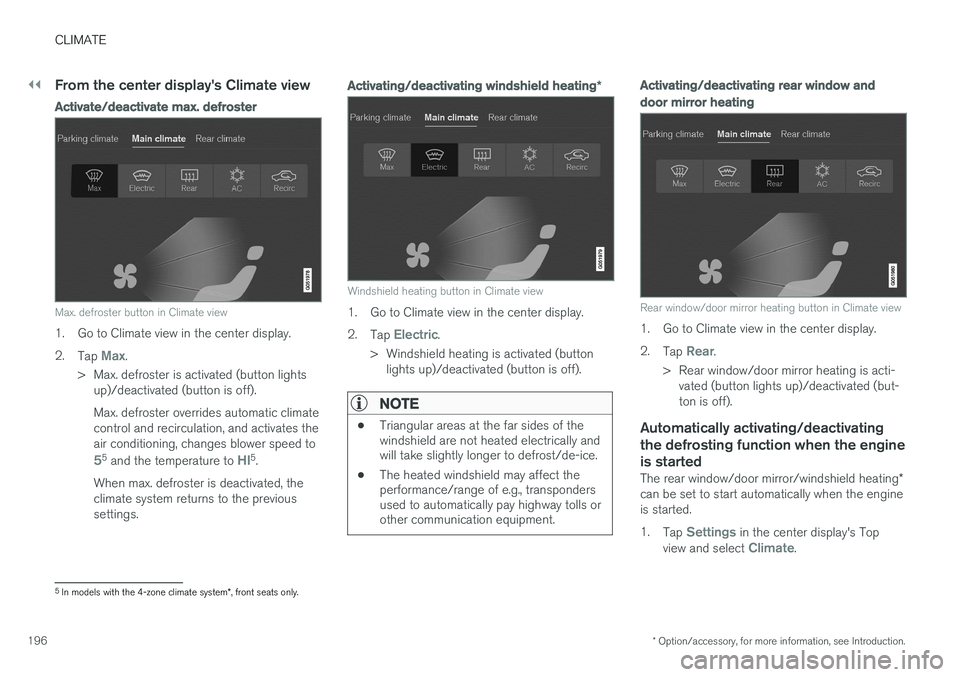
The ambience lighting can also be fine-tuned using the thumb wheel (on the dashboard to the left of the steer-ing wheel)
Mood lighting *When the overhead courtesy lighting has gone out and the engine is running, several LEDslocated near the roof console illuminate to pro-vide faint lighting to help e.g., see objects in stor-age compartments. This lighting goes out justafter the overhead courtesy lighting when thevehicle is locked. The following settings can be made for the mood lighting in the center display:
Brightness
1. In the center display's Top view, select
SettingsMy CarLightsInterior
Mood Lighting.
2. Press
Interior Mood Light Intensity and
choose Off, Low or High.
Change the color of the light
1. In the center display's Top view, select
SettingsMy CarLightsInterior
Mood Lighting.
2. Choose
By Temperature, By Theme orTheme Colors.
The intensity of the mood lighting can also be fine-tuned using the thumb wheel (on the dashboard to the left ofthe steering wheel)
Related information
• Lighting panel and controls (p. 140)
• Ignition modes (p. 370)
Page 160 of 546

||
INSTRUMENTS AND CONTROLS
* Option/accessory, for more information, see Introduction.
158
Activating/deactivating the memory function
The rain sensor's memory function can be set to activate the rain sensor each time the engine isstarted: 1.
In the center display, select
SettingsMy
Car
Wipers
2. Activate by selecting the Rain Sensor
Memory box.
Deactivate by deselecting the
Rain Sensor
Memory box.
Related information
• Using the windshield wipers (p. 156)
• Windshield wipers in the service position (p. 508)
• Tailgate window wiper and washer (p. 159)
Windshield and headlight washers
Use the windshield/headlight washers to help improve visibility.
Starting the windshield and headlight washers
Washing function
–Move the right-side steering wheel lever toward the wheel to start the windshield andheadlight washers.
> After the lever is released the wipers make several extra sweeps.
CAUTION
• Use ample washer fluid when washing the windshield. The windshield should bethoroughly wet when the wipers are inoperation.
• Avoid using the washers if the fluid reser-voir is frozen or empty to help avoid dam-age to the pump.
When the washing system is used, the length of time that the windshield washers operatedepends on the ambient temperature. In coldweather, the amount of washer fluid used willalso be increased automatically to help improvecleaning.
Heated washer nozzles
*The washer nozzles are heated automatically incold weather to help prevent the washer fluidfrom freezing.
High-pressure headlight washing *High-pressure headlight washing consumes alarge quantity of washer fluid. To save fluid, theheadlights are washed once for every five timesthe windshield is washed.
Reduced washingWhen approx. 1 US quart (1 liter) of washer fluidremains in the reservoir, the headlights will nolonger be washed to conserve fluid.
Page 186 of 546

CLIMATE
* Option/accessory, for more information, see Introduction.
184
Starting and stopping preconditioning
Preconditioning heats/cools the passenger com- partment prior to driving. Please note that thecharging cable must be connected.
Starting/stopping from the centerdisplay
The preconditioning button in the Parking climate tab
in Climate view.
1. Open Climate view in the center display. 2. Tap
Parking climate .
The window for seat/steering wheel heating in Climate view's Parking climate tab
3. Tap the boxes to select if seat/steering
wheel heating is to be activated/deactivated when preconditioning starts.
4. Tap
Preconditioning.
> Preconditioning starts/stops and the indi- cator lights in the buttons will be on/off.
NOTE
Full preconditioning is only possible when the vehicle's charging cable is connected. In other cases, the passenger compartment can be cooled for 3 minutes in warm weather. This function is started from the
Parking
climate tab in the center display's Climate
view.
The vehicle's doors and windows should be closed during preconditioning.
Starting from a cell phone *Starting preconditioning and checking the cur-rent settings can be done from a cell phone withthe Volvo On Call mobile app. Preconditioningheats the passenger compartment to a comforta-ble temperature or cools the compartment to thecurrent ambient temperature. If the vehicle is equipped with the optional Engine Remote Start (ERS), the air conditioningcan be used to pre-cool the passenger compart-ment to a comfortable temperature.
Related information
•Setting the parking climate (preconditioning) timer (p. 182)
• Activating/deactivating the parking climatetimer (p. 181)
• Hybrid battery charging cable (p. 375)
Page 189 of 546

CLIMATE
}}
* Option/accessory, for more information, see Introduction.187
2. Activate/deactivate IAQS by selecting/dese-
lecting the
Air Quality Sensor box.
Related information
• Air quality (p. 186)
• Passenger compartment air filter (p. 187)
• Clean Zone Interior Package (CZIP)
*
(p. 186)
• Turning recirculation on and off (p. 194)
Passenger compartment air filter
All air entering the passenger compartment through the climate system air intake is filtered.
Filter replacementThe filter must be replaced according to the serv- ice schedule for your vehicle. When driving in e.g.,dusty or industrial areas, the filer may need to bereplaced more often. Consult your Volvo retailer.
Related information
• Air quality (p. 186)
• Clean Zone Interior Package (CZIP)
*
(p. 186)
• Interior Air Quality System (IAQS)
* (p. 186)
• Volvo's service program (p. 472)
Automatic climate control The Auto feature automatically controls a num- ber of climate system functions.
The Auto climate button in Climate view
1. Go to the center display's Climate view. 2.
Tap or press and hold
AUTO.
> Auto mode is activated (button lights up)/ deactivated (button is off). Auto mode automatically controls air recirculation, airconditioning, and air distribution. Blower speed and temperature change depending on how long the button ispressed.
• Tap: return to previous settings.
• Press and hold: change to default set- tings (level
3 and 72 °F (22 °C).
Page 196 of 546

||
CLIMATE
194
From the rear seat
Temperature controls on the climate panel on the rear side of the tunnel console
–Tap the left or right side's buttons on cli-
mate panel to lower/raise the temperature.
> The temperature will change and the cli- mate panel screen will show the new tem- perature.
NOTE
Heating or cooling cannot be speeded up by selecting a higher/lower temperature thanthe actual temperature required.
Related information
• Climate system controls (p. 188)
• Climate system controls in the center display (p. 189) •
Rear climate system controls on the tunnelconsole (p. 190)
• Perceived temperature (p. 178)
Turning recirculation on and off
Recirculation can be used to shut out exhaust fumes, smoke, etc., from the passenger com-partment.
Recirculation button in Climate view
1. Go to Climate view in the center display. 2. Press
Recirc.
> Recirculation is activated (button lights up)/deactivated (button is off)
NOTE
• If recirculation is on for too long, there is a risk of condensation forming on theinsides of the windows, especially in win-ter.
• Recirculation cannot be deactivated ifmax. defroster is being used.
Page 198 of 546

||
CLIMATE
* Option/accessory, for more information, see Introduction.
196
From the center display's Climate view
Activate/deactivate max. defroster
Max. defroster button in Climate view
1. Go to Climate view in the center display. 2.
Tap
Max.
> Max. defroster is activated (button lights up)/deactivated (button is off). Max. defroster overrides automatic climate control and recirculation, and activates theair conditioning, changes blower speed to
55 and the temperature to HI5.
When max. defroster is deactivated, the climate system returns to the previoussettings.
Activating/deactivating windshield heating *
Windshield heating button in Climate view
1. Go to Climate view in the center display. 2.
Tap
Electric.
> Windshield heating is activated (button lights up)/deactivated (button is off).
NOTE
• Triangular areas at the far sides of the windshield are not heated electrically andwill take slightly longer to defrost/de-ice.
• The heated windshield may affect theperformance/range of e.g., transpondersused to automatically pay highway tolls orother communication equipment.
Activating/deactivating rear window and door mirror heating
Rear window/door mirror heating button in Climate view
1. Go to Climate view in the center display. 2.
Tap
Rear.
> Rear window/door mirror heating is acti- vated (button lights up)/deactivated (but- ton is off).
Automatically activating/deactivating the defrosting function when the engineis started
The rear window/door mirror/windshield heating *
can be set to start automatically when the engine is started. 1. Tap
Settings in the center display's Top
view and select Climate.
5 In models with the 4-zone climate system *, front seats only.