Page 499 of 546
MAINTENANCE AND SERVICING
497
WARNING
•The ignition should be switched off com- pletely (be in ignition mode
0) when
replacing bulbs.
• If the engine has been running just prior to replacing bulbs in the headlight hous-ing, please keep in mind that componentsin the engine compartment will be hot.
Front bulbs (vehicles with halogen headlights)
Side marker light
Low beam
High beam
Parking light/Daytime Running Light
Turn signal
(Not in use)
Taillight bulbs
Brake light (LED)
Side marker light (LED)
Backup light 2
Taillight (LED)
Turn signal (LED)
Fog light (LED)
High-mounted brake light (LED)
Related information
•
Bulb specifications (p. 501)
• Removing the rectangular headlight cover (p. 498)
• Replacing parking light bulbs (p. 500)
• Replacing front turn signal bulbs (p. 500)
• Replacing High Beam headlight bulbs(p. 499)
• Replacing low beam headlight bulbs (p. 498)
2
Must be replaced by a trained and qualified Volvo service technician.
Page 500 of 546

MAINTENANCE AND SERVICING
498
Removing the rectangular headlight cover
Most of the bulbs in the headlight housing can be accessed when the rectangular cover hasbeen removed.
Before the rectangular cover can be removed, the plastic covering must be removed, see the article"Replacing bulbs" for information.
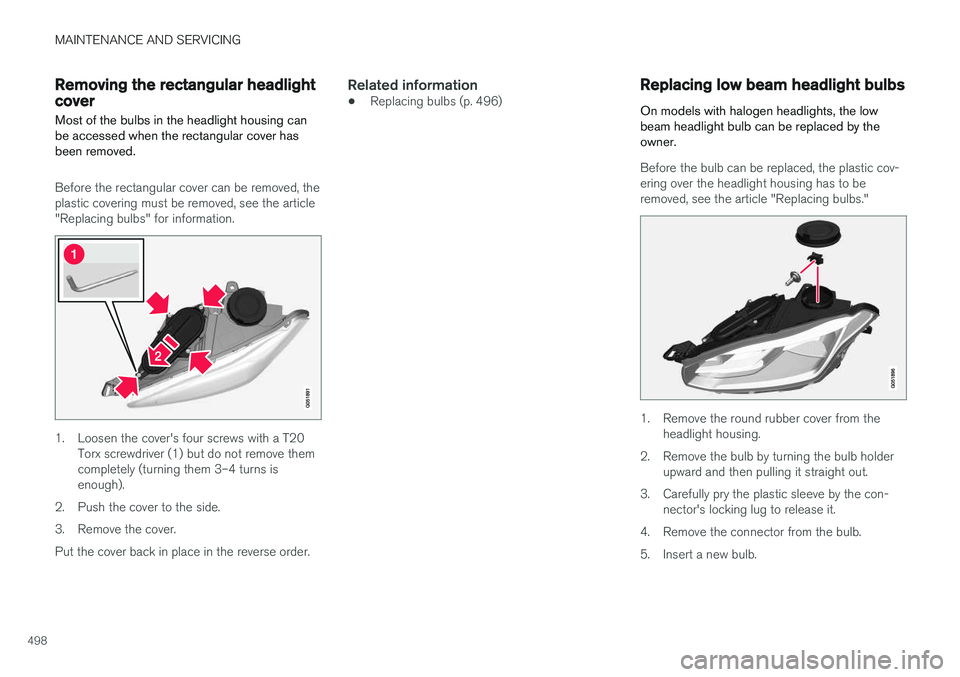
1. Loosen the cover's four screws with a T20 Torx screwdriver (1) but do not remove them completely (turning them 3–4 turns isenough).
2. Push the cover to the side.
3. Remove the cover.Put the cover back in place in the reverse order.
Related information
• Replacing bulbs (p. 496)
Replacing low beam headlight bulbs
On models with halogen headlights, the low beam headlight bulb can be replaced by theowner.
Before the bulb can be replaced, the plastic cov- ering over the headlight housing has to be removed, see the article "Replacing bulbs."
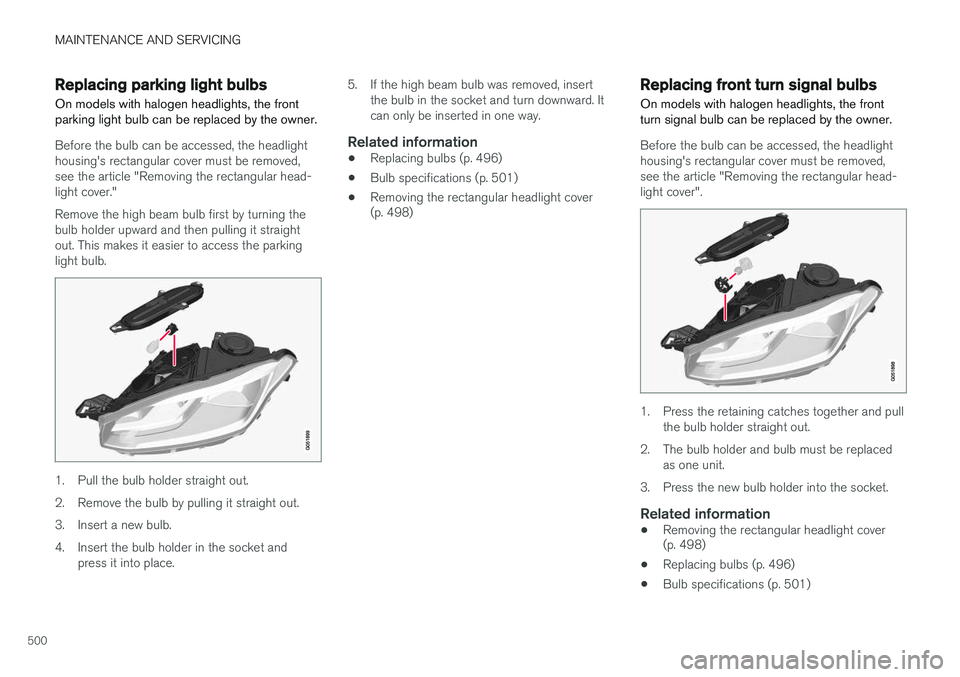
1. Remove the round rubber cover from the headlight housing.
2. Remove the bulb by turning the bulb holder upward and then pulling it straight out.
3. Carefully pry the plastic sleeve by the con- nector's locking lug to release it.
4. Remove the connector from the bulb.
5. Insert a new bulb.
Page 501 of 546
MAINTENANCE AND SERVICING
499
6. Insert the bulb in the socket and turn down-
ward. It can only be inserted in one way.
7. Put the rubber cover back into place.
Related information
• Replacing bulbs (p. 496)
• Bulb specifications (p. 501)
Replacing High Beam headlight bulbs
On models with halogen headlights, the High Beam headlight bulb can be replaced by theowner.
Before the bulb can be accessed, the headlight housing's rectangular cover must be removed,see the article "Removing the rectangular head-light cover."
1. Remove the bulb by turning the bulb holder upward and then pulling it straight out.
2. Carefully pry the plastic sleeve by the con- nector's locking lug to release it.
3. Remove the connector from the bulb.
4. Insert a new bulb.
5. Insert the bulb in the socket and turn down- ward. It can only be inserted in one way.
Related information
• Removing the rectangular headlight cover (p. 498)
• Bulb specifications (p. 501)
Page 502 of 546

MAINTENANCE AND SERVICING
500
Replacing parking light bulbsOn models with halogen headlights, the front parking light bulb can be replaced by the owner.
Before the bulb can be accessed, the headlight housing's rectangular cover must be removed,see the article "Removing the rectangular head-light cover." Remove the high beam bulb first by turning the bulb holder upward and then pulling it straightout. This makes it easier to access the parkinglight bulb.
1. Pull the bulb holder straight out.
2. Remove the bulb by pulling it straight out.
3. Insert a new bulb.
4. Insert the bulb holder in the socket and press it into place. 5. If the high beam bulb was removed, insert
the bulb in the socket and turn downward. It can only be inserted in one way.
Related information
• Replacing bulbs (p. 496)
• Bulb specifications (p. 501)
• Removing the rectangular headlight cover (p. 498)
Replacing front turn signal bulbs On models with halogen headlights, the front turn signal bulb can be replaced by the owner.
Before the bulb can be accessed, the headlight housing's rectangular cover must be removed,see the article "Removing the rectangular head-light cover".
1. Press the retaining catches together and pull
the bulb holder straight out.
2. The bulb holder and bulb must be replaced as one unit.
3. Press the new bulb holder into the socket.
Related information
• Removing the rectangular headlight cover (p. 498)
• Replacing bulbs (p. 496)
• Bulb specifications (p. 501)
Page 503 of 546
MAINTENANCE AND SERVICING
501
Bulb specifications The following specifications apply to models equipped with halogen headlights. If other bulbsneed to be replaced, contact a trained and quali-fied Volvo service technician.
Function[W]AType
Low beam55H11
High Beam65H9
Turn signal24PY24W
Daytime running light/ parking light21/5W21/5W
A
Watt
Related information
• Replacing bulbs (p. 496)
Page 513 of 546

MAINTENANCE AND SERVICING
}}
* Option/accessory, for more information, see Introduction.511
Refilling the windshield washer fluid reservoir
Washer fluid helps keep the windshield and headlights clean.
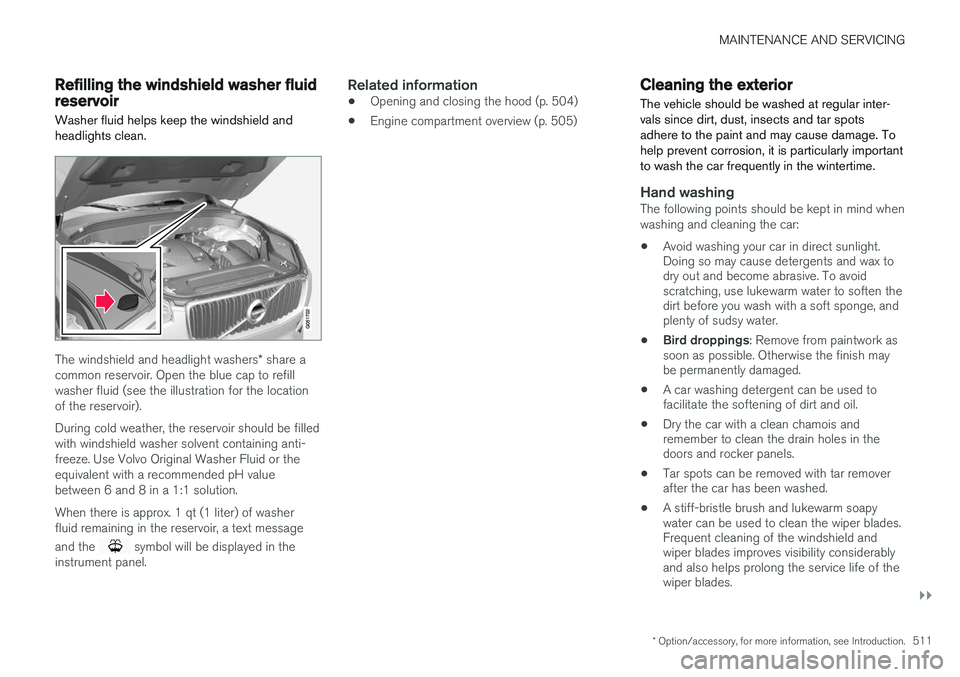
The windshield and headlight washers * share a
common reservoir. Open the blue cap to refill washer fluid (see the illustration for the locationof the reservoir). During cold weather, the reservoir should be filled with windshield washer solvent containing anti-freeze. Use Volvo Original Washer Fluid or theequivalent with a recommended pH valuebetween 6 and 8 in a 1:1 solution. When there is approx. 1 qt (1 liter) of washer fluid remaining in the reservoir, a text message and the
symbol will be displayed in the
instrument panel.
Related information
• Opening and closing the hood (p. 504)
• Engine compartment overview (p. 505)
Cleaning the exterior
The vehicle should be washed at regular inter- vals since dirt, dust, insects and tar spotsadhere to the paint and may cause damage. Tohelp prevent corrosion, it is particularly importantto wash the car frequently in the wintertime.
Hand washingThe following points should be kept in mind when washing and cleaning the car: • Avoid washing your car in direct sunlight. Doing so may cause detergents and wax todry out and become abrasive. To avoidscratching, use lukewarm water to soften thedirt before you wash with a soft sponge, andplenty of sudsy water.
• Bird droppings
: Remove from paintwork as
soon as possible. Otherwise the finish maybe permanently damaged.
• A car washing detergent can be used tofacilitate the softening of dirt and oil.
• Dry the car with a clean chamois andremember to clean the drain holes in thedoors and rocker panels.
• Tar spots can be removed with tar removerafter the car has been washed.
• A stiff-bristle brush and lukewarm soapywater can be used to clean the wiper blades.Frequent cleaning of the windshield andwiper blades improves visibility considerablyand also helps prolong the service life of thewiper blades.
Page 514 of 546

||
MAINTENANCE AND SERVICING
512•
Wash off the dirt from the underside (wheel housings, fenders, etc).
• In areas of high industrial fallout, more fre-quent washing is recommended.
CAUTION
• During high pressure washing, the spray mouthpiece must never be closer to thevehicle than 13" (30 cm). Do not sprayinto the locks.
• Dirt, snow, etc., on the headlights canreduce lighting capacity considerably.Clean the headlights regularly, for exam-ple when refueling.
Special laminated panoramic roof cau-
tions:
• Always close the laminated panoramicroof and sun shade before washing yourvehicle.
• Never use abrasive cleaning agents onthe laminated panoramic roof.
• Never use wax on the rubber sealsaround the laminated panoramic roof.
NOTE
When washing the car, remember to remove dirt from the drain holes in the doors and sills.
Automatic car washes
•We do NOT recommend washing your car in an automatic wash during the first fewmonths (because the paint will not havehardened sufficiently).
• An automatic wash is a simple and quick wayto clean your car, but it is worth rememberingthat it may not be as thorough as when youyourself go over the car with sponge andwater. Keeping the underbody clean is mostimportant, especially in the winter. Someautomatic washers do not have facilities forwashing the underbody.
NOTE
Condensation may form temporarily on the inside of the lenses of exterior lights such asheadlights or taillights. This is normal and thelights are designed to withstand moisture.Normally, condensation will dissipate after thelights have been on for a short time.
CAUTION
When using an automatic car wash in which the vehicle has to be able to roll freely, theauto-hold brake function must be deactivated.If this is not done, the brakes will automati-cally be applied when the vehicle is stationary. To deactivate this function:
1. Drive the vehicle into the car wash
2. Turn off the auto-hold function using the
control on the center console
3. Turn off the parking brake's automatic function in the center display's Top view (tap
Settings, tap My CarElectric
Parking Brake and deselect Auto
Activate Parking Brake)
4. Put the gear selector in N
5. Switch off the ignition by turning the start knob to STOP and holding it in this posi-
tion for at least 4 seconds
The vehicle will then be able to roll freely.
Page 535 of 546
INDEX
533
A
A/C (air conditioning) 198
Accessory installation warning 26, 28
Active high beams 143
Active yaw control 323
Adaptive brake lights 350
Adaptive cruise control 266, 268, 269,271, 272, 273, 282, 283, 284, 286
passing assistance 284
radar sensor 283, 284
Adaptive Cruise Control fault tracing 285
Airbags disconnecting the front passenger