2016 VOLVO XC90 T8 lights
[x] Cancel search: lightsPage 200 of 546
CLIMATE
* Option/accessory, for more information, see Introduction.
198
Air conditioning
The air conditioning cools and dehumidifies the air in the passenger compartment.
Activating/deactivating the main air conditioning unit
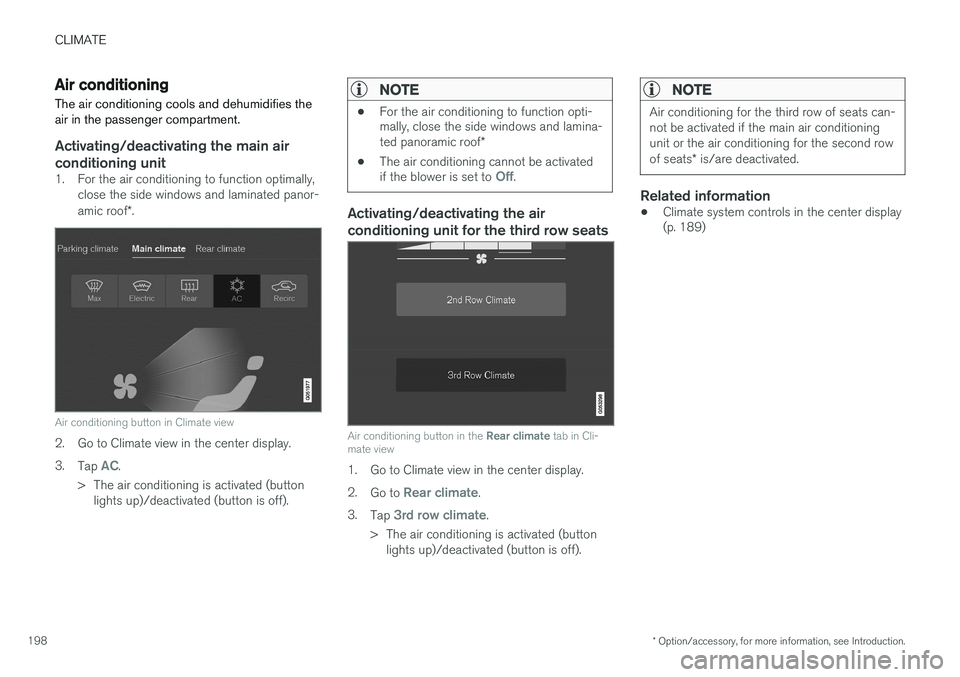
1. For the air conditioning to function optimally, close the side windows and laminated panor- amic roof *.
Air conditioning button in Climate view
2. Go to Climate view in the center display. 3.
Tap
AC.
> The air conditioning is activated (button lights up)/deactivated (button is off).
NOTE
• For the air conditioning to function opti- mally, close the side windows and lamina- ted panoramic roof
*
• The air conditioning cannot be activated if the blower is set to
Off.
Activating/deactivating the air conditioning unit for the third row seats
Air conditioning button in the
Rear climate tab in Cli-
mate view
1. Go to Climate view in the center display. 2. Go to
Rear climate.
3. Tap
3rd row climate.
> The air conditioning is activated (button lights up)/deactivated (button is off).
NOTE
Air conditioning for the third row of seats can- not be activated if the main air conditioningunit or the air conditioning for the second row of seats * is/are deactivated.
Related information
• Climate system controls in the center display (p. 189)
Page 215 of 546

LOADING AND STORAGE
}}
213
trained and qualified Volvo service techni- cian.
Failure to follow the points above could result in electrical shock and/or serious injury.Status indication
An LED (Light Emitting Diode) on the socket indicates its status:
Status indicator lightSocket statusAction
Steady green lightThe socket is providing current to a connected device.None.
Flashing orange lightThe socket's voltage converter is too hot (the connected device draws too much current, etc. or the temperature in the passenger compartment is very high).Unplug the device, let the converter cool down and plug in the device again.
The connected device draws too much current (constantly or currently) or is not functioning properly.None. The device should not be plugged into the socket.
Indicator light offThe socket has not detected a plugged in device.Be sure the device is correctly plugged into the socket.
The socket is not active.Put the vehicle's ignition in at least mode I.
The socket has been active but has been deactivated.Start the engine and/or charge the start battery.
If a problem persists, have the socket checked by a trained and qualified Volvo service technician.
Page 243 of 546
LOCKS AND ALARM
241
Indicators in the interior lock buttons
Lock buttons in the front doors
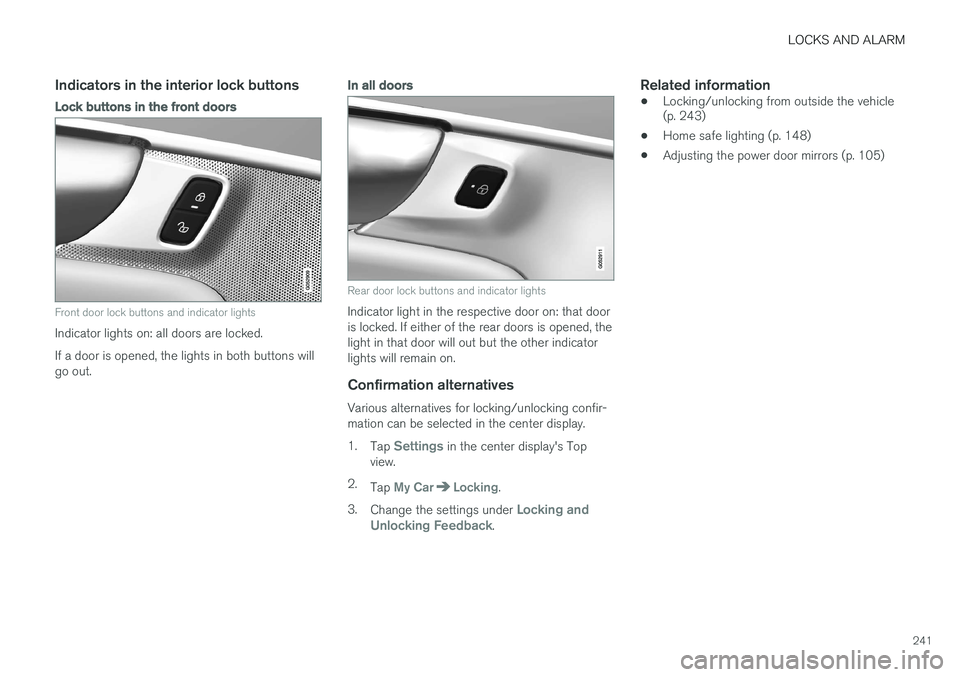
Front door lock buttons and indicator lights
Indicator lights on: all doors are locked. If a door is opened, the lights in both buttons will go out.
In all doors
Rear door lock buttons and indicator lights
Indicator light in the respective door on: that door is locked. If either of the rear doors is opened, thelight in that door will out but the other indicatorlights will remain on.
Confirmation alternatives
Various alternatives for locking/unlocking confir-mation can be selected in the center display. 1.Tap
Settings in the center display's Top
view.
2. Tap
My CarLocking.
3. Change the settings under
Locking and
Unlocking Feedback.
Related information
• Locking/unlocking from outside the vehicle (p. 243)
• Home safe lighting (p. 148)
• Adjusting the power door mirrors (p. 105)
Page 244 of 546
LOCKS AND ALARM
* Option/accessory, for more information, see Introduction.
242
Locking/unlocking from inside the vehicle The lock buttons on either of the front doors can be used to lock or unlock all doors and the tail-gate at the same time. The rear doors can be locked using their respective lock buttons *.
The central locking system
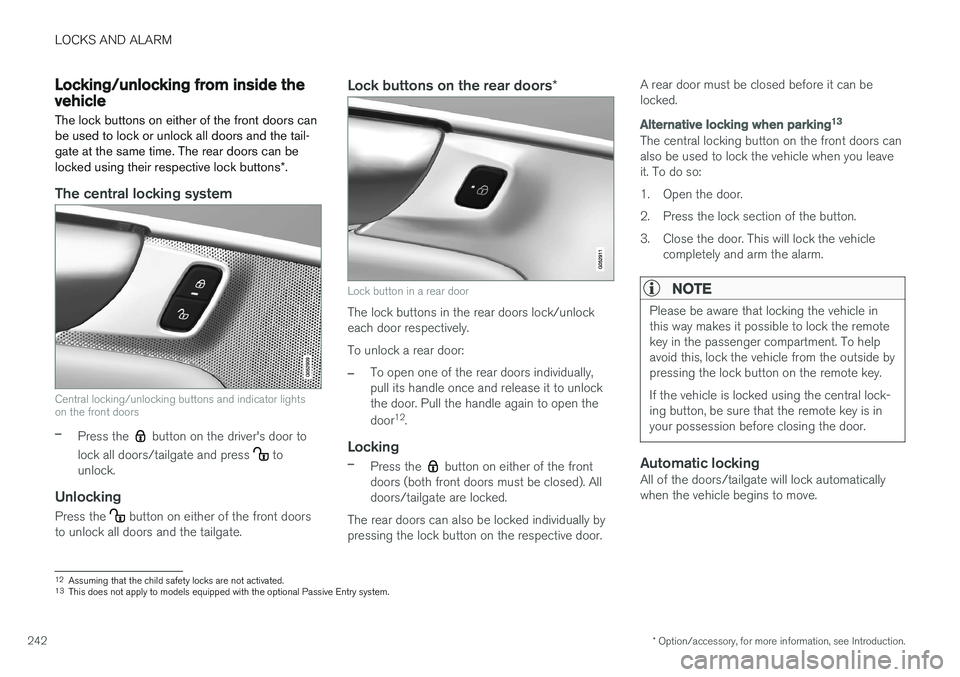
Central locking/unlocking buttons and indicator lights on the front doors
–Press the button on the driver's door to
lock all doors/tailgate and press
to
unlock.
Unlocking
Press the button on either of the front doors
to unlock all doors and the tailgate.
Lock buttons on the rear doors *
Lock button in a rear door
The lock buttons in the rear doors lock/unlock each door respectively. To unlock a rear door:
–To open one of the rear doors individually, pull its handle once and release it to unlockthe door. Pull the handle again to open the door12
.
Locking
–Press the button on either of the front
doors (both front doors must be closed). All doors/tailgate are locked.
The rear doors can also be locked individually bypressing the lock button on the respective door. A rear door must be closed before it can belocked.
Alternative locking when parking
13
The central locking button on the front doors can also be used to lock the vehicle when you leaveit. To do so:
1. Open the door.
2. Press the lock section of the button.
3. Close the door. This will lock the vehicle
completely and arm the alarm.
NOTE
Please be aware that locking the vehicle in this way makes it possible to lock the remotekey in the passenger compartment. To helpavoid this, lock the vehicle from the outside bypressing the lock button on the remote key. If the vehicle is locked using the central lock- ing button, be sure that the remote key is inyour possession before closing the door.
Automatic lockingAll of the doors/tailgate will lock automatically when the vehicle begins to move.
12Assuming that the child safety locks are not activated.13
This does not apply to models equipped with the optional Passive Entry system.
Page 254 of 546
DRIVER SUPPORT
* Option/accessory, for more information, see Introduction.
252
Driver support systems
The vehicle is equipped with a number of driver support systems that help provide the driver withactive/passive support.
Some of these systems are standard while others are optional and they are designed to e.g., helpthe driver maintain a set speed or a set distanceto a vehicle ahead, or warn the driver of a poten-tial collision situation and in certain cases applythe brakes if necessary. Certain optional systemscan also assist in various parking situations.
Related information
• Adjustable steering force
* (p. 323)
• Electronic Stability Control (ESC) (p. 323)
• Speed limiter (SL)
* (p. 298)
• Cruise Control (CC) (p. 261)
• Adaptive Cruise Control (ACC)
* (p. 266)
• Pilot Assist
* (p. 273)
• Distance Alert
* (p. 329)
• City Safety
™ (p. 287)
• Blind Spot Information (BLIS)
* (p. 330)
• Cross Traffic Alert (CTA)
* (p. 333)
• Driver Alert Control (DAC) (p. 327)
• Driving lane assistance (p. 338)
• Road Sign Information (RSI)
* (p. 304)
• Park Assist
* (p. 306)
• Park Assist Pilot (PAP)
* (p. 316) •
Park Assist Camera (PAC)
* (p. 311)
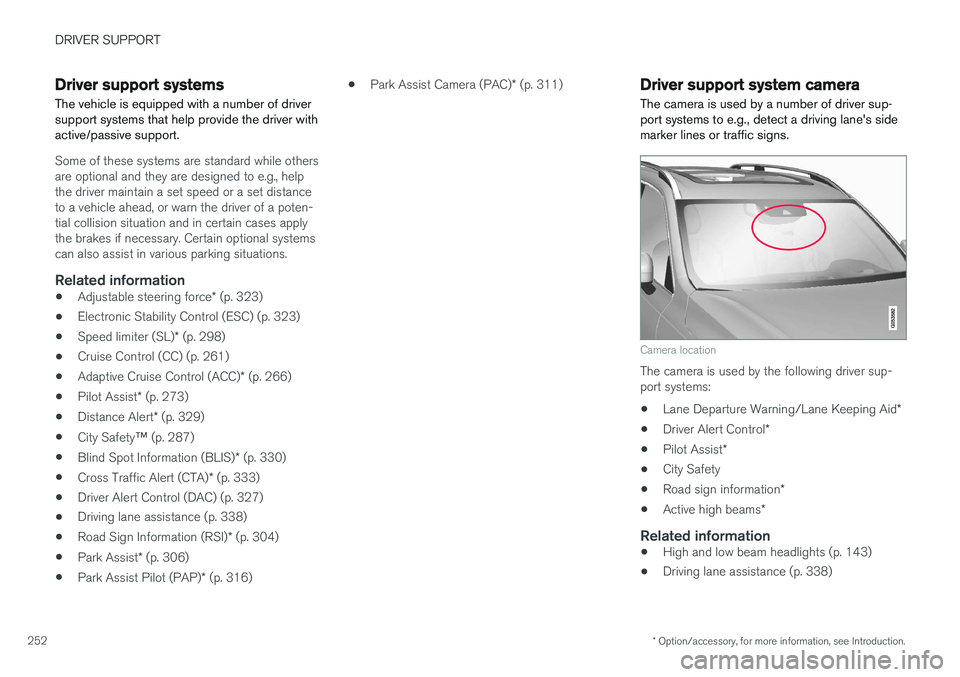
Driver support system camera
The camera is used by a number of driver sup- port systems to e.g., detect a driving lane's sidemarker lines or traffic signs.
Camera location
The camera is used by the following driver sup- port systems:
• Lane Departure Warning/Lane Keeping Aid
*
• Driver Alert Control
*
• Pilot Assist
*
• City Safety
• Road sign information
*
• Active high beams
*
Related information
•High and low beam headlights (p. 143)
• Driving lane assistance (p. 338)
Page 281 of 546
DRIVER SUPPORT
}}
* Option/accessory, for more information, see Introduction.279
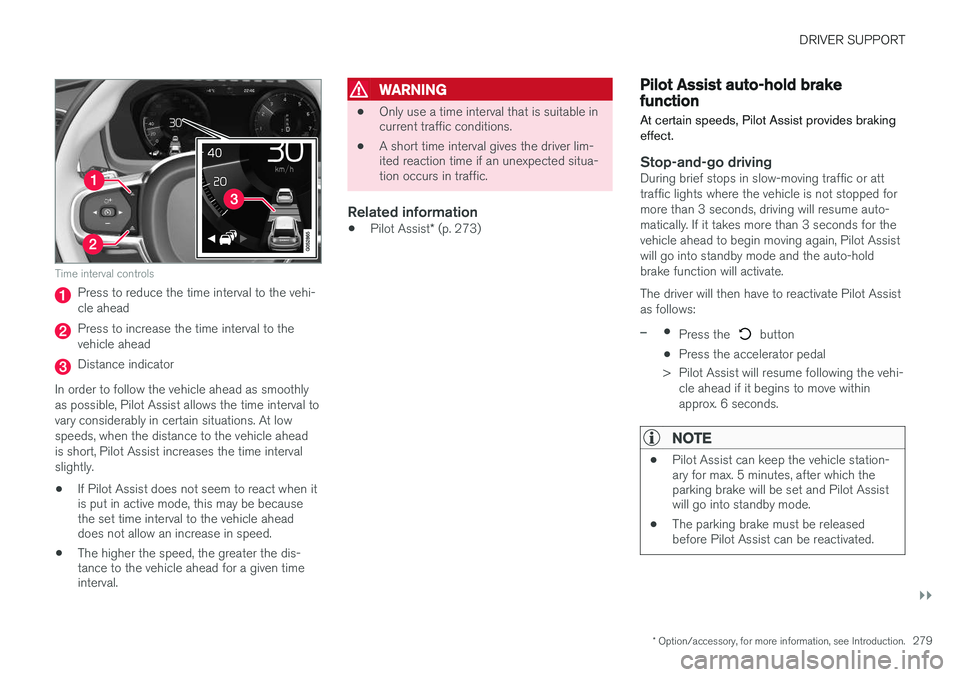
Time interval controls
Press to reduce the time interval to the vehi- cle ahead
Press to increase the time interval to the vehicle ahead
Distance indicator
In order to follow the vehicle ahead as smoothly as possible, Pilot Assist allows the time interval tovary considerably in certain situations. At lowspeeds, when the distance to the vehicle aheadis short, Pilot Assist increases the time intervalslightly.
• If Pilot Assist does not seem to react when it is put in active mode, this may be becausethe set time interval to the vehicle aheaddoes not allow an increase in speed.
• The higher the speed, the greater the dis-tance to the vehicle ahead for a given timeinterval.
WARNING
• Only use a time interval that is suitable in current traffic conditions.
• A short time interval gives the driver lim-ited reaction time if an unexpected situa-tion occurs in traffic.
Related information
•
Pilot Assist
* (p. 273)
Pilot Assist auto-hold brake function At certain speeds, Pilot Assist provides braking effect.
Stop-and-go drivingDuring brief stops in slow-moving traffic or att traffic lights where the vehicle is not stopped formore than 3 seconds, driving will resume auto-matically. If it takes more than 3 seconds for thevehicle ahead to begin moving again, Pilot Assistwill go into standby mode and the auto-holdbrake function will activate. The driver will then have to reactivate Pilot Assist as follows:
–•
Press the button
• Press the accelerator pedal
> Pilot Assist will resume following the vehi- cle ahead if it begins to move within approx. 6 seconds.
NOTE
• Pilot Assist can keep the vehicle station- ary for max. 5 minutes, after which theparking brake will be set and Pilot Assistwill go into standby mode.
• The parking brake must be releasedbefore Pilot Assist can be reactivated.
Page 291 of 546
DRIVER SUPPORT
}}}}
289
When City Safety applies the brakes, the brake lights will illuminate. When City Safety is triggered and applies the brakes, a text message will be displayed in theinstrument panel.
Related information
•
City Safety
™ troubleshooting (p. 295)
• City Safety in crossing traffic (p. 291)
• City Safety limitations (p. 293)
• City Safety symbols and messages (p. 297)
• Detecting cyclists and pedestrians with City Safety (p. 290)
• Rear Collision Warning (RCW) (p. 292)
• City Safety warning level settings (p. 289)
• City Safety in crossing traffic (p. 291)
• Seat belts (p. 64)
City Safety warning level settings
City Safety is always activated but the function's warning distance can be adjusted.
NOTE
City Safety cannot be turned off and activates automatically each time the engine/electricmotor is started.
Setting a warning level (distance)
The distance set for warnings determines the system's responsiveness and sets the distance atwhich visual, audible and tangible (haptic) warn-ings will be triggered. To do so:1. Tap
Settings in the center display's Top
view.
2. Tap
My CarIntelliSafeCity Safety.
3. Choose among
Earlier, Normal or Later.
Begin by choosing
Earlier. If too many warnings
are given, change to Normal.
If the driver feels that warnings are given too often, the warning level can be lowered. Thismeans that warnings will be provided later, result-ing in fewer warnings being given. The setting
Later should only used in exceptional
circumstances, e.g., for a more dynamic driving style.
WARNING
• No automatic system can be guaranteed to function 100% correctly in all situa-tions. For that reason, never test CitySafety by driving toward a person orobject. This could result in serious injuryor death.
• Even if the setting
Earlier has been
selected, warnings may be perceived as being given late, e.g., if the difference inspeed is great or if the vehicle aheadbrakes suddenly.
• City Safety can provide a warning for apotential collision but it can never shortenthe driver's reaction time.
• To help make City Safety as effective as possible, always using the setting
Earlieris recommended.
NOTE
•Due to local traffic regulations in certain markets, RCW will
not activate the rear
turn signals. That part of the function will be deactivated.
• The use of the rear turn signals will alsobe deactivated if the City Safety warning level is set at
Later. See also the section
"Setting a warning level (distance)" in the article "City Safety settings."
• If RCW detects a vehicle approachingfrom behind, the seat belt pretensioners
Page 292 of 546
||
DRIVER SUPPORT
290
and Whiplash Protection System will be activated.
Related information
•City Safety limitations (p. 293)
• City Safety
™ (p. 287)
• Rear Collision Warning (RCW) (p. 292)
Detecting cyclists and pedestrians with City Safety
City Safety can detect vehicles, cyclists and pedestrians.
VehiclesCity Safety detects most types of vehicles that are either stationary, moving in the same direc-tion as your vehicle or approaching when you areabout to turn left. In order for City Safety to detect a vehicle in darkness, its headlights and taillights must be onand clearly visible.
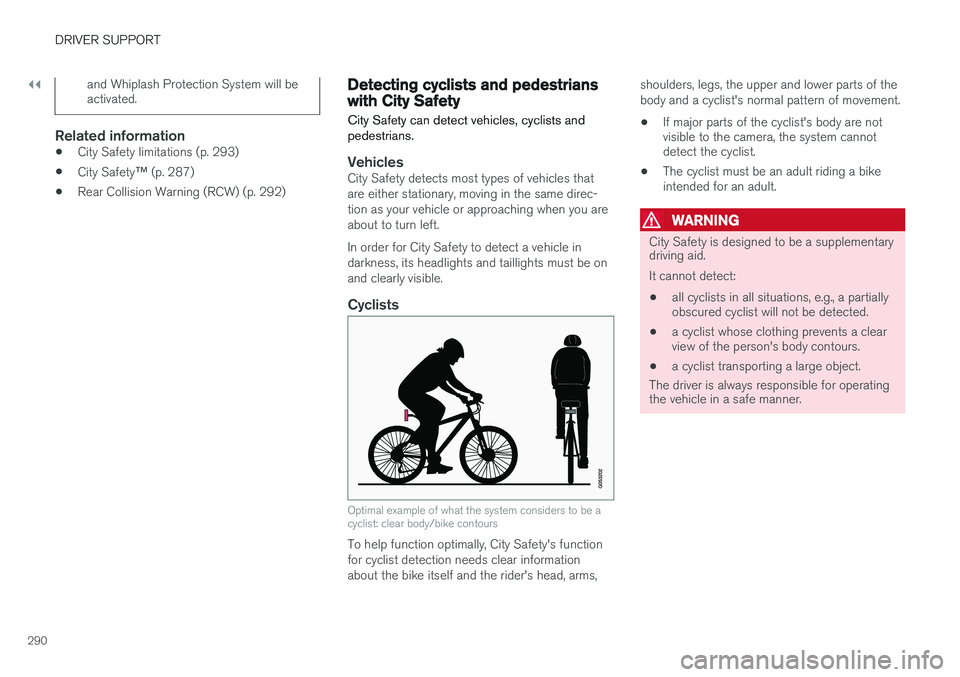
Cyclists
Optimal example of what the system considers to be a cyclist: clear body/bike contours
To help function optimally, City Safety's function for cyclist detection needs clear informationabout the bike itself and the rider's head, arms, shoulders, legs, the upper and lower parts of thebody and a cyclist's normal pattern of movement.
• If major parts of the cyclist's body are not visible to the camera, the system cannotdetect the cyclist.
• The cyclist must be an adult riding a bikeintended for an adult.
WARNING
City Safety is designed to be a supplementary driving aid. It cannot detect:
• all cyclists in all situations, e.g., a partially obscured cyclist will not be detected.
• a cyclist whose clothing prevents a clearview of the person's body contours.
• a cyclist transporting a large object.
The driver is always responsible for operating the vehicle in a safe manner.