Page 457 of 546

WHEELS AND TIRES
}}
* Option/accessory, for more information, see Introduction.455
WARNING
•The jack must correctly engage the jack attachment.
• Be sure the jack is on a firm, level, non-slippery surface.
• Never allow any part of your body to beextended under a vehicle supported by ajack.
• Use the jack intended for the vehicle whenchanging a tire. For any other job, usestands to support the vehicle.
• Apply the parking brake and put the gear selector in the Park (
P) position.
• Block the wheels standing on the ground, use rigid wooden blocks or large stones.
• The jack should be kept well-greased andclean, and should not be damaged.
• No objects should be placed between thebase of jack and the ground, or betweenthe jack and the attachment bar on thevehicle.
NOTE
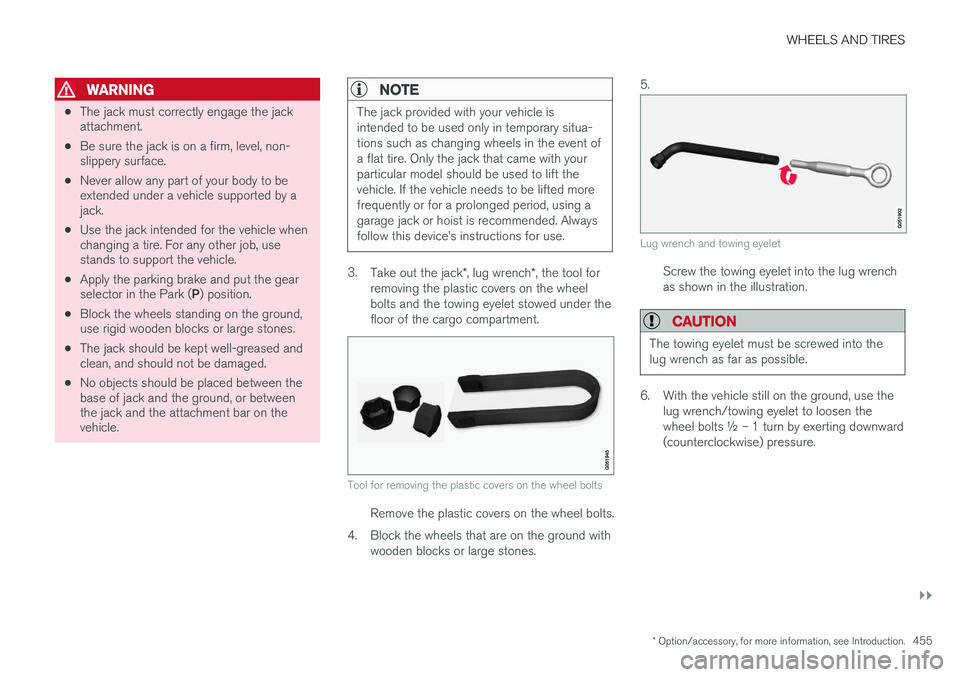
The jack provided with your vehicle is intended to be used only in temporary situa-tions such as changing wheels in the event ofa flat tire. Only the jack that came with yourparticular model should be used to lift thevehicle. If the vehicle needs to be lifted morefrequently or for a prolonged period, using agarage jack or hoist is recommended. Alwaysfollow this device
Page 460 of 546

||
WHEELS AND TIRES
458If a spare wheel or other wheel without a TPMS sensor is used, a fault message will appear in theinstrument panel after driving for a few minutes. After changing wheels, always check that the new wheels have TPMS sensors to avoid a sys-tem malfunction warning. TPMS does not replace the need for regular tire inspection and maintenance.
RecommendationsTPMS sensors should be mounted on all wheelsused with the vehicle, including winter wheels.
NOTE
•
If you change to tires with a different dimension than the factory-installed ones,the TPMS system must be reconfiguredfor these tires. This must be done by atrained and qualified Volvo service techni-cian.
• If a tire is changed, or if the TPMS sensoris moved to another wheel, the rubbervalve and valve core should be replaced.
• When installing TPMS sensors, the vehi-cle must be parked for at least15 minutes with the ignition off. If thevehicle is driven within 15 minutes, aTPMS error message will be displayed.
WARNING
Incorrect inflation pressure could lead to tire failure, resulting in a loss of control of thevehicle.
Turning TPMS off 4TPMS can be turned off in the center display's Top view.
1. Park the vehicle and turn off the engine.2.
Activate ignition mode I.
3. Select
SettingsMy CarIntelliSafe
Tire Pressure Monitor in the Top view
and deselect (tap) the button.
> The function will remain off until it is reac- tivated.
Related information
• Checking inflation pressure (p. 458)
• Reinflating tires equipped with the Tire Pressure Monitoring System (TPMS)(p. 459)
• Tire Pressure Monitoring System type appro-val (p. 461)
• Ignition modes (p. 370)
Checking inflation pressure The Tire Pressure Monitoring System makes it possible to view the current inflation pressure ofall four tires.
Checking inflation pressureOpen the Car status app in
the center display's Application view. Tap
Status to see the
current inflation pressure of all four tires.
The on-screen graphic displays the inflation pres- sure.
The illustration is generic and may vary from model to model or after a software update
4 Certain markets only.
Page 462 of 546

||
WHEELS AND TIRES
460
NOTE
To help avoid incorrect tire inflation pressure, if possible only inflate the tires when they arecold. The tires are considered to be coldwhen they have the same temperature as thesurrounding (ambient) air. This temperature isnormally reached after the vehicle has beenparked for at least 3 hours. After driving a dis-tance of approximately 1 mile (1.6 km), thetires are considered to be warm.
CAUTION
When inflating tires with TPMS sensors, press the pump's mouthpiece straight onto thevalve to help avoid bending or otherwise dam-aging the valve.
CAUTION
•After inflating the tires, always reinstall the valve cap to help avoid damage to thevalve from dirt, gravel, etc.
• Use plastic valve caps only. Metal capscould corrode and become difficult toremove.
WARNING
• Incorrect inflation pressure could lead to tire failure, resulting in a loss of control ofthe vehicle.
• Tire monitoring systems cannot indicatesudden tire damage caused by externalfactors (e.g., a blowout) in advance.
Related information
•
Tire Pressure Monitoring System (TPMS)(p. 457)
• Checking inflation pressure (p. 458)
Calibrating the Tire Pressure Monitoring System (TPMS) 6
In certain situations, a text pertaining to calibra- tion requirements may appear in the center dis-play. This text is generic and does not apply
to North American models .
6
Certain markets only.
Page 482 of 546

||
MAINTENANCE AND SERVICING
480
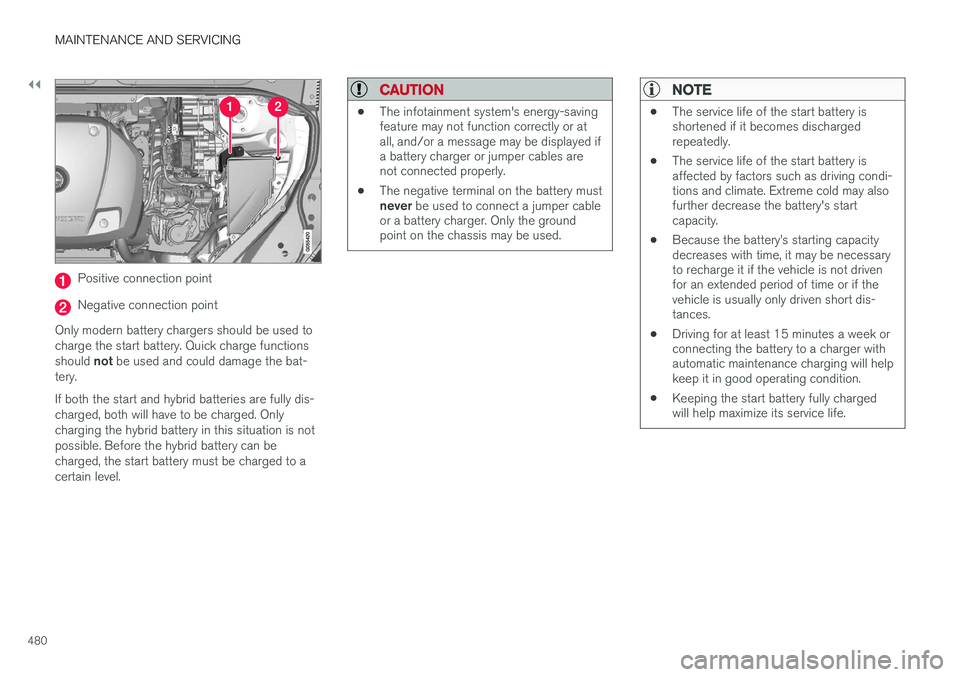
Positive connection point
Negative connection point
Only modern battery chargers should be used to charge the start battery. Quick charge functions should not be used and could damage the bat-
tery. If both the start and hybrid batteries are fully dis- charged, both will have to be charged. Onlycharging the hybrid battery in this situation is notpossible. Before the hybrid battery can becharged, the start battery must be charged to acertain level.
CAUTION
• The infotainment system's energy-saving feature may not function correctly or atall, and/or a message may be displayed ifa battery charger or jumper cables arenot connected properly.
• The negative terminal on the battery must never
be used to connect a jumper cable
or a battery charger. Only the ground point on the chassis may be used.
NOTE
• The service life of the start battery is shortened if it becomes dischargedrepeatedly.
• The service life of the start battery isaffected by factors such as driving condi-tions and climate. Extreme cold may alsofurther decrease the battery's startcapacity.
• Because the battery
Page 505 of 546
MAINTENANCE AND SERVICING
503
Location of the jack attachment points (triangles)/lifting points (red areas)
NOTE
The jack provided with your vehicle is intended to be used only in temporary situa-tions such as changing wheels in the event ofa flat tire. Only the jack that came with yourparticular model should be used to lift thevehicle. If the vehicle needs to be lifted morefrequently or for a prolonged period, using agarage jack or hoist is recommended. Alwaysfollow this device
Page 508 of 546
||
MAINTENANCE AND SERVICING
506
•The distributor ignition system operates at very high voltages. Special safety pre-cautions must be followed to prevent injury. Always turn the ignition
off when
replacing distributor ignition components e.g. plugs, coil, etc.
• Do not touch any part of the distributorignition system while the engine is run-ning. This may result in unintended move-ments and body injury.
The layout of the engine compartment may differ slightly from model to model
Coolant expansion tank
Brake fluid reservoir
Washer fluid reservoir
Relay/fuse box
Air cleaner
Engine oil filler cap
Related information
• Ignition modes (p. 370)
• Opening and closing the hood (p. 504)
• Refilling the windshield washer fluid reservoir (p. 511)
Engine oil
The correct oil must be used for the stated oil change (service) intervals to apply.
Volvo recommends:
Page 509 of 546

MAINTENANCE AND SERVICING
}}
507
CAUTION
•Not checking the oil level regularly can result in serious engine damage if the oillevel becomes too low.
• Oil that is lower than the specified qualitycan damage the engine.
• Volvo does not recommend the use of oiladditives.
• Always add oil of the same type and vis-cosity as already used.
• Oil changes should be carried out by atrained and qualified Volvo service techni-cian.
• Using oil of higher than the specifiedquality is permitted and may be neces-sary for demanding driving.
Also, refer to the Warranty and Service Records information booklet for information on oil changeintervals and oil specifications.
Related information
•
Checking and refilling engine oil (p. 507)
Checking and refilling engine oil The oil level is checked electronically.
Oil filler cap 3
It may be necessary to top up engine oil between regularly scheduled services. No action is necessary until a message is dis- played in the instrument panel.
WARNING
•
Do not allow oil to spill onto or come into contact with hot exhaust pipe surfaces.
• If
Engine oil level Service required is
displayed, have the vehicle checked by a trained and qualified Volvo service techni-cian. The oil level may be too high.
Checking the oil levelThe oil level can be checked in the center display when theengine is not running. From the center display's Home view, swipe the screenfrom right to left to open App
view. Tap
Car status and then tap Status to
show the oil level.
Oil level graphic in the center display
The oil level should be checked at regular inter- vals, particularly during the period up to the firstscheduled maintenance service. If the oil level sensor indicates that the level is too low, using the correct oil, top up with theamount of oil indicated as soon as possible.
3 Models with an electronic oil level sensor do not have a dipstick.
Page 524 of 546

||
SPECIFICATIONS
522
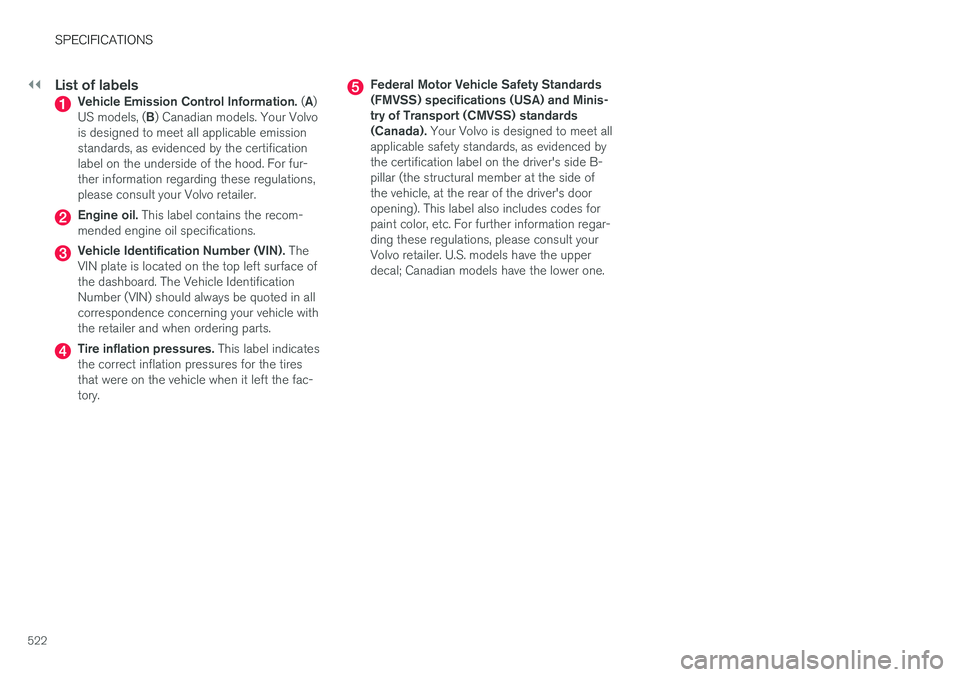
List of labelsVehicle Emission Control Information. (A )
US models, ( B) Canadian models. Your Volvo
is designed to meet all applicable emission standards, as evidenced by the certificationlabel on the underside of the hood. For fur-ther information regarding these regulations,please consult your Volvo retailer.
Engine oil. This label contains the recom-
mended engine oil specifications.
Vehicle Identification Number (VIN). The
VIN plate is located on the top left surface of the dashboard. The Vehicle IdentificationNumber (VIN) should always be quoted in allcorrespondence concerning your vehicle withthe retailer and when ordering parts.
Tire inflation pressures. This label indicates
the correct inflation pressures for the tires that were on the vehicle when it left the fac-tory.
Federal Motor Vehicle Safety Standards (FMVSS) specifications (USA) and Minis-try of Transport (CMVSS) standards(Canada). Your Volvo is designed to meet all
applicable safety standards, as evidenced bythe certification label on the driver's side B-pillar (the structural member at the side ofthe vehicle, at the rear of the driver's dooropening). This label also includes codes forpaint color, etc. For further information regar-ding these regulations, please consult yourVolvo retailer. U.S. models have the upperdecal; Canadian models have the lower one.