2016 VOLVO XC90 T8 ECO mode
[x] Cancel search: ECO modePage 400 of 546
||
STARTING AND DRIVING
* Option/accessory, for more information, see Introduction.
398
Brake – B
B can be selected at any time during a drive. In
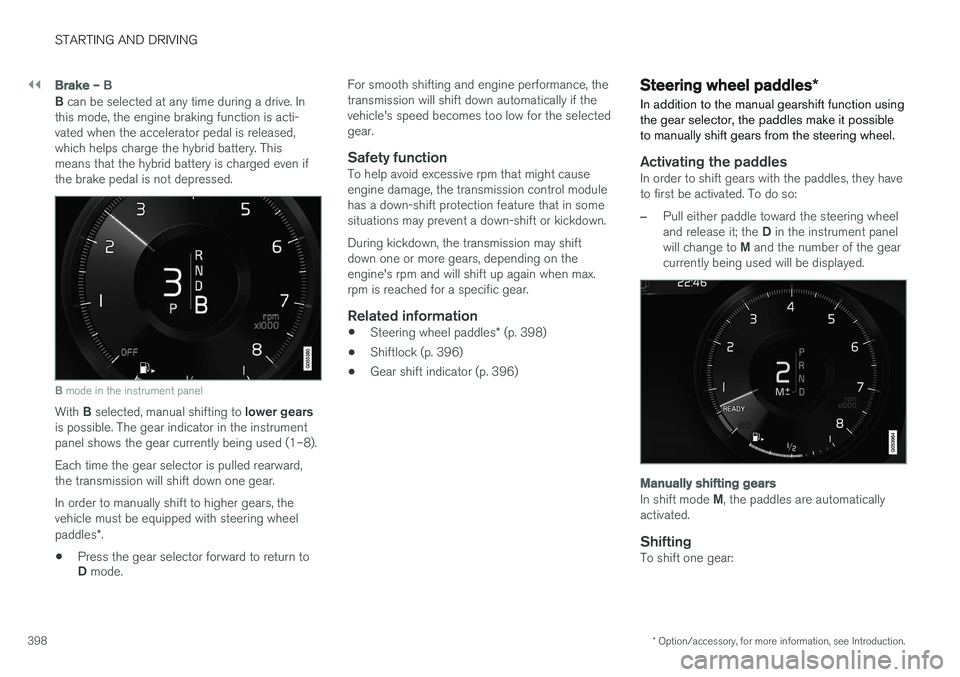
this mode, the engine braking function is acti- vated when the accelerator pedal is released,which helps charge the hybrid battery. Thismeans that the hybrid battery is charged even ifthe brake pedal is not depressed.
B mode in the instrument panel
With B selected, manual shifting to lower gears
is possible. The gear indicator in the instrument panel shows the gear currently being used (1–8). Each time the gear selector is pulled rearward, the transmission will shift down one gear. In order to manually shift to higher gears, the vehicle must be equipped with steering wheel paddles *.
• Press the gear selector forward to return to D
mode. For smooth shifting and engine performance, the transmission will shift down automatically if thevehicle's speed becomes too low for the selectedgear.
Safety functionTo help avoid excessive rpm that might causeengine damage, the transmission control modulehas a down-shift protection feature that in somesituations may prevent a down-shift or kickdown. During kickdown, the transmission may shift down one or more gears, depending on theengine's rpm and will shift up again when max.rpm is reached for a specific gear.
Related information
•
Steering wheel paddles
* (p. 398)
• Shiftlock (p. 396)
• Gear shift indicator (p. 396)
Steering wheel paddles
*
In addition to the manual gearshift function using the gear selector, the paddles make it possibleto manually shift gears from the steering wheel.
Activating the paddlesIn order to shift gears with the paddles, they have to first be activated. To do so:
–Pull either paddle toward the steering wheel and release it; the D in the instrument panel
will change to M and the number of the gear
currently being used will be displayed.
Manually shifting gears
In shift mode M, the paddles are automatically
activated.
ShiftingTo shift one gear:
Page 402 of 546
||
STARTING AND DRIVING
* Option/accessory, for more information, see Introduction.
400
Activating LSC
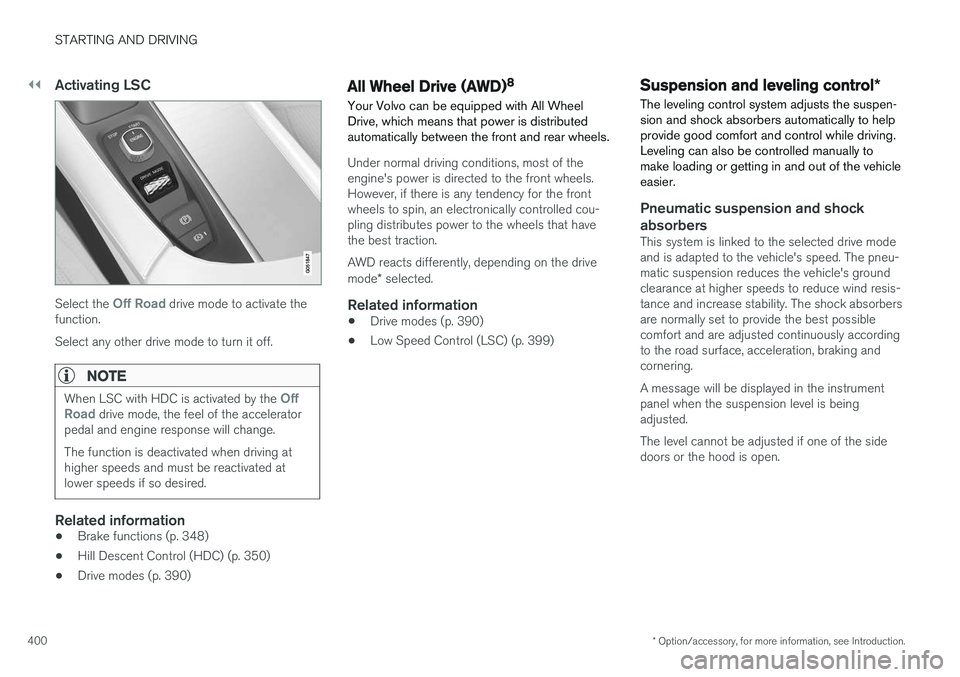
Select the Off Road drive mode to activate the
function. Select any other drive mode to turn it off.
NOTE
When LSC with HDC is activated by the Off
Road drive mode, the feel of the accelerator
pedal and engine response will change. The function is deactivated when driving at higher speeds and must be reactivated atlower speeds if so desired.
Related information
• Brake functions (p. 348)
• Hill Descent Control (HDC) (p. 350)
• Drive modes (p. 390)
All Wheel Drive (AWD) 8
Your Volvo can be equipped with All Wheel Drive, which means that power is distributedautomatically between the front and rear wheels.
Under normal driving conditions, most of the engine's power is directed to the front wheels.However, if there is any tendency for the frontwheels to spin, an electronically controlled cou-pling distributes power to the wheels that havethe best traction. AWD reacts differently, depending on the drive mode * selected.
Related information
• Drive modes (p. 390)
• Low Speed Control (LSC) (p. 399)
Suspension and leveling control
*
The leveling control system adjusts the suspen- sion and shock absorbers automatically to helpprovide good comfort and control while driving.Leveling can also be controlled manually tomake loading or getting in and out of the vehicleeasier.
Pneumatic suspension and shock absorbers
This system is linked to the selected drive mode and is adapted to the vehicle's speed. The pneu-matic suspension reduces the vehicle's groundclearance at higher speeds to reduce wind resis-tance and increase stability. The shock absorbersare normally set to provide the best possiblecomfort and are adjusted continuously accordingto the road surface, acceleration, braking andcornering. A message will be displayed in the instrument panel when the suspension level is beingadjusted. The level cannot be adjusted if one of the side doors or the hood is open.
Page 403 of 546

STARTING AND DRIVING
401
Suspension leveling settings
Easy entry
The vehicle can be lowered to entering and exit- ing easier. Select
SettingsVehicleEasy Entry/Exit
Control via the center display's Top view to lower
the vehicle when getting in or out. When the vehicle is parked and the engine is turned off, the level is lowered (if a side door isopened, the level adjustment will stop). When theengine is started and the vehicle begins to move,the level will be raised to the height set by theselected drive mode.
Turning off suspension and leveling control
In certain situations, this function has to be turned off, for example when lifting the vehicle ona jack or garage hoist. 1. Tap
Settings in the center display's Top
view.
2. Tap
My CarSuspension .
3. Select
Deactivate Suspension & Leveling
Control.
Changing suspension control
Three different levels of suspension control can be selected from the center display: 1. Tap
Settings in the center display's Top
view. 2.
Tap
My CarDrive Mode.
3. Under
Suspension Control, select Eco,Comfort or Dynamic.
Loading mode
Use the buttons in the cargo compartment to raise or lower the vehicle to make loading orunloading easier or when attaching a trailer.
Parking the vehicleWhen parking, be sure that there is adequatespace above and below the vehicle since itsground clearance may vary, e.g., depending onthe ambient temperature, how the vehicle is loa-ded, if loading mode is being used or the drivemode selected after the engine is started. The level may also be adjusted for a certain time after the vehicle has been parked to compensatefor possible height adjustments due to tempera-ture changes in the pneumatic suspension whenthe vehicle has cooled.
TransportWhen transporting the vehicle on a ferry, train ora tow truck, it may only be secured (lashed)around the tires, not using any other chassiscomponents. Changes in the pneumatic suspen-sion may occur during transport that could nega-tively affect the lashing and result in damage.
Related information
• Drive modes (p. 390)
• Driving with a trailer (p. 367)
• Loading (p. 215)
8
Standard equipment on certain models.
Page 410 of 546
||
INFOTAINMENT
* Option/accessory, for more information, see Introduction.
408 The IBOC system is referred to as a "hybrid" since it is both analogue and digital. Duringhybrid operation, receivers still continue toreceive the analogue (non-digital) signal. HDRadio receivers incorporate both modes ofreception, where the receiver will automaticallyswitch to the analogue signal if the digital signalcannot be decoded or is lost by the receiver. When you have tuned to an HD Radio station, the
symbol will appear in the infotainment sys-
tem display. The symbol will be displayed in dif- ferent colors:
• Grayed-out symbol
: NoHD Radio broadcast
reception
• White symbol
: the radio is actively receiving
an HD broadcast
• Orange symbol
: the radio is receiving an
HD broadcast with digital sound
More information about HD Radio and IBOC canbe found on Ibiquity's website, www.hdradio.comand www.ibiquity.com.
Artist Experience ™A radio station's logo and album art can be dis-played. If a station opts to provide this informa-tion, it is broadcast once every 12 minutes, whichmeans that there may be a delay before thelogo/album art appear on the screen. The radiocan store 100 station logos so the next time theradio is tuned to the same station, the logo will be displayed immediately. Album art is synchedwith the artist that you are currently listening to.
iTunes taggingThis feature is common to both HD Radio and SiriusXM
®
Satellite radio *. See the section
"iTunes tagging" in the article "SiriusXM satellite radio settings" for more detailed information.
Ball game modeThis feature means that a main FM station (HD1)will broadcast live events, where the content ofthe programming is more important than soundquality, in analog mode only to help prevent thedelay between analog and digital broadcasting.The HD Radio symbol will be white during livebroadcasts and "Live" will be displayed next tothe symbol.
Benefits of digital broadcasting
• Better sound (FM sounds near CD quality).
• Some FM frequencies offer a greater num- ber of listening choices through “multicast-ing” (consisting of a frequency's main chan-nel and any sub-channels that may also beavailable on that particular frequency.)
• When receiving a digital signal there is nomultipath disturbance or hisses/pops/crack-ling due to outside influences.
How HD Radio
™ Technology
broadcasting works
HD Radio works similarly to conventional radio and broadcasts of this type are available in manyareas of the United States. However, there are afew key differences:
• Instead of transmitting one analogue signal, stations send out a bundled signal – bothanalogue and digital.
• An HD Radio receiver can receive both digi-tal and analogue broadcasts. Depending onthe terrain and location of the vehicle (whichwill influence the signal strength), thereceiver will determine which signal toreceive.
Related information
•
Switching HD Radio on and off (p. 409)
• HD Radio sub-channels (p. 409)
• HD Radio limitations (p. 410)
• Radio (p. 405)
• Changing and searching for radio stations(p. 406)
4
HD Radio (TM) technology is manufactured under license from iBiquity Digital Corp. U.S. and Foreign Patents. HD Radio(TM) and the HD and HD Radio logos are proprietary trademarks of iBiquity Digital Corp.
Page 412 of 546
||
INFOTAINMENT
410
Selecting sub-channels
To listen to a station's sub-channel(s), tap the station on the screen or press the forward/backarrow keys on the right-side steering wheel key-pad or below the screen. Sub-channels can also be stored as favorites, see the article "Changing and searching for radio sta-tions". If you tap a sub-channel favorite, it may take up to 6 seconds before the channel becomes audi-
ble. If you tap a station while you are out of digital range of the transmitter,
No reception will be
displayed.
Related information
• HD Radio
™reception (p. 407)
• Switching HD Radio on and off (p. 409)
• Changing and searching for radio stations (p. 406)
HD Radio limitations
Limitations
•
Main channel vs. sub-channels (FM only)
:
The main channel is the only channel that can receive in hybrid mode (both digital andanalogue). If a frequency has sub-channels,they are broadcast in digital mode only. Themain FM channel will be displayed as, forexample, "WRIF-FM HD1". The sub-FMchannels will be displayed as"WRIF-FMHD2", "WRIF-FM HD3", etc.
• Reception coverage area
: Due to current
IBOC transmitter power limitations, thereception coverage area in digital mode issomewhat more limited than the station'sanalogue coverage area. Please be awarethat as with any radio broadcast technology,terrain, time of day, foliage level and buildinglocation can have positive or negative effectson radio reception.
• Analogue to digital/digital to analogueblending
: Analogue to digital blending will
occur as the signal strength reaches a presetthreshold in the receiver. This will be noticea-ble in fringe areas (areas with weak recep-tion) and is normal.
NOTE
There may be a noticeable difference in sound quality when a change from analogueto digital or digital to analogue occurs, suchas:
• Volume increase or decrease
• Equalizer settings, i.e., Bass/ Midrange/ Treble cut or boost
• Time alignment (Digital program materialin extreme cases can be as much as 8seconds behind the analogue). This willnoticeable as a "stuttering" effect.
The above items are dependant on the broadcaster's equipment settings and donot indicate a fault in the vehicle's radioreceiver or antenna systems .
Related information
•HD Radio sub-channels (p. 409)
• HD Radio
™reception (p. 407)
Page 453 of 546
WHEELS AND TIRES
}}
451
Snow tires and chains
The use of snow chains and/or winter tires can help improve traction in winter driving conditions.
Snow chains can be used on your Volvo with the following restrictions:
• Snow chains should be installed on front wheels only. Use only Volvo approved snowchains.
• If accessory, aftermarket or "custom" tiresand wheels are installed and are of a size dif-ferent than the original tires and wheels,chains in some cases CANNOT be used.Sufficient clearances between chains andbrakes, suspension and body componentsmust be maintained.
• Some strap-on type chains will interfere withbrake components and therefore CANNOTbe used.
• All Wheel Drive models
: Snow chains
should only be installed on the front wheels.
• Certain size tires may not allow the assemblyof snow chains/traction devices.
Consult your Volvo retailer for additional snow chain information.
CAUTION
• Snow chains should not be used on wheels larger than 19".
• Always follow the chain manufacturer'sinstallation instructions carefully. Installchains as tightly as possible andretighten periodically.
• Check local regulations regarding the useof snow chains before installing.
• Use single-sided snow chains only.
• Never exceed the chain manufacturer'sspecified maximum speed limit. (Underno circumstances should you exceed31 mph (50 km/h).
• Avoid bumps, holes or sharp turns whendriving with snow chains.
• The handling of the vehicle can beadversely affected when driving withchains. Avoid fast or sharp turns as wellas locked wheel braking.
Checking tire inflation pressure
Correct tire inflation pressure helps improve driv- ing stability, save fuel and increase the servicelife of the tires.
WARNING
• Under-inflation is the most common cause of tire failure and may result insevere tire cracking, tread separation, or"blow-out," with unexpected loss of vehi-cle control and increased risk of injury.
• Under-inflated tires reduce the load car-rying capacity of your vehicle.
Cold tiresInflation pressure should be checked when the tires are cold. The tires are considered to be cold when they have the same temperature as the sur-rounding (ambient) air. This temperature is normally reached after the vehicle has been parked for at least 3 hours. After driving a distance of approximately 1 mile (1.6 km), the tires are considered to be hot. If youhave to drive farther than this distance to pumpyour tire(s), check and record the tire pressurefirst and add the appropriate air pressure whenyou get to the pump. When weather temperature changes occur, tire inflation pressures also change. A 10-degree
Page 454 of 546
||
WHEELS AND TIRES
452temperature drop causes a corresponding drop of 1 psi (7 kPa) in inflation pressure. Check yourtire pressures frequently and adjust them to theproper pressure, which can be found on the vehi-cle's tire information placard or certification label. If checking tire pressure when the tire is hot, never "bleed" or reduce air pressure. The tiresare hot from driving and it is normal for pressuresto increase above recommended cold pressures.A hot tire at or below recommended cold inflationpressure could be significantly under-inflated.
Recommended inflation pressures
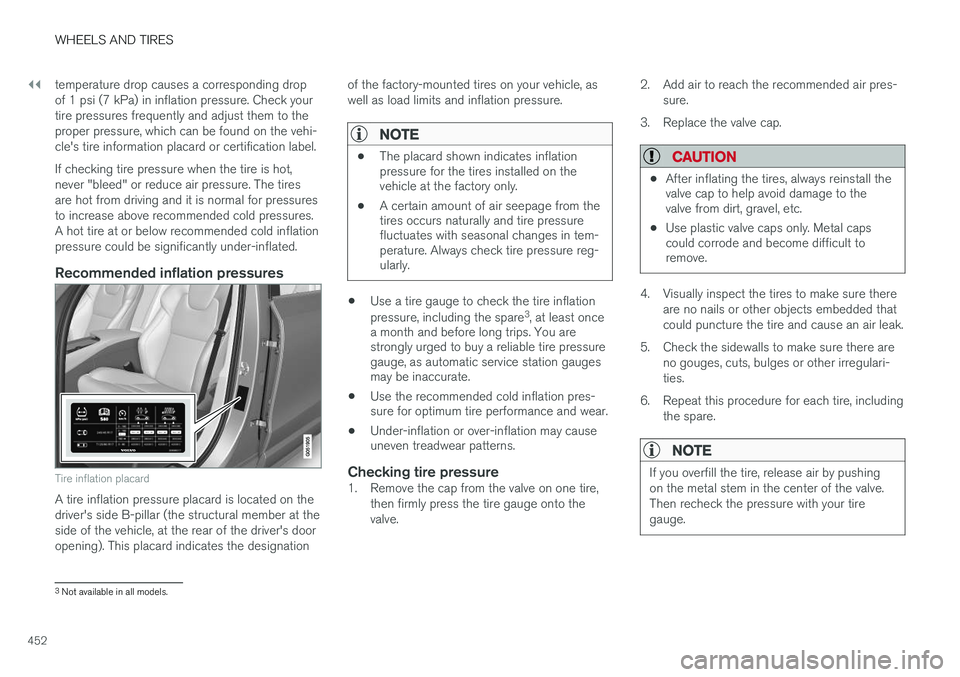
Tire inflation placard
A tire inflation pressure placard is located on the driver's side B-pillar (the structural member at theside of the vehicle, at the rear of the driver's dooropening). This placard indicates the designation
of the factory-mounted tires on your vehicle, aswell as load limits and inflation pressure.
NOTE
•
The placard shown indicates inflation pressure for the tires installed on thevehicle at the factory only.
• A certain amount of air seepage from thetires occurs naturally and tire pressurefluctuates with seasonal changes in tem-perature. Always check tire pressure reg-ularly.
•Use a tire gauge to check the tire inflation pressure, including the spare 3
, at least once
a month and before long trips. You are strongly urged to buy a reliable tire pressuregauge, as automatic service station gaugesmay be inaccurate.
• Use the recommended cold inflation pres-sure for optimum tire performance and wear.
• Under-inflation or over-inflation may causeuneven treadwear patterns.
Checking tire pressure1. Remove the cap from the valve on one tire,
then firmly press the tire gauge onto the valve. 2. Add air to reach the recommended air pres-
sure.
3. Replace the valve cap.
CAUTION
• After inflating the tires, always reinstall the valve cap to help avoid damage to thevalve from dirt, gravel, etc.
• Use plastic valve caps only. Metal capscould corrode and become difficult toremove.
4. Visually inspect the tires to make sure there
are no nails or other objects embedded that could puncture the tire and cause an air leak.
5. Check the sidewalls to make sure there are no gouges, cuts, bulges or other irregulari-ties.
6. Repeat this procedure for each tire, including the spare.
NOTE
If you overfill the tire, release air by pushing on the metal stem in the center of the valve.Then recheck the pressure with your tiregauge.
3Not available in all models.
Page 456 of 546
||
WHEELS AND TIRES
* Option/accessory, for more information, see Introduction.
454
CAUTION
• When not in use, the jack
* should be kept
in its storage compartment under the cargo compartment floor.
• The jack provided with your vehicle isintended to be used only in temporary sit-uations such as changing wheels in theevent of a flat tire. Only the jack thatcame with your particular model shouldbe used to lift the vehicle. If the vehicleneeds to be lifted more frequently or for aprolonged period, using a garage jack orhoist is recommended. Always follow thisdevice