2016 TOYOTA CAMRY HYBRID ECO mode
[x] Cancel search: ECO modePage 167 of 572

1674-2. Driving procedures
4
Driving
CAMRY_HV_U (OM33C35U)n
Switching to EV drive mode when the gasoline engine is cold
If the hybrid system is started while the gasoline engine is cold, the gasoline
engine will start automatically after a short period of time in order to warm up.
In this case, you will become unable to switch to EV drive mode.
After the hybrid system has started and the “READY” indicator has illumi-
nated, press the EV drive mode switch before the gasoline engine starts to
switch to EV drive mode.
n Automatic cancelatio n of EV drive mode
When driving in EV drive mode, the gas oline engine may automatically restart
in the following situations. When EV drive mode is canceled, a buzzer will
sound and the EV drive mode indicator will flash and go off.
l The hybrid battery (traction battery) becomes low.
The remaining battery level indicated in the energy monitor on the multi-
information display is low. ( P. 98)
l Vehicle speed is high.
l The accelerator pedal is depressed firmly or the vehicle is on a hill etc.
n Possible driving distance when driving in EV drive mode
EV drive mode’s possible driving distance ranges from a few hundred meters
to approximately 1.3 miles (2 km). However, depending on vehicle conditions,
there are situations when EV drive mode cannot be used.
(The distance that is possible depends on the hybrid battery [traction battery]
level and driving conditions.)
n Fuel economy
The hybrid system is designed to achieve the best possible fuel economy
during normal driving (using the gasoline engine and electric motor [traction
motor]). Driving in EV drive mode more than necessary may lower fuel econ-
omy.
WARNING
nCaution while driving
When driving in EV drive mode no engine noise is made. As such, pedestri-
ans, people riding bicycles or other people and vehicles in the surrounding
area may not be aware of the vehicle starting off or approaching them.
Therefore, take extra care while driving even if the vehicle proximity notifica-
tion system is active.
Page 169 of 572
1694-2. Driving procedures
4
Driving
CAMRY_HV_U (OM33C35U)
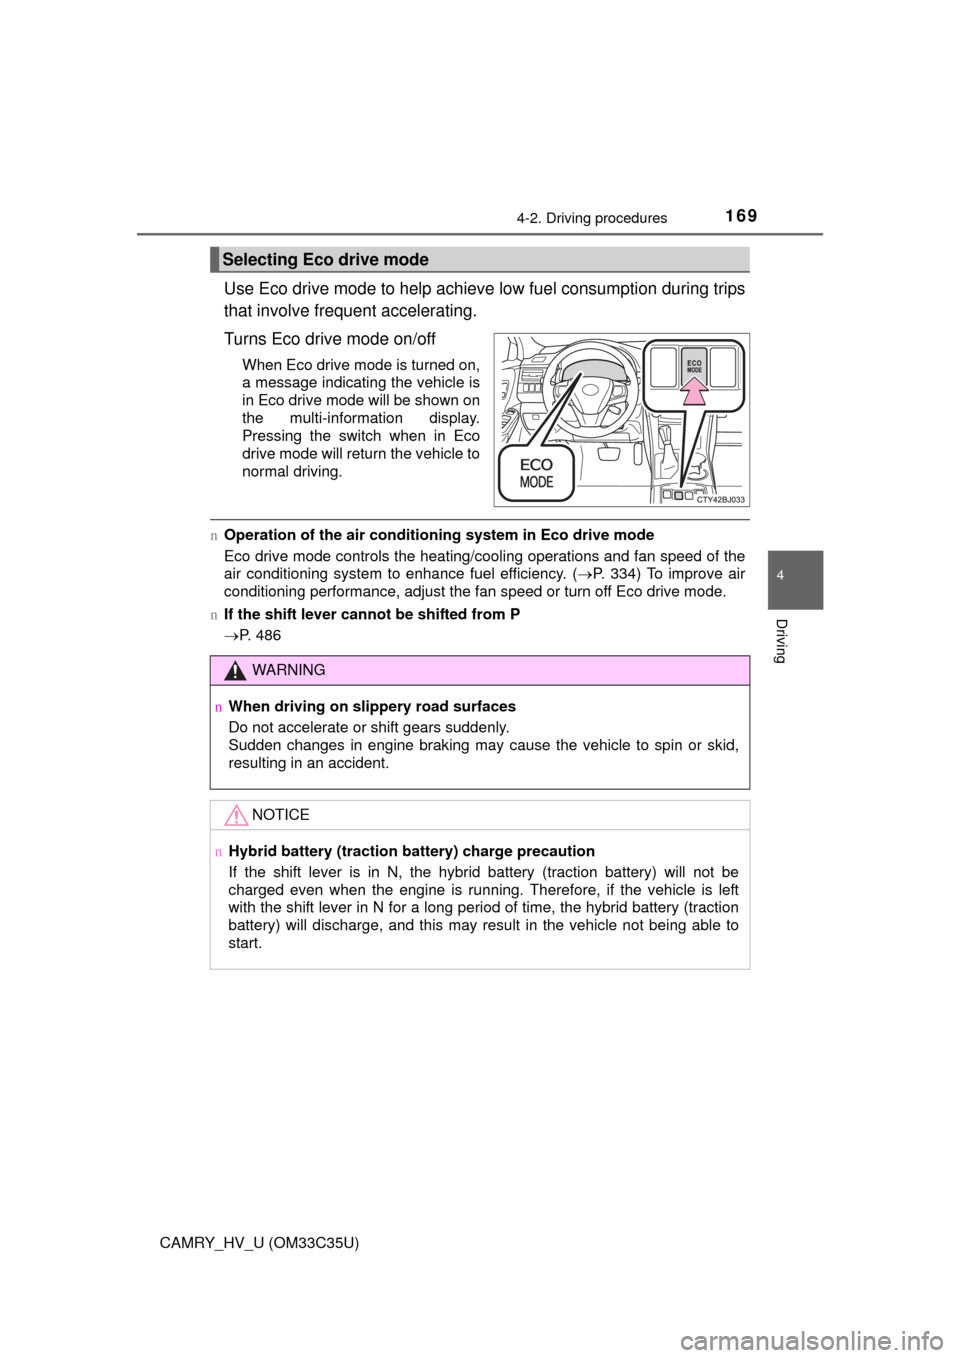
Use Eco drive mode to help achieve low fuel consumption during trips
that involve frequent accelerating.
Turns Eco drive mode on/off
When Eco drive mode is turned on,
a message indicating the vehicle is
in Eco drive mode will be shown on
the multi-information display.
Pressing the switch when in Eco
drive mode will return the vehicle to
normal driving.
n Operation of the air conditioning system in Eco drive mode
Eco drive mode controls the heating/cooling operations and fan speed of the
air conditioning system to enhance fuel efficiency. (P. 334) To improve air
conditioning performance, adjust the fan speed or turn off Eco drive mode.
n If the shift lever cannot be shifted from P
P. 486
Selecting Eco drive mode
WARNING
nWhen driving on slippery road surfaces
Do not accelerate or shift gears suddenly.
Sudden changes in engine braking may cause the vehicle to spin or skid,
resulting in an accident.
NOTICE
nHybrid battery (traction battery) charge precaution
If the shift lever is in N, the hybrid battery (traction battery) will not be
charged even when the engine is running. Therefore, if the vehicle is left
with the shift lever in N for a long period of time, the hybrid battery (traction
battery) will discharge, and this may result in the vehicle not being able to
start.
Page 173 of 572
1734-3. Operating the lights and wipers
4
Driving
CAMRY_HV_U (OM33C35U)
nDaytime running light system
lVehicles with halogen daytime running lights:
To make your vehicle more visible to other drivers during daytime driving,
the daytime running lights turn on automatically whenever the hybrid system
is started and the parking brake is released with the headlight switch in the
“AUTO” position. (Illuminate darker than headlight high beams.) Daytime
running lights are not designed for use at night.
Vehicles with LED daytime running lights:
To make your vehicle more visible to other drivers during daytime driving,
the daytime running lights turn on automatically whenever the hybrid system
is started and the parking brake is released with the headlight switch in the
“AUTO” position. (Illuminate brighter than parking lights.) Daytime running
lights are not designed for use at night.
U.S.A.: Daytime running lights can be turned off by operating the switch.
Canada: Daytime running lights are turned on even when the headlight
switch is in position.
l Compared to turning on the headlights, the daytime running light system
offers greater durability and consumes less electricity, so it can help improve
fuel economy.
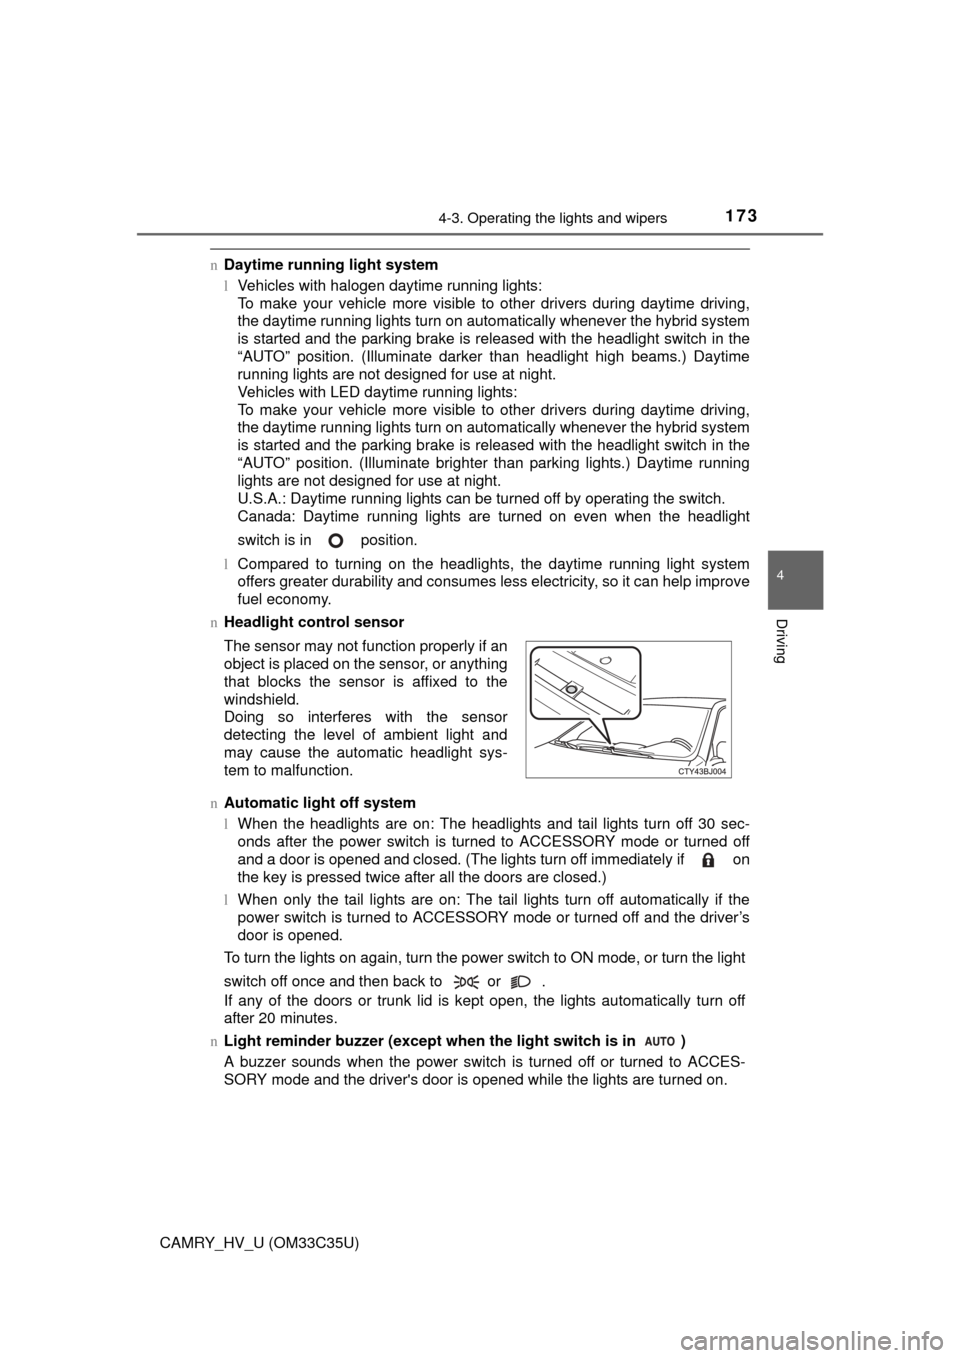
n Headlight control sensor
n Automatic light off system
lWhen the headlights are on: The headlights and tail lights turn off 30 sec-
onds after the power switch is turned to ACCESSORY mode or turned off
and a door is opened and closed. (The lights turn off immediately if on
the key is pressed twice after all the doors are closed.)
l When only the tail lights are on: The tail lights turn off automatically if the
power switch is turned to ACCESSORY mode or turned off and the driver’s
door is opened.
To turn the lights on again, turn the power switch to ON mode, or turn the light
switch off once and then back to or .
If any of the doors or trunk lid is kept open, the lights automatically turn off
after 20 minutes.
n Light reminder buzzer (except when the light switch is in )
A buzzer sounds when the power switch is turned off or turned to ACCES-
SORY mode and the driver's door is opened while the lights are turned on. The sensor may not function properly if an
object is placed on the sensor, or anything
that blocks the sensor is affixed to the
windshield.
Doing so interferes with the sensor
detecting the level of ambient light and
may cause the automatic headlight sys-
tem to malfunction.
Page 178 of 572

1784-3. Operating the lights and wipers
CAMRY_HV_U (OM33C35U)l
In the situations below, the system may not be able to correctly detect the
surrounding brightness levels, and may flash or expose nearby pedestrians
to the high beam. Therefore, you should consider turning the high beams on
or off manually rather than relying on the Automatic High Beam system.
• In bad weather (rain, snow, fog, sandstorms etc.)
• The windshield is obscured by fog, mist, ice, dirt etc.
• The windshield is cracked or damaged.
• The camera sensor is deformed or dirty.
• The camera sensor temperature is extremely high.
• Surrounding brightness levels are equal to those of headlights, tail lights
or fog lights.
• Vehicles ahead have headlights that are either switched off, dirty, are changing color, or are not aimed properly.
• When driving through an area of in termittently changing brightness and
darkness.
• When frequently and repeatedly driving ascending/descending roads, or
roads with rough, bumpy or uneven surfaces (such as stone-paved
roads, gravel tracks etc.).
• When frequently and repeatedly taking curves or driving on a winding
road.
• There is a highly reflective object ahead of the vehicle, such as a sign or a mirror.
• The back of a vehicle ahead is highly reflective, such as a container on a truck.
• The vehicle’s headlights are damaged or dirty.
• The vehicle is listing or tilting, due to a flat tire, a trailer being towed etc.
• The high beam and low beam are repeatedly being switched between in
an abnormal manner.
• The driver believes that the high beam may be causing problems or dis- tress to other drivers or pedestrians nearby.
n Temporarily lowering sensor sensitivity
The sensitivity of the sensor can be temporarily lowered.
Turn the power switch off while the following conditions are met.
• The headlight switch is in .
• The headlight switch lever is in high beam position. Turn the power switch to ON mode.
Within 5 seconds after , repeat pulling the headlight switch lever to the
original position then pushing it to the high beam position quickly 9 times,
then leave the lever in high beam position.
Automatic High Beam (headlights) may turn on even the vehicle is stopped.
n If a warning message for the Automatic High Beam is shown on the
multi-information display
It may indicate a malfunction in the system. Contact your Toyota dealer.
n Customization
The Automatic High Beam can be deactivated.
(Customizable features: P. 535)
1
2
32
Page 181 of 572
1814-3. Operating the lights and wipers
4
Driving
CAMRY_HV_U (OM33C35U)
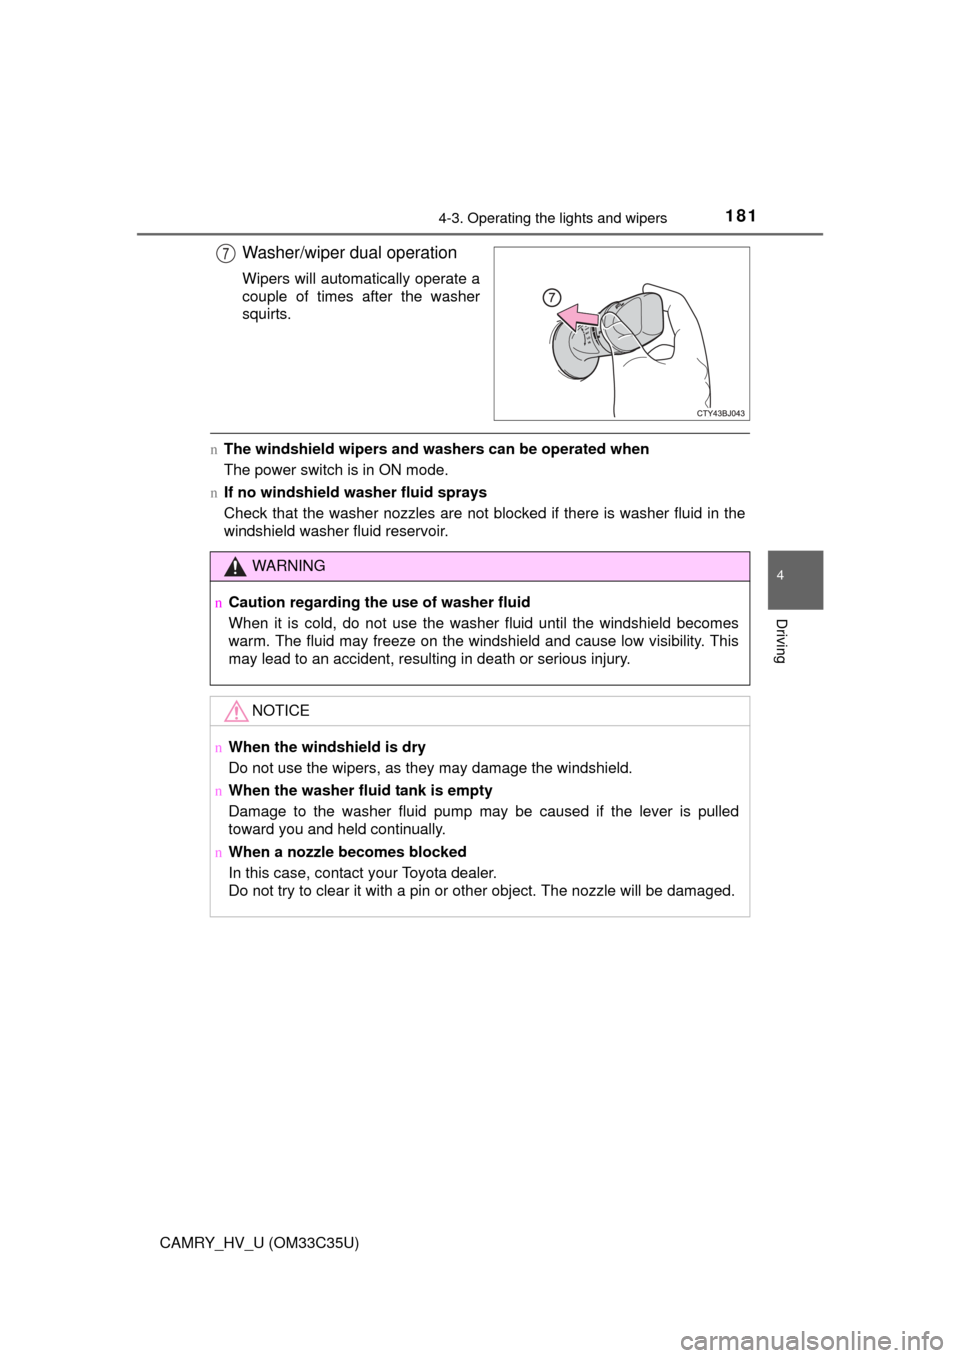
Washer/wiper dual operation
Wipers will automatically operate a
couple of times after the washer
squirts.
nThe windshield wipers and washers can be operated when
The power switch is in ON mode.
n If no windshield washer fluid sprays
Check that the washer nozzles are not blocked if there is washer fluid in the
windshield washer fluid reservoir.
7
WARNING
nCaution regarding the use of washer fluid
When it is cold, do not use the washer fluid until the windshield becomes
warm. The fluid may freeze on the windshield and cause low visibility. This
may lead to an accident, resulting in death or serious injury.
NOTICE
nWhen the windshield is dry
Do not use the wipers, as they may damage the windshield.
n When the washer fluid tank is empty
Damage to the washer fluid pump may be caused if the lever is pulled
toward you and held continually.
n When a nozzle becomes blocked
In this case, contact your Toyota dealer.
Do not try to clear it with a pin or other object. The nozzle will be damaged\
.
Page 190 of 572
1904-5. Using the driving support systems
CAMRY_HV_U (OM33C35U)
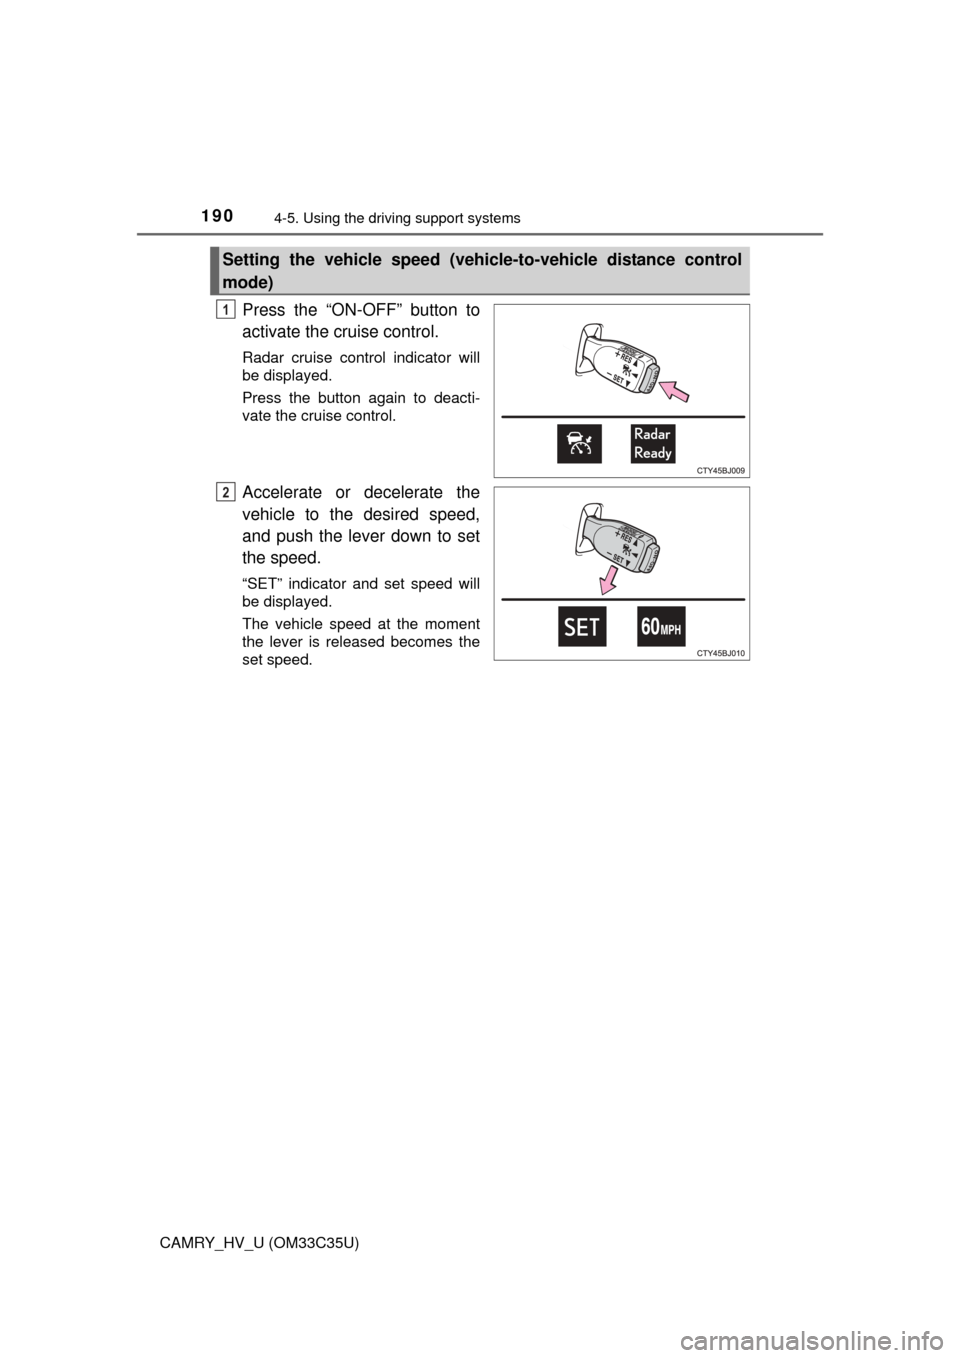
Press the “ON-OFF” button to
activate the cruise control.
Radar cruise control indicator will
be displayed.
Press the button again to deacti-
vate the cruise control.
Accelerate or decelerate the
vehicle to the desired speed,
and push the lever down to set
the speed.
“SET” indicator and set speed will
be displayed.
The vehicle speed at the moment
the lever is released becomes the
set speed.
Setting the vehicle speed (vehicle-to-vehicle distance control
mode)
1
2
Page 191 of 572
1914-5. Using the driving support systems
4
Driving
CAMRY_HV_U (OM33C35U)
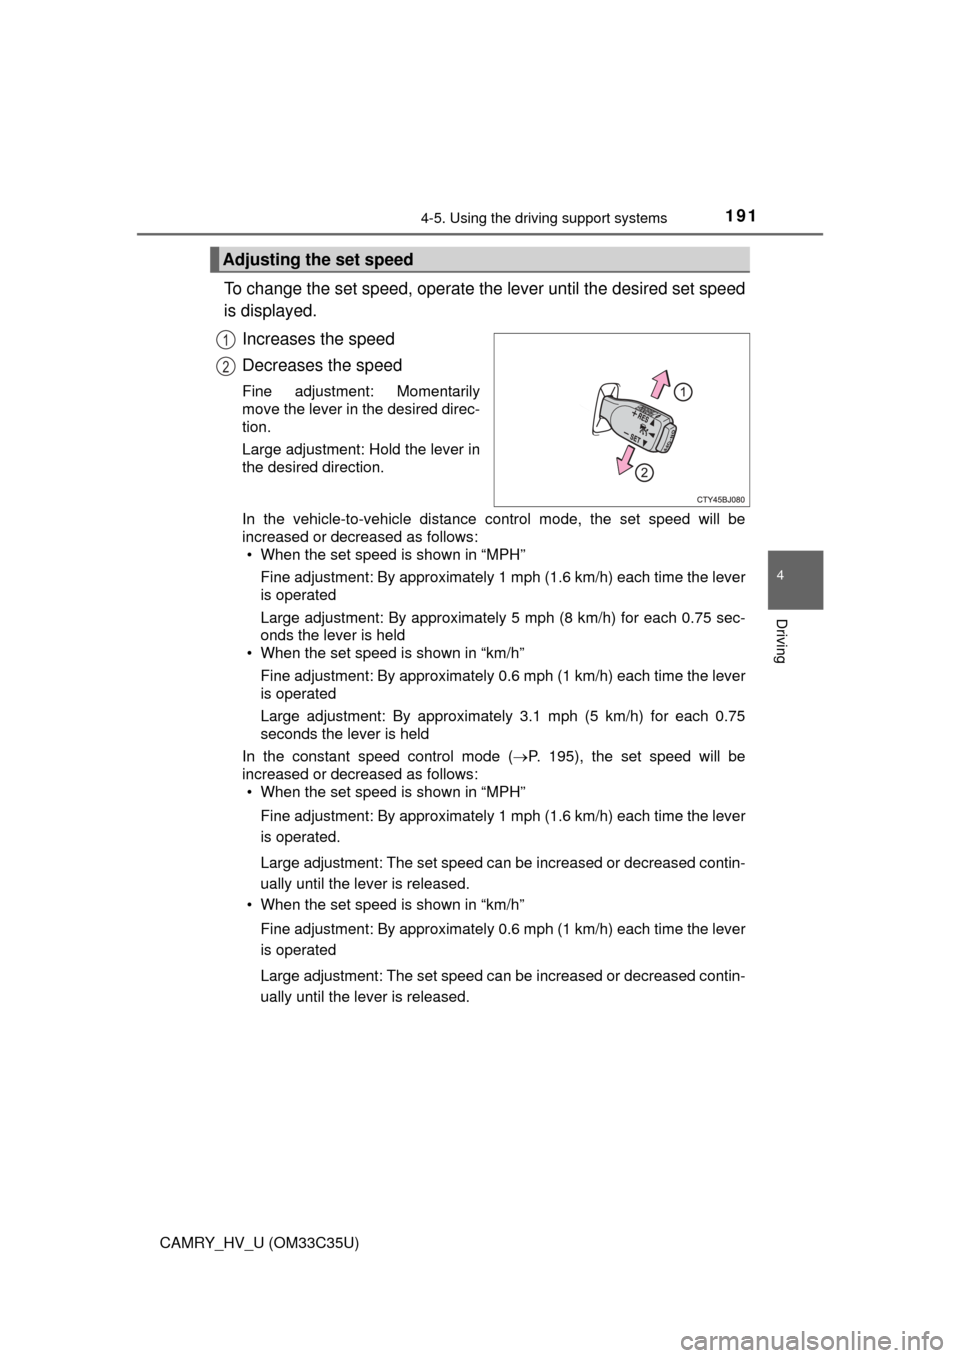
To change the set speed, operate the lever until the desired set speed
is displayed.Increases the speed
Decreases the speed
Fine adjustment: Momentarily
move the lever in the desired direc-
tion.
Large adjustment: Hold the lever in
the desired direction.
In the vehicle-to-vehicle distance control mode, the set speed will be
increased or decreased as follows:• When the set speed is shown in “MPH”
Fine adjustment: By approximately 1 mph (1.6 km/h) each time the lever
is operated
Large adjustment: By approximately 5 mph (8 km/h) for each 0.75 sec-
onds the lever is held
• When the set speed is shown in “km/h”
Fine adjustment: By approximately 0.6 mph (1 km/h) each time the lever
is operated
Large adjustment: By approximately 3.1 mph (5 km/h) for each 0.75
seconds the lever is held
In the constant speed control mode ( P. 195), the set speed will be
increased or decreased as follows: • When the set speed is shown in “MPH”
Fine adjustment: By approximately 1 mph (1.6 km/h) each time the lever
is operated.
Large adjustment: The set speed can be increased or decreased contin-
ually until the lever is released.
• When the set speed is shown in “km/h”
Fine adjustment: By approximately 0.6 mph (1 km/h) each time the lever
is operated
Large adjustment: The set speed can be increased or decreased contin-
ually until the lever is released.
Adjusting the set speed
1
2
Page 195 of 572
1954-5. Using the driving support systems
4
Driving
CAMRY_HV_U (OM33C35U)
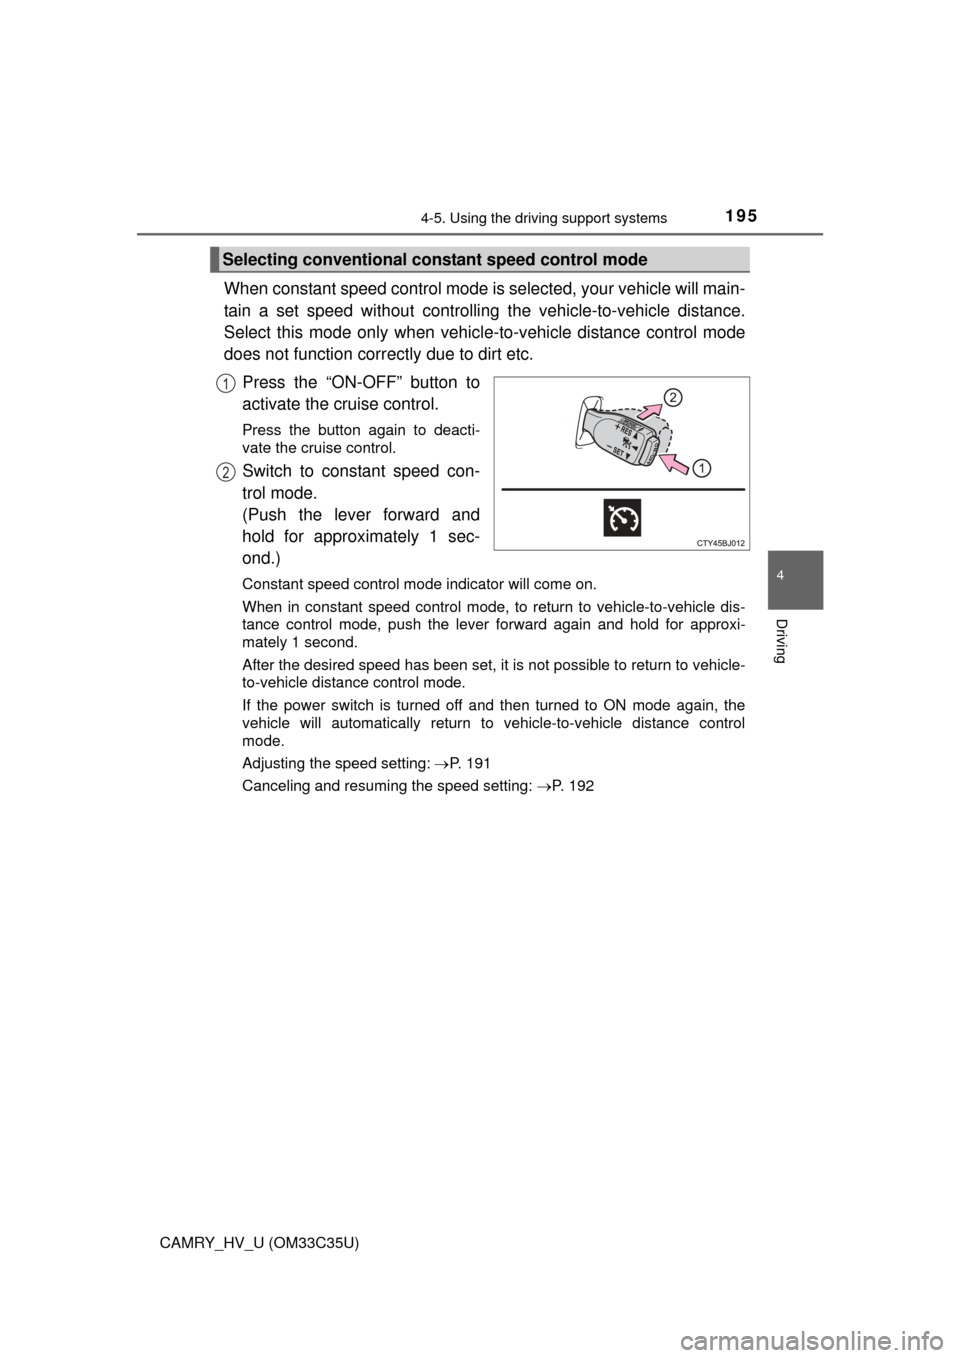
When constant speed control mode is selected, your vehicle will main-
tain a set speed without controlling the vehicle-to-vehicle distance.
Select this mode only when vehicl e-to-vehicle distance control mode
does not function corr ectly due to dirt etc.
Press the “ON-OFF” button to
activate the cruise control.
Press the button again to deacti-
vate the cruise control.
Switch to constant speed con-
trol mode.
(Push the lever forward and
hold for approximately 1 sec-
ond.)
Constant speed control mode indicator will come on.
When in constant speed control mode, to return to vehicle-to-vehicle dis-
tance control mode, push the leve r forward again and hold for approxi-
mately 1 second.
After the desired speed has been set, it is not possible to return to vehicle-
to-vehicle distance control mode.
If the power switch is turned off and then turned to ON mode again, the
vehicle will automatically return to vehicle-to-vehicle distance control
mode.
Adjusting the speed setting: P. 191
Canceling and resuming the speed setting: P. 192
Selecting conventional constant speed control mode
1
2