Page 21 of 304
21
2. QUICK REFERENCE
QUICK GUIDE
AVA L O N _ N a v i _ U
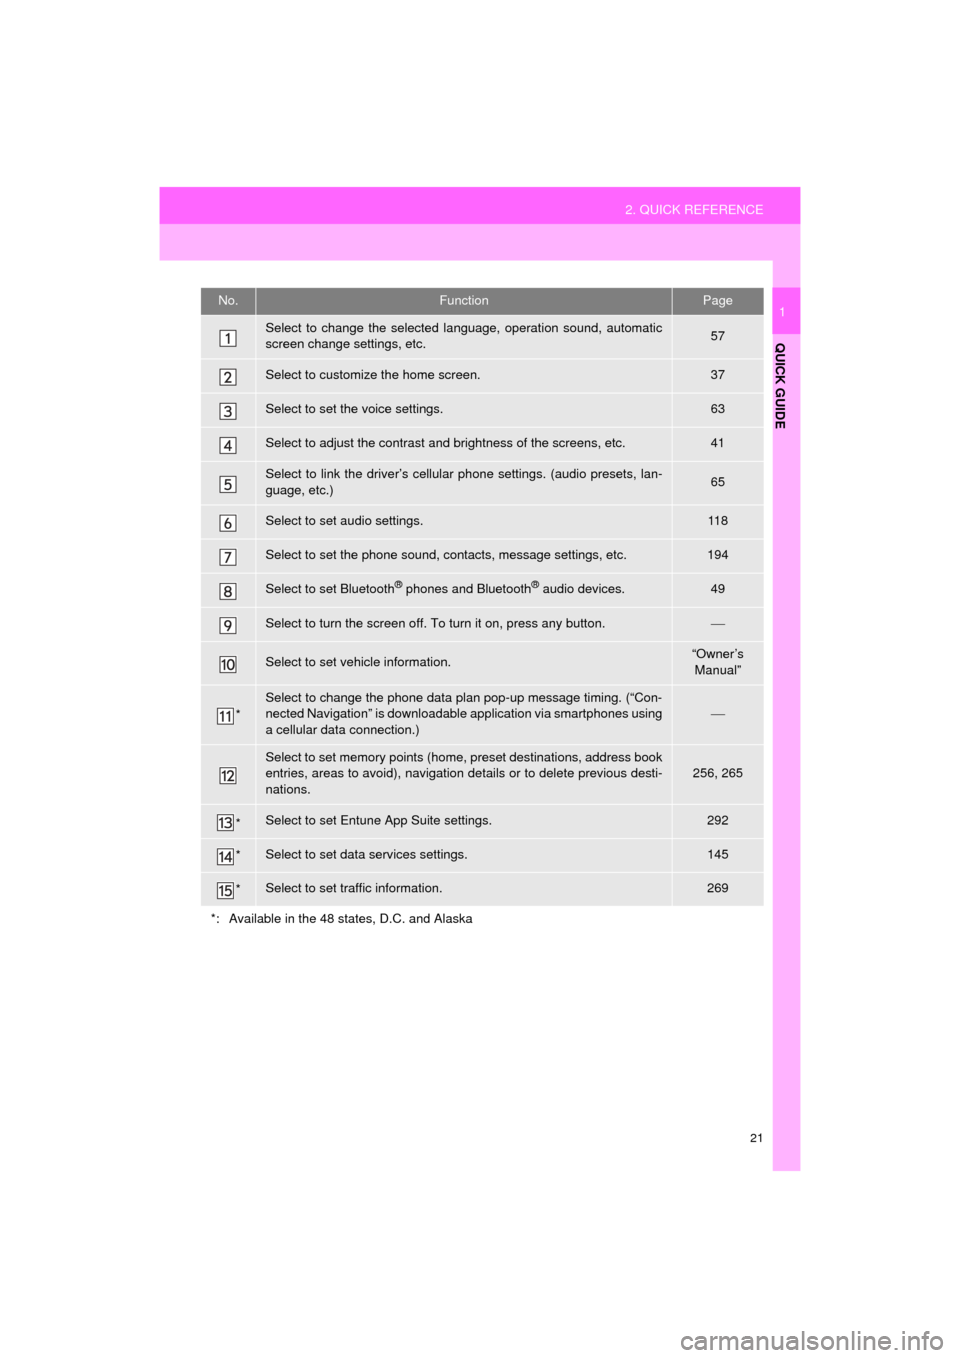
1No.FunctionPage
Select to change the selected language, operation sound, automatic
screen change settings, etc.57
Select to customize the home screen.37
Select to set the voice settings.63
Select to adjust the contrast and brightness of the screens, etc.41
Select to link the driver’s cellular phone settings. (audio presets, lan-
guage, etc.)65
Select to set audio settings.11 8
Select to set the phone sound, contacts, message settings, etc.194
Select to set Bluetooth® phones and Bluetooth® audio devices.49
Select to turn the screen off. To turn it on, press any button.
Select to set vehicle information.“Owner’s
Manual”
*
Select to change the phone data plan pop-up message timing. (“Con-
nected Navigation” is downloadable application via smartphones using
a cellular data connection.)
Select to set memory points (home, preset destinations, address book
entries, areas to avoid), navigation details or to delete previous desti-
nations.256, 265
*Select to set Entune App Suite settings.292
*Select to set data services settings.145
*Select to set traffic information.269
*: Available in the 48 states, D.C. and Alaska
Page 32 of 304
32
AVA L O N _ N a v i _ U
1. BASIC INFORMATION BEFORE OPERATION
1. INITIAL SCREEN
1When the engine switch is
turned to ACCESSORY or IGNITION
ON mode, the initial screen will
be displayed and the system will begin
operating.
After a few seconds, the “Caution” screen
will be displayed.
After about 5 seconds, the “Caution”
screen automatically switches to the next
screen.
WA R N I N G
●When the vehicle is stopped with the
engine running
ating>, always apply the parking brake
for safety.
*: Entune Premium Audio only
MAINTENANCE
INFORMATION*
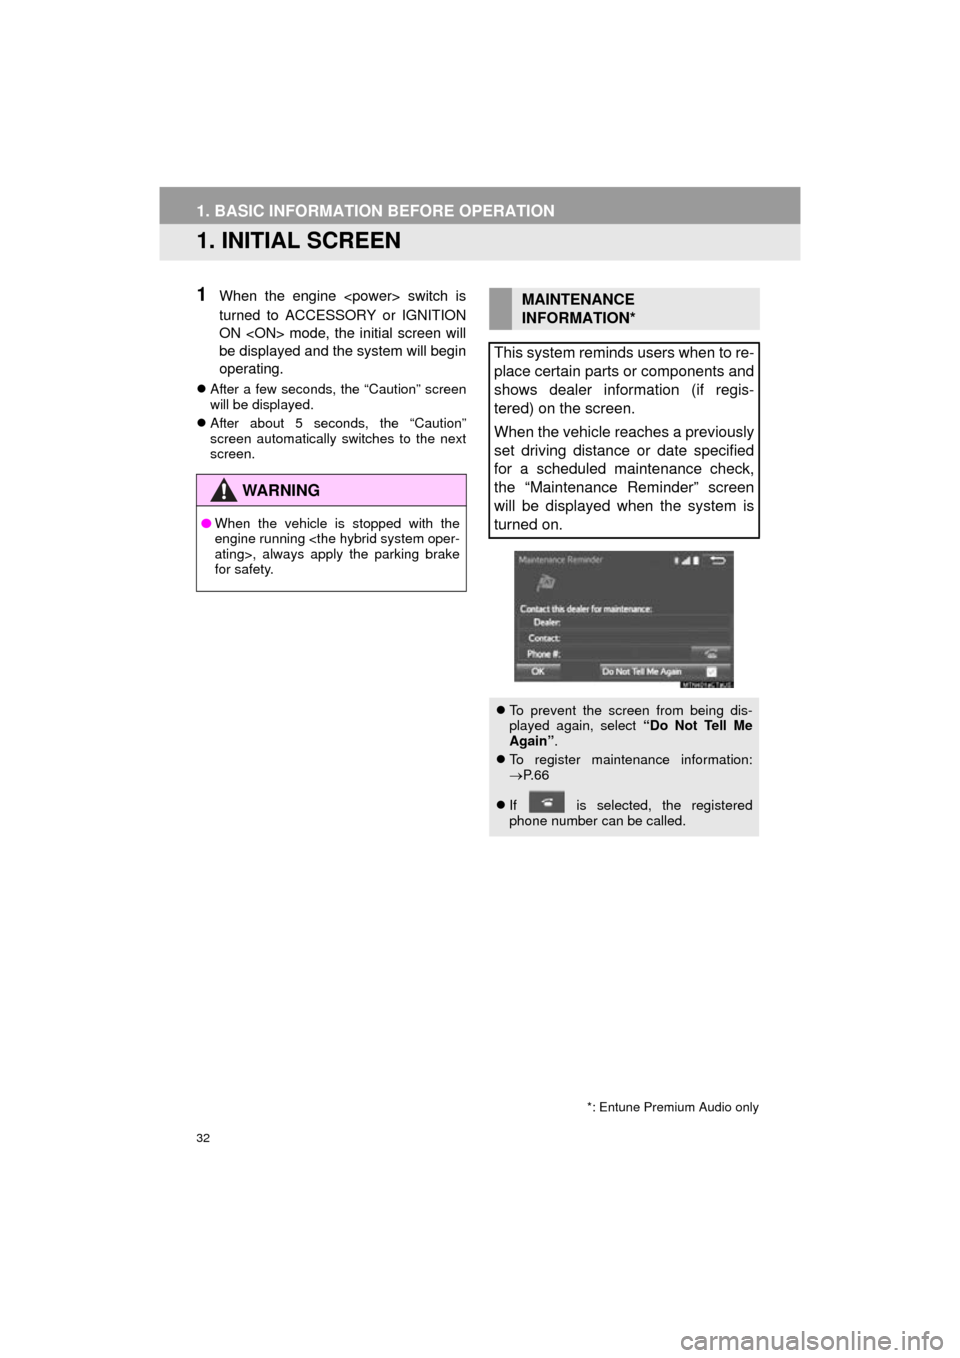
This system reminds users when to re-
place certain parts or components and
shows dealer information (if regis-
tered) on the screen.
When the vehicle reaches a previously
set driving distance or date specified
for a scheduled maintenance check,
the “Maintenance Reminder” screen
will be displayed when the system is
turned on.
To prevent the screen from being dis-
played again, select “Do Not Tell Me
Again” .
To register maintenance information:
P. 6 6
If is selected, the registered
phone number can be called.
Page 38 of 304

38
1. BASIC INFORMATION BEFORE OPERATION
AVA L O N _ N a v i _ U
6. ENTERING LETTERS AND NUMBERS/LIST SCREEN OPERATION
On certain letter entry screens, letters can
be entered in upper or lower case.
: Select to enter in lower case.
: Select to enter in upper case.
1Enter characters and select “OK”.
Matching items from the database are
listed even if the entered address or name
is incomplete.
The list will be displayed automatically if
the maximum number of characters is
entered or matching items can be dis-
played on a single list screen.
When searching by an address, name,
etc., or entering data, letters and num-
bers can be entered via the screen.
ENTERING LETTERS AND
NUMBERS
No.Function
Select to enter desired characters.
Text field. Entered character(s) will
be displayed.
During entering character(s), when
there is only one available option for
the next character(s), the next char-
acter(s) will be displayed in gray text
in the text field automatically. Gray
text is entered by selecting this but-
ton.
Select to erase one character.
Select to display the alphabet keys.
Select to display other symbols.
Keyboard layout can be changed.
( P. 5 7 )
LIST SCREEN
The list screen may be displayed after
entering characters.
DISPLAYING THE LIST
INFORMATION
●The number of matching items is shown
on the right side of the screen. If the
number of matching items is more than
999, the system displays “ ” on the
screen.
Page 53 of 304

53
2. Bluetooth® SETTINGS
AVA L O N _ N a v i _ U
BASIC FUNCTION
2
■AUTO CONNECTION MODE
When the engine switch is
turned to ACCESSORY or IGNITION ON
mode, the system searches for a
nearby registered device.
The system will connect with the regis-
tered device that was last connected, if it
is nearby.
■CONNECTING MANUALLY
1Press the “APPS” button and select
“Setup” .
2Select “Bluetooth*” .
3Follow the steps in “CONNECTING A
Bluetooth
® DEVICE” from “STEP 2”.
( P.52)
*: Bluetooth is a registered trademark of Bluetooth SIG, Inc.
■RECONNECTING THE Bluetooth®
PHONE
To turn auto connection mode on, set
“Bluetooth* Power” to on. ( P.55)
Leave the Bluetooth
® device in a loca-
tion where the connection can be es-
tablished.
When the auto connection has failed or
“Bluetooth* Power” is turned off, it is
necessary to connect Bluetooth
® man-
ually.
If a Bluetooth® phone is disconnected
due to poor reception from the
Bluetooth
® network the engine
er> switch is in ACCESSORY or IGNI-
TION ON mode, the system
automatically reconnects the
Bluetooth
® phone.
Page 56 of 304
56
2. Bluetooth® SETTINGS
AVA L O N _ N a v i _ U
1Select “Bluetooth* Power” .
When “Bluetooth* Power” is on :
The Bluetooth
® device is automatically
connected when the engine
switch is turned to ACCESSORY or IGNI-
TION ON mode.
When “Bluetooth* Power” is off :
The Bluetooth
® device is disconnected,
and the system will not connect to it next
time.
1Select “Bluetooth* Name” .
2Enter a name and select “OK”.
1Select “Bluetooth* PIN” .
2Enter a PIN-code and select “OK”.
*: Bluetooth is a registered trademark of Bluetooth SIG, Inc.
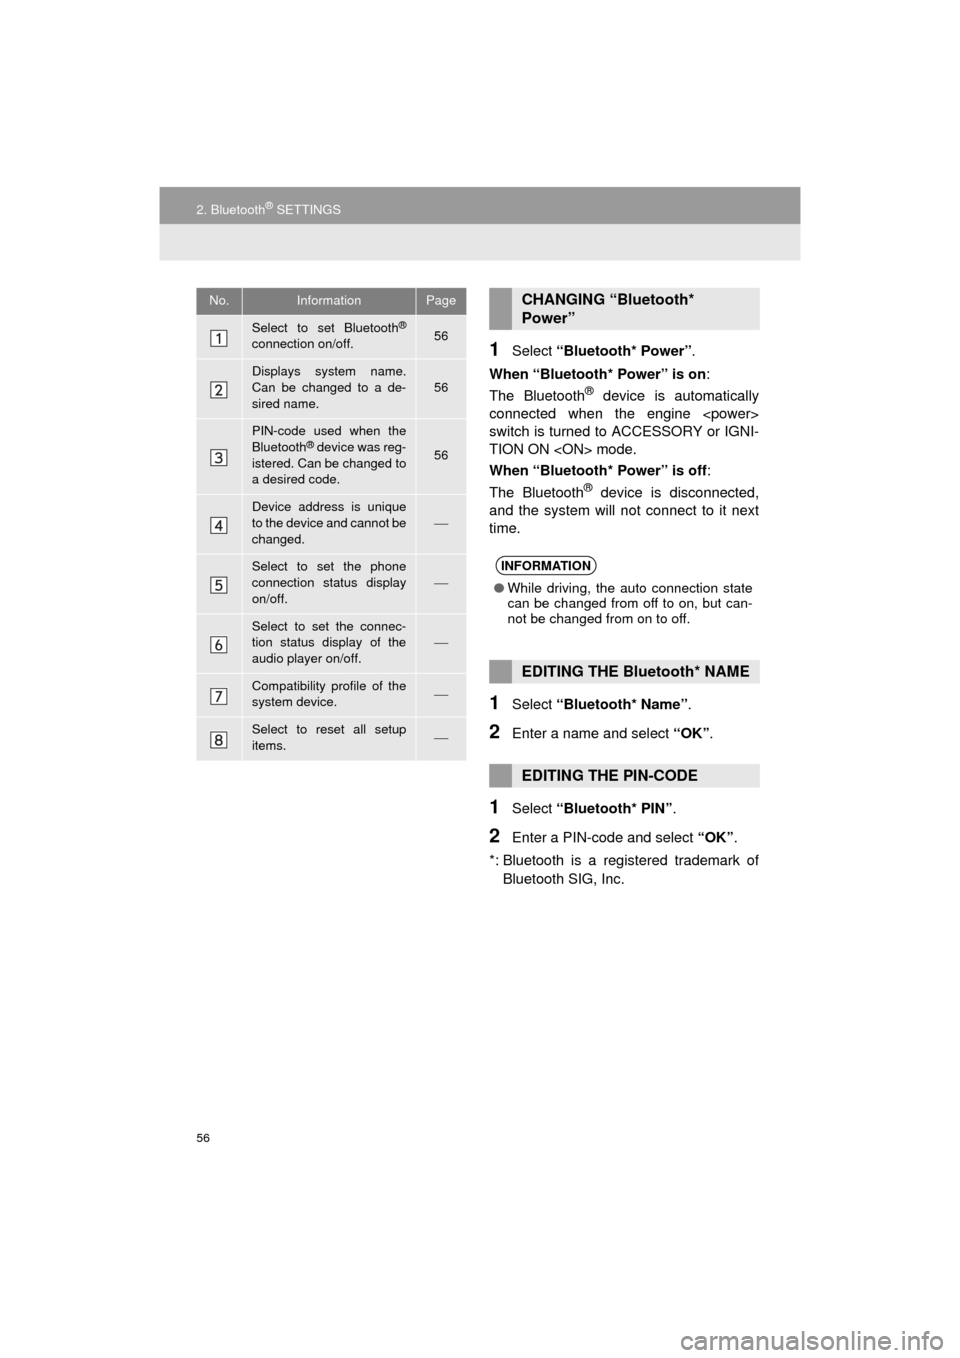
No.InformationPage
Select to set Bluetooth®
connection on/off.56
Displays system name.
Can be changed to a de-
sired name.56
PIN-code used when the
Bluetooth® device was reg-
istered. Can be changed to
a desired code.56
Device address is unique
to the device and cannot be
changed.
Select to set the phone
connection status display
on/off.
Select to set the connec-
tion status display of the
audio player on/off.
Compatibility profile of the
system device.
Select to reset all setup
items.
CHANGING “Bluetooth*
Power”
INFORMATION
● While driving, the auto connection state
can be changed from off to on, but can-
not be changed from on to off.
EDITING THE Bluetooth* NAME
EDITING THE PIN-CODE
Page 58 of 304
58
3. OTHER SETTINGS
AVA L O N _ N a v i _ U
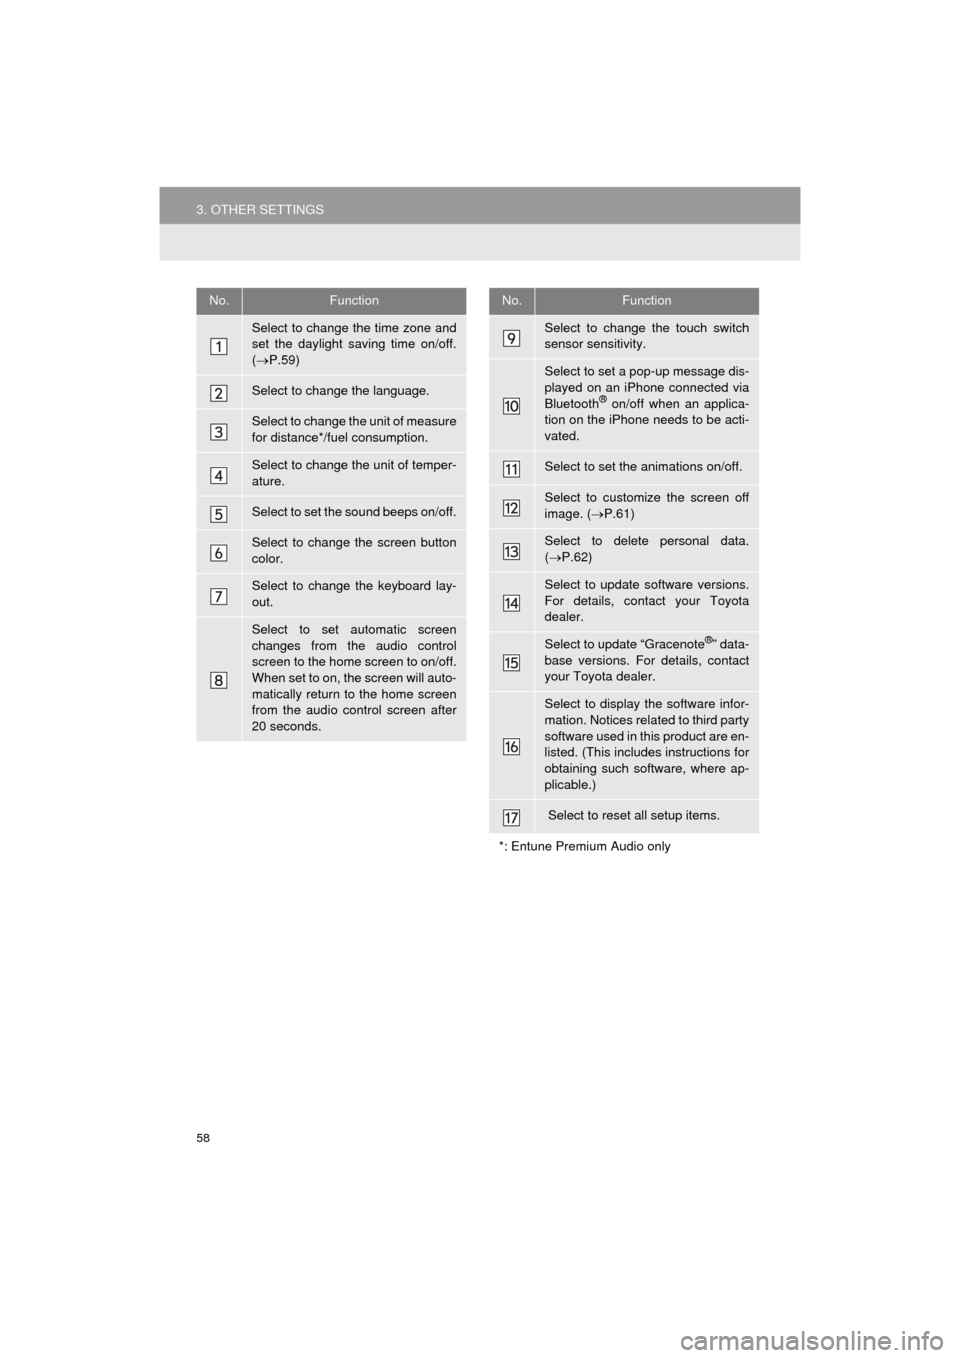
No.Function
Select to change the time zone and
set the daylight saving time on/off.
( P.59)
Select to change the language.
Select to change the unit of measure
for distance*/fuel consumption.
Select to change the unit of temper-
ature.
Select to set the sound beeps on/off.
Select to change the screen button
color.
Select to change the keyboard lay-
out.
Select to set automatic screen
changes from the audio control
screen to the home screen to on/off.
When set to on, the screen will auto-
matically return to the home screen
from the audio control screen after
20 seconds.
Select to change the touch switch
sensor sensitivity.
Select to set a pop-up message dis-
played on an iPhone connected via
Bluetooth
® on/off when an applica-
tion on the iPhone needs to be acti-
vated.
Select to set the animations on/off.
Select to customize the screen off
image. ( P.61)
Select to delete personal data.
( P.62)
Select to update software versions.
For details, contact your Toyota
dealer.
Select to update “Gracenote®” data-
base versions. For details, contact
your Toyota dealer.
Select to display the software infor-
mation. Notices related to third party
software used in this product are en-
listed. (This includes instructions for
obtaining such software, where ap-
plicable.)
Select to reset all setup items.
*: Entune Premium Audio only
No.Function
Page 74 of 304
74
1. BASIC OPERATION
AVA L O N _ N a v i _ U
“PWR/VOL” knob: Press to turn the audio
system on and off. The system turns on in
the last mode used. Turn this knob to ad-
just the volume.
“AUDIO” button: Press to display screen
buttons for the audio system.
1Press the “AUDIO” button.
2Select “Source” or press “AUDIO”
button again.
3Select the desired source.
TURNING THE SYSTEM ON
AND OFF
A function that enables automatic return
to the home screen from the audio
screen can be selected. ( P.57)
SELECTING AN AUDIO
SOURCE
INFORMATION
● Dimmed screen buttons cannot be oper-
ated.
● When there are two pages, select
or to change the page.
Page 75 of 304
75
1. BASIC OPERATION
AVA L O N _ N a v i _ U
AUDIO SYSTEM
3
1Display the “Select Audio Source”
screen. (P.74)
2Select “Reorder” .
3Select the desired audio source then
or to reorder.
4Select “OK”.
1Insert a disc into the disc slot.
After insertion, the disc is automatically
loaded.
1Press the button and remove the
disc.
REORDERING THE AUDIO
SOURCEDISC SLOT
INSERTING A DISC
EJECTING A DISC
NOTICE
●Never try to disassemble or oil any part
of the CD player. Do not insert anything
other than a disc into the slot.
INFORMATION
●The player is intended for use with 4.7
in. (12 cm) discs only.
● When inserting a disc, gently insert the
disc with the label facing up.

