2016 SUBARU IMPREZA ESP
[x] Cancel search: ESPPage 454 of 594
tire placard is located on the
driver’s door pillar.
If all of four winter tires are not
the same for items (a) to (h),
serious mechanical damage
could occur to the drive train of
your car, and affect the following.
— Ride
— Handling
— Braking
— Speedometer/Odometer
calibration
— Clearance between the body
and tires
It also may be dangerous and
lead to loss of vehicle control,
and it can lead to an accident.
. Do not use a combination of
radial, belted bias or bias tires
since it may cause dangerous
handling characteristics and lead
to an accident.
Your vehicle is equipped with “all season
tires ”as original equipment, which are
designed to provide an adequate measure
of traction, handling and braking perfor-
mance in year-round driving. In winter, it
may be possible to enhance performance
through use of tires designed specifically for winter driving conditions.
When you choose to install winter tires on
your vehicle, be sure to use the correct tire
size and type. You must install four winter
tires that are of the same size, construc-
tion, brand and load range and you should
never mix radial, belted bias or bias tires
since this may result in dangerous hand-
ling characteristics. When you choose a
tire, make sure that there is enough
clearance between the tire and vehicle
body.
Remember to drive with care at all times
regardless of the type of tires on your
vehicle.
&
Tire chains
CAUTION
Tire chains cannot be used on your
vehicle because of the lack of
clearance between the tires and
vehicle body.
NOTE
When tire chains cannot be used, use
of another type of traction device (such
as spring chains) may be acceptable if
use on your vehicle is recommended
by the device manufacturer, taking into account tire size and road conditions.
Follow the device manufacturer
’s in-
structions, especially regarding max-
imum vehicle speed.
To help avoid damage to your vehicle,
drive slowly, readjust or remove the
device if it is contacting your vehicle,
and do not spin your wheels. Damage
caused to your vehicle by use of a
traction device is not covered under
warranty.
Make certain that any traction device
you use is an SAE class S device, and
use it on the front wheels only. Always
use the utmost care when driving with
a traction device. Overconfidence be-
cause you are using a traction device
could easily lead to a serious accident.
& Rocking the vehicle
If you must rock the vehicle to free it from
snow, sand, or mud, depress the accel-
erator pedal slightly and move the shift
lever/select lever back and forth between
“1 ”/ “D ”and “R ”repeatedly. Do not race the
engine. For the best possible traction,
avoid spinning the wheels when trying to
free the vehicle.
When the road surface is extremely
slippery, you can obtain better traction by
starting the vehicle with the transmission
Driving tips/Winter driving
–CONTINUED –8-11
Page 462 of 594
manufacturer.
SUBARU assumes no responsibility for
injuries or vehicle damage that result from
trailer towing equipment, or from any
errors or omissions in the instructions
accompanying such equipment or for your
failure to follow the proper instructions.
Regularly check that the hitch mounting
bolts and nuts are tightened securely.
&Warranties and maintenance
SUBARU warranties do not apply to
vehicle damage or malfunction caused
by trailer towing. If you use your vehicle to
tow a trailer, more frequent maintenance
will be required due to the additional load.
(Refer to “Maintenance schedule under
severe driving conditions ”in the “Warranty
and Maintenance Booklet ”.)
Under no circumstances should a trailer
be towed with a new vehicle or a vehicle
with any new powertrain component (en-
gine, transmission, differential, wheel
bearings, etc.) for the first 1,000 miles
(1,600 km) of driving.
& Maximum load limits
WARNING
Never exceed the maximum load
limits explained in the following.
Exceeding the maximum load limits
could cause personal injury and/or
vehicle damage.
CAUTION
. Adequate size trailer brakes are
required when the trailer and its
cargo exceed 1,000 lbs (453 kg)
total weight.
. Before towing a trailer, check the
trailer total weight, GVW, GAWs
and tongue load. Make sure the
load and its distribution in your
vehicle and trailer are accepta-
ble. !
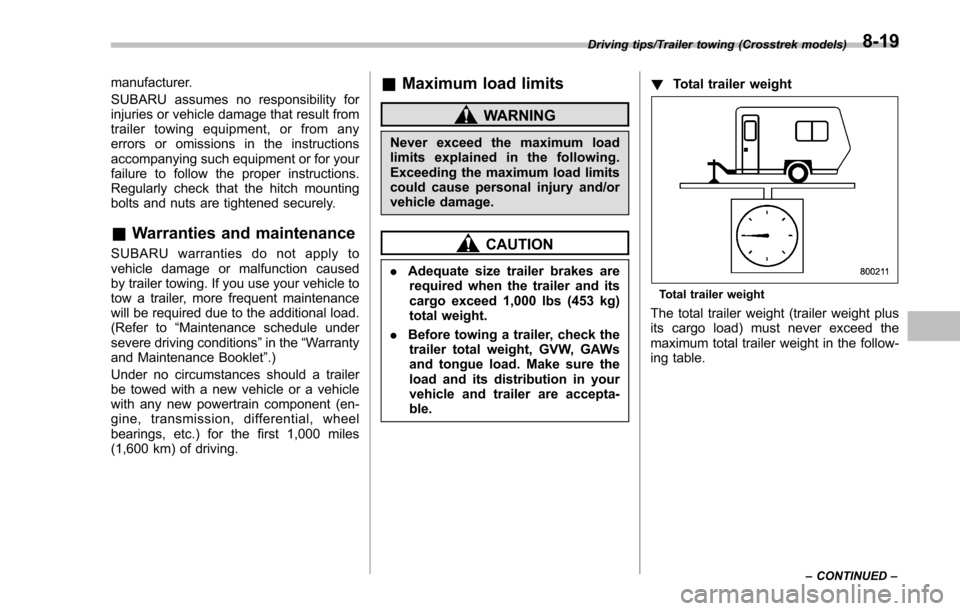
Total trailer weight
Total trailer weight
The total trailer weight (trailer weight plus
its cargo load) must never exceed the
maximum total trailer weight in the follow-
ing table.
Driving tips/Trailer towing (Crosstrek models)
–CONTINUED –8-19
Page 465 of 594
Driving tips/Trailer towing (Crosstrek models)
1) Jack
2) Bathroom scale
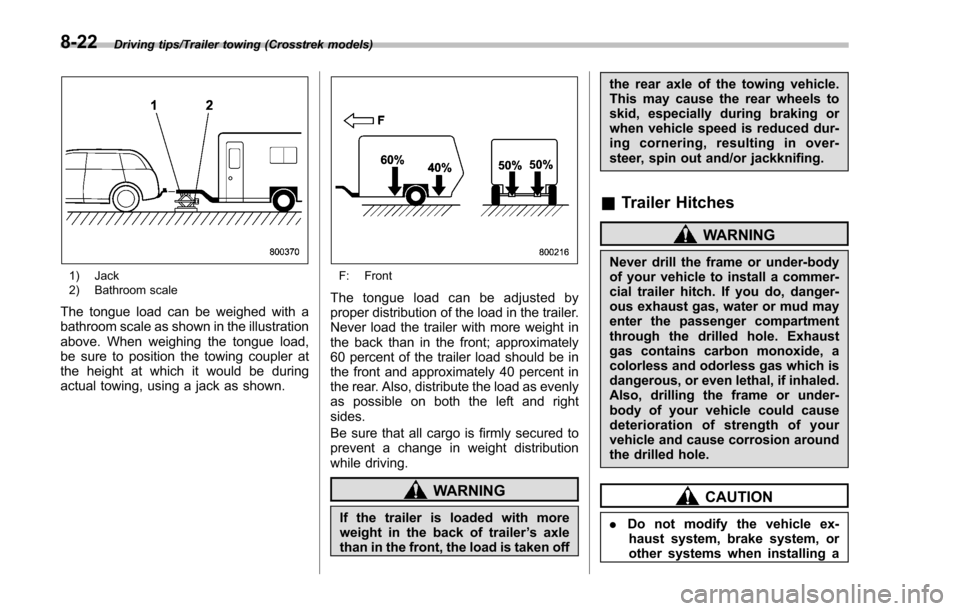
The tongue load can be weighed with a
bathroom scale as shown in the illustration
above. When weighing the tongue load,
be sure to position the towing coupler at
the height at which it would be during
actual towing, using a jack as shown.
F: Front
The tongue load can be adjusted by
proper distribution of the load in the trailer.
Never load the trailer with more weight in
the back than in the front; approximately
60 percent of the trailer load should be in
the front and approximately 40 percent in
the rear. Also, distribute the load as evenly
as possible on both the left and right
sides.
Be sure that all cargo is firmly secured to
prevent a change in weight distribution
while driving.
WARNING
If the trailer is loaded with more
weight in the back of trailer’s axle
than in the front, the load is taken off the rear axle of the towing vehicle.
This may cause the rear wheels to
skid, especially during braking or
when vehicle speed is reduced dur-
ing cornering, resulting in over-
steer, spin out and/or jackknifing.
&
Trailer Hitches
WARNING
Never drill the frame or under-body
of your vehicle to install a commer-
cial trailer hitch. If you do, danger-
ous exhaust gas, water or mud may
enter the passenger compartment
through the drilled hole. Exhaust
gas contains carbon monoxide, a
colorless and odorless gas which is
dangerous, or even lethal, if inhaled.
Also, drilling the frame or under-
body of your vehicle could cause
deterioration of strength of your
vehicle and cause corrosion around
the drilled hole.
CAUTION
. Do not modify the vehicle ex-
haust system, brake system, or
other systems when installing a
8-22
Page 493 of 594

Appearance care/Corrosion protection
Corrosion protection
Your SUBARU has been designed and
built to resist corrosion. Special materials
and protective finishes have been used on
most parts of the vehicle to help maintain
fine appearance, strength, and reliable
operation.
&Most common causes of
corrosion
The most common causes of corrosion
are:
. The accumulation of moisture retaining
dirt and debris in body panel sections,
cavities, and other areas.
. Damage to paint and other protective
coatings caused by gravel and stone
chips or minor accidents.
Corrosion is accelerated on the vehicle
when:
. It is exposed to road salt or dust control
chemicals, or used in coastal areas where
there is more salt in the air, or in areas
where there is considerable industrial
pollution.
. It is driven in areas of high humidity,
especially when temperatures range just
above freezing.
. Dampness in certain parts of the vehicle remains for a long time, even
though other parts of the vehicle may be
dry.
.
High temperatures will cause corrosion
to parts of the vehicle which cannot dry
quickly due to lack of proper ventilation.
& To help prevent corrosion
Wash the vehicle regularly to prevent
corrosion of the body and suspension
components. Also, wash the vehicle
promptly after driving on any of the
following surfaces.
. roads that have been salted to prevent
them from freezing in winter
. mud, sand, or gravel
. coastal roads
After the winter has ended, it is recom-
mended that the underbody be given a
very thorough washing.
Before the beginning of winter, check the
condition of underbody components, such
as the exhaust system, fuel and brake
lines, brake cables, suspension, steering
system, floor pan, and fenders. If any of
them are found to be rusted, they should
be given an appropriate rust prevention
treatment or should be replaced. Contact
your SUBARU dealer to perform this kind
of maintenance and treatment if you need assistance.
Repair chips and scratches in the paint as
soon as you find them.
Check the interior of the vehicle for water
and dirt accumulation under the floor mats
because that could cause corrosion.
Occasionally check under the mats to
make sure the area is dry.
Keep your garage dry. Do not park your
vehicle in a damp, poorly ventilated
garage. In such a garage, corrosion can
be caused by dampness. If you wash the
vehicle in the garage or put the vehicle
into the garage when wet or covered with
snow, that can cause dampness.
If your vehicle is operated in cold weather
and/or in areas where road salts and other
corrosive materials are used, the door
hinges and locks, trunk lid lock, and hood
latch should be inspected and lubricated
periodically.
10-4
Page 515 of 594
Maintenance and service/Replacement of brake pad and lining
Replacement of brake pad
and lining
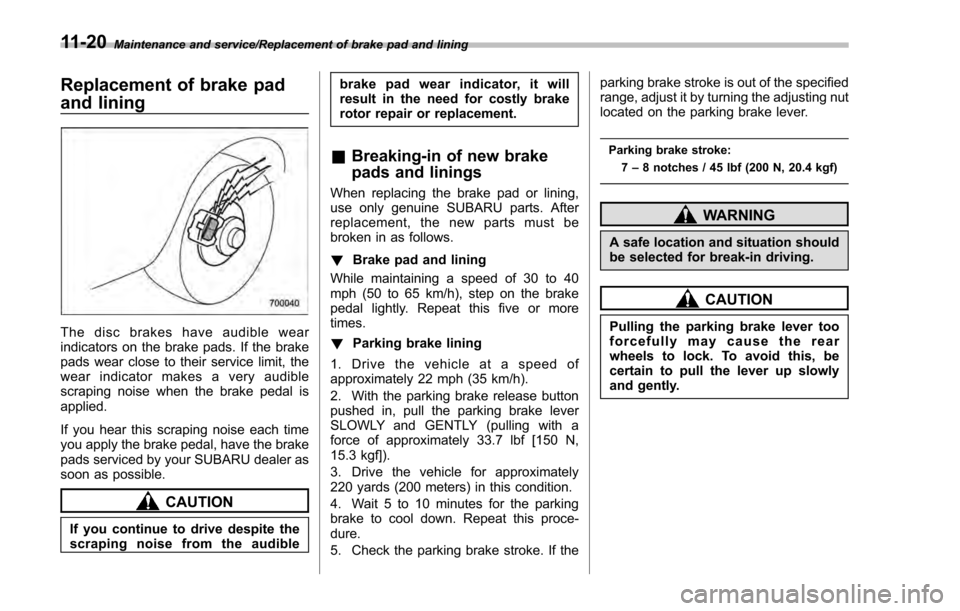
The disc brakes have audible wear
indicators on the brake pads. If the brake
pads wear close to their service limit, the
wear indicator makes a very audible
scraping noise when the brake pedal is
applied.
If you hear this scraping noise each time
you apply the brake pedal, have the brake
pads serviced by your SUBARU dealer as
soon as possible.
CAUTION
If you continue to drive despite the
scraping noise from the audiblebrake pad wear indicator, it will
result in the need for costly brake
rotor repair or replacement.
&
Breaking-in of new brake
pads and linings
When replacing the brake pad or lining,
use only genuine SUBARU parts. After
replacement, the new parts must be
broken in as follows.
! Brake pad and lining
While maintaining a speed of 30 to 40
mph (50 to 65 km/h), step on the brake
pedal lightly. Repeat this five or more
times.
! Parking brake lining
1. Drive the vehicle at a speed of
approximately 22 mph (35 km/h).
2. With the parking brake release button
pushed in, pull the parking brake lever
SLOWLY and GENTLY (pulling with a
force of approximately 33.7 lbf [150 N,
15.3 kgf]).
3. Drive the vehicle for approximately
220 yards (200 meters) in this condition.
4. Wait 5 to 10 minutes for the parking
brake to cool down. Repeat this proce-
dure.
5. Check the parking brake stroke. If the parking brake stroke is out of the specified
range, adjust it by turning the adjusting nut
located on the parking brake lever.
Parking brake stroke:
7–8 notches / 45 lbf (200 N, 20.4 kgf)
WARNING
A safe location and situation should
be selected for break-in driving.
CAUTION
Pulling the parking brake lever too
forcefully may cause the rear
wheels to lock. To avoid this, be
certain to pull the lever up slowly
and gently.
11-20
Page 517 of 594
Maintenance and service/Tires and wheels
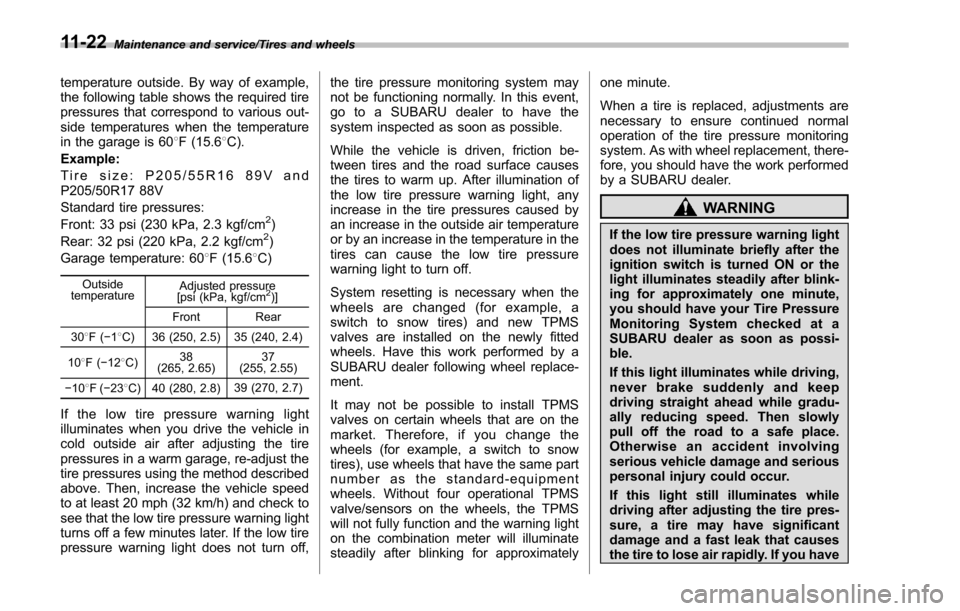
temperature outside. By way of example,
the following table shows the required tire
pressures that correspond to various out-
side temperatures when the temperature
in the garage is 608F (15.6 8C).
Example:
Tire size: P205/55R16 89V and
P205/50R17 88V
Standard tire pressures:
Front: 33 psi (230 kPa, 2.3 kgf/cm
2)
Rear: 32 psi (220 kPa, 2.2 kgf/cm2)
Garage temperature: 60 8F (15.6 8C)
Outside
temperature Adjusted pressure
[psi (kPa, kgf/cm2)]
Front Rear
30 8F( −18C) 36 (250, 2.5) 35 (240, 2.4)
10 8F( −12 8C) 38
(265, 2.65) 37
(255, 2.55)
−10 8F( −23 8C) 40 (280, 2.8) 39 (270, 2.7)
If the low tire pressure warning light
illuminates when you drive the vehicle in
cold outside air after adjusting the tire
pressures in a warm garage, re-adjust the
tire pressures using the method described
above. Then, increase the vehicle speed
to at least 20 mph (32 km/h) and check to
see that the low tire pressure warning light
turns off a few minutes later. If the low tire
pressure warning light does not turn off, the tire pressure monitoring system may
not be functioning normally. In this event,
go to a SUBARU dealer to have the
system inspected as soon as possible.
While the vehicle is driven, friction be-
tween tires and the road surface causes
the tires to warm up. After illumination of
the low tire pressure warning light, any
increase in the tire pressures caused by
an increase in the outside air temperature
or by an increase in the temperature in the
tires can cause the low tire pressure
warning light to turn off.
System resetting is necessary when the
wheels are changed (for example, a
switch to snow tires) and new TPMS
valves are installed on the newly fitted
wheels. Have this work performed by a
SUBARU dealer following wheel replace-
ment.
It may not be possible to install TPMS
valves on certain wheels that are on the
market. Therefore, if you change the
wheels (for example, a switch to snow
tires), use wheels that have the same part
number as the standard-equipment
wheels. Without four operational TPMS
valve/sensors on the wheels, the TPMS
will not fully function and the warning light
on the combination meter will illuminate
steadily after blinking for approximatelyone minute.
When a tire is replaced, adjustments are
necessary to ensure continued normal
operation of the tire pressure monitoring
system. As with wheel replacement, there-
fore, you should have the work performed
by a SUBARU dealer.
WARNING
If the low tire pressure warning light
does not illuminate briefly after the
ignition switch is turned ON or the
light illuminates steadily after blink-
ing for approximately one minute,
you should have your Tire Pressure
Monitoring System checked at a
SUBARU dealer as soon as possi-
ble.
If this light illuminates while driving,
never brake suddenly and keep
driving straight ahead while gradu-
ally reducing speed. Then slowly
pull off the road to a safe place.
Otherwise an accident involving
serious vehicle damage and serious
personal injury could occur.
If this light still illuminates while
driving after adjusting the tire pres-
sure, a tire may have significant
damage and a fast leak that causes
the tire to lose air rapidly. If you have
11-22
Page 519 of 594
Maintenance and service/Tires and wheels
NOTE
.The air pressure in a tire increases
by approximately 4.3 psi (30 kPa, 0.3
kgf/cm
2) when the tire becomes warm.
. The tires are considered cold when
the vehicle has been parked for at least
three hours or has been driven less
than one mile (1.6 km).
WARNING
Do not let air out of warm tires to
adjust pressure. Doing so will result
in low tire pressure.
Incorrect tire pressures detract from con-
trollability and ride comfort, and they
cause the tires to wear abnormally. .
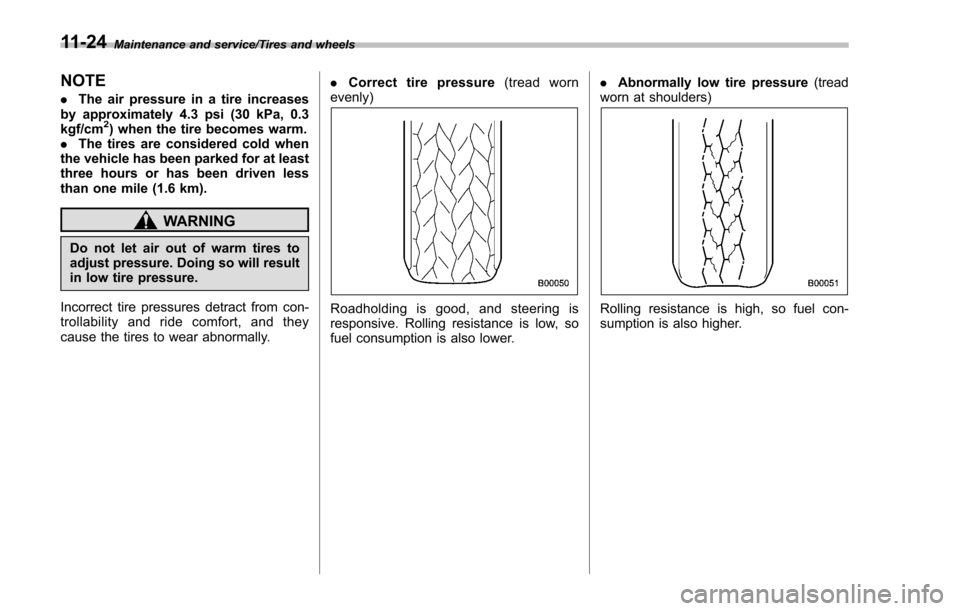
Correct tire pressure (tread worn
evenly)
Roadholding is good, and steering is
responsive. Rolling resistance is low, so
fuel consumption is also lower. .
Abnormally low tire pressure (tread
worn at shoulders)Rolling resistance is high, so fuel con-
sumption is also higher.
11-24
Page 530 of 594
Fuses
CAUTION
Never replace a fuse with one hav-
ing a higher rating or with material
other than a fuse because serious
damage or a fire could result.
The fuses are designed to melt during an
overload to prevent damage to the wiring
harness and electrical equipment. The
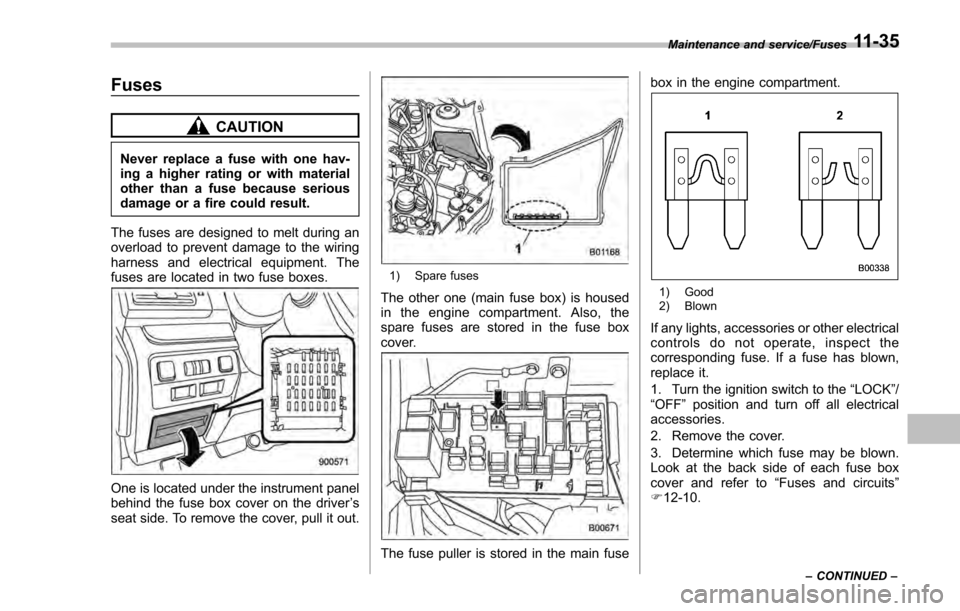
fuses are located in two fuse boxes.
One is located under the instrument panel
behind the fuse box cover on the driver ’s
seat side. To remove the cover, pull it out.
1) Spare fuses
The other one (main fuse box) is housed
in the engine compartment. Also, the
spare fuses are stored in the fuse box
cover.
The fuse puller is stored in the main fuse box in the engine compartment.
1) Good
2) Blown
If any lights, accessories or other electrical
controls do not operate, inspect the
corresponding fuse. If a fuse has blown,
replace it.
1. Turn the ignition switch to the
“LOCK”/
“OFF ”position and turn off all electrical
accessories.
2. Remove the cover.
3. Determine which fuse may be blown.
Look at the back side of each fuse box
cover and refer to “Fuses and circuits”
F 12-10.
Maintenance and service/Fuses
–CONTINUED –11-35