2016 RENAULT TWINGO phone
[x] Cancel search: phonePage 93 of 168
GB.35
R & GO: GENERAL DESCRIPTION (3/6)
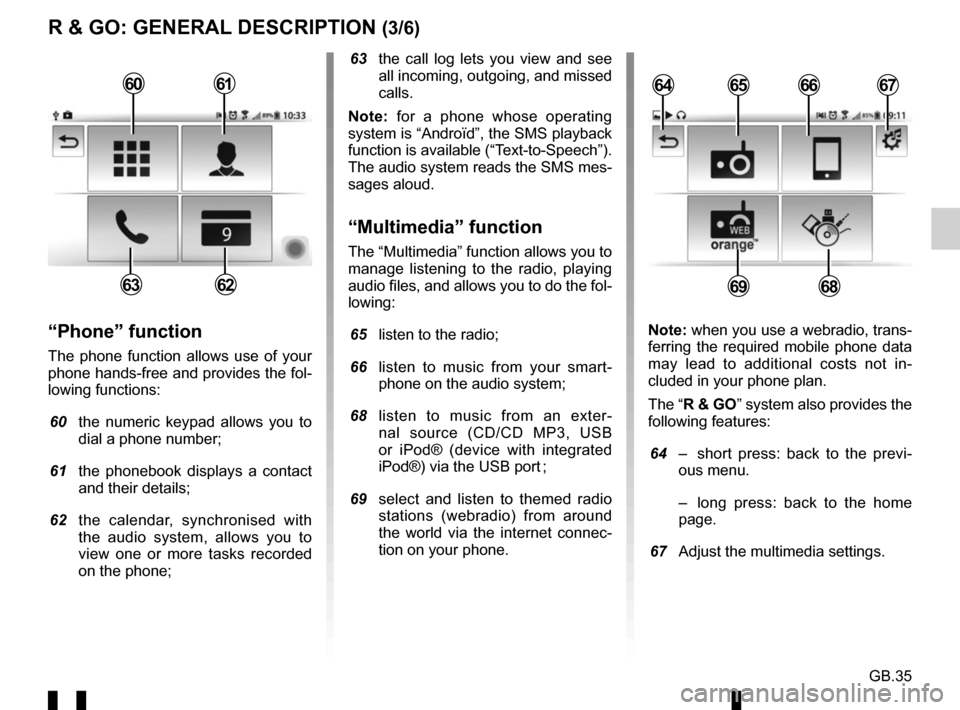
63 the call log lets you view and see all incoming, outgoing, and missed
calls.
Note: for a phone whose operating
system is “Androïd”, the SMS playback
function is available (“Text-to-Speech”).
The audio system reads the SMS mes-
sages aloud.
“Multimedia” function
The “Multimedia” function allows you to
manage listening to the radio, playing
audio files, and allows you to do the fol-
lowing:
65 listen to the radio;
66 listen to music from your smart- phone on the audio system;
68 listen to music from an exter- nal source (CD/CD MP3, USB
or iPod® (device with integrated
iPod®) via the USB port ;
69 select and listen to themed radio stations (webradio) from around
the world via the internet connec-
tion on your phone.
“Phone” function
The phone function allows use of your
phone hands-free and provides the fol-
lowing functions:
60 the numeric keypad allows you to
dial a phone number;
61 the phonebook displays a contact and their details;
62 the calendar, synchronised with the audio system, allows you to
view one or more tasks recorded
on the phone; Note: when you use a webradio, trans-
ferring the required mobile phone data
may lead to additional costs not in-
cluded in your phone plan.
The “R & GO” system also provides the
following features:
64 – short press: back to the previ-
ous menu.
– long press: back to the home page.
67 Adjust the multimedia settings.
6566
6968
64676061
6263
Page 95 of 168
GB.37
R & GO: GENERAL DESCRIPTION (5/6)
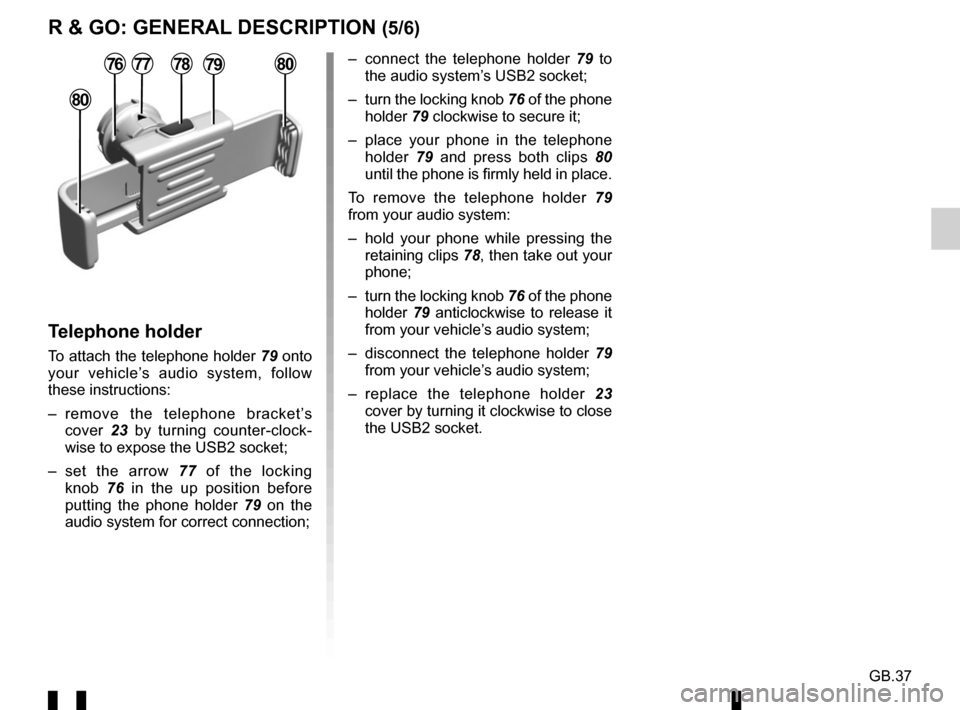
– connect the telephone holder 79 to
the audio system’s USB2 socket;
– turn the locking knob 76 of the phone
holder 79 clockwise to secure it;
– place your phone in the telephone holder 79 and press both clips 80
until the phone is firmly held in place.
To remove the telephone holder 79
from your audio system:
– hold your phone while pressing the retaining clips 78, then take out your
phone;
– turn the locking knob 76 of the phone
holder 79 anticlockwise to release it
from your vehicle’s audio system;
– disconnect the telephone holder 79
from your vehicle’s audio system;
– replace the telephone holder 23
cover by turning it clockwise to close
the USB2 socket.
Telephone holder
To attach the telephone holder 79 onto
your vehicle’s audio system, follow
these instructions:
– remove the telephone bracket’s cover 23 by turning counter-clock-
wise to expose the USB2 socket;
– set the arrow 77 of the locking knob 76 in the up position before
putting the phone holder 79 on the
audio system for correct connection;
78
80
80777679
Page 96 of 168

GB.38
Note: You can use the telephone
holder 79 in two positions:
– vertically, by placing your phone hor- izontally and then turning the sup-
port 79 to an upright position;
– horizontally, by placing your phone vertically and then turning the sup-
port 79 horizontally.
NB: You can also tilt the telephone
holder to get a better view of the
phone’s screen.
79
Charging using the USB port
Once your telephone’s USB socket is
connected to the USB port of the tele-
phone holder 79, you can charge its
battery during use.
R & GO: GENERAL DESCRIPTION (6/6)
Page 97 of 168
GB.39
R & GO: PHONE FUNCTION (1/2)
Note: you can check your voicemail by
holding down key “1” on the keypad 11.
The first long press on key “1” on the
keypad 11 saves the voicemail number
for your telephone.
“Numeric keypad”
To dial a number or call your phone's
voicemail, press the “Digital keypad”
icon.
Dial your number using the numeric
keypad and press the green button to
start the call.
Introduction to the “Phone”
menu
To access the telephone menu, from
the main menu press the “Menu” icon,
then “Phone”.
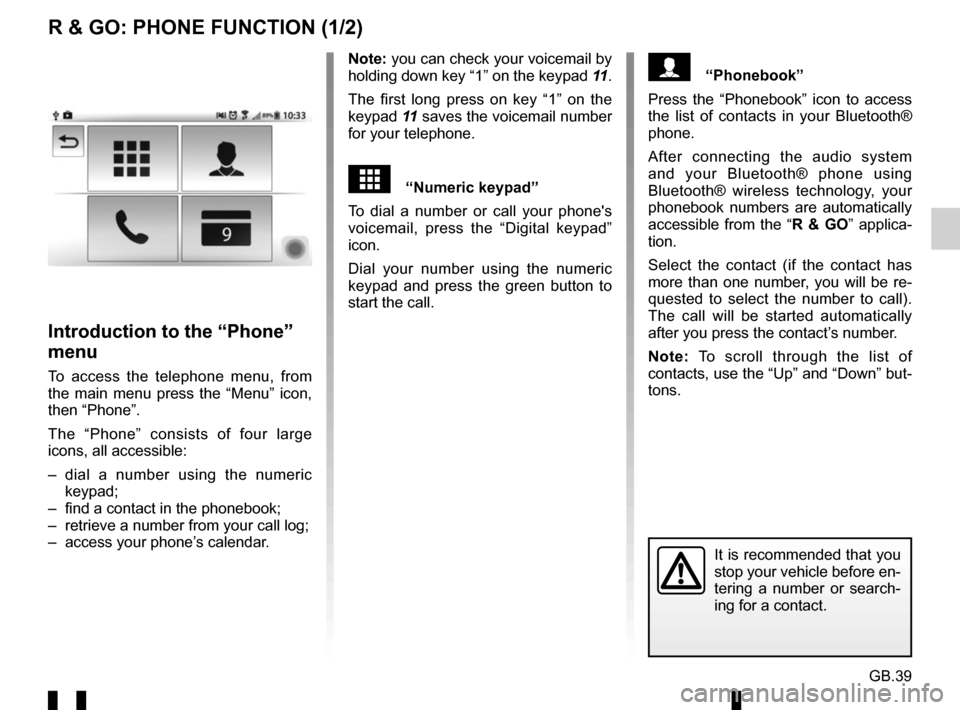
The “Phone” consists of four large
icons, all accessible:
– dial a number using the numeric keypad;
– find a contact in the phonebook;
– retrieve a number from your call log;
– access your phone’s calendar.
It is recommended that you
stop your vehicle before en-
tering a number or search-
ing for a contact.
“Phonebook”
Press the “Phonebook” icon to access
the list of contacts in your Bluetooth®
phone.
After connecting the audio system
and your Bluetooth® phone using
Bluetooth® wireless technology, your
phonebook numbers are automatically
accessible from the “ R & GO” applica-
tion.
Select the contact (if the contact has
more than one number, you will be re-
quested to select the number to call).
The call will be started automatically
after you press the contact’s number.
Note: To scroll through the list of
contacts, use the “Up” and “Down” but-
tons.
Page 98 of 168

GB.40
R & GO: PHONE FUNCTION (2/2)
“Call log”
From the “Phone” menu, press the
“Call log” icon.
The call log places the various calls in
four tabs:
– All calls (incoming, outgoing, missed);
– incoming calls;
– missed calls;
– outgoing calls.
For each list, the contacts are listed
from the most recent to the oldest.
To navigate through the call log, you
can press:
– a tab to view its contents;
– the “Up” and “Down” buttons to scroll through the list of calls;
– an entry from the call log to call the corresponding contact.“Calendar”
From the “Phone” menu, press the
“Calendar” icon.
The phone calendar shows all of the
tasks, appointments and events of that
day, etc. listed in your phone on the
audio system.
To browse through the calendar, you
can press:
– a tab to see its contents in detail, such as the time, description, and
address;
– the “Up” and “Down” buttons to scroll through the calendar.
From a stored address, you can launch
the “CoPilot” application. Press the red
icon to navigate to the stored address.“SMS log” (depending on
the phone)
From the “Phone” menu, press the
“SMS log” icon.
The SMS log allows you to listen to
the last three messages received while
using the “R & GO”.
Note: to scroll through the list of SMS,
use the “Up” and “Down” buttons.
\b“Warning message”
(depending on the phone)
This function is for playing warning
messages. Press the “Warning mes-
sage” icon to play the message.
Page 99 of 168
GB.41
R & GO: MULTIMEDIA FUNCTION (1/2)
”Listen to the radio”
From the main menu, press the icons
“Menu”, “Multimedia”, then the “Listen
to the radio” icon.
This menu allows you to listen to radio
stations and provides the following
functions:
– select a waveband (FM2, FM1, DR1, DR2, or AM);
– select a station using one of three search modes “Frequency”, “List” or
“Preset”;
– find a station using the integrated in- telligent keypad;
– listen to preset stations;
– view text information from certain FM and DR radio stations while listening.
For further information, please refer to
the section on “Listening to the radio”.Bluetooth® “Audio
playback”
From the main menu, press the icons
“Menu”, “Multimedia”, then the icon
“Play Bluetooth® audio”.
In order to use your Bluetooth® device,
you must pair it to the vehicle upon first
use.
The “Play Bluetooth® audio” menu pro-
vides the following functions:
– access the audio files directly;
– access files, music, genres, artists, albums and reading lists;
– access files and/or audio files.
NB: Only available sources can be
selected. Unavailable sources will be
greyed out.Introduction to the
“Multimedia” menu
To access the “Multimedia” menu, from
the main menu, press the “Menu” icon,
then “Multimedia”.
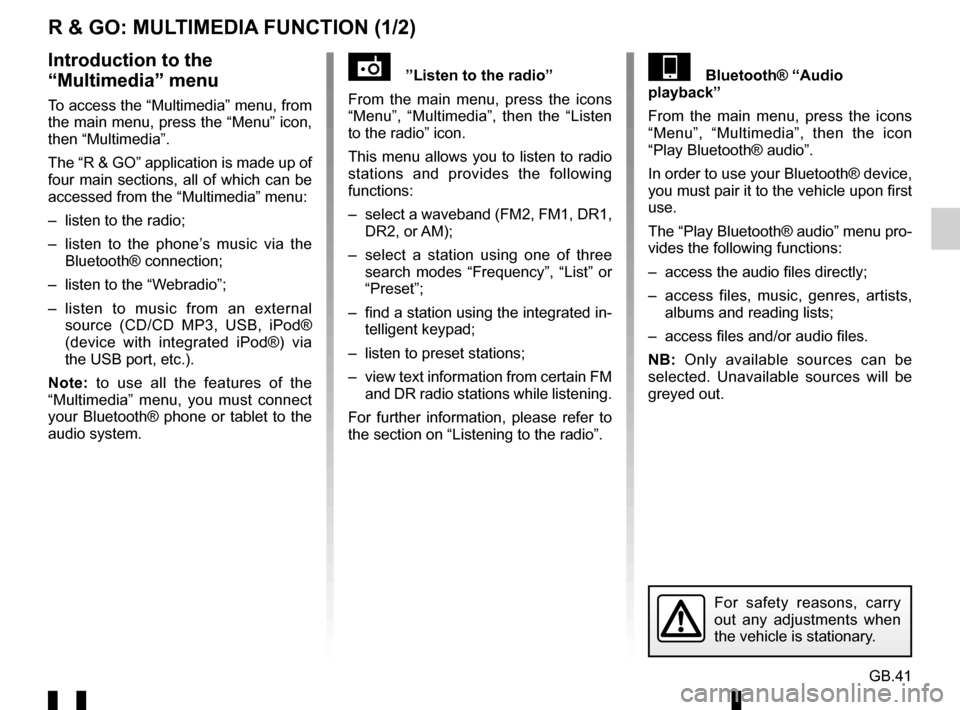
The “R & GO” application is made up of
four main sections, all of which can be
accessed from the “Multimedia” menu:
– listen to the radio;
– listen to the phone’s music via the Bluetooth® connection;
– listen to the “Webradio”;
– listen to music from an external source (CD/CD MP3, USB, iPod®
(device with integrated iPod®) via
the USB port, etc.).
Note: to use all the features of the
“Multimedia” menu, you must connect
your Bluetooth® phone or tablet to the
audio system.
For safety reasons, carry
out any adjustments when
the vehicle is stationary.
Page 100 of 168
GB.42
R & GO: MULTIMEDIA FUNCTION (2/2)
”Auxiliary audio source”
The “Auxiliary audio source” menu en-
ables you to listen to music from an ex-
ternal audio source.
From the main menu, press the icons
“Menu”, “Multimedia”, then “Auxiliary
audio source”.
From the following list, select an input
source connected to the audio system
to access the audio files:
– CD/CD MP3;
– USB1;
– USB2;
– iPod®: device with integrated iPod®;
– jack connection.
\f”Multimedia settings”.
From the main menu, press the icons
“Menu”, “Multimedia”, then “Multimedia
Settings”.
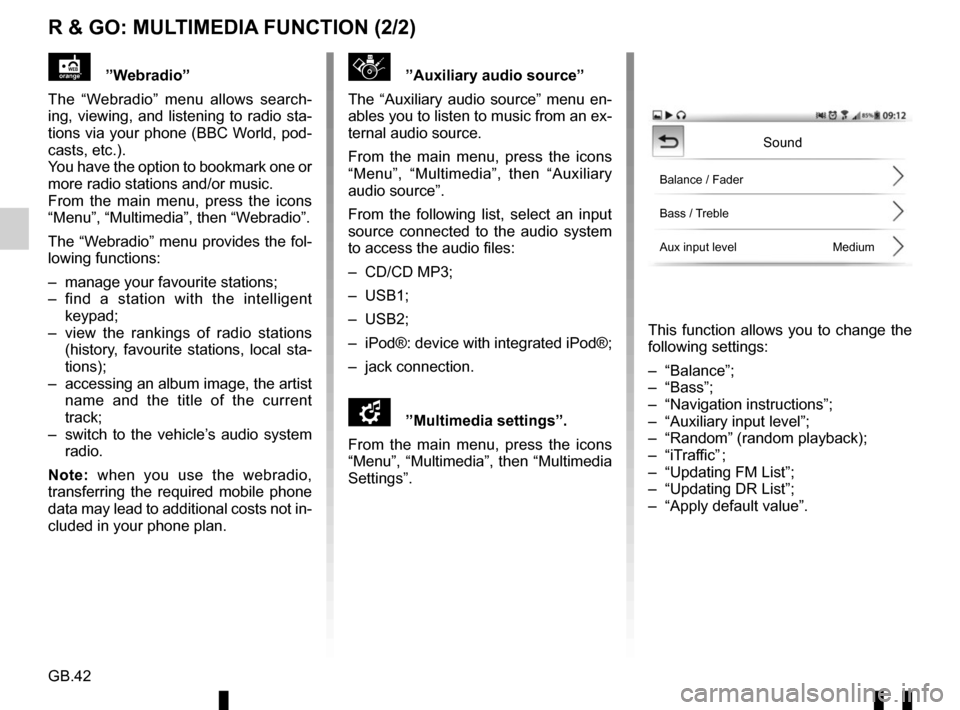
This function allows you to change the
following settings:
– “Balance”;
– “Bass”;
– “Navigation instructions”;
– “Auxiliary input level”;
– “Random” (random playback);
– “iTraffic” ;
– “Updating FM List”;
– “Updating DR List”;
– “Apply default value”.
”Webradio”
The “Webradio” menu allows search-
ing, viewing, and listening to radio sta-
tions via your phone (BBC World, pod-
casts, etc.).
You have the option to bookmark one or
more radio stations and/or music.
From the main menu, press the icons
“Menu”, “Multimedia”, then “Webradio”.
The “Webradio” menu provides the fol-
lowing functions:
– manage your favourite stations;
– find a station with the intelligent keypad;
– view the rankings of radio stations (history, favourite stations, local sta-
tions);
– accessing an album image, the artist name and the title of the current
track;
– switch to the vehicle’s audio system radio.
Note: when you use the webradio,
transferring the required mobile phone
data may lead to additional costs not in-
cluded in your phone plan.
Sound
Balance / Fader
Bass / Treble
Aux input level Medium
Page 101 of 168
GB.43
R & GO: NAVIGATION FUNCTION (1/2)
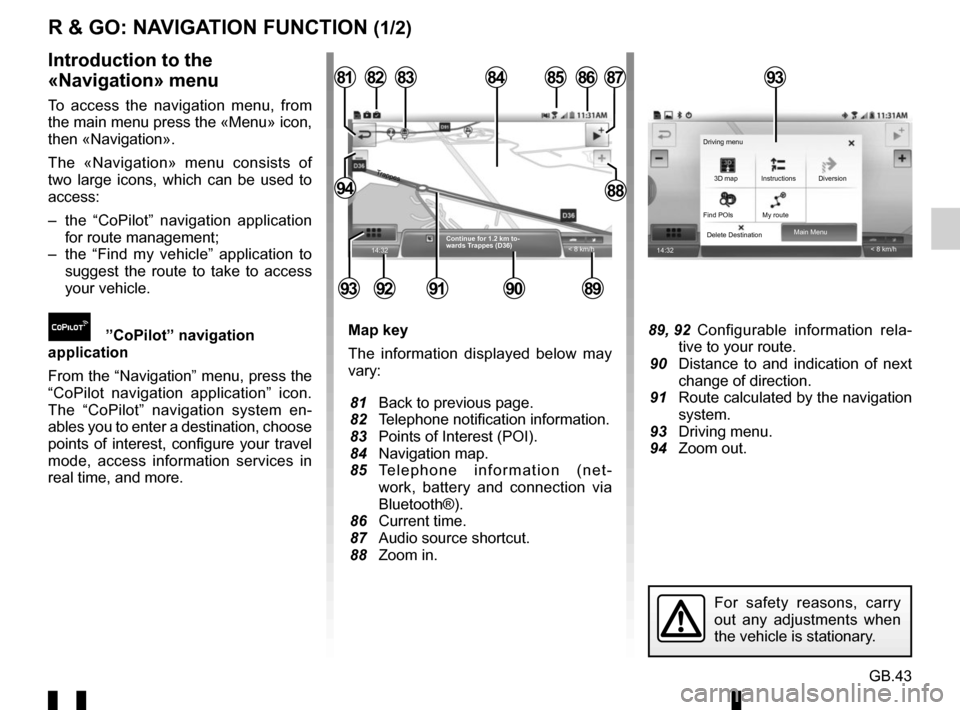
Map key
The information displayed below may
vary:
81 Back to previous page.
82 Telephone notification information.
83 Points of Interest (POI).
84 Navigation map.
85 Telephone information (net-work, battery and connection via
Bluetooth®).
86 Current time.
87 Audio source shortcut.
88 Zoom in. 89, 92 Configurable information rela- tive to your route.
90 Distance to and indication of next change of direction.
91 Route calculated by the navigation system.
93 Driving menu.
94 Zoom out.
Introduction to the
«Navigation» menu
To access the navigation menu, from
the main menu press the «Menu» icon,
then «Navigation».
The «Navigation» menu consists of
two large icons, which can be used to
access:
– the “CoPilot” navigation application for route management;
– the “Find my vehicle” application to suggest the route to take to access
your vehicle.
”CoPilot” navigation
application
From the “Navigation” menu, press the
“CoPilot navigation application” icon.
The “CoPilot” navigation system en-
ables you to enter a destination, choose
points of interest, configure your travel
mode, access information services in
real time, and more.
14:32
85
89909291
828187
8894
8684
< 8 km/h
83
Continue for 1.2 km to-
wards Trappes (D36)
Trappes
93
14:32 < 8 km/h
Main Menu
Delete Destination 3D map
Find POIs My route Instructions Diversion
Driving menu
For safety reasons, carry
out any adjustments when
the vehicle is stationary.
93