2016 RENAULT KADJAR temperature
[x] Cancel search: temperaturePage 94 of 300

1.88
Vehicle fitted with front
windscreen wiper rain sensor
The rain sensor is located on the winds-
creen, in front of the interior rear-view
mirror.
A single sweep
A short push will trigger one sweep
of the wipers.
B stop
When activating automatic wiping
or when increasing sensitivity, one
sweep of the blades is performed.
Note:
– the rain sensor is only intended
as a driving aid. In the event of re-
duced visibility, the driver should
manually activate the wipers;
– In foggy weather or during snow-
falls, wiping is not automatically
triggered and remains under the
driver’s control;
– in the event of temperatures
below zero, automatic wiping is
not activated when the vehicle
is started. It is automatically acti-
vated as soon as the vehicle ex-
ceeds a certain speed (approxi-
mately 5 mph (8 km/h));
– do not activate automatic wiping
in dry weather;
– fully de-ice the windscreen before
activating automatic wiping.
1
A
B
C
DG
F
1
E
WINDSCREEN WASH/WIPE (2/6)
C automatic wiper function
When this position is selected, the
system detects water on the wind-
screen and triggers the wipers at a
suitable wiping speed. It is possi-
ble to change the triggering thresh-
old and the time sweeps by turning
ring 2:
– F : minimum sensitivity
– G : maximum sensitivity
The higher the sensitivity, the quic-
ker the wipers will react and the
faster the wipe.
2
Page 97 of 300

1.91
Note:
In temperatures below zero, the washer
liquid risks freezing to the windscreen,
thereby reducing visibility. Heat the
windscreen using the demister control
before cleaning.
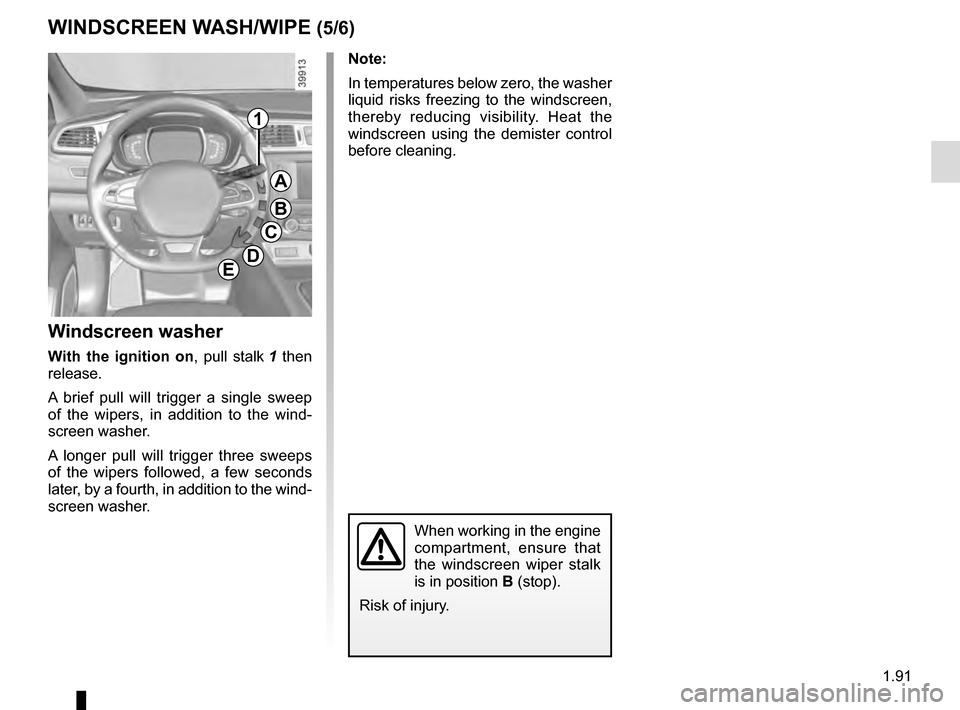
Windscreen washer
With the ignition on, pull stalk 1 then
release.
A brief pull will trigger a single sweep
of the wipers, in addition to the wind-
screen washer.
A longer pull will trigger three sweeps
of the wipers followed, a few seconds
later, by a fourth, in addition to the wind-
screen washer.
When working in the engine
compartment, ensure that
the windscreen wiper stalk
is in position B (stop).
Risk of injury.
WINDSCREEN WASH/WIPE (5/6)
1
A
B
C
DE
Page 108 of 300

2.4
STARTING, STOPPING THE ENGINE: vehicle with key
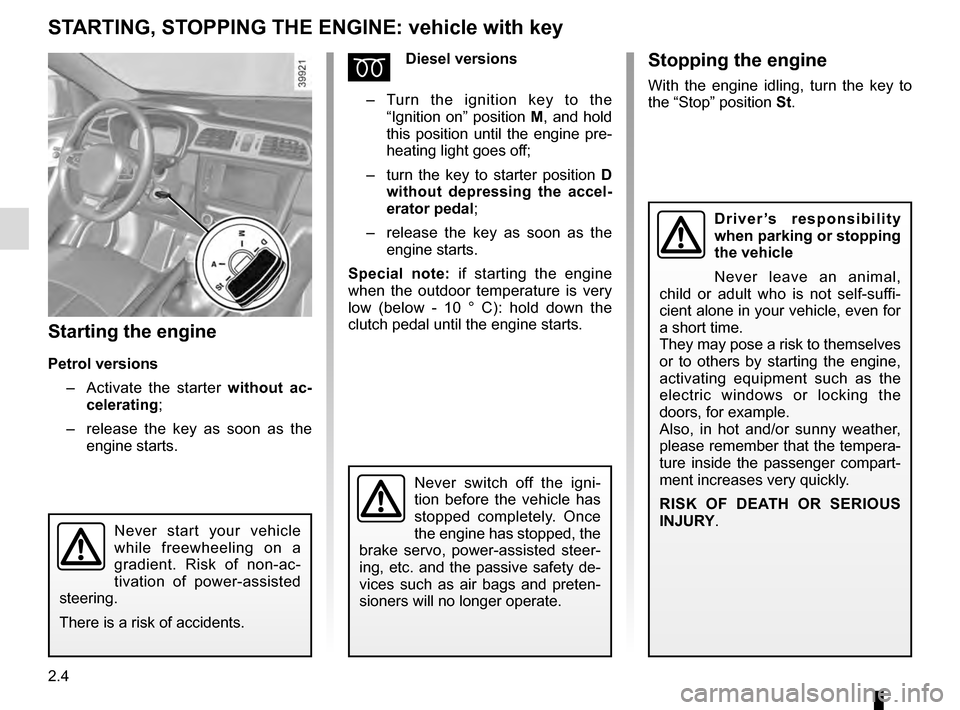
Starting the engine
Petrol versions– Activate the starter without ac-
celerating;
– release the key as soon as the
engine starts.
ÉDiesel versions
– Turn the ignition key to the
“Ignition on” position M, and hold
this position until the engine pre-
heating light goes off;
– turn the key to starter position D
without depressing the accel-
erator pedal;
– release the key as soon as the
engine starts.
Special note: if starting the engine
when the outdoor temperature is very
low (below - 10 ° C): hold down the
clutch pedal until the engine starts.
Never start your vehicle
while freewheeling on a
gradient. Risk of non-ac-
tivation of power-assisted
steering.
There is a risk of accidents.
Never switch off the igni-
tion before the vehicle has
stopped completely. Once
the engine has stopped, the
brake servo, power-assisted steer-
ing, etc. and the passive safety de-
vices such as air bags and preten-
sioners will no longer operate.
Driver’s responsibility
when parking or stopping
the vehicle
Never leave an animal,
child or adult who is not self-suffi-
cient alone in your vehicle, even for
a short time.
They may pose a risk to themselves
or to others by starting the engine,
activating equipment such as the
electric windows or locking the
doors, for example.
Also, in hot and/or sunny weather,
please remember that the tempera-
ture inside the passenger compart-
ment increases very quickly.
RISK OF DEATH OR SERIOUS
INJURY.
Stopping the engine
With the engine idling, turn the key to
the “Stop” position St.
Page 114 of 300

2.10
STOP AND START FUNCTION (3/4)
Conditions preventing the
standby of the engine
Certain conditions prevent the system
from using the engine standby function,
including when:
for vehicles equipped with a
RENAULT card:
– the driver’s door is not closed;
– the driver’s seatbelt is not fastened;
for all vehicles:
– reverse gear is engaged;
– the bonnet is not locked;
– the outdoor temperature is too low or too high (less than around 0 °C or
higher than around 30 °C);
– the battery is not sufficiently char- ged;
– if available, “4WD Lock” mode is activated (please see the section
“Transmission: 4-wheel drive (4WD)”
in Section 2);
– the difference between the vehicle interior temperature and the auto-
matic climate control instruction is
too high; – parking distance control is in opera-
tion;
– for vehicles with automatic gear- boxes, the gradient is steeper than
approximately 12%;
– the “Clear View” function is activa- ted (please see “Automatic Climate
Control” in Section 3);
– the engine temperature is too low;
– the emission control system is being regenerated;
or
– ...
Warning light
is displayed on the
instrument panel. This notifies you that
engine standby is not available.
Deactivate the Stop and
Start function when perfor-
ming any operations in the
engine compartment.
Special cases for vehicles
with a RENAULT card
With the engine on standby (traffic jam,
traffic lights, etc.), if the driver unfas-
tens the seat belt and opens the driv-
er’s door, or gets out of the seat, the
ignition is switched off.
The assisted parking brake is applied
automatically.
To restart and reactivate the Stop and
Start system, start the engine (please
refer to “Starting, stopping the engine”
in Section 2).
Special cases of vehicles
with a key
With the engine on standby (traffic
jam, traffic lights, etc.), if you get out of
the vehicle, a beep warns you that the
engine is on standby and has not been
stopped.
Page 115 of 300

2.11
STOP AND START FUNCTION (4/4)
Special feature of the automatic
engine re-start
Under certain conditions, the engine
can restart on its own in order to gua-
rantee your safety and comfort.
This can occur especially when:
– the outdoor temperature is too low or too high (less than around 0 °C or
higher than around 30 °C);
– the “Clear View” function is activa- ted (please see “Automatic Climate
Control” in Section 3);
– the battery is not sufficiently char- ged;
– the vehicle speed is above 3 mph (5 km/h) (downhill slope, etc.);
– repeated pressing on the brake pedal or braking system require-
ment;
– ...
1
2
Deactivating, activating the
function
Press switch 1 to deactivate the func-
tion. The message “Stop & Start deac-
tivated” will appear on the instrument
panel and the integrated warning light 2
on the switch will light up.
Pressing again will reactivate the
system. The message “Stop & Start ac-
tivated” will appear on the instrument
panel and the integrated warning light 2
on switch 1 will go out.
Note: With the engine on standby,
press switch 1 to automatically re-
start the engine.
The system is automatically reacti-
vated each time the vehicle is started
(see “Starting, stopping the engine” in
Section 2).
Operating faults
When the message “Check Stop &
Start” appears on the instrument panel
and the integrated warning light 2 lights
up on the switch 1, the system is deac-
tivated.
Please consult an authorised dealer.
Before getting out of the
vehicle, you must switch
off the ignition (please see
section on “Starting, stop-
ping the engine”).Special feature of vehicles with
a key: for some of these condi-
tions the automatic restarting of the
engine is inhibited if a front door is
open.
Page 126 of 300

2.22
– Do not overrev the engine in the in-termediate gears.
You should always use the highest gear possible.
– Avoid sudden acceleration.
– Brake as little as possible. If you an- ticipate an obstacle or bend in ad-
vance, you may then simply release
the accelerator pedal.
– Do not try to maintain the same speed up a hill, accelerate no more
than you would on flat ground. Keep
your foot in the same position on the
accelerator pedal.
– Double declutching and accelerating before switching off are unnecessary
in modern vehicles.
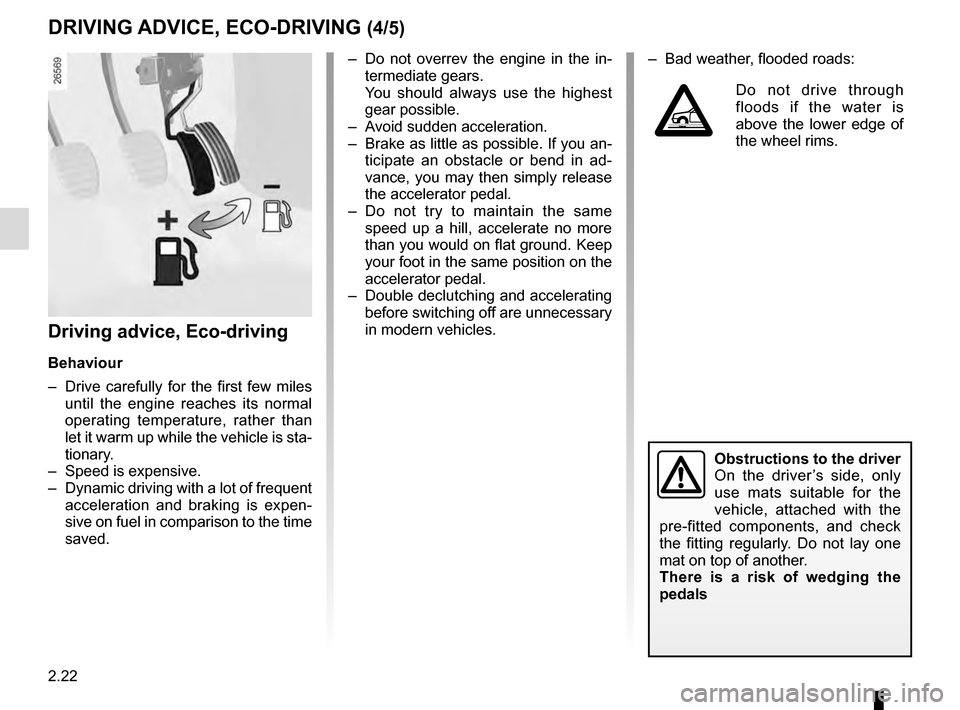
Driving advice, Eco-driving
Behaviour
– Drive carefully for the first few miles until the engine reaches its normal
operating temperature, rather than
let it warm up while the vehicle is sta-
tionary.
– Speed is expensive.
– Dynamic driving with a lot of frequent acceleration and braking is expen-
sive on fuel in comparison to the time
saved.
DRIVING ADVICE, ECO-DRIVING (4/5)
Obstructions to the driver
On the driver’s side, only
use mats suitable for the
vehicle, attached with the
pre-fitted components, and check
the fitting regularly. Do not lay one
mat on top of another.
There is a risk of wedging the
pedals
– Bad weather, flooded roads:
Do not drive through
floods if the water is
above the lower edge of
the wheel rims.
Page 127 of 300

2.23
DRIVING ADVICE, ECO-DRIVING (5/5)
Advice on use
– Favour the ECO mode.
– Electricity is fuel; switch off all the electrical components which are
not really needed. However (safety
first), keep your lights on when the
visibility is bad (“see and be seen”).
– Use the air vents. Driving with the windows open at 60 mph (100 km/h)
will increase fuel consumption by
4%.
– Never fill the fuel tank right to the brim to avoid overflow.
– In vehicles fitted with air conditio-
ning, it is normal to observe an in-
crease in fuel consumption (espe-
cially in urban conditions) when it is
used. For vehicles fitted with manual
air conditioning, switch off the system
when it is not required.
Recommendations for reducing
consumption and therefore help-
ing to preserve the environment:
If the vehicle has been parked in the
sun, open the doors for a few mo-
ments to let the hot air escape before
starting the engine.
– Do not leave an empty roof rack fitted to the vehicle.
– It is better to fit a trailer for bulky ob- jects.
– When towing a caravan, fit a wind deflector and adjust it carefully.
– Avoid using the car for door-to-door calls (short journeys with long waits
in between) because the engine
never reaches its normal operating
temperature.
Tyres
– An underinflated tyre increases fuel consumption.
– Opt for the highest speed pressure or the pressure recommended to op-
timise fuel consumption indicated
on edge of the driver’s door (please
refer to the information on “Tyre infla-
tion pressure” in Section 4).
– The use of non-recommended tyres can increase fuel consumption.
Page 182 of 300

3.4
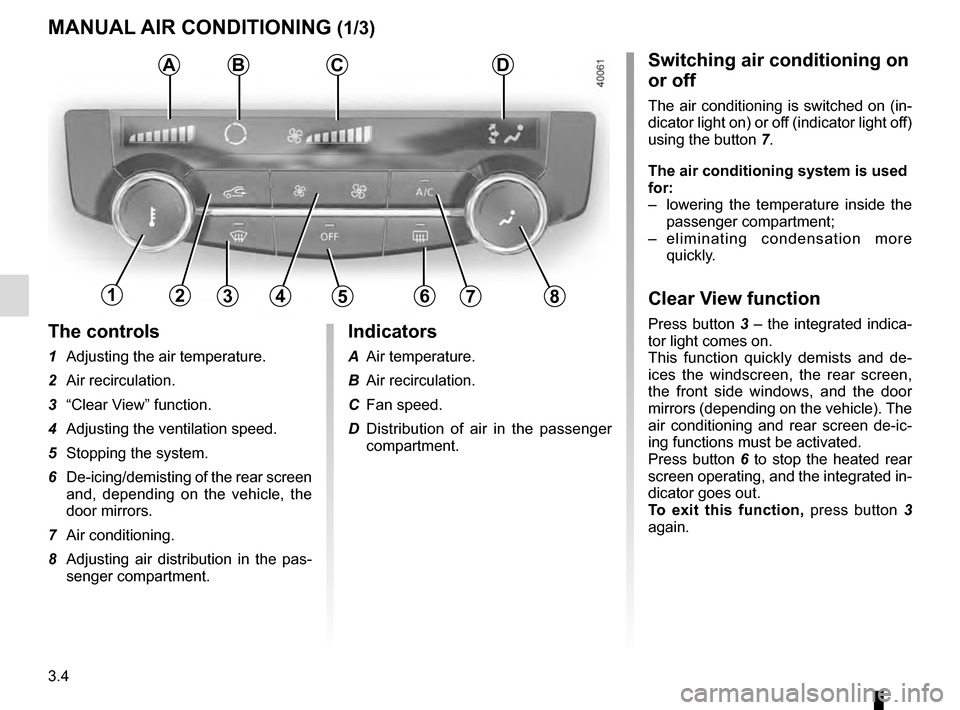
The controls
1 Adjusting the air temperature.
2 Air recirculation.
3 “Clear View” function.
4 Adjusting the ventilation speed.
5 Stopping the system.
6 De-icing/demisting of the rear screen and, depending on the vehicle, the
door mirrors.
7 Air conditioning.
8 Adjusting air distribution in the pas- senger compartment.
MANUAL AIR CONDITIONING (1/3)
ABSwitching air conditioning on
or off
The air conditioning is switched on (in-
dicator light on) or off (indicator light off)
using the button 7.
The air conditioning system is used
for:
– lowering the temperature inside the
passenger compartment;
– eliminating condensation more quickly.
Clear View function
Press button 3 – the integrated indica-
tor light comes on.
This function quickly demists and de-
ices the windscreen, the rear screen,
the front side windows, and the door
mirrors (depending on the vehicle). The
air conditioning and rear screen de-ic-
ing functions must be activated.
Press button 6 to stop the heated rear
screen operating, and the integrated in-
dicator goes out.
To exit this function, press button 3
again.
C
13456782
Indicators
A Air temperature.
B Air recirculation.
C Fan speed.
D Distribution of air in the passenger compartment.
D