Page 97 of 300
1.91
Note:
In temperatures below zero, the washer
liquid risks freezing to the windscreen,
thereby reducing visibility. Heat the
windscreen using the demister control
before cleaning.
Windscreen washer
With the ignition on, pull stalk 1 then
release.
A brief pull will trigger a single sweep
of the wipers, in addition to the wind-
screen washer.
A longer pull will trigger three sweeps
of the wipers followed, a few seconds
later, by a fourth, in addition to the wind-
screen washer.
When working in the engine
compartment, ensure that
the windscreen wiper stalk
is in position B (stop).
Risk of injury.
WINDSCREEN WASH/WIPE (5/6)
1
A
B
C
DE
Page 197 of 300
3.19
Cup holders 6
This can be used for storing a mobile
ashtray, cup holder, etc.
This storage compartment has a re-
movable carpet for easy cleaning.
When turning corners,
accelerating or braking,
ensure that the recepta-
cle being held by the cup
holder is not dislodged.
There is a risk of injury if hot liquid
escapes.
PASSENGER COMPARTMENT STORAGE, FITTINGS (2/5)
6
Storage compartment under
the front central armrest A
(depending on the vehicle)
Lift the control 8 and raise the arm-
rest 7.
Front centre armrest storage
compartment B
Lift the control 9 and raise the arm-
rest 7.
A
9
8
7
B
7
7
Page 200 of 300
3.22
PASSENGER COMPARTMENT STORAGE, FITTINGS (5/5)
17
Ensure that no hard, heavy
or pointed objects are
placed in the “open” storage
compartments in such a
way that they may fall onto passen-
gers during sudden turning, braking
or in the event of an accident.
Rear armrest with cup holder
Pull down the armrest 16.
16
Rear door storage
compartment 17
When turning corners,
accelerating or braking,
ensure that the recepta-
cle being held by the cup
holder is not dislodged.
There is a risk of injury if hot liquid
escapes.
Page 225 of 300

4.9
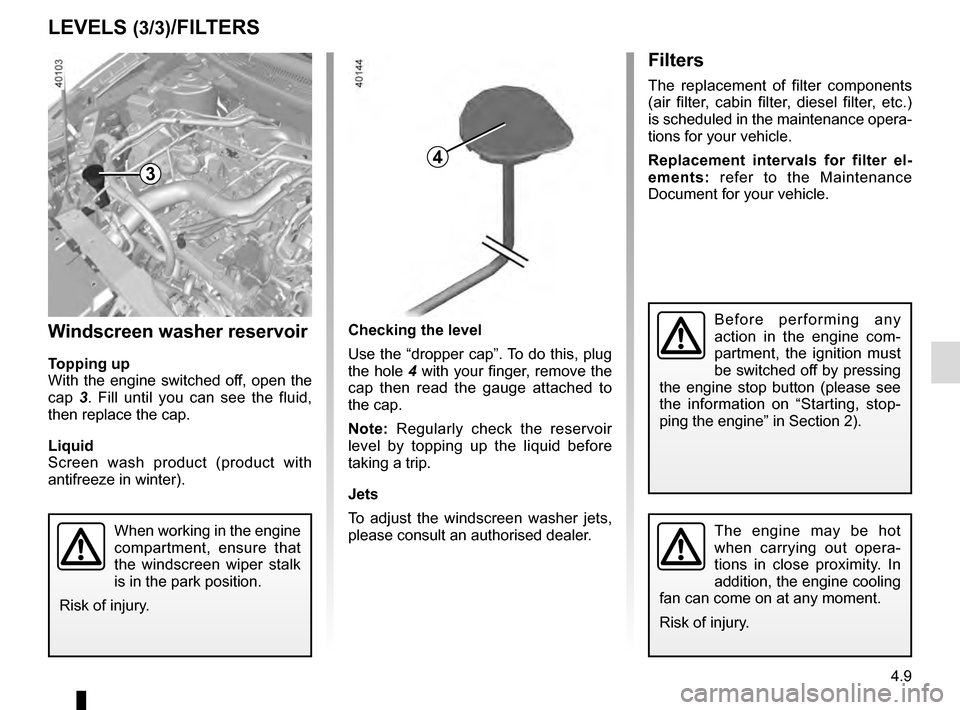
Checking the level
Use the “dropper cap”. To do this, plug
the hole 4 with your finger, remove the
cap then read the gauge attached to
the cap.
Note: Regularly check the reservoir
level by topping up the liquid before
taking a trip.
Jets
To adjust the windscreen washer jets,
please consult an authorised dealer.
Filters
The replacement of filter components
(air filter, cabin filter, diesel filter, etc.)
is scheduled in the maintenance opera-
tions for your vehicle.
Replacement intervals for filter el-
ements: refer to the Maintenance
Document for your vehicle.
Windscreen washer reservoir
Topping up
With the engine switched off, open the
cap 3. Fill until you can see the fluid,
then replace the cap.
Liquid
Screen wash product (product with
antifreeze in winter).
LEVELS (3/3)/FILTERS
3
When working in the engine
compartment, ensure that
the windscreen wiper stalk
is in the park position.
Risk of injury.The engine may be hot
when carrying out opera-
tions in close proximity. In
addition, the engine cooling
fan can come on at any moment.
Risk of injury.
Before performing any
action in the engine com-
partment, the ignition must
be switched off by pressing
the engine stop button (please see
the information on “Starting, stop-
ping the engine” in Section 2).
4
Page 232 of 300

4.16
Glass instrument panel(e.g.: instrument panel, clock, exterior
temperature display, radio display, mul-
timedia or multifunction display etc.)
Use a soft cloth (or cotton wool).
If this does not clean them properly,
use a soft cloth (or cotton wool) slightly
moistened with soapy water and then
wipe clean with another soft damp cloth
or cotton wool.
Finally, carefully dry off with a soft dry
cloth.
Do not use products containing alco-
hol and/or spray fluids on the area.
Seat belts
These must be kept clean.
Use products selected by our Technical
Department (Approved outlets) or
warm, soapy water and a sponge and
wipe with a dry cloth.
Detergents or dyes must not be used
under any circumstances.
INTERIOR TRIM MAINTENANCE (1/2)
Textiles (seats, door trim, etc)
Vacuum-clean the textiles regularly.
Liquid stain
Use soapy water.
Dab lightly (never rub) with a soft cloth,
rinse and remove the excess.
Solid or pasty stain
Carefully remove the excess solid or
pasty material immediately with a
spatula (working from the edges to the
centre to avoid spreading the stain).
Clean as for a liquid stain.
Special instructions for sweets or
chewing gum
Put an ice cube on the stain to solidify
it, then proceed as for a solid stain.
A well-maintained vehicle will last
longer. It is therefore recommended to
maintain the interior of the vehicle regu-
larly.
A stain should always be dealt with
swiftly.
Whatever type of stain is on the trim,
use
cold (or warm) soapy water with
natural soap.
Detergents (washing-up liquid, pow-
dered products, alcohol-based prod-
ucts) should not be used.
Use a soft cloth.
Rinse and soak up the excess.
For further recommendations for
maintaining the interior, and/or for
any unsatisfactory results, please
see an authorised dealer.
Page 238 of 300

5.4
TYRE PRESSURE KIT (1/3)
The kit is only approved for
inflating the tyres of the ve-
hicle originally equipped
with the kit.
It must never be used to inflate
the tyres of another vehicle, or any
other inflatable object (rubber ring,
rubber boat, etc.).
Avoid spillage on skin when hand-
ling the repair liquid bottle. If drop-
lets do leak out, rinse them off with
plenty of water.
Keep the repair kit away from chil-
dren.
Do not dispose of the empty bottle
in the countryside. Return it to your
approved dealer or to a recycling or-
ganisation.
The bottle has a limited service
life which is indicated on its label.
Check the expiry date.
Contact an approved dealer to re-
place the inflation tube and repair
product bottle.
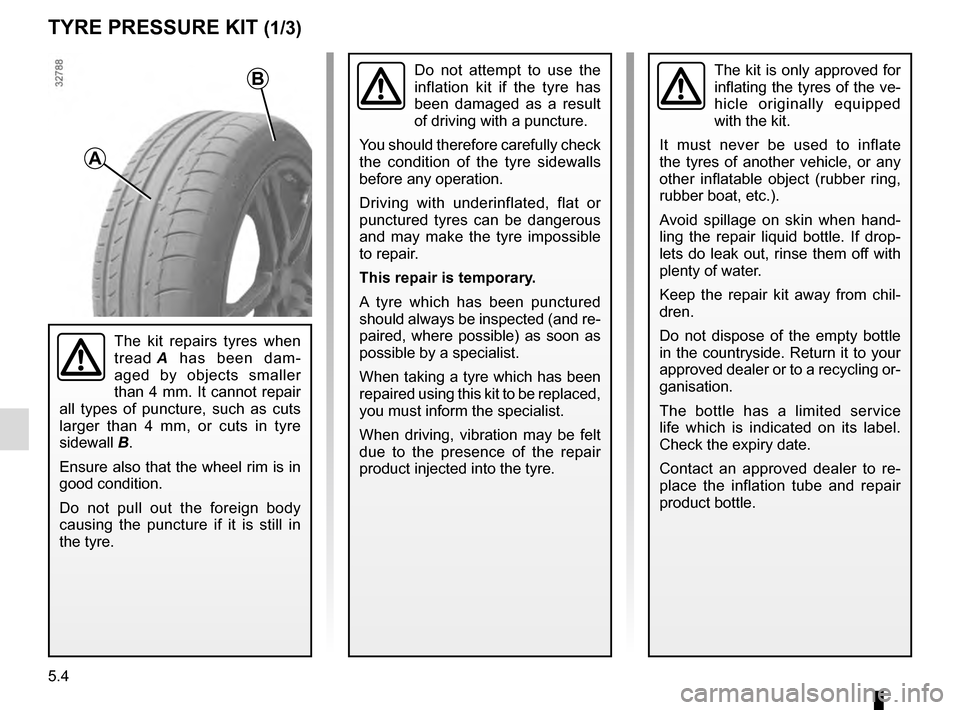
A
B
The kit repairs tyres when
tread A has been dam-
aged by objects smaller
than 4 mm. It cannot repair
all types of puncture, such as cuts
larger than 4 mm, or cuts in tyre
sidewall B.
Ensure also that the wheel rim is in
good condition.
Do not pull out the foreign body
causing the puncture if it is still in
the tyre.
Do not attempt to use the
inflation kit if the tyre has
been damaged as a result
of driving with a puncture.
You should therefore carefully check
the condition of the tyre sidewalls
before any operation.
Driving with underinflated, flat or
punctured tyres can be dangerous
and may make the tyre impossible
to repair.
This repair is temporary.
A tyre which has been punctured
should always be inspected (and re-
paired, where possible) as soon as
possible by a specialist.
When taking a tyre which has been
repaired using this kit to be replaced,
you must inform the specialist.
When driving, vibration may be felt
due to the presence of the repair
product injected into the tyre.