Page 81 of 364

79
5008_en_Chap03_confort_ed01-2015
Mirrors
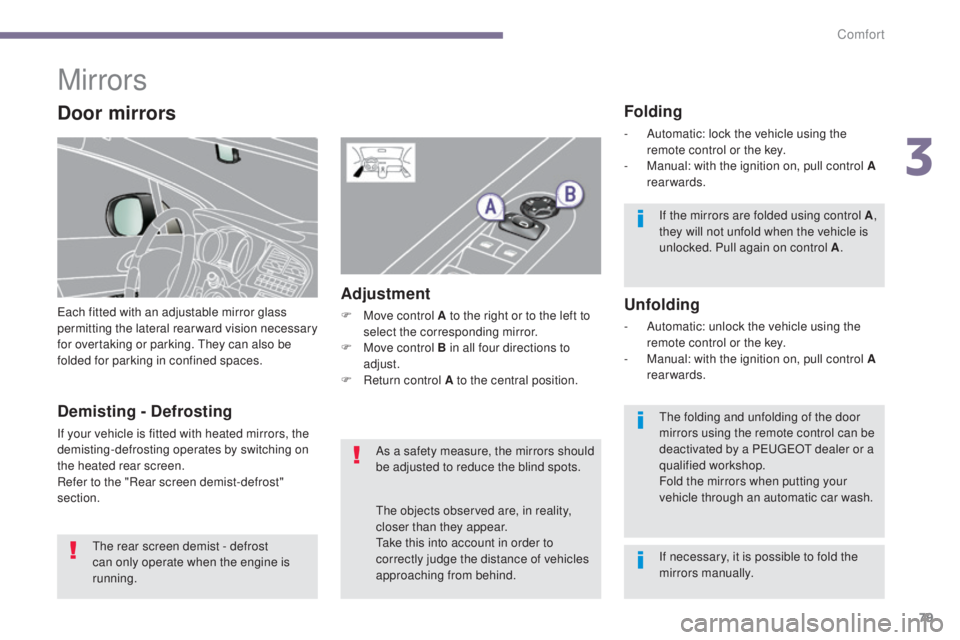
Each fitted with an adjustable mirror glass
permitting the lateral rearward vision necessary
for overtaking or parking. They can also be
folded for parking in confined spaces.
Folding
- Automatic: lock the vehicle using the remote control or the key.
-
M
anual: with the ignition on, pull control A
rearwards.
Unfolding
- Automatic: unlock the vehicle using the remote control or the key.
-
M
anual: with the ignition on, pull control A
rearwards.
Adjustment
F Move control A to the right or to the left to select the corresponding mirror.
F
M
ove control B in all four directions to
adjust.
F
R
eturn control A to the central position.
Demisting - Defrosting
If your vehicle is fitted with heated mirrors, the
demisting-defrosting operates by switching on
the heated rear screen.
Refer to the "Rear screen demist-defrost"
section. The rear screen demist - defrost
can only operate when the engine is
running. As a safety measure, the mirrors should
be adjusted to reduce the blind spots.
The objects observed are, in reality,
closer than they appear.
Take this into account in order to
correctly judge the distance of vehicles
approaching from behind.If the mirrors are folded using control A
,
they will not unfold when the vehicle is
unlocked. Pull again on control A .
The folding and unfolding of the door
mirrors using the remote control can be
deactivated by a PEUGEOT dealer or a
qualified workshop.
Fold the mirrors when putting your
vehicle through an automatic car wash.
Door mirrors
If necessary, it is possible to fold the
mirrors manually.
3
Comfort
Page 83 of 364
81
5008_en_Chap03_confort_ed01-2015
Steering wheel adjustment
F When stationary, pull the control lever to
release the adjustment mechanism.
F
A
djust the height and reach to suit your
driving position.
F
P
ush the control lever to lock the
adjustment mechanism.
As a safety measure, these operations
should only be carried out with the
vehicle stationary.
3
Comfort
Page 88 of 364

86
5008_en_Chap04_visibilite_ed01-2015
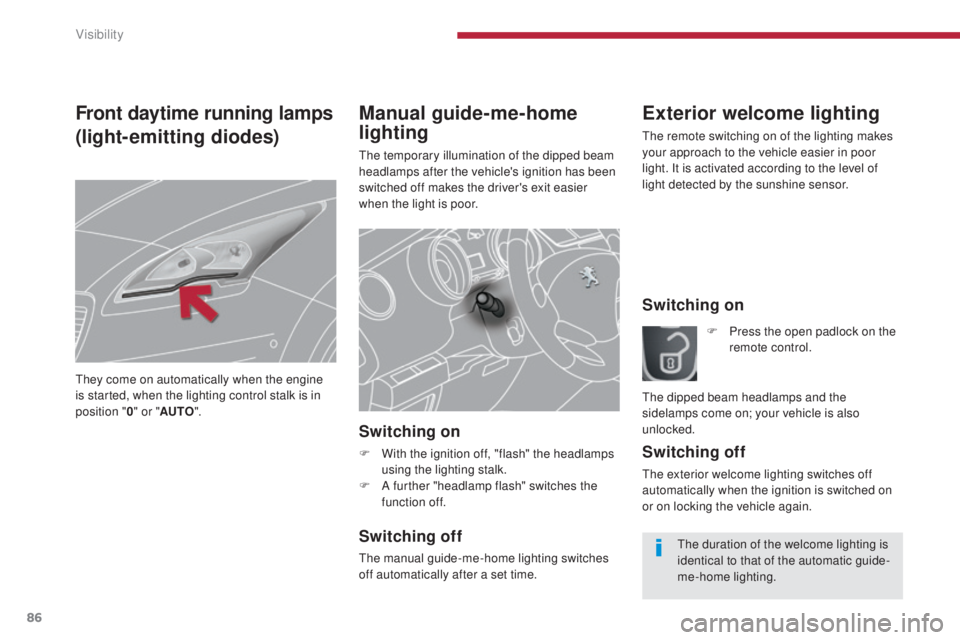
Manual guide-me-home
lighting
The temporary illumination of the dipped beam
headlamps after the vehicle's ignition has been
switched off makes the driver's exit easier
when the light is poor.
Switching on
F With the ignition off, "flash" the headlamps using the lighting stalk.
F
A f
urther "headlamp flash" switches the
function off.
Switching off
The manual guide-me-home lighting switches
off automatically after a set time.
Front daytime running lamps
(light-emitting diodes)
They come on automatically when the engine
is started, when the lighting control stalk is in
position " 0" or " AUTO ".
Switching on
Switching off
The exterior welcome lighting switches off
automatically when the ignition is switched on
or on locking the vehicle again. F
P
ress the open padlock on the
remote control.
The dipped beam headlamps and the
sidelamps come on; your vehicle is also
unlocked.
Exterior welcome lighting
The remote switching on of the lighting makes
your approach to the vehicle easier in poor
light. It is activated according to the level of
light detected by the sunshine sensor.
The duration of the welcome lighting is
identical to that of the automatic guide-
me-home lighting.
Visibility
Page 90 of 364
88
5008_en_Chap04_visibilite_ed01-2015
Exterior welcome lighting
The remote switching on of the lighting makes your approach to the vehicle easier in poor light. It is
activated according to the level of light detected by the sunshine sensor.
Switching on
The duration of the welcome lighting is
identical to that of the automatic guide-
me-home lighting.
F
P
ress the open padlock on the
remote control.
The dipped beam headlamps and the
sidelamps come on; your vehicle is also
unlocked.
Switching off
The exterior welcome lighting switches off
automatically when the ignition is switched on
or on locking the vehicle again.
Visibility
Page 98 of 364
96
5008_en_Chap04_visibilite_ed01-2015
Courtesy lamps
1. Front courtesy lamp
2. Map reading lamps
Map reading lampsFront and rear courtesy lamps
In this position, the courtesy lamp
comes on gradually:
-
w
hen the vehicle is unlocked,
-
w
hen the key is removed from the ignition,
-
w
hen a door is opened,
-
w
hen the remote control locking button is
activated, in order to locate your vehicle.
Permanently off.
Permanent lighting.
It switches off gradually:
-
w
hen the vehicle is locked,
-
w
hen the ignition is switched on,
-
3
0 seconds after the last door is closed.
3.
R
ear courtesy lamp Take care not to place anything in
contact with the courtesy lamps.
With the "permanent lighting" mode, the lighting
time varies according to the circumstances:
- with the ignition off, approximately
ten minutes,
- in energy economy mode, approximately thirty seconds,
- with the engine running, unlimited.
F With the ignition on, press the corresponding switch.
Visibility
Page 99 of 364

97
5008_en_Chap04_visibilite_ed01-2015
Interior mood
lighting
Switching on
At night, the mood lamp in the front courtesy
lamp comes on automatically when the
sidelamps are switched on.
Switching off
The interior mood lighting switches off
automatically when the sidelamps are
switched off.
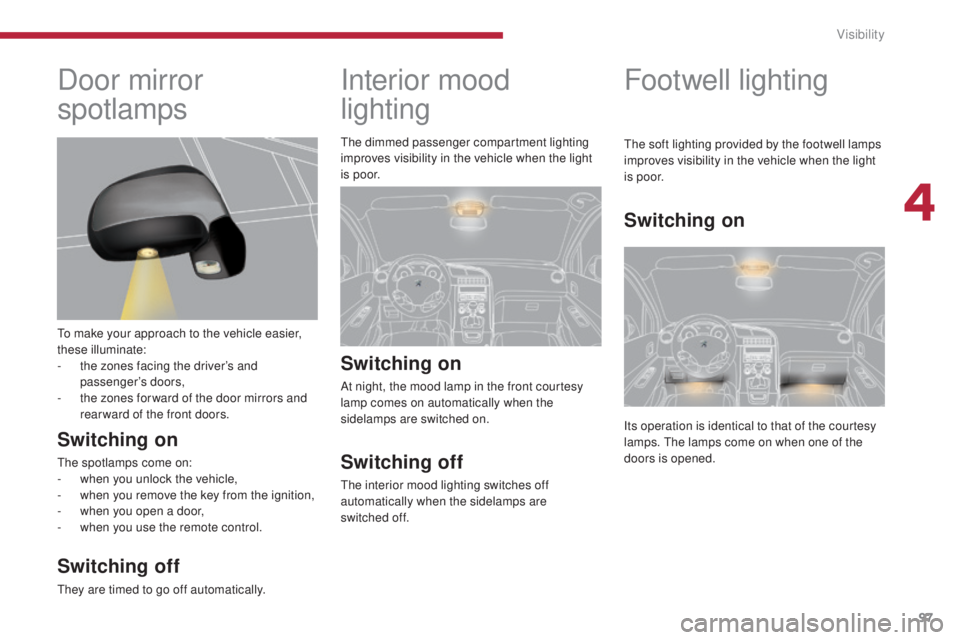
Door mirror
spotlamps
To make your approach to the vehicle easier,
these illuminate:
-
t
he zones facing the driver’s and
passenger’s doors,
-
t
he zones for ward of the door mirrors and
rear ward of the front doors.
Switching on
The spotlamps come on:
- w hen you unlock the vehicle,
-
w
hen you remove the key from the ignition,
-
w
hen you open a door,
-
w
hen you use the remote control.
Switching off
They are timed to go off automatically. The dimmed passenger compartment lighting
improves visibility in the vehicle when the light
i s p o o r.
Footwell lighting
Switching on
The soft lighting provided by the footwell lamps
improves visibility in the vehicle when the light
i s p o o r.
Its operation is identical to that of the courtesy
lamps. The lamps come on when one of the
doors is opened.
4
Visibility
Page 105 of 364
103
5008_en_Chap05_amenagements_ed01-2015
Storage compartments
under the rear footwells
Depending on the configuration, the vehicle
has storage compartments under the footwells,
located for ward of the outer rear seats. Access
is via clipped flaps with a handle A.
"Aircraft" type
tables
Installed on the back of each front seat, these
allow you to set down objects.
F
T
o use the table, lower it fully until it locks
in the low position.
F
T
o store the table, raise it, passing the
point of resistance, to the high position.
On the passenger side, do not forget
to fold the "aircraft" type table before
placing the seat in the table position.
Do not place hard or heavy objects
on the table. They could become
dangerous projectiles in the event of
emergency braking or impact.
Storage drawer
Opening
F Raise the front of the drawer and pull it.
Do not place heavy objects in the drawers. It is located under the driver's seat (manual
adjustment).
5
Fittings
Page 135 of 364

133
5008_en_Chap06_securite-enfants_ed01-2015
Recommendations
Child seats
The incorrect installation of a child seat in a
vehicle compromises the child's protection in
the event of an accident.
Check that there is no seat belt or seat belt
buckle under the child seat as this could
destabilise it.
Remember to fasten the seat belts or the
child seat harnesses keeping the slack in
relation to the child's body to a minimum,
even for short journeys.
For the installation of a child seat using a seat
belt, ensure that this is well tensioned on the
child seat and that it is holding the child seat
firmly against the seat of your vehicle. If your
front passenger seat is adjustable, move it
forward if necessary.
At the rear seats, always leave sufficient
space between the front seat and:
-
a r
ear ward facing child seat,
-
t
he feet of a child seated in a for ward
facing child seat.
For this, move the front seat for ward and if
necessary straighten its backrest.
Children at the front
For optimum installation of the "forward facing"
child seat, ensure that the back of the child seat
is as close as possible to the backrest of the
vehicle's seat, or in contact if possible
The head restraint must be removed before
installing a child seat with a backrest on the
passenger seat.
Ensure that the head restraint is stowed or
attached securely so that it is not thrown around
the vehicle in the event of sharp braking.
Refit the head restraint as soon as the child
seat is removed.
The legislation on carrying a child on the front
passenger seat is specific to each country.
Refer to the legislation in force in the country
in which you are driving.
Deactivate the passenger's front airbag when
a "rear ward facing" child seat is installed on
the front passenger seat. Otherwise, the child
would risk being seriously injured or killed if
the airbag were deployed.
Installing a booster
cushion
The chest part of the seat belt must be
positioned on the child's shoulder without
touching the neck.
Ensure that the lap part of the seat belt
passes correctly over the child's thighs.
PEUGEOT recommends the use of a booster
seat which has a back, fitted with a seat belt
guide at shoulder level.
As a safety precaution, do not leave:
-
o
ne or more children alone and
unsupervised in a vehicle,
-
a c
hild or an animal in a vehicle which
is exposed to the sun, with the windows
closed,
-
t
he keys within reach of children inside
the vehicle.
To prevent accidental opening of the doors,
use the "Child lock".
Take care not to open the rear windows by
more than one third.
To protect young children from the rays of the
sun, fit side blinds on the rear windows.
6
Child safety