2016 PEUGEOT 5008 lock
[x] Cancel search: lockPage 33 of 364
31
5008_en_Chap01_controle-marche_ed01-2015
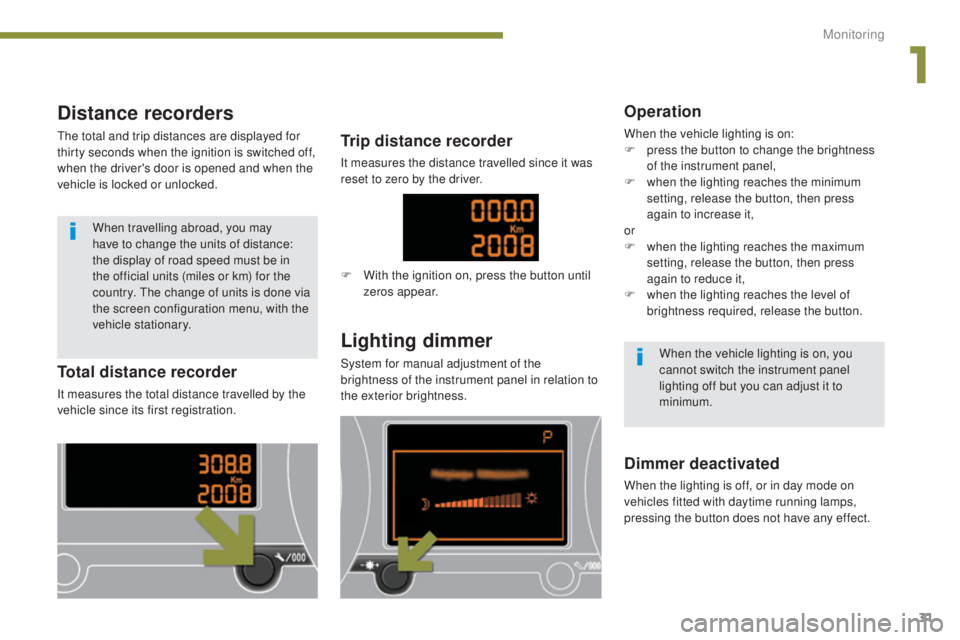
Distance recorders
The total and trip distances are displayed for
thirty seconds when the ignition is switched off,
when the driver's door is opened and when the
vehicle is locked or unlocked.
Lighting dimmer
System for manual adjustment of the
brightness of the instrument panel in relation to
the exterior brightness.Total distance recorder
It measures the total distance travelled by the
vehicle since its first registration.
Trip distance recorder
It measures the distance travelled since it was
reset to zero by the driver.
Dimmer deactivated
When the lighting is off, or in day mode on
vehicles fitted with daytime running lamps,
pressing the button does not have any effect.
Operation
When the vehicle lighting is on:
F p ress the button to change the brightness
of the instrument panel,
F
w
hen the lighting reaches the minimum
setting, release the button, then press
again to increase it,
or
F
w
hen the lighting reaches the maximum
setting, release the button, then press
again to reduce it,
F
w
hen the lighting reaches the level of
brightness required, release the button.
When the vehicle lighting is on, you
cannot switch the instrument panel
lighting off but you can adjust it to
minimum.
When travelling abroad, you may
have to change the units of distance:
the display of road speed must be in
the official units (miles or km) for the
country. The change of units is done via
the screen configuration menu, with the
vehicle stationary.
F
W
ith the ignition on, press the button until
zeros appear.
1
Monitoring
Page 35 of 364

33
5008_en_Chap01_controle-marche_ed01-2015
Vehicle configuration
Options
Once the "Options" menu has been selected,
you can start diagnostics of the status of the
equipment (active, not active, faulty).
Languages
Once the "Languages" menu has been
selected, you can change the language used
by the display (Français, Italiano, Nederlands,
Portugues, Portugues-Brasil, Türkçe, Deutsch,
English, Espanol).
Date and time
Once the "Display settings" menu has been
selected, you have access to the following
settings:
- year,
-
month,
-
d ay,
-
h o u r,
-
minutes,
-
1
2 or 24 hour mode.
Units
Once the "Units" menu has been selected, you
can change the units for:
-
t
emperature (°C or °F),
-
f
uel consumption (l/100 km, mpg or km/l).
F Once you have selected a setting, press the "OK" button to change its value.
F
W
ait for approximately ten seconds without
any action to allow the changed data to
be recorded or press the "ESC" button to
cancel.
The screen then returns to the normal display.
Once the " Vehicle configuration" menu has
been selected, you can activate or deactivate
the following equipment:
-
w
iper linked with reverse gear (refer to the
"Visibility" section),
-
s
elective unlocking (refer to the "Access"
section),
-
"
guide-me-home" lighting (refer to the
"Visibility" section),
-
d
irectional headlamps (refer to the
"Visibility" section),
-
a
utomatic parking brake** (refer to the
"Driving" section),
-
p
arking space sensors (refer to the
"Driving" section),
-
... As a safety measure, configuration of
the multifunction screen by the driver
must only be done when stationary.
** Depending on the country of sale.
1
Monitoring
Page 37 of 364
35
5008_en_Chap01_controle-marche_ed01-2015
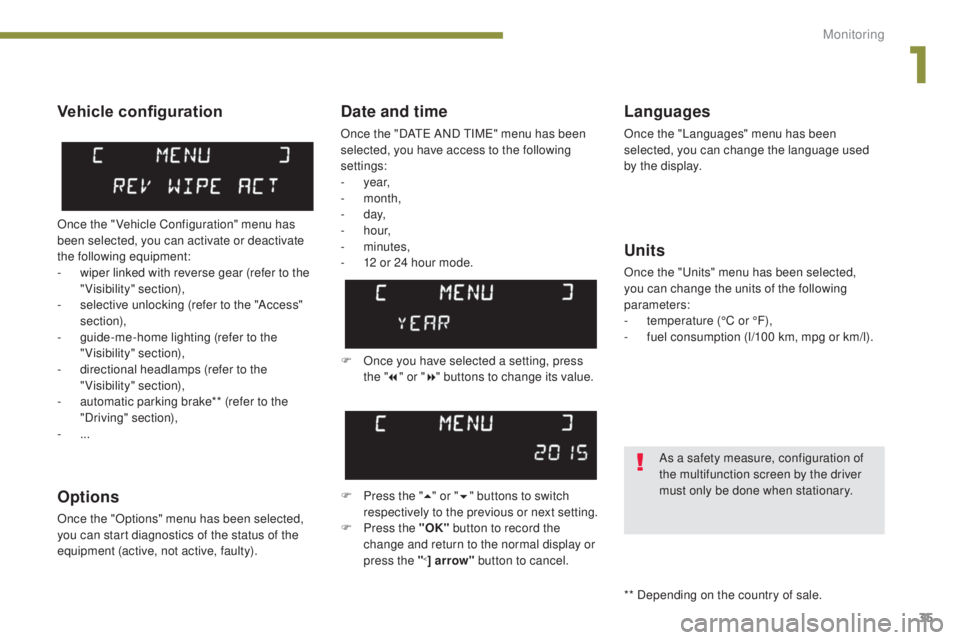
Date and time
Once the "DATE AND TIME" menu has been
selected, you have access to the following
settings:
- year,
-
month,
-
d ay,
-
h o u r,
-
minutes,
-
1
2 or 24 hour mode.
Languages
Once the "Languages" menu has been
selected, you can change the language used
by the display.
Units
Once the "Units" menu has been selected,
you can change the units of the following
parameters:
-
t
emperature (°C or °F),
-
f
uel consumption (l/100 km, mpg or km/l).
F
O
nce you have selected a setting, press
the " 7" or " 8" buttons to change its value.
F
P
ress the " 5" or " 6" buttons to switch
respectively to the previous or next setting.
F
P
ress the "OK" button to record the
change and return to the normal display or
press the "
<] arrow" button to cancel.
Vehicle configuration
Once the " Vehicle Configuration" menu has
been selected, you can activate or deactivate
the following equipment:
-
w
iper linked with reverse gear (refer to the
"Visibility" section),
-
s
elective unlocking (refer to the "Access"
section),
-
g
uide-me-home lighting (refer to the
"Visibility" section),
-
d
irectional headlamps (refer to the
"Visibility" section),
-
a
utomatic parking brake** (refer to the
"Driving" section),
-
...
Options
Once the "Options" menu has been selected,
you can start diagnostics of the status of the
equipment (active, not active, faulty).
As a safety measure, configuration of
the multifunction screen by the driver
must only be done when stationary.
** Depending on the country of sale.
1
Monitoring
Page 39 of 364
37
5008_en_Chap01_controle-marche_ed01-2015
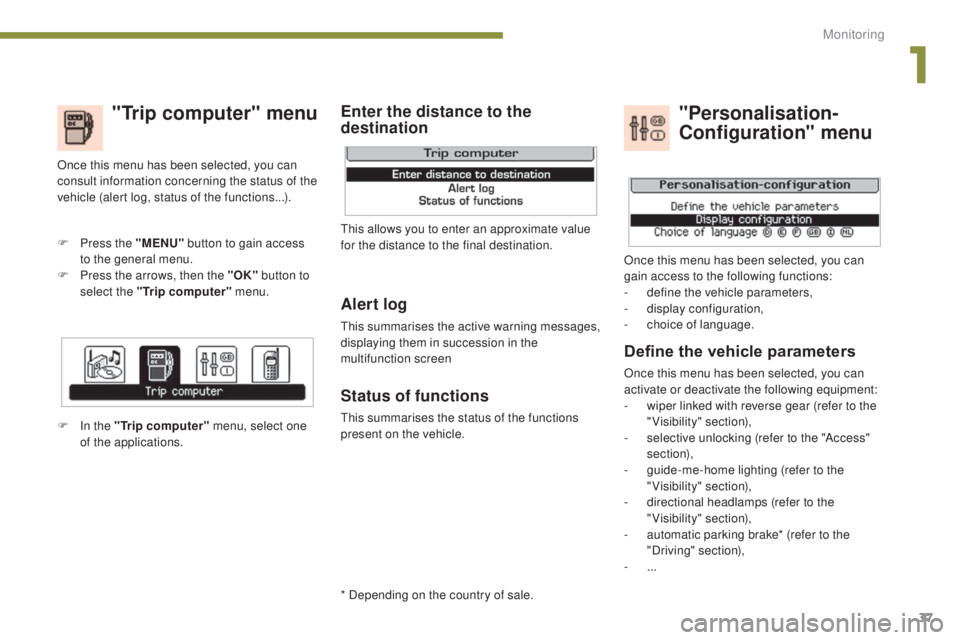
"Trip computer" menu
Alert log
This summarises the active warning messages,
displaying them in succession in the
multifunction screen
Status of functions
This summarises the status of the functions
present on the vehicle.
F
P
ress the "MENU"
button to gain access
to the general menu.
F
P
ress the arrows, then the "OK"
button to
select the "Trip computer" menu.
Once this menu has been selected, you can
consult information concerning the status of the
vehicle (alert log, status of the functions...).
Define the vehicle parameters
Once this menu has been selected, you can
activate or deactivate the following equipment:
-
w
iper linked with reverse gear (refer to the
"Visibility" section),
-
s
elective unlocking (refer to the "Access"
section),
-
g
uide-me-home lighting (refer to the
"Visibility" section),
-
d
irectional headlamps (refer to the
"Visibility" section),
-
a
utomatic parking brake* (refer to the
"Driving" section),
-
...
"Personalisation-
Configuration" menu
Once this menu has been selected, you can
gain access to the following functions:
-
d
efine the vehicle parameters,
-
d
isplay configuration,
-
c
hoice of language.
F In the "Trip computer" menu, select one
of the applications. This allows you to enter an approximate value
for the distance to the final destination.
Enter the distance to the
destination
* Depending on the country of sale.
1
Monitoring
Page 42 of 364
40
5008_en_Chap01_controle-marche_ed01-2015
Display configuration
This menu is used to select the colour scheme
for the screen, adjust the brightness, set the
date and time and to choose the units for
distance (km or miles), fuel consumption
(l/100 km, mpg or km/l) and temperature
(°Celsius or °Fahrenheit).
Adjusting the voice synthesiser
This menu is used to adjust the volume setting
for navigation instructions and to choose the
type of voice (male or female).
Choice of language
This menu is used to choose the language
used by the screen from a defined list.
Vehicle parameters
This menu is used to activate or deactivate
certain driving and comfort systems, classified
by category:
-
"
Driver aid":
●
"
Electric brake*" (Automatic electric
parking brake; refer to the "Driving"
section),
-
"
Wiper operation":
●
"R
ear wiper operates in reverse:
ON
/ OFF" (rear wiper coupled to
reverse gear; refer to the " Visibility"
section), -
"
Vehicle access" (refer to the "Access"
section):
●
"
P
lip action: all doors, driver only
"
(Selective unlocking of the driver's door),
- "
Lighting configuration " (refer to the
"Visibility" section):
●
"
D
uration of guide me home lighting:
OFF / 15 s / 30 s / 60 s " (Automatic
guide me home lighting),
●
"
Directional headlights: ON / OFF
"
(Main / additional directional lighting).
Alert log
This lists the active alerts by displaying in turn
the different messages associated with them.
* Depending on the country of sale.
Adjusting the date and time
-
P
ress on SETUP
.
-
Sel
ect "Display configuration" and confirm.
-
S
elect "Set date and time" and confirm.
Select "Minute adjustment via GPS" so that the
minutes are adjusted automatically by satellite
reception.
-
S
elect the setting to modify. Confirm by
pressing on OK , then modify the setting
and confirm again to save the modification.
-
A
djust the settings one by one.
-
Sel
ect " OK" in the screen then confirm to
save the setting.
Monitoring
Page 48 of 364
46
5008_en_Chap02_ouvertures_ed01-2015
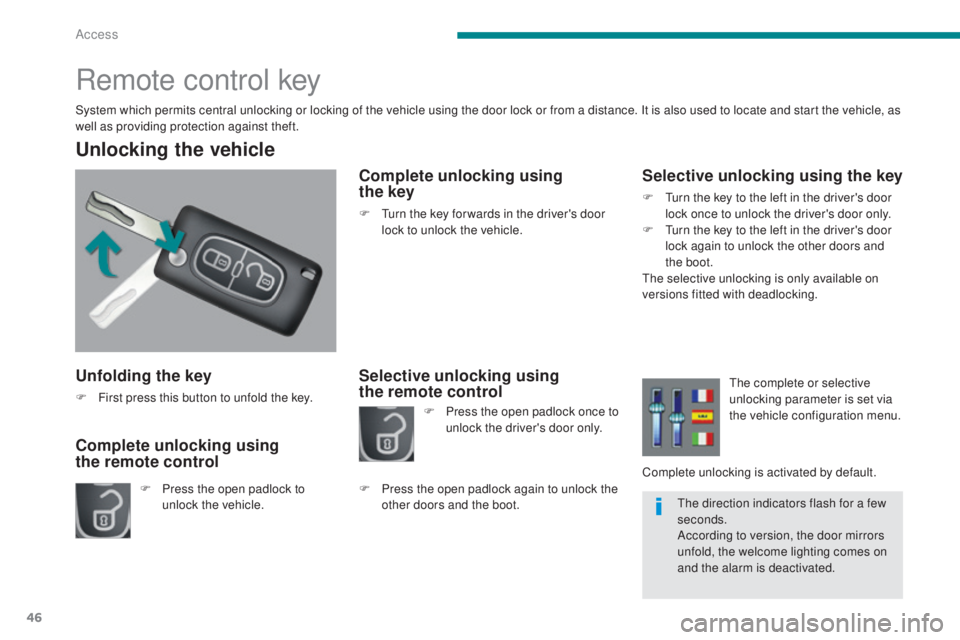
Unfolding the key
F First press this button to unfold the key.
Unlocking the vehicle
F Press the open padlock to unlock the vehicle.
Complete unlocking using
the remote control
Remote control key
System which permits central unlocking or locking of the vehicle using the door lock or from a distance. It is also used to locate and start the vehicle, as
well as providing protection against theft.
Complete unlocking using
the key
F Turn the key for wards in the driver's door
lock to unlock the vehicle.
Selective unlocking using
the remote control Selective unlocking using the key
F Turn the key to the left in the driver's door
lock once to unlock the driver's door only.
F
T
urn the key to the left in the driver's door
lock again to unlock the other doors and
the boot.
The selective unlocking is only available on
versions fitted with deadlocking.
F
P
ress the open padlock once to
unlock the driver's door only.
F
P
ress the open padlock again to unlock the
other doors and the boot. The complete or selective
unlocking parameter is set via
the vehicle configuration menu.
Complete unlocking is activated by default. The direction indicators flash for a few
seconds.
According to version, the door mirrors
unfold, the welcome lighting comes on
and the alarm is deactivated.
Access
Page 49 of 364
47
5008_en_Chap02_ouvertures_ed01-2015
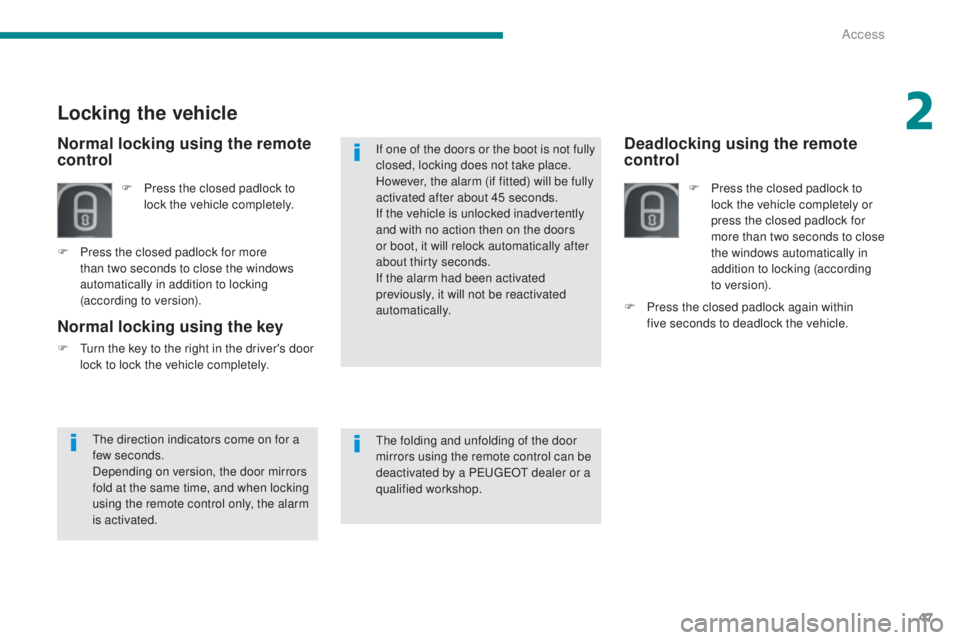
Deadlocking using the remote
control
F Press the closed padlock to lock the vehicle completely or
press the closed padlock for
more than two seconds to close
the windows automatically in
addition to locking (according
to ve r s i o n).
Normal locking using the key
F Turn the key to the right in the driver's door lock to lock the vehicle completely.
Locking the vehicle
F Press the closed padlock to lock the vehicle completely.
F
P
ress the closed padlock for more
than two seconds to close the windows
automatically in addition to locking
(according to version).
Normal locking using the remote
control
F Press the closed padlock again within five seconds to deadlock the vehicle.
The direction indicators come on for a
few seconds.
Depending on version, the door mirrors
fold at the same time, and when locking
using the remote control only, the alarm
is activated. The folding and unfolding of the door
mirrors using the remote control can be
deactivated by a PEUGEOT dealer or a
qualified workshop. If one of the doors or the boot is not fully
closed, locking does not take place.
However, the alarm (if fitted) will be fully
activated after about 45 seconds.
If the vehicle is unlocked inadvertently
and with no action then on the doors
or boot, it will relock automatically after
about thirty seconds.
If the alarm had been activated
previously, it will not be reactivated
automatically.
2
Access
Page 50 of 364
48
5008_en_Chap02_ouvertures_ed01-2015
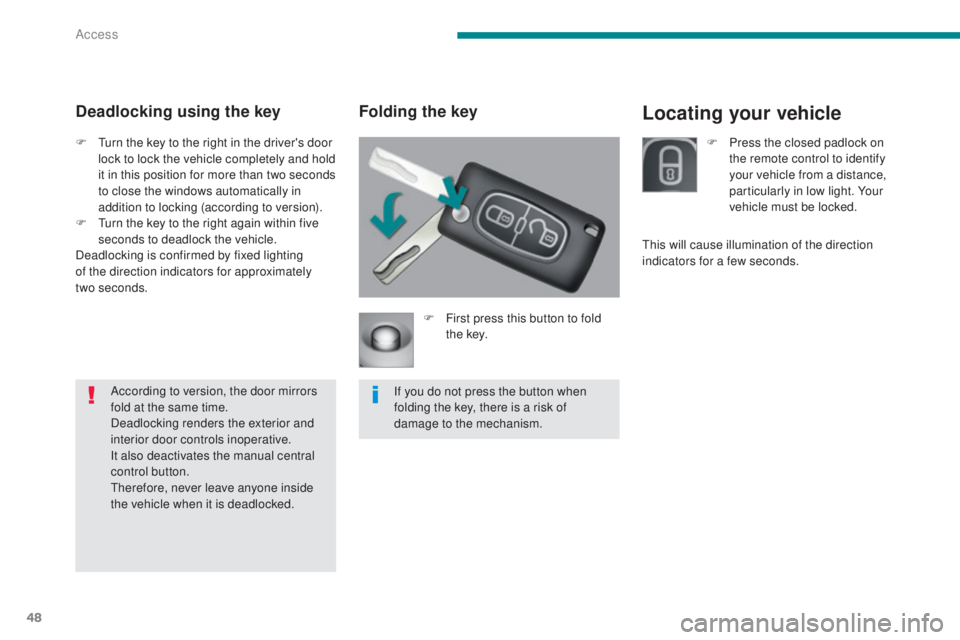
Locating your vehicleFolding the key
F First press this button to fold t h e key.
If you do not press the button when
folding the key, there is a risk of
damage to the mechanism.
Deadlocking using the key
F Turn the key to the right in the driver's door lock to lock the vehicle completely and hold
it in this position for more than two seconds
to close the windows automatically in
addition to locking (according to version).
F
T
urn the key to the right again within five
seconds to deadlock the vehicle.
Deadlocking is confirmed by fixed lighting
of the direction indicators for approximately
two
seconds.According to version, the door mirrors
fold at the same time.
Deadlocking renders the exterior and
interior door controls inoperative.
It also deactivates the manual central
control button.
Therefore, never leave anyone inside
the vehicle when it is deadlocked. F
P ress the closed padlock on
the remote control to identify
your vehicle from a distance,
particularly in low light. Your
vehicle must be locked.
This will cause illumination of the direction
indicators for a few seconds.
Access