Page 109 of 380
●If the key is turned slowly when locking
the door, the system may not arm. Fur-
thermore, if the key is turned beyond
the vertical position toward the unlock
position to remove the key, the system
may be disarmed when the key is re-
moved. If the indicator light fails to
glow for a period of time, unlock the
door once and lock it again.
● Even when the driver and/or passen-
gers are in the vehicle, the system will
arm with all doors closed and locked
with the ignition switch in the OFF po-
sition.
Vehicle security system activation
The vehicle security system will give the following
alarm:
● The headlights blink and the horn sounds
intermittently.
● The alarm automatically turns off after a pe-
riod of time. However, the alarm reactivates if
the vehicle is tampered with again. The alarm
can be shut off by unlocking the driver’s door
with the key or by pressing the
button
on the key fob. The alarm is activated by:
● opening a door without using the key or key
fob (even if the door is unlocked by using the
inside lock knob or the power door lock
switch) .
How to stop an activated alarm
The alarm stops only by unlocking the driver’s
door with the key or by pressing the
button
on the key fob.
NISSAN VEHICLE IMMOBILIZER
SYSTEM (if so equipped)
The NISSAN Vehicle Immobilizer System will not
allow the engine to start without the use of a
registered key.
If the engine fails to start using a registered key
(for example, when interference is caused by
another registered key, an automated toll road
device or automatic payment device on the key
ring) , restart the engine using the following pro-
cedures:
1. Leave the ignition switch in the ON position for approximately 5 seconds.
2. Turn the ignition switch to the OFF or LOCK position, and wait approximately 10 sec-
onds.
3. Repeat steps 1 and 2. 4. Restart the engine while holding the device
(which may have caused the interference)
separate from the registered key.
If the no start condition re-occurs, NISSAN rec-
ommends placing the registered key on a sepa-
rate key ring to avoid interference from other
devices.
FCC Notice:
For USA:
This device complies with Part 15 of the
FCC Rules. Operation is subject to the fol-
lowing two conditions; (1) This device may
not cause harmful interference, and (2) this
device must accept any interference re-
ceived, including interference that may
cause undesired operation of the device.
NOTE:
Changes or modifications not expressly ap-
proved by the party responsible for compli-
ance could void the user’s authority to op-
erate the equipment.
2-24Instruments and controls
Page 112 of 380
HEADLIGHT CONTROL SWITCH
Lighting
�1Rotate the switch to theposition, and
the front parking, tail, license plate, and in-
strument panel lights will come on.
�2Rotate the switch to theposition, and
the headlights will come on and all the other
lights remain on.
CAUTION
Use the headlights with the engine run-
ning to avoid discharging the vehicle
battery.
Type B (if so equipped)
LIC1158LIC2049
HEADLIGHT AND TURN SIGNAL
SWITCH
Instruments and controls2-27
Page 113 of 380
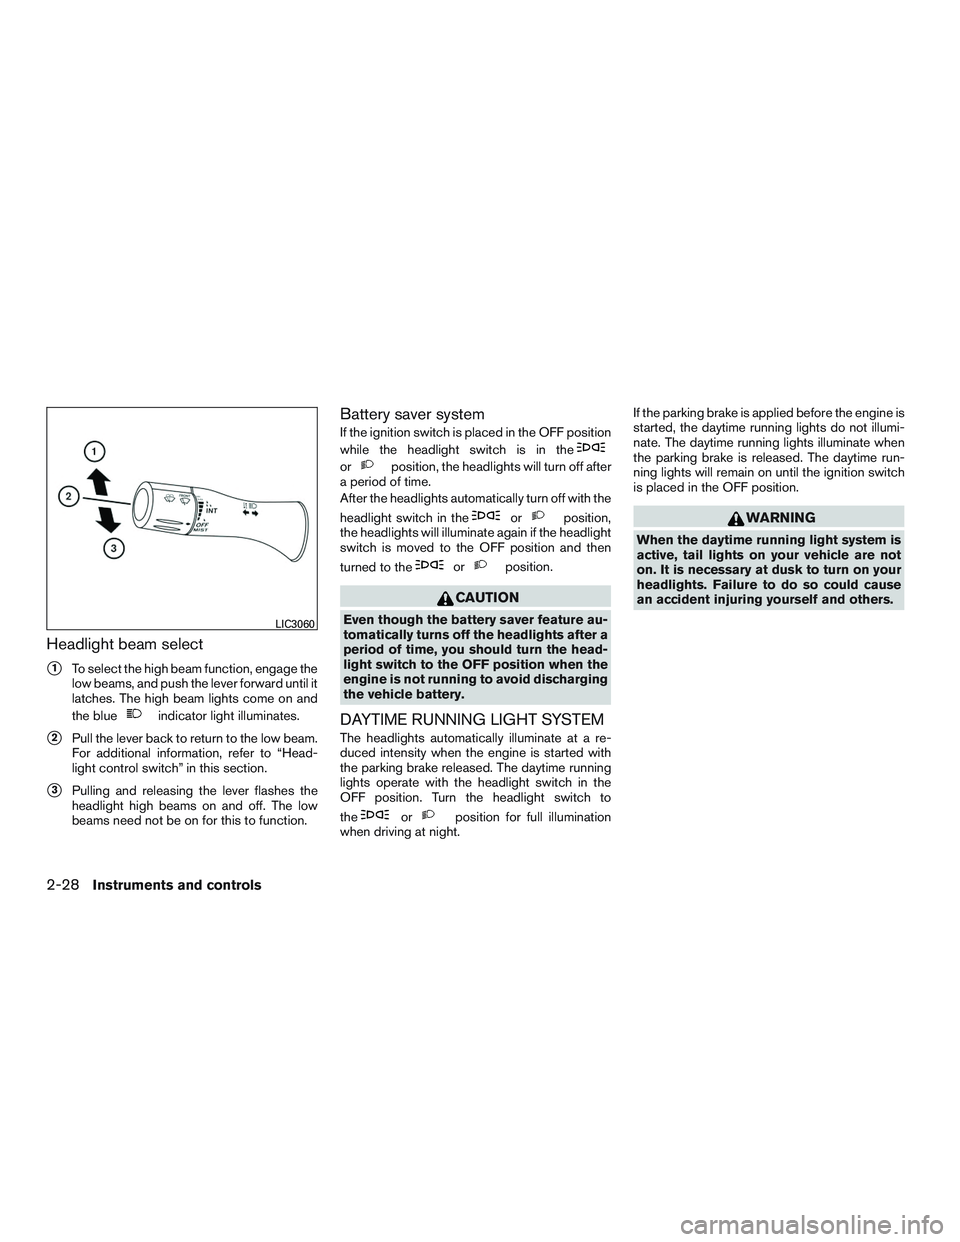
Headlight beam select
�1To select the high beam function, engage the
low beams, and push the lever forward until it
latches. The high beam lights come on and
the blue
indicator light illuminates.
�2Pull the lever back to return to the low beam.
For additional information, refer to “Head-
light control switch” in this section.
�3Pulling and releasing the lever flashes the
headlight high beams on and off. The low
beams need not be on for this to function.
Battery saver system
If the ignition switch is placed in the OFF position
while the headlight switch is in the
orposition, the headlights will turn off after
a period of time.
After the headlights automatically turn off with the
headlight switch in the
orposition,
the headlights will illuminate again if the headlight
switch is moved to the OFF position and then
turned to the
orposition.
CAUTION
Even though the battery saver feature au-
tomatically turns off the headlights after a
period of time, you should turn the head-
light switch to the OFF position when the
engine is not running to avoid discharging
the vehicle battery.
DAYTIME RUNNING LIGHT SYSTEM
The headlights automatically illuminate at a re-
duced intensity when the engine is started with
the parking brake released. The daytime running
lights operate with the headlight switch in the
OFF position. Turn the headlight switch to
the
orposition for full illumination
when driving at night. If the parking brake is applied before the engine is
started, the daytime running lights do not illumi-
nate. The daytime running lights illuminate when
the parking brake is released. The daytime run-
ning lights will remain on until the ignition switch
is placed in the OFF position.
WARNING
When the daytime running light system is
active, tail lights on your vehicle are not
on. It is necessary at dusk to turn on your
headlights. Failure to do so could cause
an accident injuring yourself and others.
LIC3060
2-28Instruments and controls
Page 114 of 380
INSTRUMENT BRIGHTNESS
CONTROL
The instrument brightness control operates when
the headlight control switch is in the
orposition.
Turn the knob
�1to adjust the brightness of the
instrument panel lights.
TURN SIGNAL SWITCH
Turn signal
�1Move the lever up or down until it latches to
signal the turning direction. When the turn is
completed, the turn signal cancels automati-
cally.
Lane change signal
�2To signal a lane change, move the lever up or
down to the point where the indicator light
begins to flash, but the lever does not latch.
Hold the lever until the lane change is completed.
FOG LIGHT SWITCH (if so equipped)
To turn the front fog lights on, turn the headlight
switch to the
position, then push the fog
light switch
�1.
To turn them off, push the fog light switch
�1
again.
The fog lights will turn off if the headlights are
turned off.
LIC2053LIC3061LIC2197
Instruments and controls2-29
Page 120 of 380
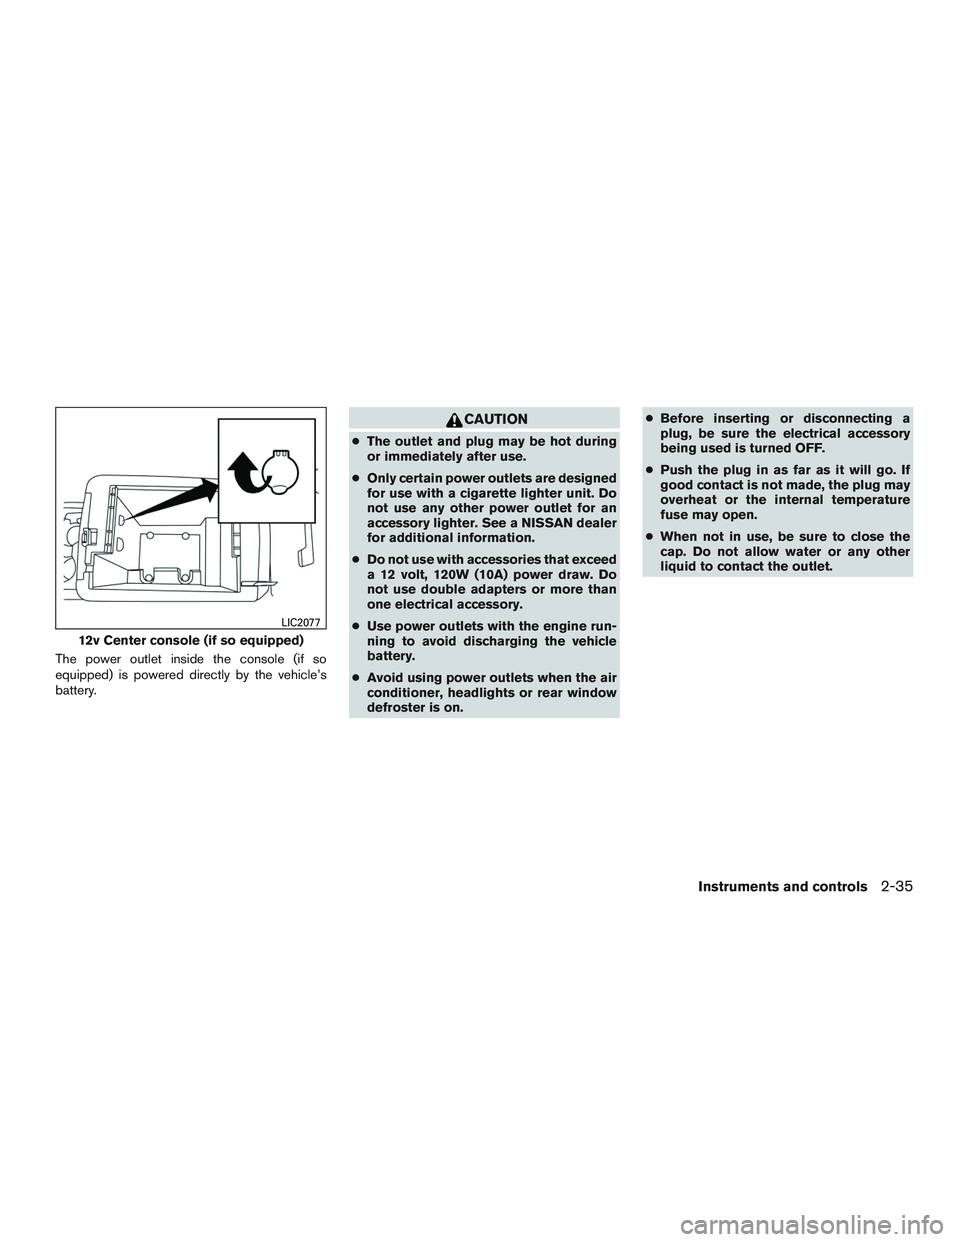
The power outlet inside the console (if so
equipped) is powered directly by the vehicle’s
battery.
CAUTION
●The outlet and plug may be hot during
or immediately after use.
● Only certain power outlets are designed
for use with a cigarette lighter unit. Do
not use any other power outlet for an
accessory lighter. See a NISSAN dealer
for additional information.
● Do not use with accessories that exceed
a 12 volt, 120W (10A) power draw. Do
not use double adapters or more than
one electrical accessory.
● Use power outlets with the engine run-
ning to avoid discharging the vehicle
battery.
● Avoid using power outlets when the air
conditioner, headlights or rear window
defroster is on. ●
Before inserting or disconnecting a
plug, be sure the electrical accessory
being used is turned OFF.
● Push the plug in as far as it will go. If
good contact is not made, the plug may
overheat or the internal temperature
fuse may open.
● When not in use, be sure to close the
cap. Do not allow water or any other
liquid to contact the outlet.
12v Center console (if so equipped)
LIC2077
Instruments and controls2-35
Page 122 of 380
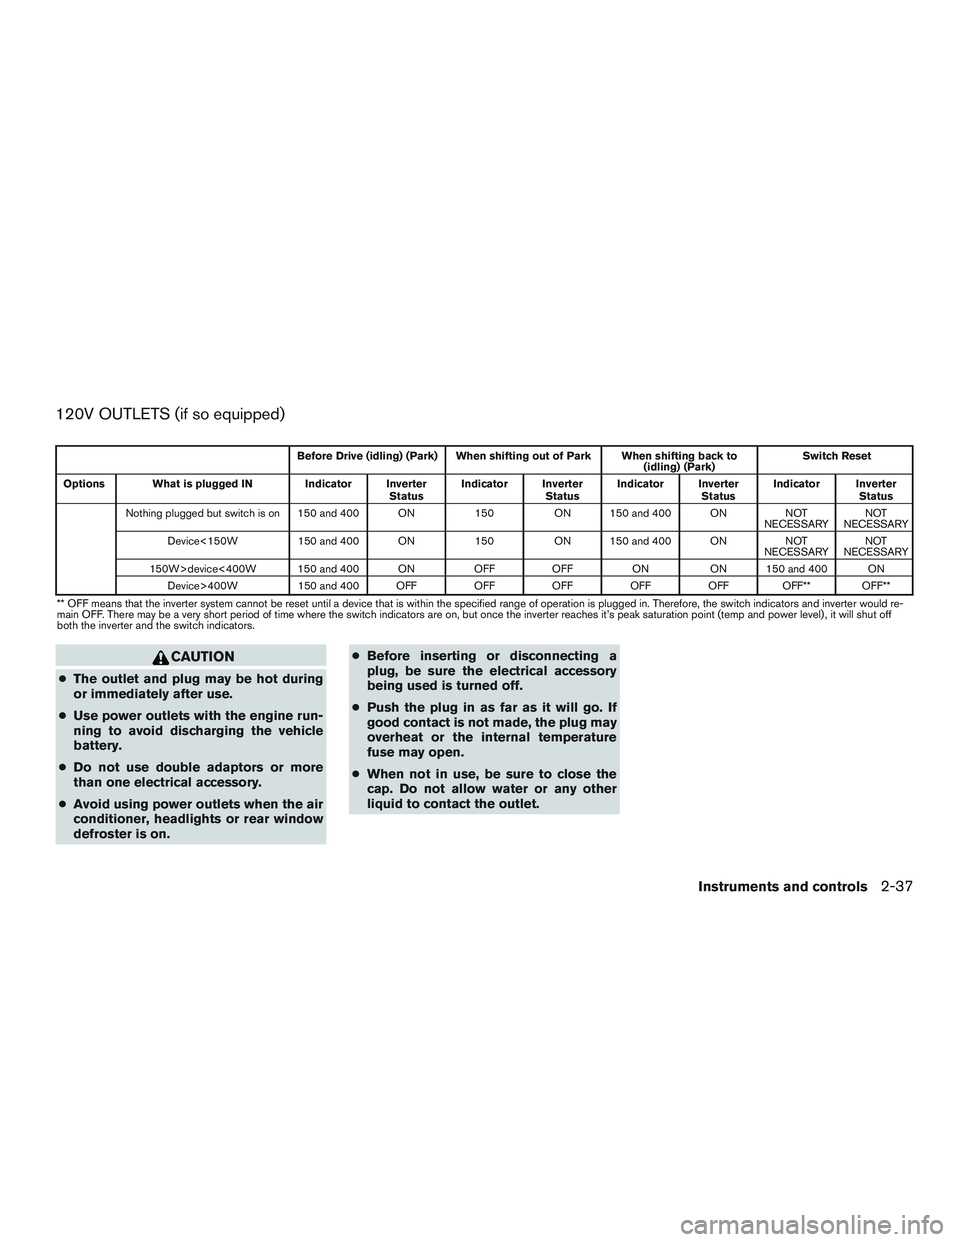
120V OUTLETS (if so equipped)
Before Drive (idling) (Park) When shifting out of Park When shifting back to(idling) (Park)Switch Reset
Options What is plugged IN Indicator Inverter StatusIndicator Inverter
StatusIndicator Inverter
StatusIndicator Inverter
Status
Nothing plugged but switch is on 150 and 400 ON 150ON 150 and 400 ON NOT
NECESSARY NOT
NECESSARY
Device<150W 150 and 400 ON 150ON 150 and 400 ON NOT
NECESSARY NOT
NECESSARY
150W>device<400W 150 and 400 ON OFFOFF ONON 150 and 400 ON
Device>400W 150 and 400 OFF OFFOFFOFFOFF OFF** OFF**
** OFF means that the inverter system cannot be reset until a device that is within the specified range of operation is plugged in. Therefore, the switch indicators and inverter would re-
main OFF. There may be a very short period of time where the switch indicators are on, but once the inverter reaches it’s peak saturation point (temp and power level) , it will shut off
both the inverter and the switch indicators.
CAUTION
● The outlet and plug may be hot during
or immediately after use.
● Use power outlets with the engine run-
ning to avoid discharging the vehicle
battery.
● Do not use double adaptors or more
than one electrical accessory.
● Avoid using power outlets when the air
conditioner, headlights or rear window
defroster is on. ●
Before inserting or disconnecting a
plug, be sure the electrical accessory
being used is turned off.
● Push the plug in as far as it will go. If
good contact is not made, the plug may
overheat or the internal temperature
fuse may open.
● When not in use, be sure to close the
cap. Do not allow water or any other
liquid to contact the outlet.
Instruments and controls2-37
Page 133 of 380
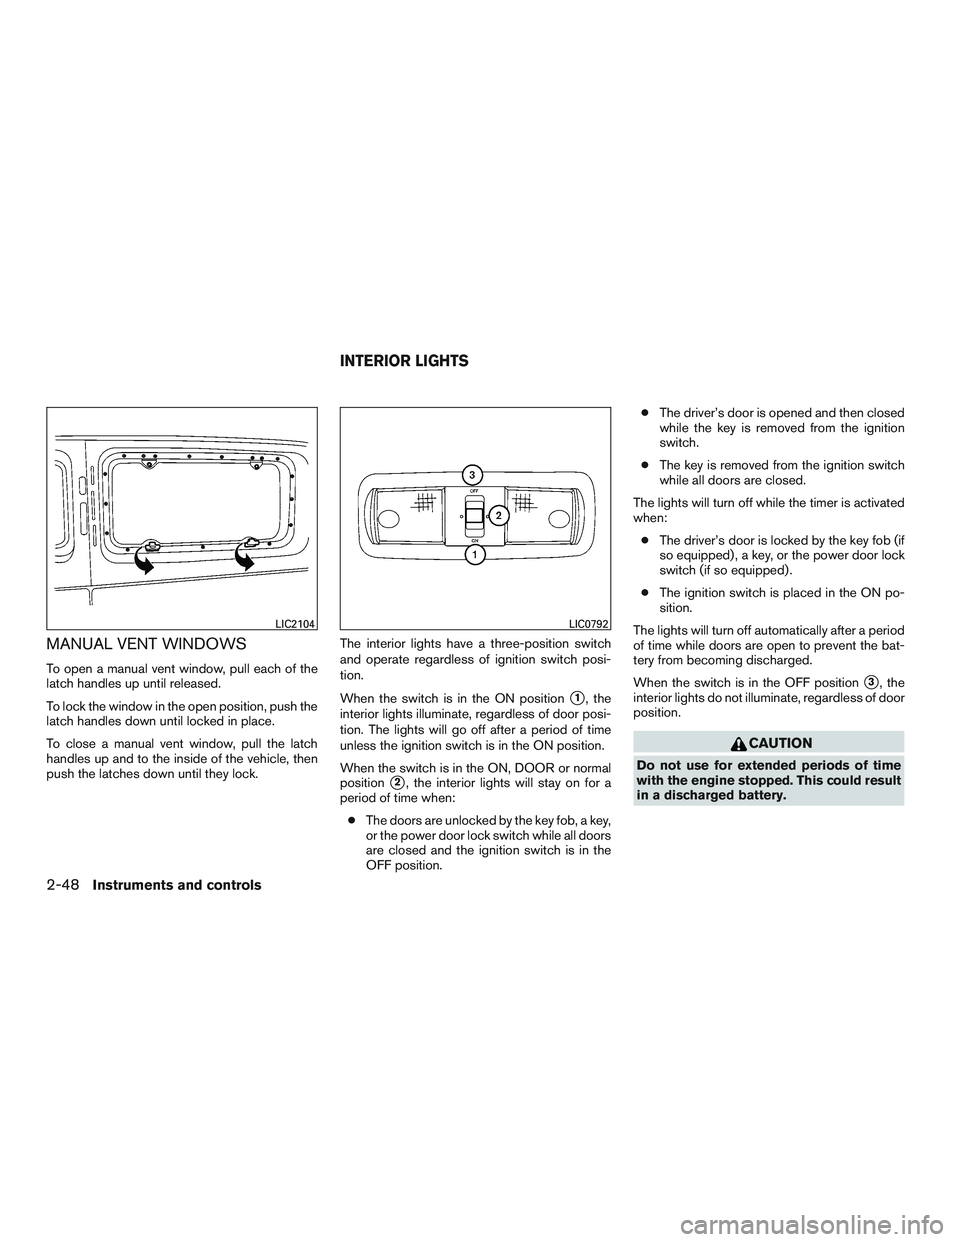
MANUAL VENT WINDOWS
To open a manual vent window, pull each of the
latch handles up until released.
To lock the window in the open position, push the
latch handles down until locked in place.
To close a manual vent window, pull the latch
handles up and to the inside of the vehicle, then
push the latches down until they lock.The interior lights have a three-position switch
and operate regardless of ignition switch posi-
tion.
When the switch is in the ON position
�1, the
interior lights illuminate, regardless of door posi-
tion. The lights will go off after a period of time
unless the ignition switch is in the ON position.
When the switch is in the ON, DOOR or normal
position
�2, the interior lights will stay on for a
period of time when:
● The doors are unlocked by the key fob, a key,
or the power door lock switch while all doors
are closed and the ignition switch is in the
OFF position. ●
The driver’s door is opened and then closed
while the key is removed from the ignition
switch.
● The key is removed from the ignition switch
while all doors are closed.
The lights will turn off while the timer is activated
when: ● The driver’s door is locked by the key fob (if
so equipped) , a key, or the power door lock
switch (if so equipped) .
● The ignition switch is placed in the ON po-
sition.
The lights will turn off automatically after a period
of time while doors are open to prevent the bat-
tery from becoming discharged.
When the switch is in the OFF position
�3, the
interior lights do not illuminate, regardless of door
position.
CAUTION
Do not use for extended periods of time
with the engine stopped. This could result
in a discharged battery.
LIC2104LIC0792
INTERIOR LIGHTS
2-48Instruments and controls
Page 134 of 380
MAP LIGHTS
To turn the map lights on, push the switches. To
turn them off, push the switches again.
CAUTION
Do not use for extended periods of time
with the engine stopped. This could result
in a discharged battery.
LIC0790
Instruments and controls2-49