Page 21 of 28

19
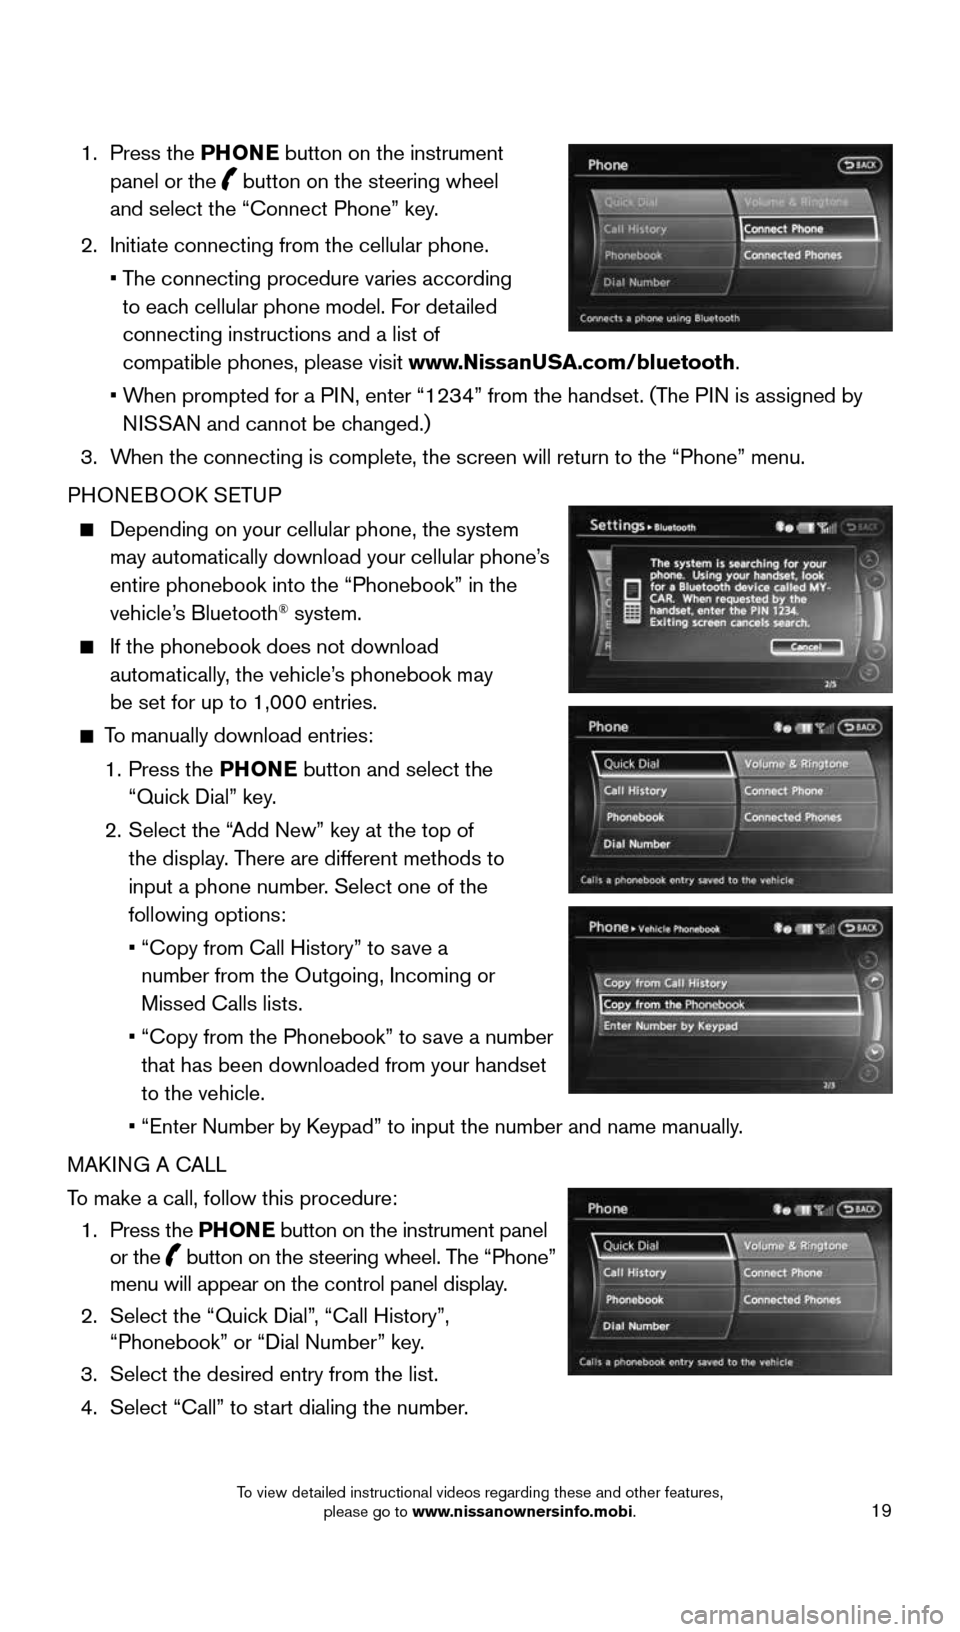
1. Press the PHONE button on the instrument
panel or the
button on the steering wheel
and select the “Connect Phone” key.
2. Initiate connecting from the cellular phone.
• The connecting procedure varies according
to each cellular phone model. For detailed
connecting instructions and a list of
compatible phones, please visit www.NissanUSA.com/bluetooth.
• When prompted for a PIN, enter “1234” from the handset. (The PIN is assigned by
NISSAN and cannot be changed.)
3. When the connecting is complete, the screen will return to the “Phone”\
menu.
PHONEBOOK SETUP
Depending on your cellular phone, the system
may automatically download your cellular phone’s
entire phonebook into the “Phonebook” in the
vehicle’s Bluetooth
® system.
If the phonebook does not download
automatically, the vehicle’s phonebook may
be set for up to 1,000 entries.
To manually download entries:
1. Press the PHONE button and select the
“Quick Dial” key.
2. Select the “Add New” key at the top of
the display. There are different methods to
input a phone number. Select one of the
following options:
• “Copy from Call History” to save a
number from the Outgoing, Incoming or
Missed Calls lists.
• “Copy from the Phonebook” to save a number
that has been downloaded from your handset
to the vehicle.
• “Enter Number by Keypad” to input the number and name manually.
MAKING A CALL
To make a call, follow this procedure:
1. Press the PHONE button on the instrument panel
or the
button on the steering wheel. The “Phone”
menu will appear on the control panel display.
2. Select the “Quick Dial”, “Call History”,
“Phonebook” or “Dial Number” key.
3. Select the desired entry from the list.
4. Select “Call” to start dialing the number.
1870658_16_370Z_QRG_012315.indd 191/23/15 12:09 PM
To view detailed instructional videos regarding these and other features, please go to www.nissanownersinfo.mobi.
Page 22 of 28

20
SYSTEM GUIDE
RECEIVING/ENDING A CALL
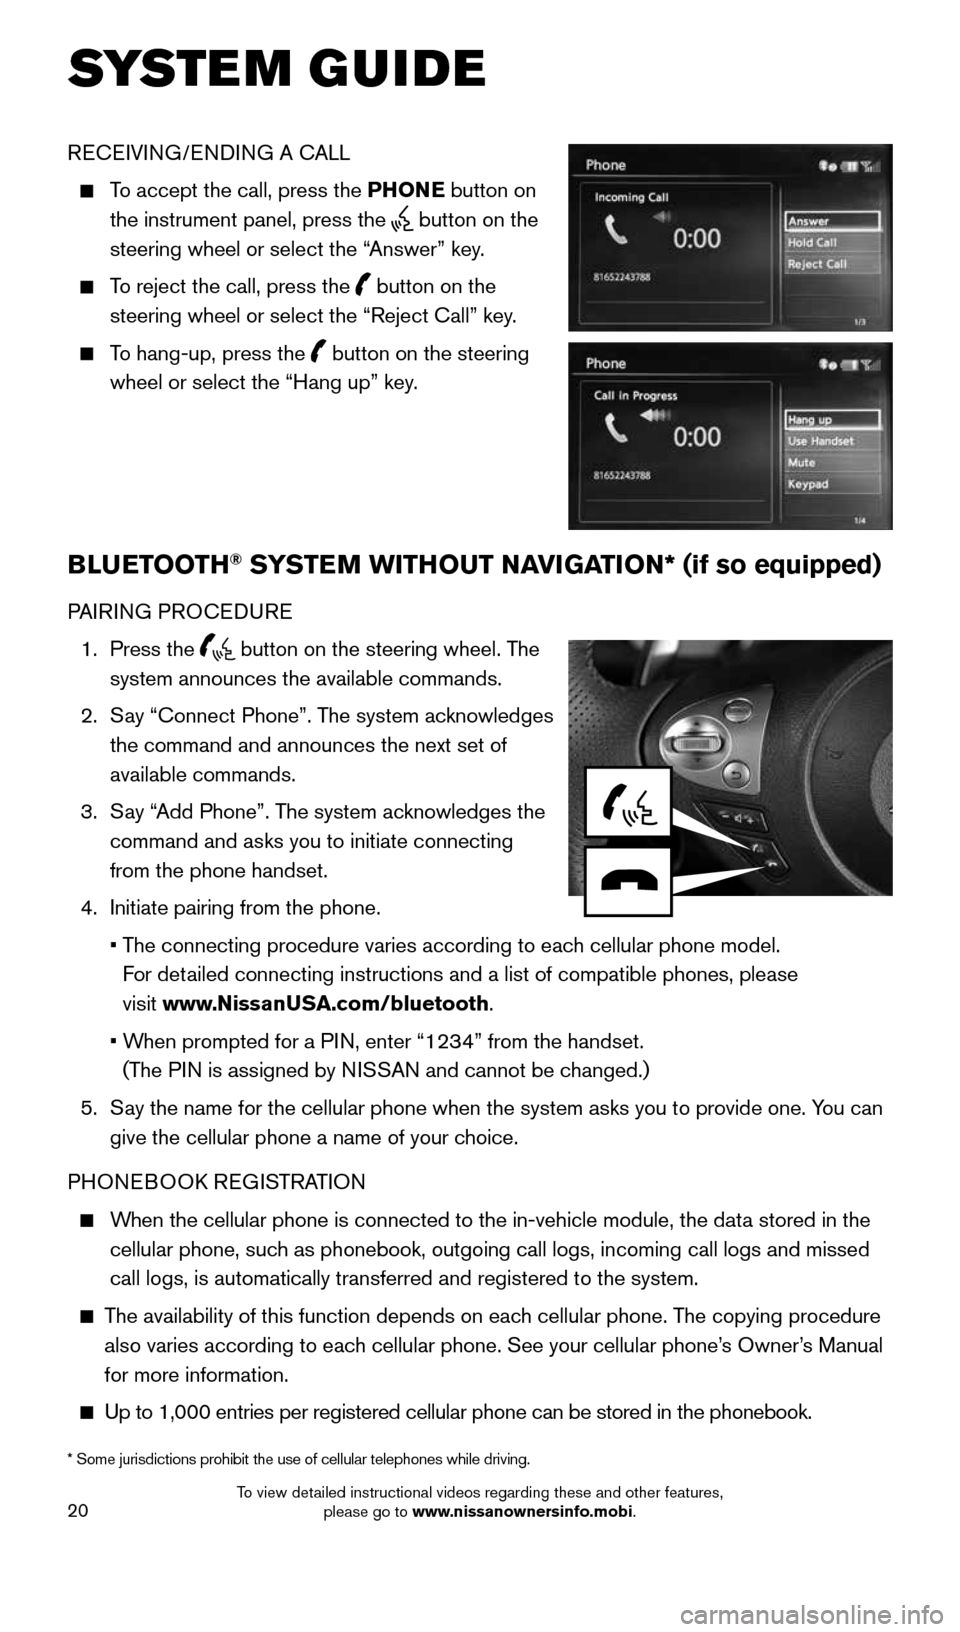
To accept the call, press the PHONE button on
the instrument panel, press the
button on the
steering wheel or select the “Answer” key.
To reject the call, press the
button on the
steering wheel or select the “Reject Call” key.
To hang-up, press the
button on the steering
wheel or select the “Hang up” key.
BLUETOOTH® SYSTEM WITHOUT NAVIGATION* (if so equipped)
PAIRING PROCEDURE
1. Press the
button on the steering wheel. The
system announces the available commands.
2. Say “Connect Phone”. The system acknowledges
the command and announces the next set of
available commands.
3. Say “Add Phone”. The system acknowledges the
command and asks you to initiate connecting
from the phone handset.
4. Initiate pairing from the phone.
• The connecting procedure varies according to each cellular phone model.
For detailed connecting instructions and a list of compatible phones, please
visit www.NissanUSA.com/bluetooth.
• When prompted for a PIN, enter “1234” from the handset.
(The PIN is assigned by NISSAN and cannot be changed.)
5. Say the name for the cellular phone when the system asks you to provide o\
ne. You can
give the cellular phone a name of your choice.
PHONEBOOK REGISTRATION
When the cellular phone is connected to the in-vehicle module, the data stored in the
cellular phone, such as phonebook, outgoing call logs, incoming call logs and missed
call logs, is automatically transferred and registered to the system.
The availability of this function depends on each cellular phone. The copying procedure
also varies according to each cellular phone. See your cellular phone’s Owner’s Manual
for more information.
Up to 1,000 entries per registered cellular phone can be stored in the p\
honebook.
* Some jurisdictions prohibit the use of cellular telephones while drivi\
ng.
1870658_16_370Z_QRG_012315.indd 201/23/15 12:09 PM
To view detailed instructional videos regarding these and other features, please go to www.nissanownersinfo.mobi.
Page 24 of 28

22
SYSTEM GUIDE
To help promote safe driving, some functions cannot be operated or have limited
operation when the vehicle speed is above 5 mph (8 km/h). The on-screen
text and keys for these restricted functions will be grayed-out or muted\
and cannot
be selected while driving. These functions will become available again when the
vehicle speed is reduced to 5 mph (8 km/h). Voice commands may be available for
some of the restricted functions. For more information, refer to the “Center display,
heater, air conditioner, audio, phone and voice recognition systems (section 4)” of your
Owner’s Manual.
1 Touch-screen display.
2 S TAT U S – Press multiple times to display audio information with either the air
conditioner status, fuel economy or navigation directions.
3 Destination (DEST) – Press to enter a destination.
4 ZOOM OUT – Press to zoom out the map.
5 ROUTE – Press to access guidance control functions (guidance cancellation, route
priority, waypoint setting on the route, etc.).
6 Information (INFO) – Press to display the vehicle, traffic (if so equipped), weather
(if so equipped) or Voice Recognition information.
7 – Press to switch between the day screen (bright) and the night screen (dark).
Press and hold the button to turn the display off. Press again to turn the display on.
8 Multi Function Controller
• ENTER – Press to select the highlighted item on the screen. If this button is pushed
while a map is displayed, the map menu screen is displayed.
• Main directional buttons – Press to move across the map, highlight an item on the
screen or adjust a setting.
• Additional directional buttons – Press to move across the map or highlight an item
on the character input screen.
• Center dial – Turn the dial to highlight an item on the screen, adjust a setting or
adjust the map scale.
9 ZOOM IN – Press to zoom in the map.
10 MAP – Press to display the map. While following a programed route, press multiple
times to change the type of route information.
11 SETTING – Press to access the system settings.
12 BACK
– Press to return to the previous screen. In a settings screen, this button
can also be used to apply the setting. In a character input screen, this button can
also delete the characters that have been entered.
13 VOICE – Press to hear the current voice guidance for a programed route.
For more information, refer to the “Navigation (section 2)” of your Multi Function Display Owner’s Manual.
1870658_16_370Z_QRG_012315.indd 221/23/15 12:09 PM
To view detailed instructional videos regarding these and other features, please go to www.nissanownersinfo.mobi.