2016 MERCEDES-BENZ GLS SUV wipers
[x] Cancel search: wipersPage 129 of 397
The interior lighting automatically switches on if
you:
R unlock the vehicle
R open a door
R remove the key from the ignition lock
The interior lighting is activated for a short time
when the key is removed from the ignition lock.
This delayed switch-off can be adjusted via the
multimedia system (see separate Owner's Man- ual). Crash-responsive emergency lighting
The interior lighting is activated automatically if
the vehicle is involved in an accident.
X To switch off the crash-responsive emer-
gency lighting: press the hazard warning
lamp button.
or X Lock and then unlock the vehicle using the
key. Replacing bulbs (vehicles with LED
headlamps)
The front and rear light clusters of your vehicle
are equipped with LED bulbs. Do not replace the
vehicle's bulbs yourself. Contact a qualified spe- cialist workshop with the necessary specialist
knowledge and tools to carry out the work
required.
Lamps are an important aspect of vehicle safety.
You must therefore make sure that these func-
tion correctly at all times. Have the headlamp
setting checked regularly. Replacing bulbs (vehicles with halo-
gen headlamps) Important safety notes
G
WARNING
Bulbs, lamps and plug connectors can
become very hot during use. When replacing a bulb, you could burn yourself on these com-
ponents. There is a risk of injury. Allow these components to cool down before
replacing the bulb.
Do not use a bulb if it has been dropped or if its
glass tube has been scratched.
The bulb may explode if:
R you touch it
R it is hot
R you drop it
R you scratch it
Use bulbs only in closed lamps that have been
designed for this purpose. Fit only spare bulbs of the same type and the specified voltage.
Marks on the glass tube reduce the service life
of the bulb. Do not touch the glass tube with
your bare hands. If necessary, clean the glass
tube when cold with alcohol or spirit and rub it
off with a lint-free cloth.
Protect bulbs from moisture during operation.
Do not allow bulbs to come into contact with
liquids.
Replace only the bulbs listed (Y page 126).
Have the bulbs that you cannot replace yourself
replaced at a qualified specialist workshop.
If you require assistance replacing bulbs, con-
sult a qualified specialist workshop.
If the new bulb does not light up either, consult
a qualified specialist workshop.
Headlamps and lamps are an important aspect
of vehicle safety. You must therefore make sure
that these function correctly at all times. Have
the headlamp setting checked regularly. Overview of bulb replacement - bulb
types
You can replace the following bulbs. The details for the bulb types can be found in the legend. 126
Replacing bulbs (vehicles with halogen headlamps)Lights and windscreen wipers
Page 130 of 397
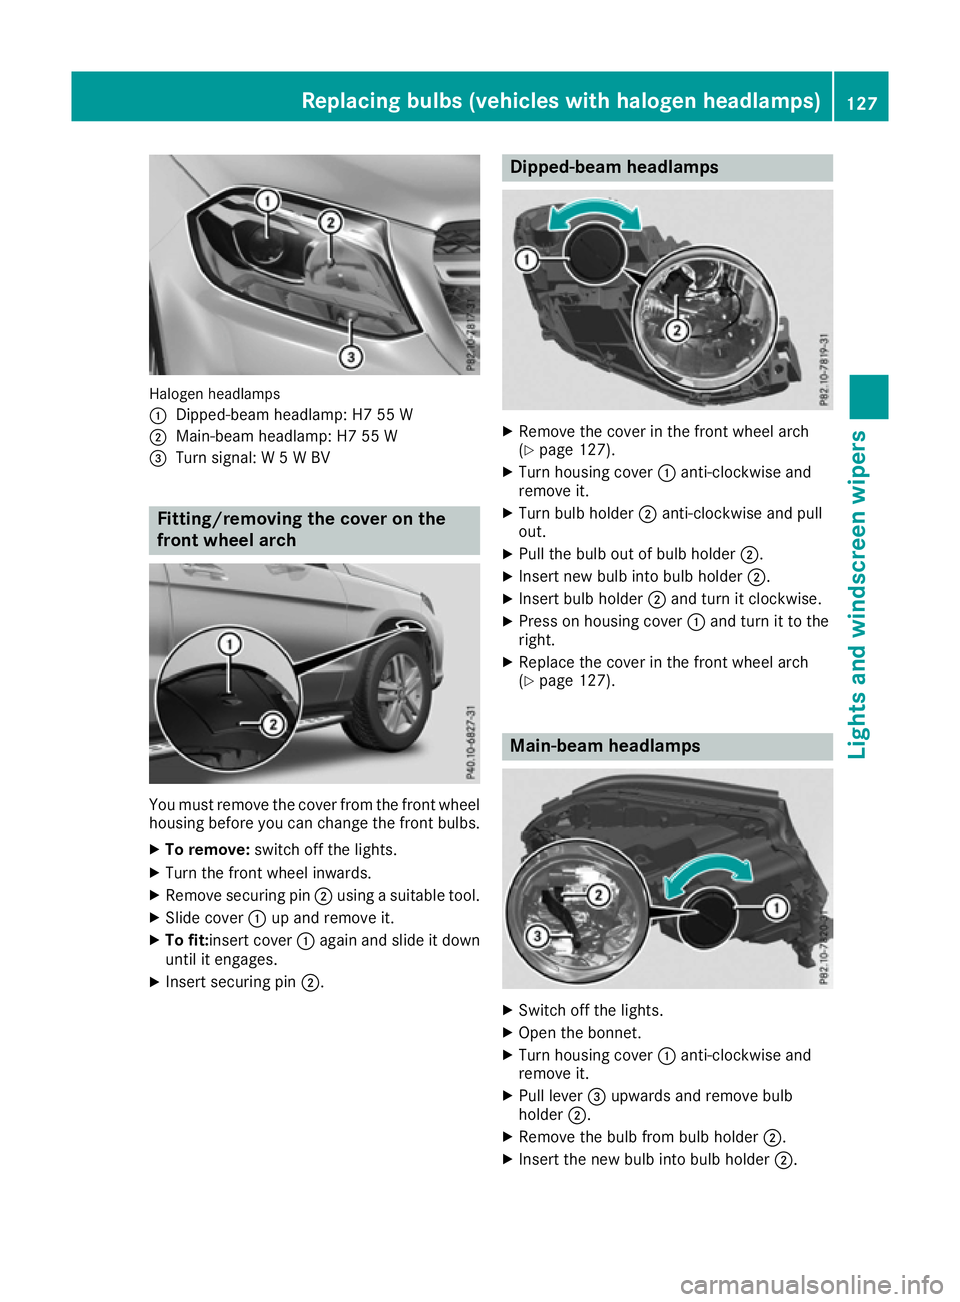
Halogen headlamps
:
Dipped-beam headlamp: H7 55 W
; Main-beam headlamp: H7 55 W
= Turn signal: W 5 W BV Fitting/removing the cover on the
front wheel arch You must remove the cover from the front wheel
housing before you can change the front bulbs.
X To remove: switch off the lights.
X Turn the front wheel inwards.
X Remove securing pin ;using a suitable tool.
X Slide cover :up and remove it.
X To fit: insert cover :again and slide it down
until it engages.
X Insert securing pin ;. Dipped-beam headlamps
X
Remove the cover in the front wheel arch
(Y page 127).
X Turn housing cover :anti-clockwise and
remove it.
X Turn bulb holder ;anti-clockwise and pull
out.
X Pull the bulb out of bulb holder ;.
X Insert new bulb into bulb holder ;.
X Insert bulb holder ;and turn it clockwise.
X Press on housing cover :and turn it to the
right.
X Replace the cover in the front wheel arch
(Y page 127). Main-beam headlamps
X
Switch off the lights.
X Open the bonnet.
X Turn housing cover :anti-clockwise and
remove it.
X Pull lever =upwards and remove bulb
holder ;.
X Remove the bulb from bulb holder ;.
X Insert the new bulb into bulb holder ;. Replacing bulbs (vehicles with halogen headlamps)
127Lights and windscreen wipers Z
Page 131 of 397

X
Simultaneously press bulb holder ;and pull
lever =downwards.
X Press on housing cover :and turn it to the
right. Turn signals
X
Switch off the lights.
X Open the bonnet.
X Turn housing cover :anti-clockwise and
remove it.
X Turn bulb holder ;anti-clockwise and pull
out.
X Pull the bulb out of bulb holder ;.
X Insert new bulb into bulb holder ;.
X Insert bulb holder ;and turn it clockwise.
X Press on housing cover :and turn it to the
right. Windscreen wipers
Switching the windscreen wipers on/
off
! Do not operate the windscreen wipers when
the windscreen is dry, as this could damage
the wiper blades. Moreover, dust that has col-
lected on the windscreen can scratch the
glass if wiping takes place when the wind-
screen is dry.
If it is necessary to switch on the windscreen wipers in dry weather conditions, always
operate them using washer fluid.
! If the windscreen wipers leave smears on
the windscreen after the vehicle has been
washed in an automatic car wash, this may be
due to wax or other residue. Clean the wind- screen with washer fluid after an automatic
car wash.
! Intermittent wiping with rain sensor: due to
optical influences and the windscreen becom-
ing dirty in dry weather conditions, the wind-
screen wipers may be activated inadvertently. This could damage the windscreen wiper
blades or scratch the windscreen.
For this reason, you should always switch off
the windscreen wipers in dry weather. Combination switch
1 $ Windscreen wipers off
2 Ä Intermittent wipe, low (rain sensor set
to low sensitivity)
3 Å Intermittent wipe, high (rain sensor
set to high sensitivity)
4 ° Continuous wipe, slow
5 ¯ Continuous wipe, fast
B í Single wipe
C î Wipes with washer fluid
X Turn the key to position 1or 2in the ignition
lock (Y page 148).
X Turn the combination switch to the corre-
sponding position.
In the ÄorÅ position, the appropriate
wiping frequency is set automatically according to the intensity of the rain. In the Åposition,
the rain sensor is more sensitive than in the
Ä position, causing the windscreen wiper to
wipe more frequently.
Vehicles with MAGIC VISION CONTROL: the
washer fluid is fed through the wiper blades and when wiping with washer fluid îthe washer
fluid is emitted directly from the blades.
If the wiper blades are worn, the windscreen will
no longer be wiped properly. This could mean
you are unable to observe the traffic conditions. 128
Windscreen wipersLights and windscreen wipers
Page 132 of 397
Switching the rear window wiper on/
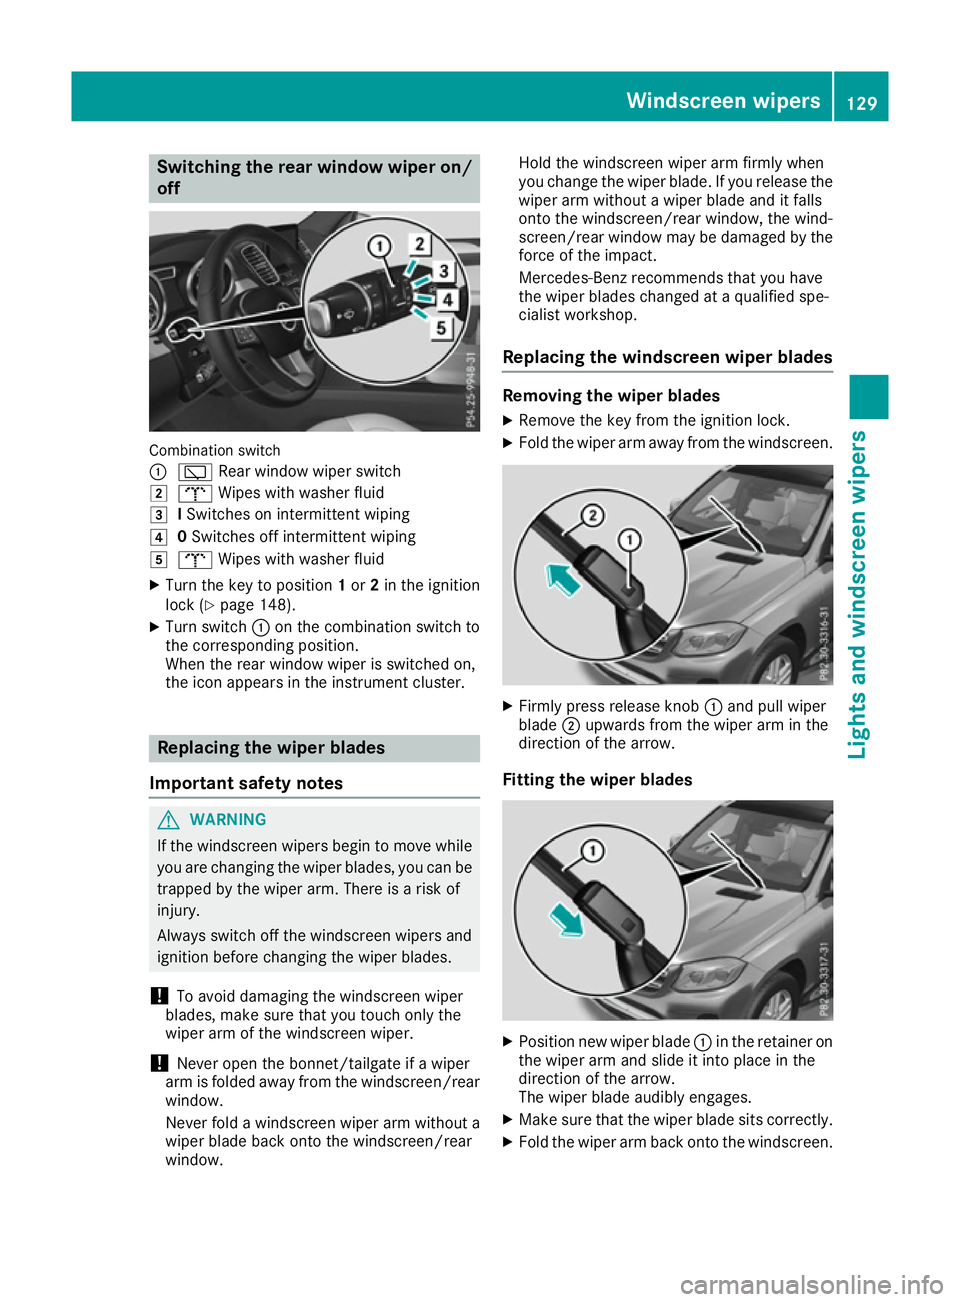
off Combination switch
:
è Rear window wiper switch
2 b Wipes with washer fluid
3 ISwitches on intermittent wiping
4 0Switches off intermittent wiping
5 b Wipes with washer fluid
X Turn the key to position 1or 2in the ignition
lock (Y page 148).
X Turn switch :on the combination switch to
the corresponding position.
When the rear window wiper is switched on,
the icon appears in the instrument cluster. Replacing the wiper blades
Important safety notes G
WARNING
If the windscreen wipers begin to move while
you are changing the wiper blades, you can be trapped by the wiper arm. There is a risk of
injury.
Always switch off the windscreen wipers and
ignition before changing the wiper blades.
! To avoid damaging the windscreen wiper
blades, make sure that you touch only the
wiper arm of the windscreen wiper.
! Never open the bonnet/tailgate if a wiper
arm is folded away from the windscreen/rear
window.
Never fold a windscreen wiper arm without a
wiper blade back onto the windscreen/rear
window. Hold the windscreen wiper arm firmly when
you change the wiper blade. If you release the
wiper arm without a wiper blade and it falls
onto the windscreen/rear window, the wind-
screen/rear window may be damaged by the
force of the impact.
Mercedes-Benz recommends that you have
the wiper blades changed at a qualified spe-
cialist workshop.
Replacing the windscreen wiper blades Removing the wiper blades
X Remove the key from the ignition lock.
X Fold the wiper arm away from the windscreen. X
Firmly press release knob :and pull wiper
blade ;upwards from the wiper arm in the
direction of the arrow.
Fitting the wiper blades X
Position new wiper blade :in the retainer on
the wiper arm and slide it into place in the
direction of the arrow.
The wiper blade audibly engages.
X Make sure that the wiper blade sits correctly.
X Fold the wiper arm back onto the windscreen. Windscreen wipers
129Lights and windscreen wipers Z
Page 133 of 397
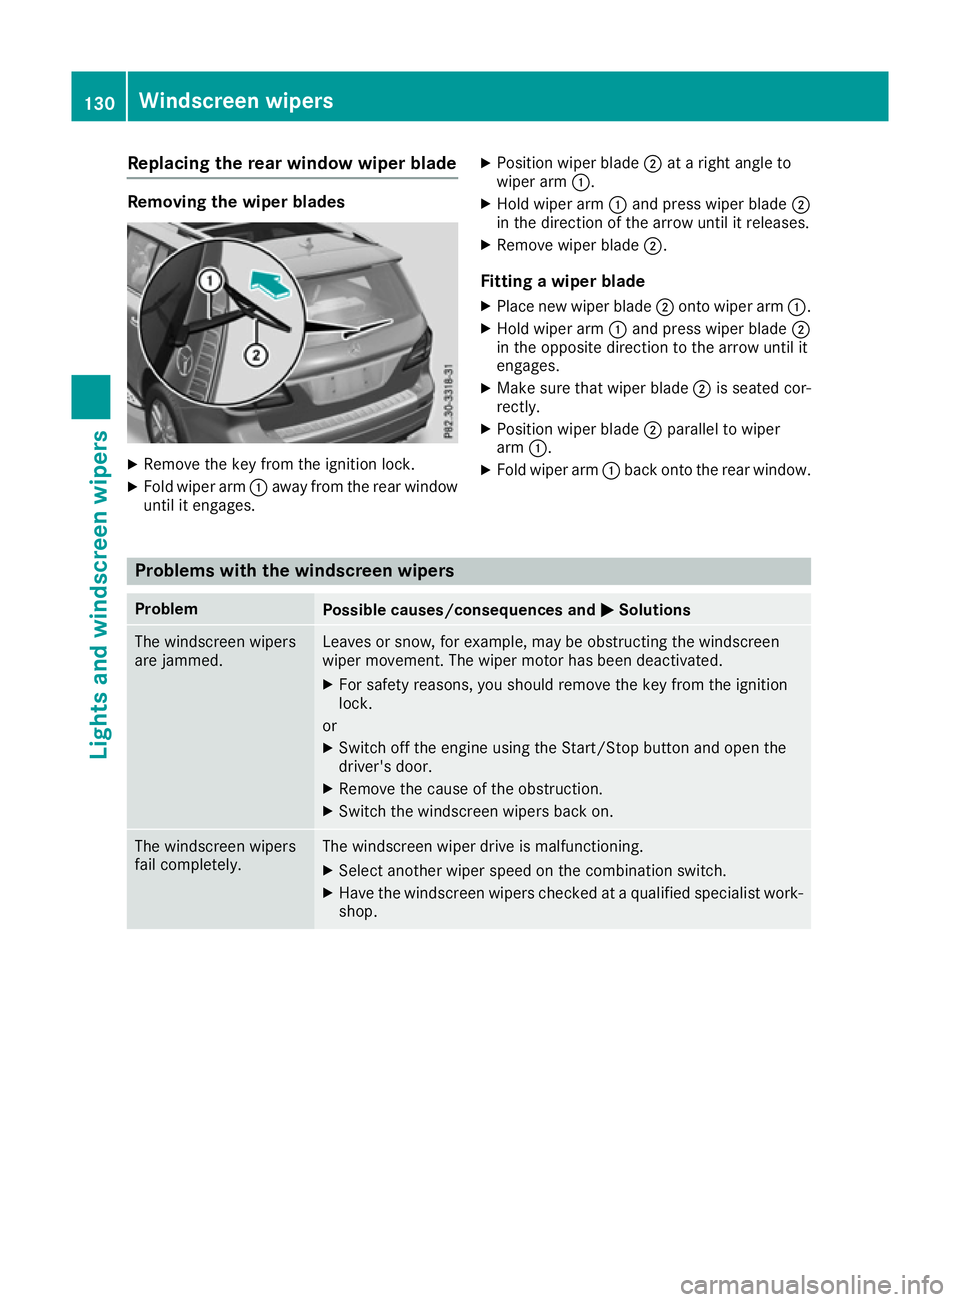
Replacing the rear window wiper blade
Removing the wiper blades
X
Remove the key from the ignition lock.
X Fold wiper arm :away from the rear window
until it engages. X
Position wiper blade ;at a right angle to
wiper arm :.
X Hold wiper arm :and press wiper blade ;
in the direction of the arrow until it releases.
X Remove wiper blade ;.
Fitting a wiper blade
X Place new wiper blade ;onto wiper arm :.
X Hold wiper arm :and press wiper blade ;
in the opposite direction to the arrow until it
engages.
X Make sure that wiper blade ;is seated cor-
rectly.
X Position wiper blade ;parallel to wiper
arm :.
X Fold wiper arm :back onto the rear window. Problems with the windscreen wipers
Problem
Possible causes/consequences and
M
MSolutions The windscreen wipers
are jammed. Leaves or snow, for example, may be obstructing the windscreen
wiper movement. The wiper motor has been deactivated.
X For safety reasons, you should remove the key from the ignition
lock.
or X Switch off the engine using the Start/Stop button and open the
driver's door.
X Remove the cause of the obstruction.
X Switch the windscreen wipers back on. The windscreen wipers
fail completely. The windscreen wiper drive is malfunctioning.
X Select another wiper speed on the combination switch.
X Have the windscreen wipers checked at a qualified specialist work-
shop. 130
Windscreen wipersLights and windscreen wipers
Page 141 of 397
Demisting the windows
Windows misted up on the inside X
Activate the ¿orÁ cooling with air
dehumidification function.
X Activate automatic mode Ã.
X If the windows continue to mist up, activate
the "Windscreen demisting" function
(Y page 137).
i You should only select this setting until the
windscreen is clear again.
Windows misted up on the outside X
Switch on the windscreen wipers.
X Press the _button repeatedly until the
P orO symbol appears in the display.
i You should only select this setting until the
windscreen is clear again.
i If you clean the windows regularly, they do
not mist up so quickly. Rear window heating
General notes The rear window heating has a high current
draw. You should therefore switch it off as soon
as the window is clear. It otherwise switches off automatically after several minutes.
If the battery voltage is too low, the rear window
heating may switch off.
Switching on/off X
Turn the key to position 2in the ignition lock
(Y page 148).
X Press the ¤button.
The indicator lamp in the ¤button lights
up or goes out.
Problems with the rear window heating Problem
Possible causes/consequences and
M MSolutions The rear window heating
has switched off prema-
turely or cannot be
switched on. The battery has not been sufficiently charged.
X Switch off any consumers that are not required, e.g. reading lamps,
interior lighting or the seat heating.
When the battery is sufficiently charged, the rear window heating
can be switched on again. Activating/deactivating air-recircula-
tion mode
General notes You can deactivate the flow of fresh air tempo-
rarily if unpleasant odours are entering the vehi-
cle from outside. The air already inside the vehi- cle will then be recirculated.
If you switch on air-recirculation mode, the win-
dows can mist up more quickly, in particular at
low temperatures. Only use air-recirculation
mode briefly to prevent the windows from mist- ing up. Switching on/off X
Turn the key to position 2in the ignition lock
(Y page 148).
X To activate: press thedbutton.
The indicator lamp in the dbutton lights
up.
i In the event of high pollution levels
(THERMOTRONIC automatic climate control
only) or at high outside temperatures, air-
recirculation mode is automatically activated.
When air-recirculation mode is activated
automatically, the indicator lamp in the d
button is not lit. 138
Operating the climate cont
rol systemClimate control
Page 151 of 397
!
Do not warm up the engine when the vehicle
is stationary. Drive off immediately. Avoid
high engine speeds and driving at full throttle
until the engine has reached its operating
temperature.
Only shift the automatic transmission to the
desired drive position when the vehicle is sta- tionary.
Where possible, avoid spinning the drive
wheels when pulling away on slippery roads.
You could otherwise damage the drive train.
! Mercedes-AMG vehicles:
at low engine oil
temperatures (below +20 †), the maximum
engine speed is restricted in order to protect
the engine. To protect the engine and main-
tain smooth engine operation, avoid driving at full throttle when the engine is cold. Key positions
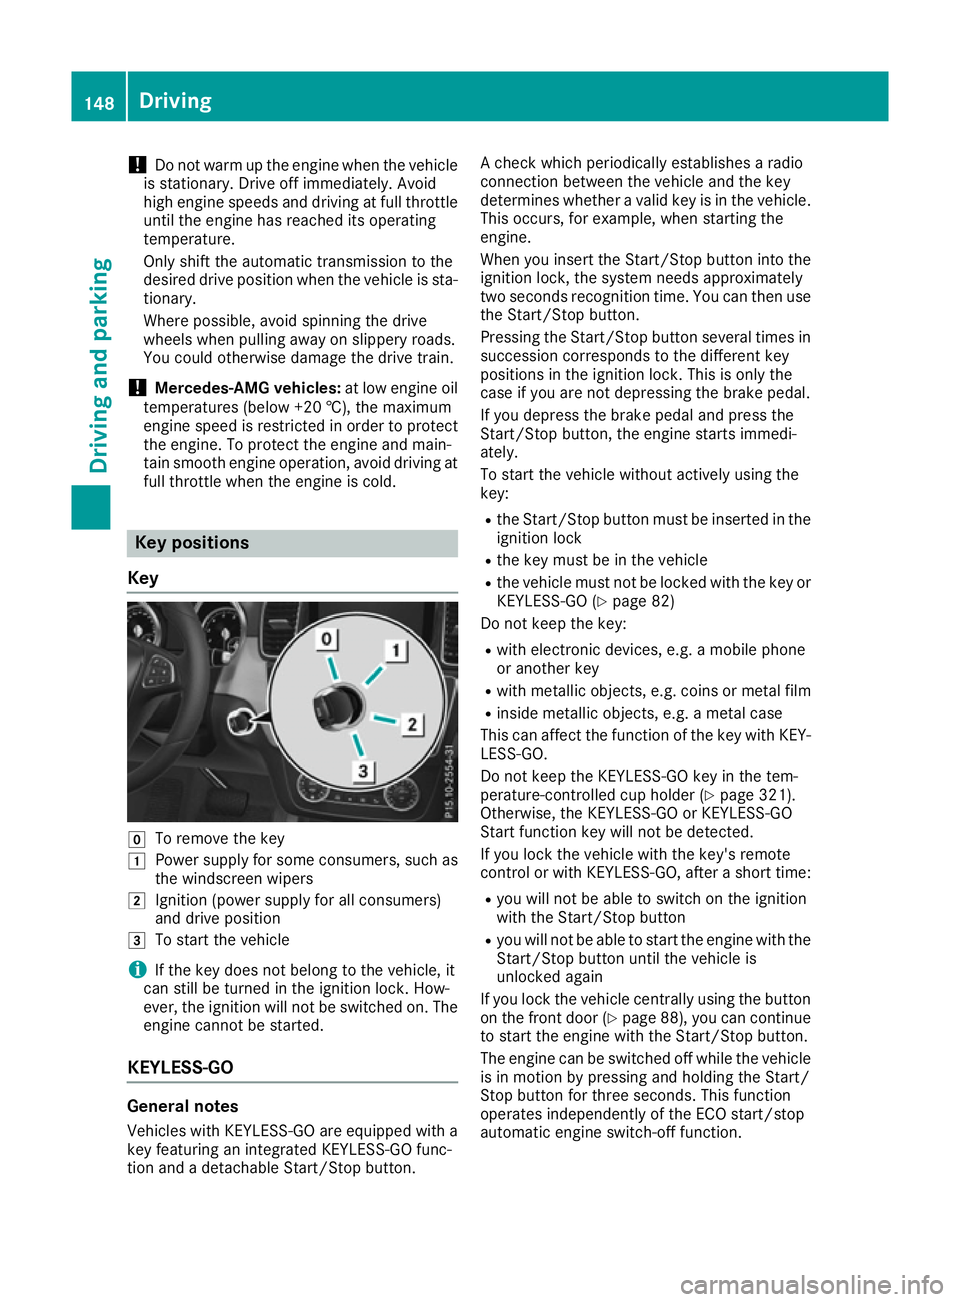
Key g
To remove the key
1 Power supply for some consumers, such as
the windscreen wipers
2 Ignition (power supply for all consumers)
and drive position
3 To start the vehicle
i If the key does not belong to the vehicle, it
can still be turned in the ignition lock. How-
ever, the ignition will not be switched on. The
engine cannot be started.
KEYLESS-GO General notes
Vehicles with KEYLESS-GO are equipped with a
key featuring an integrated KEYLESS-GO func-
tion and a detachable Start/Stop button. A check which periodically establishes a radio
connection between the vehicle and the key
determines whether a valid key is in the vehicle.
This occurs, for example, when starting the
engine.
When you insert the Start/Stop button into the
ignition lock, the system needs approximately
two seconds recognition time. You can then use the Start/Stop button.
Pressing the Start/Stop button several times in
succession corresponds to the different key
positions in the ignition lock. This is only the
case if you are not depressing the brake pedal.
If you depress the brake pedal and press the
Start/Stop button, the engine starts immedi-
ately.
To start the vehicle without actively using the
key:
R the Start/Stop button must be inserted in the
ignition lock
R the key must be in the vehicle
R the vehicle must not be locked with the key or
KEYLESS-GO (Y page 82)
Do not keep the key:
R with electronic devices, e.g. a mobile phone
or another key
R with metallic objects, e.g. coins or metal film
R inside metallic objects, e.g. a metal case
This can affect the function of the key with KEY- LESS-GO.
Do not keep the KEYLESS-GO key in the tem-
perature-controlled cup holder (Y page 321).
Otherwise, the KEYLESS-GO or KEYLESS-GO
Start function key will not be detected.
If you lock the vehicle with the key's remote
control or with KEYLESS-GO, after a short time:
R you will not be able to switch on the ignition
with the Start/Stop button
R you will not be able to start the engine with the
Start/Stop button until the vehicle is
unlocked again
If you lock the vehicle centrally using the button
on the front door (Y page 88), you can continue
to start the engine with the Start/Stop button.
The engine can be switched off while the vehicle is in motion by pressing and holding the Start/
Stop button for three seconds. This function
operates independently of the ECO start/stop
automatic engine switch-off function. 148
DrivingDriving and parking
Page 152 of 397
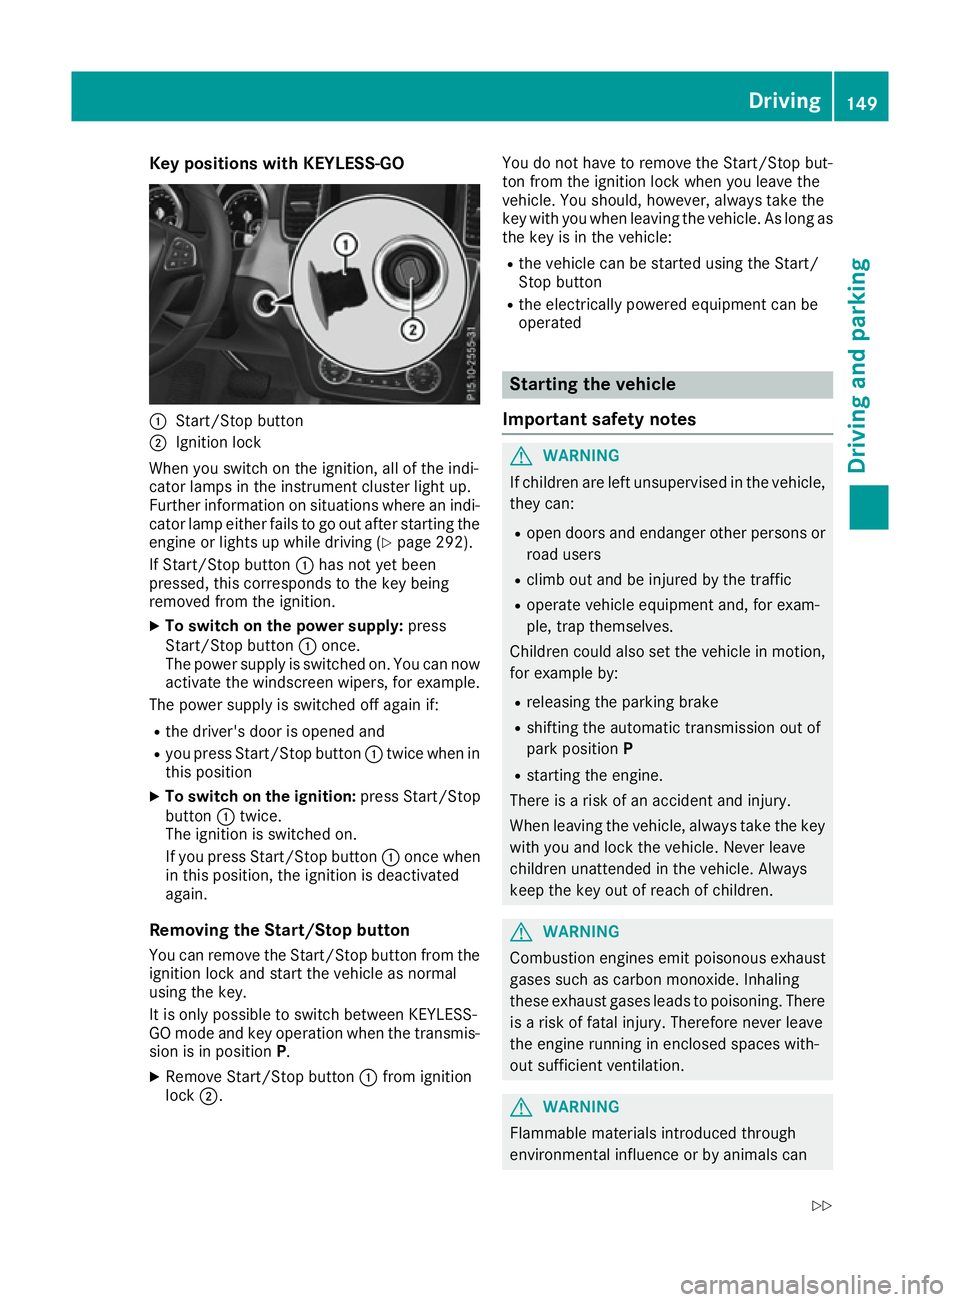
Key positions with KEYLESS-GO
:
Start/Stop button
; Ignition lock
When you switch on the ignition, all of the indi-
cator lamps in the instrument cluster light up.
Further information on situations where an indi-
cator lamp either fails to go out after starting the engine or lights up while driving (Y page 292).
If Start/Stop button :has not yet been
pressed, this corresponds to the key being
removed from the ignition.
X To switch on the power supply: press
Start/Stop button :once.
The power supply is switched on. You can now activate the windscreen wipers, for example.
The power supply is switched off again if:
R the driver's door is opened and
R you press Start/Stop button :twice when in
this position
X To switch on the ignition: press Start/Stop
button :twice.
The ignition is switched on.
If you press Start/Stop button :once when
in this position, the ignition is deactivated
again.
Removing the Start/Stop button
You can remove the Start/Stop button from the ignition lock and start the vehicle as normal
using the key.
It is only possible to switch between KEYLESS-
GO mode and key operation when the transmis-
sion is in position P.
X Remove Start/Stop button :from ignition
lock ;. You do not have to remove the Start/Stop but-
ton from the ignition lock when you leave the
vehicle. You should, however, always take the
key with you when leaving the vehicle. As long as
the key is in the vehicle:
R the vehicle can be started using the Start/
Stop button
R the electrically powered equipment can be
operated Starting the vehicle
Important safety notes G
WARNING
If children are left unsupervised in the vehicle, they can:
R open doors and endanger other persons or
road users
R climb out and be injured by the traffic
R operate vehicle equipment and, for exam-
ple, trap themselves.
Children could also set the vehicle in motion, for example by:
R releasing the parking brake
R shifting the automatic transmission out of
park position P
R starting the engine.
There is a risk of an accident and injury.
When leaving the vehicle, always take the key
with you and lock the vehicle. Never leave
children unattended in the vehicle. Always
keep the key out of reach of children. G
WARNING
Combustion engines emit poisonous exhaust
gases such as carbon monoxide. Inhaling
these exhaust gases leads to poisoning. There is a risk of fatal injury. Therefore never leave
the engine running in enclosed spaces with-
out sufficient ventilation. G
WARNING
Flammable materials introduced through
environmental influence or by animals can Driving
149Driving and pa rking
Z