2016 MERCEDES-BENZ G-CLASS SUV fuses
[x] Cancel search: fusesPage 6 of 261
Breakdow
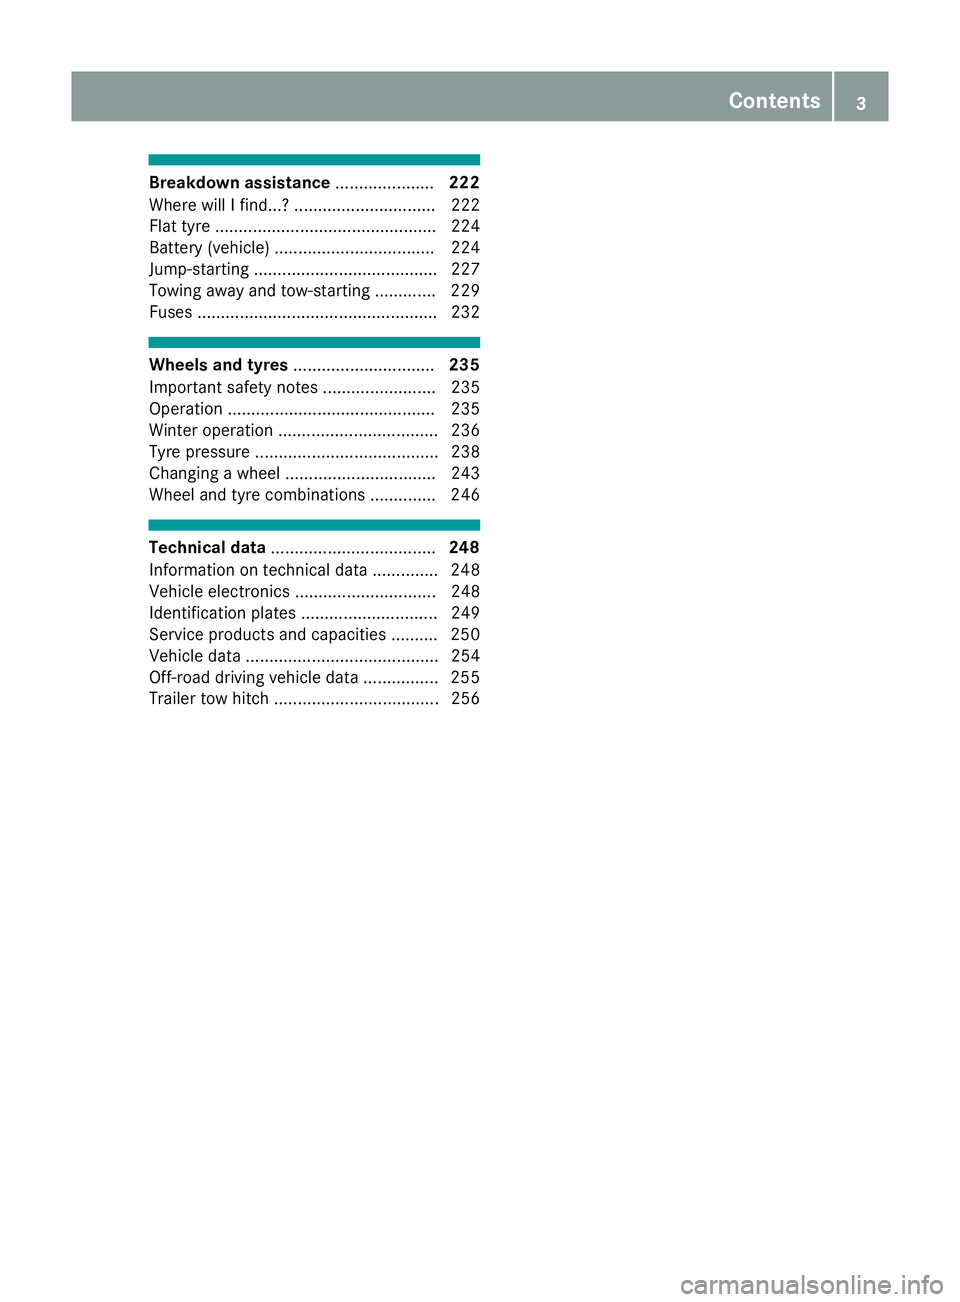
nassistance ..................... 222
Where will Ifind...? .............................. 222
Fla ttyre ............................................... 224
Battery (vehicle ).................................. 224
Jump-starting ....................................... 227
Towing away and tow-starting ............. 229
Fuses ................................................... 232 Wheel
sand tyres .............................. 235
Important safety notes ........................ 235
Operation ............................................ 235
Winter operation .................................. 236
Tyre pressure ....................................... 238
Changing awheel ................................ 243
Whee land tyre combinations .............. 246 Technical data
................................... 248
Informatio nontechnica ldata. ............. 248
Vehicl eelectronics .............................. 248
Identification plate s............................. 249
Service products and capacitie s.......... 250
Vehicl edata. ........................................ 254
Off-roa ddriving vehicl edata. ............... 255
Trailer tow hitch ................................... 256 Contents
3
Page 13 of 261

Front-passenger seat
Display message ............................ 154
Fuel
Consumptio nstatistic s................. .134
Displayin gthe range ...................... 134
Drivin gtips. .................................. .115
Fuel gauge ...................................... .26
Important safety notes .................. 250
Low outsid etemperature s.............2 51
Premium-grade unleade dpetrol ..... 251
Problem (malfunction) ................... 110
Quality (diesel )............................... 251
Refuelling ....................................... 108
Tank content/reserve fue l............. 251
Fue lfille rflap
Closing ........................................... 109
Emergency release ........................ 110
Opening ......................................... 109
Fue lfilter (white display message) .. 148
Fue llevel
Calling up the rang e(on-board
computer) ...................................... 134
Gaug e.............................................. 26
Fue ltank
Capacity ........................................ 251
Problem (malfunction) ................... 110
Fuel/wate rseparator
Service ........................................... 216
Fus eallocatio nchart ........................ 233
Fus ebox
Dashboard ..................................... 233
Front-passenger footwell ............... 233
Luggage compartment ................... 233
Transmission tunne l....................... 233
Fuses
Allocation chart ............................. 233
Before changing ............................. 232
Dashboard fus ebox ....................... 233
Fus ealloc ation chart ..................... 233
Fus ebox in the front-passenger
footwell .......................................... 233
Fus ebox in the luggage compart-
ment .............................................. 233
Fus ebox in the transmissio ntun-
nel ................................................. 233
Important safety notes .................. 232 G
Genui neMercedes-Benz parts ...........20
Glove compartment ..........................199
GPS reception ................................... .181 H
Hazard warnin glamps ........................ 76
Head restraints
Adjusting ........................................ .69
Adjusting (rear )................................ 70
Fitting/removing (rear ).................... 70
Headlamp
Cleaning system (function) .............. 75
Cleaning system (notes) ................ 254
Headlamp flasher ................................ 76
Headlamps
Misting up ........................................ 76
see Automati cheadlamp mode
Heating
see Climate control
High-pressure cleaners .................... 218
HOL Dfunction
Activating ....................................... 123
Activation conditions ..................... 123
Deactivating ................................... 123
Function/note s............................. 122
Genera lnotes ................................ 122
Horn ...................................................... 25 I
Ignition lock seeK ey positions
Immobiliser .......................................... 56
Indicator and warning lamp
Restrain tsystem ............................ 161
Indicator and warning lamps
Coolan t......................................... .162
Engin ediagnostics ........................ .162
Indicator lamps
Display message ............................ 145
Insectp rotection on the radiator .... 212
Instrument cluster
Overview .......................................... 26
Warning and indicator lamps ........... 26
Instrument cluster lighting .............. 13110
Index
Page 18 of 261

with luggage compartment
enlargement .................................. 205
without luggage compartment
enlargement .................................. 204
SD function
Important safet ynotes .................. 177
Inserting amemory car d............... .177
Selecting ........................................ 177
SD memory card
Ejecting .......................................... 177
Inserting ........................................ 177
Seat
Correct driver's seat position .......... .67
Seat backrest
Folding back ..................................2 01
Seat belt
Centre rear-compartment sea t....... .34
Correct usage .................................. 33
Sea tbelts
Cleaning ........................................ .221
Fastening ......................................... 34
Important safety guidelines ............. 32
Introduction ..................................... 32
Releasing ......................................... 35
Warning lamp ................................. 155
Warning lamp (function) ................... 36
Seat heating
Malfunction indicator lamp .............. 71
Seats
Adjusting the hea drestraint ............ 69
Cleaning the cover ......................... 220
Important safety notes .................... 67
Overview .......................................... 67
Switching sea theating on/off ......... 70
Securing aload .................................. 202
Selector lever
Cleaning ......................................... 220
Service menu (on-board com-
puter) ................................................. .137
Service products
AdBlue ®
special additive s.............. 251
Brake fluid ..................................... 253
Coolant (engine) ............................ 253
Engine oi l....................................... 252
Fue l................................................ 250
Important safety notes .................. 250
Note s............................................. 250
Washe rfluid ................................... 254 Setting
Time............................................... 138
Setting the air distribution ................. 86
Setting the date ................................. 172
Setting the day design ......................172
Settin gthe night design ................... 172
Settin gthe time ................................. 172
Settin gthe waveband ....................... 176
Settings
Date ............................................... 138
Factory (on-board computer) ......... 141
Language ....................................... 138
On-board computer ....................... 137
Shift ranges ....................................... 105
Short journey s(diesel particle fil-
ter) ...................................................... 115
Side lamps
Switching on/off .............................. 75
Side windows
Important safety notes .................... 64
Opening/closing .............................. 64
Overview .......................................... 64
Sliding sunroof
Important safety information ........... 65
Opening/closing .............................. 65
Operating manually .......................... 65
Problem (malfunction) ..................... 66
Sno wchains ...................................... 237
Socket (12 V)
Front-passenger footwell .............. .209
General notes ................................ 209
Luggage compartment ................... 209
Rea rcompartment ......................... 209
Soun dsettings
Equaliser ........................................ 171
Loudness ....................................... 171
Spare fuses ........................................ 233
Spare wheel
Spare wheel bracket at the rear .... 223
Specialist workshop ............................ 23
Speedometer
Digita l............................................ 134
In the Instrument cluster ................. 26
Selecting adispla yunit .................. 137
Starting the engine
Important safety notes .................... 96 Index
15
Page 126 of 261
Important safety notes
G
WARNING
When leavin gthe vehicle, it can still roll away
despite being braked by the HOLD function if:
R there is amalfunction in the system or in
the voltag esupply
R the HOLD function is deactivated by the
accelerator peda lbeing depressed, e.g. by
av ehicl eoccupant
R the electrica lsystem in the engine com-
partment, the battery or the fuses are tam-
pered with
R the battery is disconnected
There is arisk of an accident.
Before leaving the vehicle, alwaysd eactivate
the HOLD function and secure the vehicle
from rolling away.
Deactivating the HOLD function (Y page123).
Activation conditions You can activate the HOLD fun
ction if:
R the vehicle is stationary
R the engin eisrunning or if it has been auto-
matically switched off by the ECO start/stop
function
R the driver's door is close dorifyour seat belt
is fastened
R the parking brak eisreleased
R the transmission is in position D,Ror N
Activating th eHOLD function X
Make sure that the activation condition sare
met.
X Depress the brake pedal.
X Quickly depress the brake pedal further until
ë appears in the multifunction display.
The HOLD function is activated. You can
release the brake pedal.
If depressing the brake pedal the first time does not activate the HOLD function, wait briefly and
then try again. Deactivating the HOLD function The HOLD function is deactivated automatically
if:
R you depress the accelerator and the trans-
mission is in position Dor R.
R the transmission is in position j.
R you depress the brake pedal again with acer-
tain amount of pressure until ëdisap-
pears from the multifunction display.
On steep uphill or downhill inclines or if there is
am alfunction, the transmission may also be
automatically shifted into position P. Permanent all-wheel drive
! Never tow the vehicle with one axle raised.
This may damage the transfer case. Damage
of this sort is not covered by the Mercedes-
Benz implied warranty. All wheels must
remain either on the ground or be fully raised.
Observe the instructions for towing the vehi-
cle with all wheels in full contact with the
ground.
! When testin
gthe parking brake, operate the
vehicle only briefly (for amaximum of ten sec-
onds) on abrake test dynamometer. When
doing this, turn the key to position 0or 1in
the ignition. Failure to do this can cause dam- age to the drive train or the brake system.
! Af
unction or performanc etest should only
be carried out on atwin-axle dynamometer.
Before you operate the vehicle on such a
dynamometer, please consult aqualified
workshop. You could otherwise damage the
drive train or the brake system.
The all-wheel drive system ensures that all four
wheels are permanently driven. The all-wheel
drive system improves vehicle traction together with ESP ®
and 4ETS if adrive wheel spins due to
insufficient grip.
Only when you use winter tyres (M+S tyres) in
wintry driving condition sand, if necessary, snow
chains (Y page 237). Only in this way can the
maximum effect of all-wheel drive be achieved.
Information about driving off-road (Y page 119). Driving systems
123Driving and parking Z
Page 212 of 261
Cigarett
elighter G
WARNING
Yo uc an burn yourself if you touch the hot
heating element or the socket of the cigarette lighter.
In addition, flammable materials can ignite if:
R the hot cigarette lighter falls
R ac hild hold sthe hot cigarette lighter to
objects, for example
There is arisk of fire and injury.
Always hold the cigarette lighter by the knob.
Always make sure that the cigarette lighter is
out of reach of children. Never leave children unattended in the vehicle. X
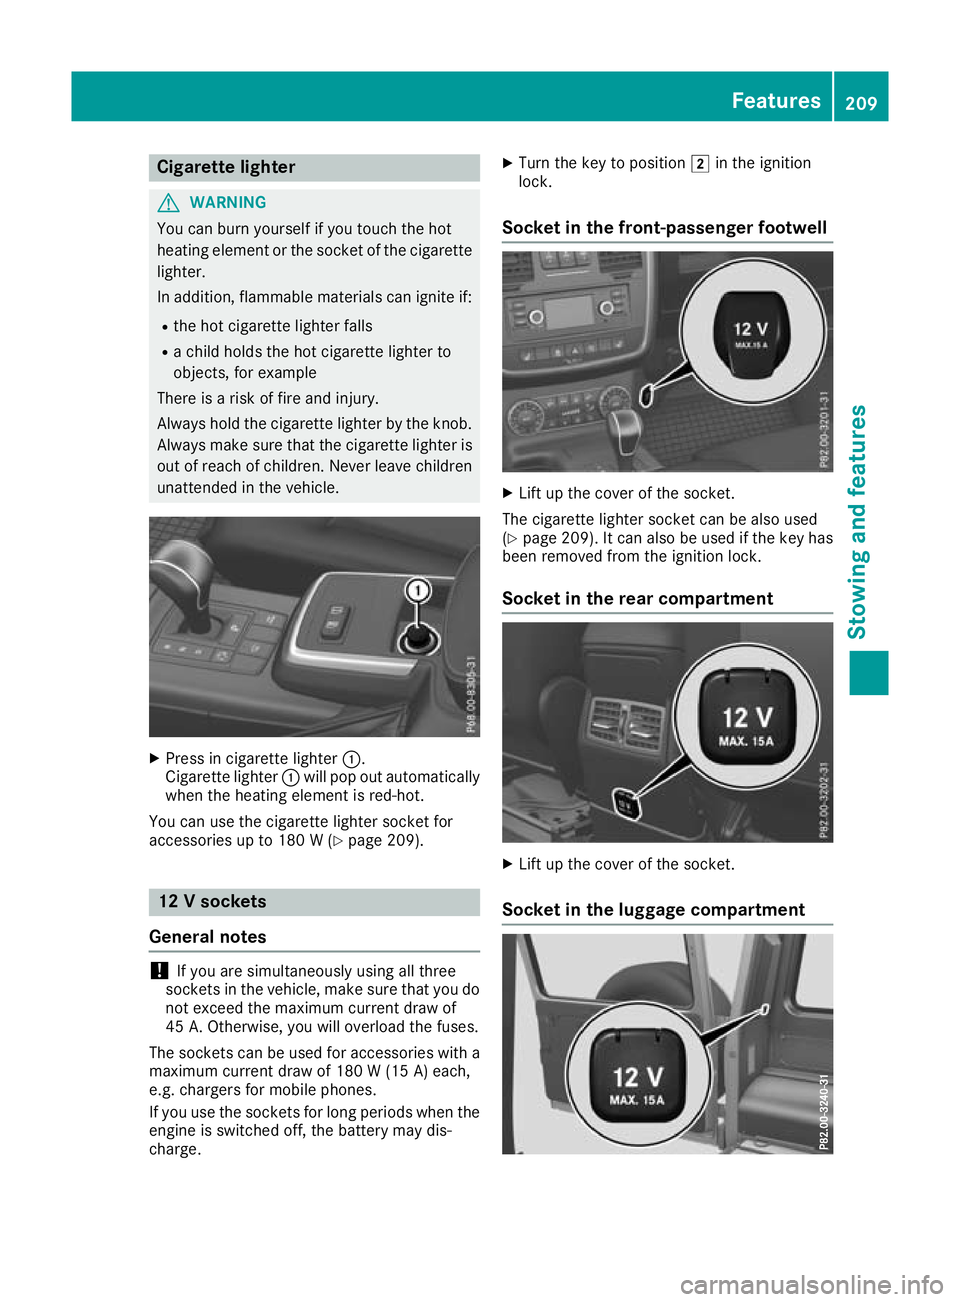
Pres sinc igarett elighter :.
Cigarette lighter :will pop out automatically
when the heating element is red-hot.
You can use the cigarett elighter socket for
accessories up to 180 W(Ypage 209). 12
Vsockets
General notes !
If you are simultaneously using all three
socketsint he vehicle, make sure that you do
not exceed the maximum current draw of
45 A. Otherwise, you will overload the fuses.
The sockets can be used for accessories with a maximum current draw of 180 W(15 A) each,
e.g. chargers fo rmobile phones.
If you use the sockets for long periods whe nthe
engine is switched off, the battery may dis-
charge. X
Turn the key to position 2in the ignition
lock.
Socket in the front-passenger footwell X
Lift up the cover of the socket.
The cigarette lighter socket can be also used
(Y page 209). It can also be used if the key has
been removed from the ignition lock.
Socket in the rear compartment X
Lift up the cover of the socket.
Socket in the luggag ecompartment Features
209Stowing and features Z
Page 235 of 261
In th
eevent of damage to th eengine,
transmission or electrical system X
Shift th etransfer cas etoneutral position
Neutral (Ypage 125).
X Shif tthe automatic transmissio ntoposition
N.
In the even tofdamage to the transfer
case Have the propeller shafts between the axles and
the transfe rcase removed.
In the event of damage to the front axle Have the propeller shaft between the rea
raxle
and the transfe rcase removed.
The nhavet he vehicle towe dawayw itht he front
axl eraised.
In the event of damage to the rear axle Have the propeller shaft between the front axle
and the transfe rcase removed.
The nhavet he vehicle towe dwitht he rea raxle
raised and wheel rollers unde rthe front axle. Tow-start
ing( em ergency engine
starting)
! Do not tow-start vehicles with automatic
transmission. Yo ucould otherwis edamage
the automatic transmission.
Yo uc an find informatio non"Jump-starting"
under (Y page 227). Fuses
Importan
tsafety notes G
WARNING
If yo umanipulate, bridge or replace afaulty
fuse with afuse of ahigher amperage ,the
electric cables coul dbeoverloaded. This may
result in afire. There is arisk of an accident
and injury.
Always replace faulty fuses with specified new fuses of the correct amperage. The fuses in your vehicle disconnect fault
ycir-
cuits. If afuse blows, all the components in the
circuit and their functions will fail.
Blown fuses must be replaced with fuses of the same rating, which you can recognise by the
colour and fuse rating. The fuse ratings are listed
in the fuse allocation chart (Y page 233).
If the newly inserted fuse also blows, have the
cause traced and rectified at aqualified special-
ist workshop, e.g. aMercedes-Benz Service
Centre.
! Only use fuses that have been approved for
Mercedes-Benz vehicles and which have the
correc tfuse rating for the system concerned.
Otherwise, components or systems could be
damaged.
! Make sure that no moisture can enter the
fuse box when the cover is open.
! When closing the cover, make sure that it is
lying correctly on the fuse box. Moisture seep-
ing in or dirt could otherwise impair the oper-
ation of the fuses. Bef
orer eplacing afuse
Observ ethe important safety notes
(Y page 232).
X Switch off the engine.
X Switch off al lelectrical consumers.
X Remove the key from the ignition lock.
All indicator lamps on the instrument cluster
must be off.
X Secure the vehicl eagain st rolling away
(Y page 113).
The fuses are locate dinvarious fus eboxes:
R Main fus eboxon the front-passenger side of
the dashboard
R Fus eboxin the front-passenger footwell
R Fus eboxin the transmission tunnel
R Fus eboxin the luggage compartment
The fus ealloc ation chart and the spare fuses are
in the fus eboxon the dashboard on the front-
passenger side (Y page 233).
The fus eextractor is in the vehicl etool kit
(Y page 223). 232
FusesBreakdo
wn assis tance
Page 236 of 261
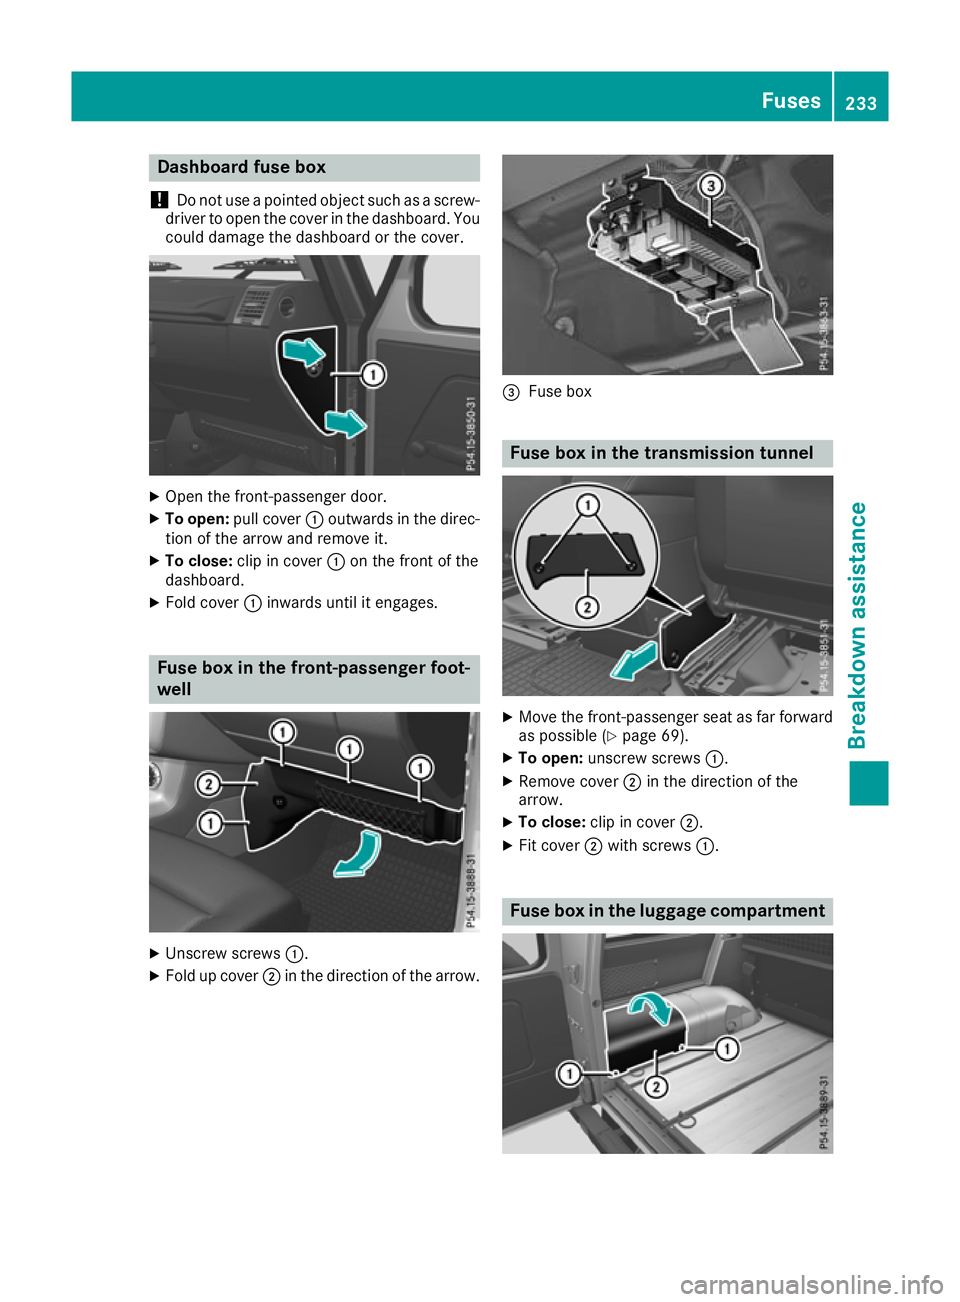
Dashboar
dfuseb ox
! Do no
tuse ap ointe dobjec tsuc hasas crew-
driver to ope nthe cover in th edashboard. You
could damage th edashboar dorthecover. X
Ope nthe front-passenger door.
X To open: pull cover :outwards in the direc-
tion of the arrow and remove it.
X To close: clip in cover :on the front of the
dashboard.
X Fold cover :inwards until it engages. Fus
ebox in th efront-passenger foot-
well X
Unscre wscrews :.
X Fold up cover ;in the direction of the arrow. =
Fuse box Fus
ebox in th etransmission tunnel X
Mov ethe front-passenger seat as far forward
as possible (Y page 69).
X To open: unscrew screws :.
X Remove cover ;in the direction of the
arrow.
X To close: clip in cover ;.
X Fit cover ;with screws :. Fus
ebox in th eluggage compartment Fuses
233Breakdown assistance Z
Page 237 of 261
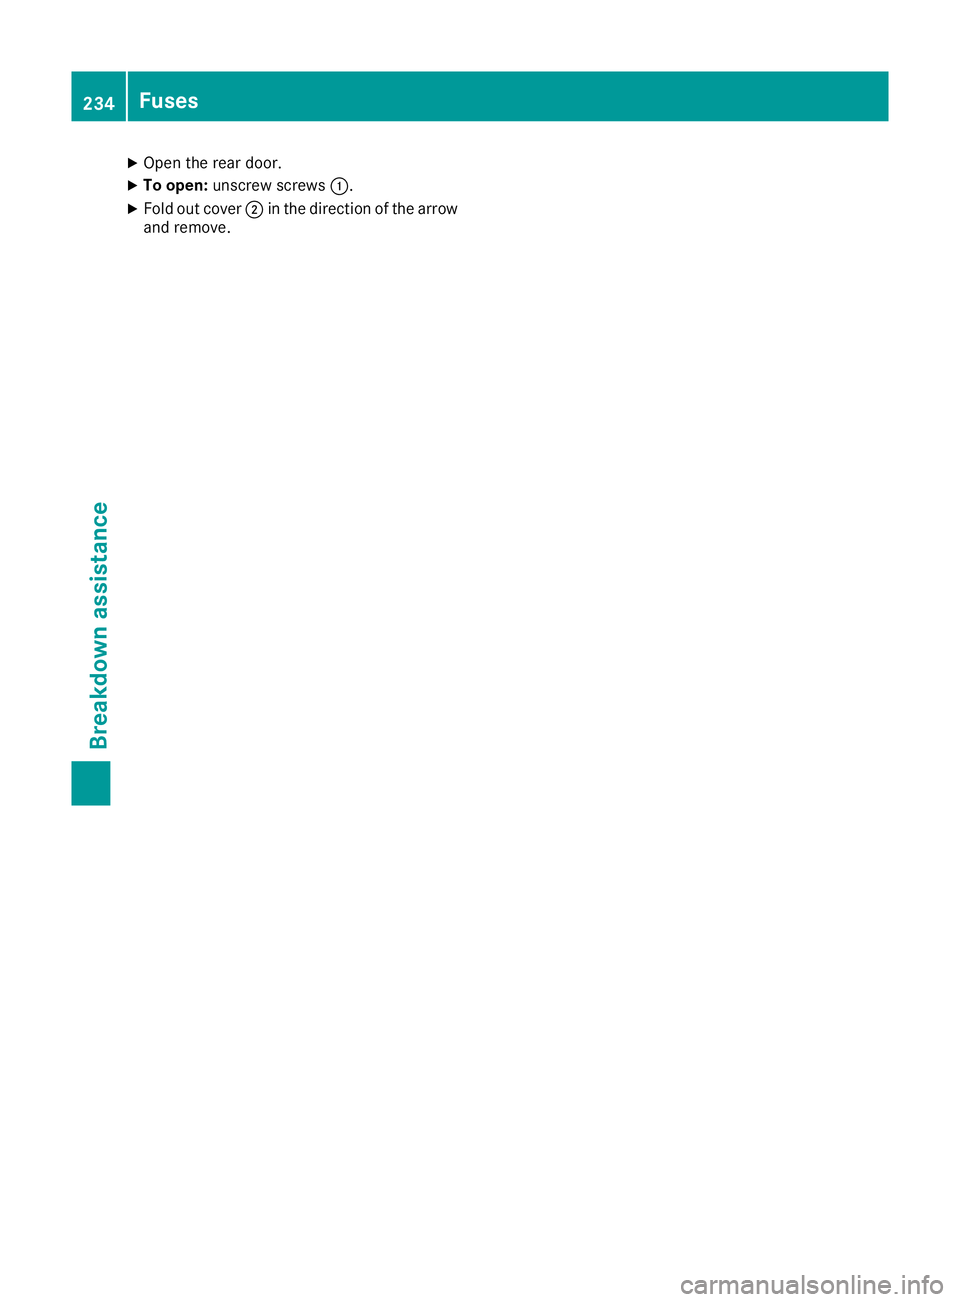
X
Open the rear door.
X To open: unscrew screws :.
X Fold out cover ;in the direction of the arrow
and remove. 234
FusesBreakdow
nassistan ce