2016 MERCEDES-BENZ G-CLASS SUV display
[x] Cancel search: displayPage 107 of 261
Kickdown
Use kickdown for maximu
macceleration:
X Depress the accelerator pedal beyond the
pressure point.
The automatic transmission shifts to alower
gear depending on the engine speed.
X Ease off the accelerator pedal once the
desired speed is reached.
The automatic transmission shifts back up.
Towing atrailer X
Drive in the middle of the engine speed range
on uphill gradients.
X Limit the shift range to 3or 2depending on
the uphill or downhill gradient (Y page 105).
X Shift the transfer case int ooff-roa ddriving
position LOWR ANGE on extreme uphill gra-
dients or stee pdownhil lgradients
(Y page 124). Progra
mselector button
General notes The program selector button allows you to
choose between drive programs with different
driving characteristics.
The automatic transmission switches to auto-
matic drive program Eeach time the engine is
started.
Available drive programs E
Economy Com
fortable, economical
driving S
Sport Sport
ydriving style M
Manual Manual gearshifting
Furthe
rinformation on the automatic drive pro-
gra m( Ypage 104). Select
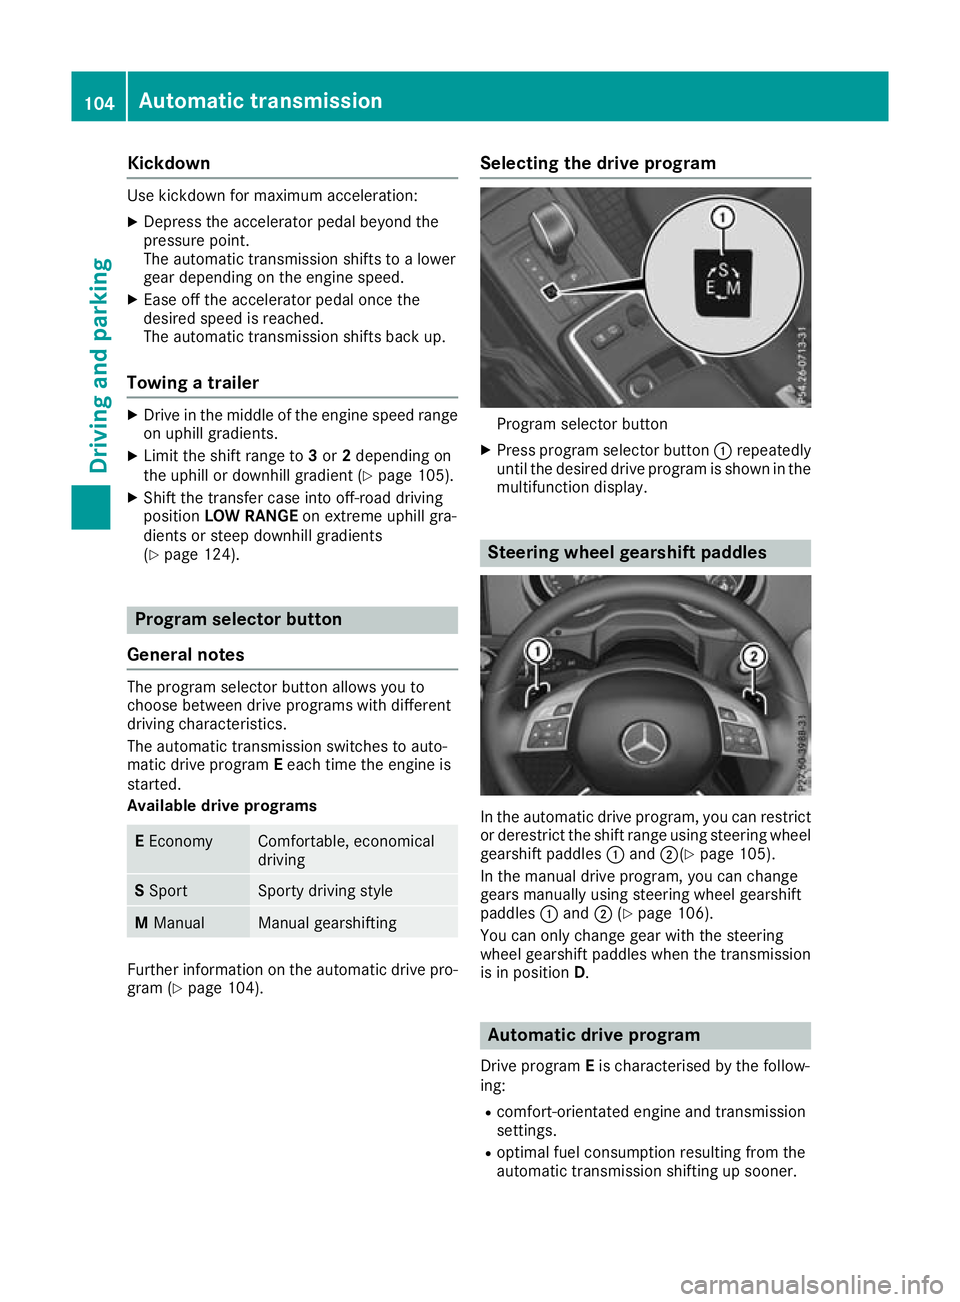
ing the drive program Program selector button
X Press program selector button :repeatedly
until the desired drive program is shown in the multifunction display. Steering wheel gearshift paddles
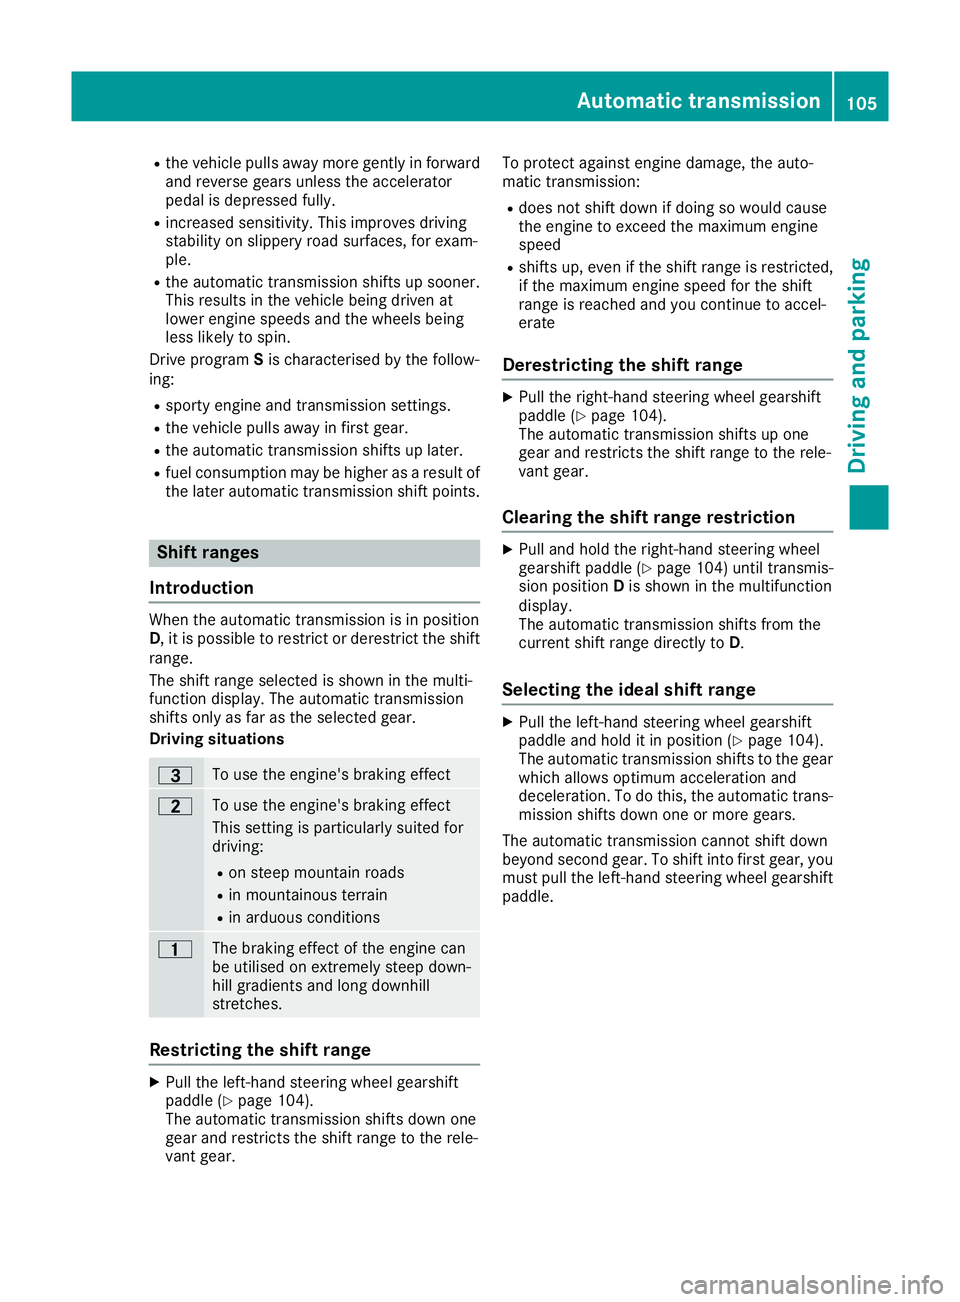
In the automatic drive program
,you can restrict
or derestrict the shift range using steering wheel gearshift paddles :and ;(Y page 105).
In the manuald rive program, you can change
gears manually using steering wheel gearshift
paddles :and ;(Ypage 106).
You can only change gear with the steering
wheel gearshift paddles when the transmission
is in position D. Automatic drive program
Drive program Eis characterised by the follow-
ing:
R comfort-orientated engine an dtransmission
settings.
R optimal fuel consumption resulting from the
automatic transmission shifting up sooner. 104
Auto
matictransmissionDriving and parking
Page 108 of 261
R
the vehicl epulls away mor egently in forward
and revers egears unles sthe accelerator
peda lisdepresse dfully.
R increase dsensitivity. Thi simp roves driving
stability on slippery roa dsurfaces ,for exam-
ple.
R the automatic transmission shifts up sooner.
Thi sresults in the vehicl ebeing driven at
lowe rengine speeds and the wheels being
less likel ytospin.
Drive program Sis characterise dbythe follow-
ing:
R sporty engine and transmission settings.
R the vehicl epulls away in first gear.
R the automatic transmission shifts up later.
R fuel consumption ma ybehighe rasa resultof
the later automatic transmission shift points. Shift ranges
Introduction When th
eautomatic transmission is in position
D,itisp ossible to restrict or derestrict the shift
range.
The shift range selected is shown in the multi-
function display. The automatic transmission
shifts only as far as the selected gear.
Driving situations =
To use the engine's braking effect
5
To use the engine's braking effect
This setting is particularly suited for
driving:
R on steep mountain roads
R in mountainous terrain
R in arduous conditions 4
The braking effect of the engine can
be utilised on extremely steep down-
hill gradients and long downhill
stretches. Restrictin
gthe shift range X
Pul lthe left-hand steerin gwheel gearshift
paddle (Y page 104).
The automatic transmission shifts down one
gear and restricts the shift range to the rele-
vant gear. To protec
tagainst engine damage, the auto-
matic transmission:
R does not shift down if doing so would cause
the engine to exceed the maximum engine
speed
R shifts up, even if the shift range is restricted,
if the maximum engine speed for the shift
range is reached and you continue to accel-
erate
Derestricting the shift range X
Pull the right-hand steerin gwheel gearshift
paddle (Y page 104).
The automatic transmission shifts up one
gear and restricts the shift range to the rele-
vant gear.
Clearing the shift range restriction X
Pull and hold the right-hand steerin gwheel
gearshift paddle (Y page 104) until transmis-
sion position Dis shown in the multifunction
display.
The automatic transmission shifts from the
curren tshift range directly to D.
Selecting the ideal shift range X
Pull the left-hand steerin gwheel gearshift
paddle and hold it in position (Y page 104).
The automatic transmission shifts to the gear
which allows optimum acceleration and
deceleration. To do this, the automatic trans- mission shifts down one or more gears.
The automatic transmission cannot shift down
beyond second gear. To shift into first gear, you
must pull the left-hand steerin gwheel gearshift
paddle. Automatic transmission
105Driving and parking Z
Page 109 of 261
Manual gearshifting
Temporary setting X
To activate: shift the selector lever to posi-
tion D.
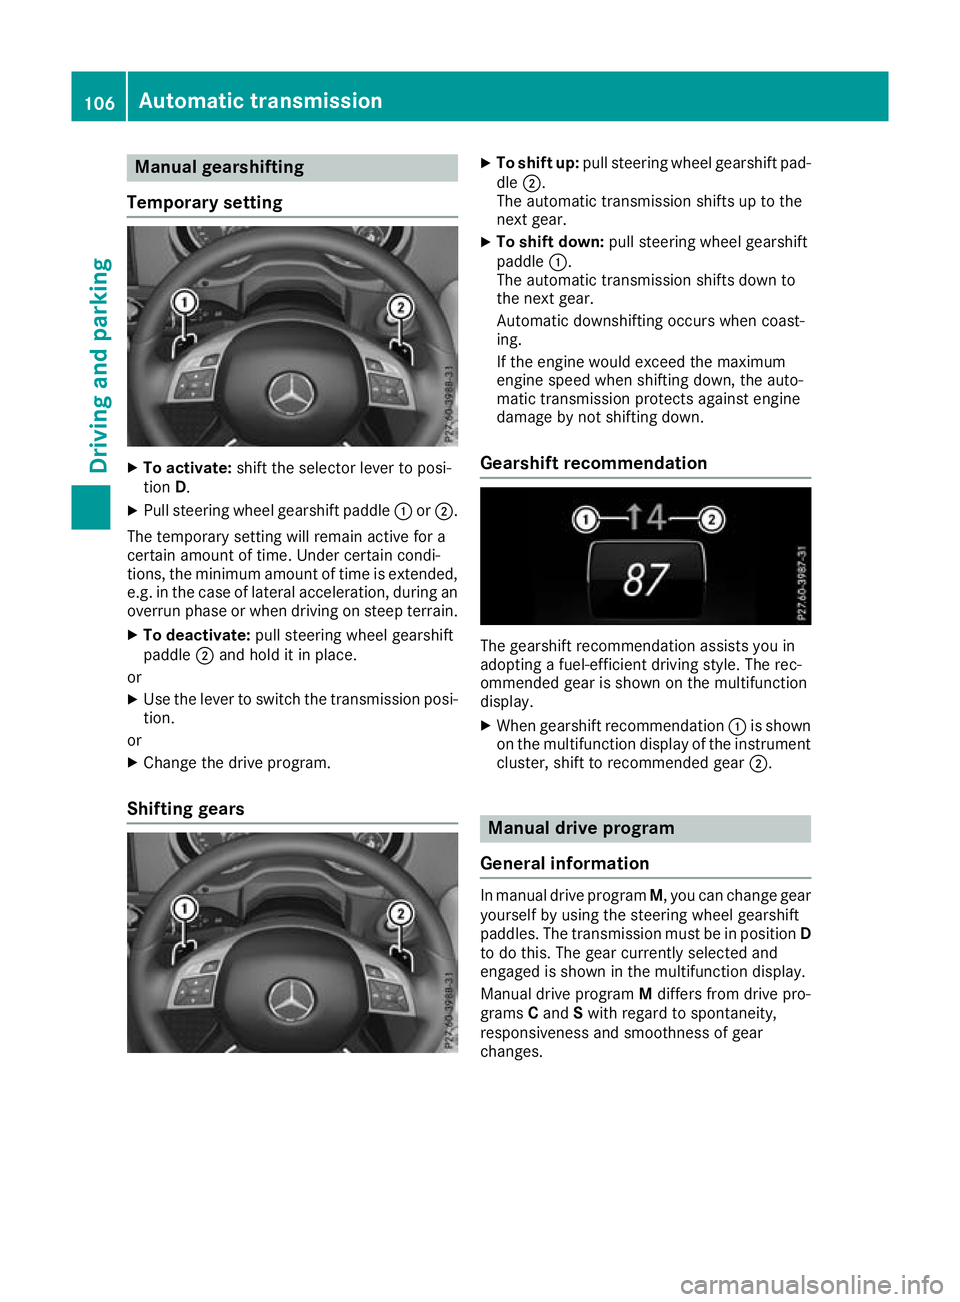
X Pull steering whee lgearshift paddle :or;.
The temporary setting will remai nactive for a
certain amount of time .Unde rcertain condi-
tions, the minimu mamount of time is extended,
e.g .int he cas eoflatera lacceleration, during an
overru nphase or when driving on stee pterrain.
X To deactivate: pull steering whee lgearshift
paddle ;and hol ditinp lace.
or X Use the lever to switch the transmission posi-
tion.
or X Chang ethe drive program.
Shiftin ggears X
To shift up: pull steering whee lgearshift pad-
dle ;.
The automatic transmission shifts up to the
next gear.
X To shift down: pull steering whee lgearshift
paddle :.
The automatic transmission shifts down to
the next gear.
Automatic downshifting occurs when coast-
ing.
If the engine woul dexceed the maximum
engine speed when shifting down, the auto-
matic transmission protects against engine
damage by not shifting down.
Gearshift recommendation The gearshift recommendation assist
syou in
adopting afuel-efficien tdriving style. The rec-
ommended gear is shown on the multifunction
display.
X When gearshift recommendation :is shown
on the multifunction display of the instrument
cluster, shift to recommended gear ;. Manual drivep
rogram
General information In manua
ldrive program M,you can change gear
yourself by using the steering wheel gearshift
paddles. The transmission must be in position D
to do this. The gear currently selected and
engaged is shown in the multifunction display.
Manuald rive program Mdiffers from drive pro-
grams Cand Swith regard to spontaneity,
responsiveness and smoothness of gear
changes. 106
Automatic transmissionDriving and parking
Page 110 of 261
Activating th
emanua ldrive program X
Shift th etransmissio ntoposition D.
X Press the progra mselector button repeatedly
unti ldrive program Mappears in the multi-
function display.
Upshifting !
When the engine limiting spee
disreached,
the fuel supplyisc ut to prevent the engine
from overrevving. Alwaysm ake sure that the
engine speed does not reach the red area of
the rev counter. There is otherwise arisk of
engine damage. X
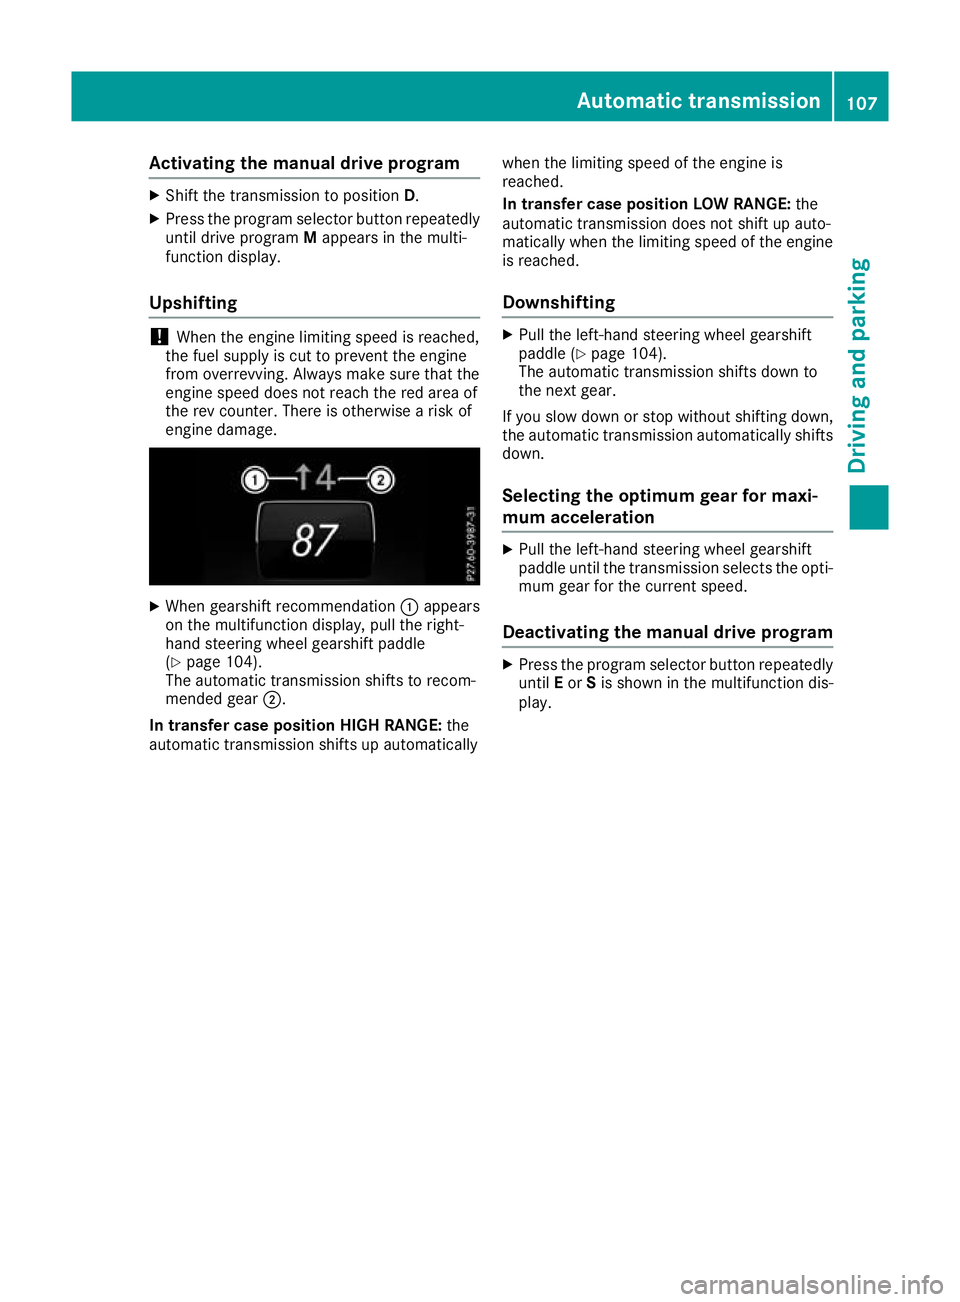
When gearshiftr ecommendation :appears
on the multifunction display, pull the right-
hand steerin gwheel gearshift paddle
(Y page 104).
The automatic transmission shifts to recom-
mended gear ;.
In transfer case position HIGH RANGE: the
automatic transmission shifts up automatically when the limiting speed of the engine is
reached.
In transfer case position LOW RANGE: the
automatic transmission does not shift up auto-
matically when the limiting speed of the engine
is reached.
Downshifting X
Pull the left-hand steerin gwheel gearshift
paddle (Y page 104).
The automatic transmission shifts down to
the next gear.
If you slow down or stop without shiftin gdown,
the automatic transmission automatically shifts
down.
Selecting the optimum gear for maxi-
mum acceleration X
Pull the left-hand steerin gwheel gearshift
paddle until the transmission selects the opti-
mum gear for the curren tspeed.
Deactivating the manual drive program X
Press the program selector button repeatedly
until Eor Sis shown in the multifunction dis-
play. Automatic transmission
107Driving and parking Z
Page 114 of 261

AdBlue
®
Genera lnotes To function properly, BlueTE
Cexhaust gas after-
treatment must be operated with the reducing
agent AdBlue ®
.
When the supply of AdBlue ®
is almost used up,
the Refill AdBlue See Owner's Manual Refill AdBlue See Owner's Manual
message is shown in the multifunction display .A
warning tonea lso sounds.
If the Refill AdBlue No start in Xkm
Refill AdBlue No start in Xkm
message is shown in the multifunction display,
you can still drive the vehicle over the distance
shown. If AdBlue ®
is not topped up, you will
subsequently be unable to startt he engine.
When you see the warning message, it is rec-
ommended that you fill the AdBlue ®
reservoir
with 10 litres of AdBlue ®
.T his ensures that the
AdBlue ®
supply will last until the next regular
service due date.
Further information about BlueTEC exhaust gas
aftertreatmen tand about AdBlue ®
can
be obtained from any Mercedes-Benz Service
Centre.
i You can also have the AdBlue ®
tank refilled
at aq ualified specialist workshop.
If the outside temperature is lower than Ò11 †,
it may be difficult to top up. If AdBlue ®
is frozen
and there is an active warning indicator, topping up may not be possible. Park the vehicle in a
warm place, e.g. in agarage, until AdBlue ®
has
become liquid again. Topping up is then possible
again. Alternatively, have the AdBlue ®
tank refil-
led at aqualified specialist workshop.
Before driving your vehicle outside Europe, have the AdBlue ®
supply checked at aqualified spe-
cialist workshop.
Further information about BlueTEC exhaust gas
aftertreatmen tand about AdBlue ®
can
be obtained from any Mercedes-Benz Service
Centre.
Important safety notes AdBlue
®
is aw ater-soluble fluid for the exhaust
ga sa ftertreatment of diese lengines. It is:
R non-toxic
R colourless and odourless
R non-flammable If you open the AdBlue
®
tank ,small amounts of
ammonia vapourm ay be released.
Ammonia vapours have apungent odoura nd are
particularly irritating to the skin, mucous mem-
branes and eyes.Y ou may experience aburning
sensation in youre yes,nose and throat. You
may also experience coughing and watery eyes.
Do not inhalea ny ammonia vapours that may be
released. Fill the AdBlue ®
tank only in well-ven-
tilated areas.
Do not swallow AdBlue ®
or let it come into con-
tact with skin, eyes or clothing. Keep AdBlue ®
awayf rom children.
If you or others come into contact with AdBlue ®
,
observe the following:
R immediately rinse AdBlue ®
off yours kin with
soap and water.
R if AdBlue ®
comes into contact with youre yes,
immediately rinse them thoroughl ywith clean
water. Seek medica lattention immediately.
R if AdBlue ®
is swallowed, immediately rinse
yourm outh out thoroughly. Drink plenty of
water. Seek medica lattention immediately.
R change immediately out of clothing that has
come into contact with AdBlue ®
.
! Only use AdBlue ®
in accordance with
ISO 22241. Do not mix any additives with
AdBlue ®
,a nd do not dilute AdBlue ®
with
water. This may destroy the BlueTEC exhaust
gas aftertreatment system.
! In order to fill the AdBlue ®
tank, the vehicle
must be parked on alevel surface. The
AdBlue ®
tank can only be filledasi ntended
with the vehicle parked on alevel surface.
Fluctuations in capacity willt hus be avoided.
Filling avehicle standing on an uneven sur-
face is not permitted. There is adanger of
overfilling, which can cause damage to Blue-
TEC exhaust gas aftertreatment components.
! Surfaces which have come into contact with
AdBlue ®
whiler efilling shouldber insed
immediately with water, or remove AdBlue ®
with amoist cloth and cold water. If AdBlue ®
has already crystallised, use asponge and
cold water to clean the area.A dBlue®
residue
crystallises after acertain amount of time and
soils the affected surfaces.
! AdBlue ®
is not afuel additive and must not
be addedtot he fuel tank. If AdBlue ®
is added Refuelling
111Driving and parking Z
Page 126 of 261
Important safety notes
G
WARNING
When leavin gthe vehicle, it can still roll away
despite being braked by the HOLD function if:
R there is amalfunction in the system or in
the voltag esupply
R the HOLD function is deactivated by the
accelerator peda lbeing depressed, e.g. by
av ehicl eoccupant
R the electrica lsystem in the engine com-
partment, the battery or the fuses are tam-
pered with
R the battery is disconnected
There is arisk of an accident.
Before leaving the vehicle, alwaysd eactivate
the HOLD function and secure the vehicle
from rolling away.
Deactivating the HOLD function (Y page123).
Activation conditions You can activate the HOLD fun
ction if:
R the vehicle is stationary
R the engin eisrunning or if it has been auto-
matically switched off by the ECO start/stop
function
R the driver's door is close dorifyour seat belt
is fastened
R the parking brak eisreleased
R the transmission is in position D,Ror N
Activating th eHOLD function X
Make sure that the activation condition sare
met.
X Depress the brake pedal.
X Quickly depress the brake pedal further until
ë appears in the multifunction display.
The HOLD function is activated. You can
release the brake pedal.
If depressing the brake pedal the first time does not activate the HOLD function, wait briefly and
then try again. Deactivating the HOLD function The HOLD function is deactivated automatically
if:
R you depress the accelerator and the trans-
mission is in position Dor R.
R the transmission is in position j.
R you depress the brake pedal again with acer-
tain amount of pressure until ëdisap-
pears from the multifunction display.
On steep uphill or downhill inclines or if there is
am alfunction, the transmission may also be
automatically shifted into position P. Permanent all-wheel drive
! Never tow the vehicle with one axle raised.
This may damage the transfer case. Damage
of this sort is not covered by the Mercedes-
Benz implied warranty. All wheels must
remain either on the ground or be fully raised.
Observe the instructions for towing the vehi-
cle with all wheels in full contact with the
ground.
! When testin
gthe parking brake, operate the
vehicle only briefly (for amaximum of ten sec-
onds) on abrake test dynamometer. When
doing this, turn the key to position 0or 1in
the ignition. Failure to do this can cause dam- age to the drive train or the brake system.
! Af
unction or performanc etest should only
be carried out on atwin-axle dynamometer.
Before you operate the vehicle on such a
dynamometer, please consult aqualified
workshop. You could otherwise damage the
drive train or the brake system.
The all-wheel drive system ensures that all four
wheels are permanently driven. The all-wheel
drive system improves vehicle traction together with ESP ®
and 4ETS if adrive wheel spins due to
insufficient grip.
Only when you use winter tyres (M+S tyres) in
wintry driving condition sand, if necessary, snow
chains (Y page 237). Only in this way can the
maximum effect of all-wheel drive be achieved.
Information about driving off-road (Y page 119). Driving systems
123Driving and parking Z
Page 127 of 261
Off-road driving systems
Transfer case
General notes The vehicle has permanent all-wheel drive. The
front and rear axles are constantly driven.
Further information on driving off-road
(Y page 119).
Shift ranges HIGH
RANGE
Position for all normal on-
road driving conditions.
LOW RANGE
Low-range position for driving
off-road.
Also for use on steep uphill or downhill gradients, especially
when towin gatrailer.
The vehicle travels around
half the speed of on-road driv-
ing range HIGH RANGE.T he
tractive powerisc orrespond-
ingly higher. Shiftin
gthe transfer case General notes
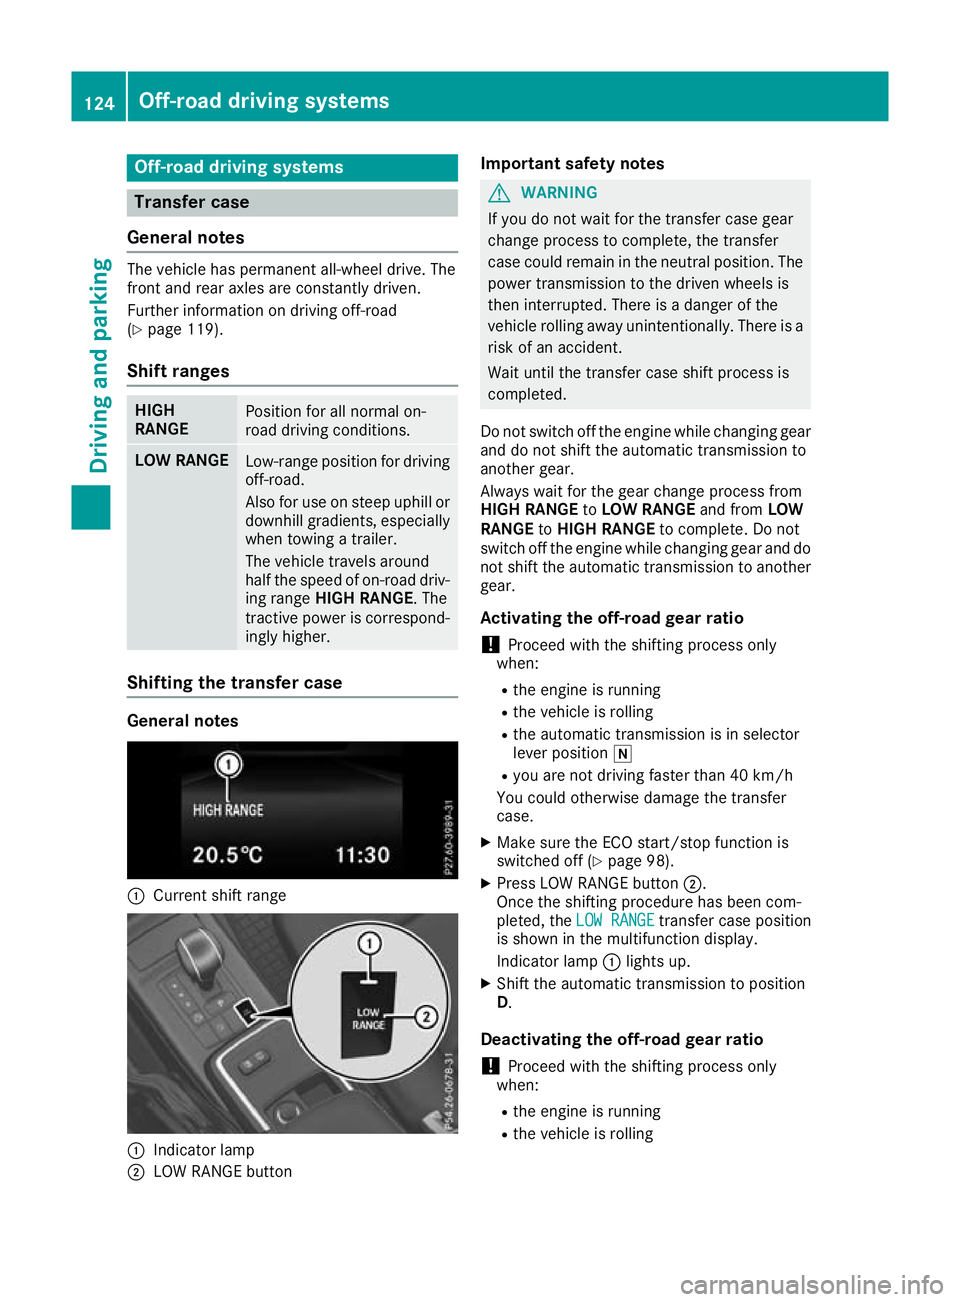
:
Curren tshif trange :
Indicator lamp
; LOW RANGE button Important safety notes G
WARNING
If yo udon ot waitf or the transfer case gear
change process to complete, the transfer
case coul dremai ninthe neutral position. The
power transmission to the drive nwheels is
then interrupted. There is adange rofthe
vehicl erolling awayu nintentionally.T here is a
risk of an accident.
Waitu ntil the transfer case shift process is
completed.
Do not switch off the engine while changing gear and do not shift the automatic transmission to
another gear.
Always waitf or the gearchange process from
HIGH RANGE toLOW RANGE and fromLOW
RANGE toHIGH RANGE to complete. Do not
switch off the engine while changing geara nd do
not shift the automatic transmission to another gear.
Activating the off-road gear ratio ! Proceed with the shifting process only
when:
R the engine is running
R the vehicl eisrolling
R the automatic transmission is in selector
leve rposition i
R you are not driving faster than 40 km/h
You coul dotherwise damage the transfer
case.
X Make sure the ECO start/stop function is
switched off (Y page98).
X Press LOW RANGE button ;.
Once the shifting procedure has been com-
pleted, the LOW RANGE LOW RANGE transfer case position
is show ninthe multifunction display.
Indicator lamp :lights up.
X Shift the automatic transmission to position
D.
Deactivatin gthe off-road gear ratio
! Proceed with the shifting process only
when:
R the engine is running
R the vehicl eisrolling 124
Off-roa
ddriving systemsDriving and parking
Page 128 of 261
R
the automatic transmission is in selector
lever position i
R youa renot drivin gfastert ha n7 0km/h
Yo uc ould otherwis edamag ethe transfer
case.
X Press button ;.
Once the shiftin gprocedur ehasbeen com-
pleted, the HIGH
HIGH RANGE RANGE transfe rcasep osit ion
is shown in the multifunctio ndisplay.
Indicato rlamp :goes out.
If the shiftin gprocedur eisunsuccessful, the
multifunctio ndisplay mayshowt he following
messages:
R TC shift condition snot fulfilled
TC shift condition snot fulfilled
One or mor eshift conditions ha snot been
met.
R TC neutra lon
TC neutra lon
The transfe rcaseh ascancelle dthe shifting
procedur eand is in position N.
R TC shift cancelled
TC shift cancelled
The transfe rcaseh ascancelle dthe gear
change process.
X Repeat the gear change process.
Make sure al lconditions for gear changing are
met.
R TC malfunction Visit workshop
TC malfunction Visit workshop
The transfe rcaseisf aulty.
X Do not shift the transfe rcase.
X Hav ethe vehicl echecked as soo naspossible
at aq uali fied specialis tworkshop.
Shifting to neutral G
WARNING
If you do not wai tfor the transfer case gear
change process to complete, the transfer
case coul dremai ninthe neutral position. The
power transmission to the drive nwheels is
then interrupted. There is adange rofthe
vehicl erolling awayu nintentionally.T here is a
risk of an accident.
Waitu ntil the transfer case shift process is
completed.
X Turn the key to position 2in the ignitio nlock.
X Apply the parking brake.
X Depress the brake pedal. X
Shift the automatic transmissio ntoposition
N.
X Press and hol dLOW RANG Ebutton ;for
approximately ten seconds.
Whe nthe shift procedure is complete, the
multifunction display shows the TC TCNeutral
Neutral
on
on message for five seconds.
If the shifting procedur eisunsuccessful, the
multifunction displaym ay show the following
messages (Y page 149).
If the transfer case is in Neutral,the key is in the
ignition lock and you open the driver's door, the
TC Neutral on
TC Neutral on message appears in the multi-
function display. If you then release the parking
brake, awarning tone will sound. Differentia
llocks
General notes G
WARNING
When th edifferential locks are engaged, ABS,
4ETS, ESP ®
and BAS are deactivated. This
coul dcauset he wheels to lock and increases
the braking distance. There is arisk of an
accident.
Disengage the differential locks immediately
on firm surfaces with good grip.
! To prevent damage to the transfer case, you
may only operate the vehicl eonaroller dyna-
mometer (single-axle roller dynamometer) if:
R the axle that is not being drive nisraised.
or
R the corresponding propellers haft is dis-
connected and the transfer case differen-
tial lock is engaged.
Otherwise, the transfer case can be damaged.
Differentia llocks improv ethe traction of the
vehicle.
Yourv ehicleise quipped with adifferential lock
each for:
R the transfer case: this controls the balance
between the front and rear axles
R the rear axle :this controls the balance
between the wheels on the rear axle
R the front axle :this controls the balance
between the wheels on the front axle Off-roa
ddriving systems
125Driving and parking Z