2016 MERCEDES-BENZ G-CLASS SUV checking oil
[x] Cancel search: checking oilPage 12 of 261

Electromagnetic compatibility
Declaratio nofconformit y................ 22
Emergenc ycall9 99 or 112 .............. 179
Emergenc ykey
Unlocking the driver' sdoor.............. 62
Emergenc ykey element
Function/note s................................ 58
Genera lnotes .................................. 58
Inserting .......................................... 59
Locking vehicl e................................ 62
Removing ......................................... 58
Emergenc yrelease
Driver's doo r.................................... 62
Emergenc yunlocking
Vehicl e............................................. 62
Engine
Displa ymessage ............................ 146
ECO start/stop function .................. 97
Engine number ............................... 250
Jump-starting ................................. 227
Running irregularly ......................... 100
Starting problems .......................... 100
Starting the engine with the key ...... 96
Stopping ........................................ 114
Tow-starting (vehicle )..................... 232
Warning lamp (engine diagnos-
tics) ............................................... 162
Engine electronics
Note s............................................. 248
Problem (fault) ............................... 100
Engine oil
Additives ........................................ 253
Checking the oi llev el ..................... 213
Checking the oi llev el using the
dipstick .......................................... 213
Checking the oi llev el using the
on-board compute r........................ 213
Displa ymessage ............................ 147
Filling capacity ............................... 253
Genera lnotes ................................ 252
Note sabout oilg rade s................... 252
Note sono illevel/consumption .... 213
Topping up ..................................... 213
Entering an address .......................... 182
Entering the town .............................. 182
Environmental protection
Returning an end-of-life vehicl e....... 20 ESP
®
(Electroni cStability Pro-
gram)
Characteristics ................................ .54
Deactivating/activating ................... 54
Display message ............................ 142
Function/note s................................ 53
Genera lnotes .................................. 53
Important safety guideline s............. 54
Trailer stabilisation .......................... 55
Warning lamp ................................. 159
ETS/4ETS (Electroni cTraction Sys-
tem) ...................................................... 54
Exhaust
see Exhaus tpipe
Exhaus tpipe
Cleaning ......................................... 219
Exterior lighting
Cleaning ......................................... 219
see Lights F
Factor ysettings ................................ 173
Fault message
see Display messages
File formats ........................................ 178
Filler cap
see Fuel fille rflap
Fire extinguisher .............................. .222
First-aid kit ......................................... 222
Fitting awheel
Fitting awheel ............................... 245
Lowering the vehicle ..................... .246
Preparing the vehicle ..................... 243
Raising the vehicle ......................... 244
Removing awheel .......................... 245
Securing the vehicle against roll-
ing away ........................................ 244
Flat tyre
Changing awheel/fitting the
spare wheel ................................... 243
Preparing the vehicle ..................... 224
Foldin gthe seat backrest (rear)
forwards/back .................................. 201
Frequencies
Mobile phone ................................. 248
Two-way radio ................................ 248 Index
9
Page 140 of 261

X
Press the 6ora button to start dial-
ling.
or X To exit the redial memory: press the%
button. Assistance menu
Introduction In the
Assist.
Assist. menu, you have the following
options:
R Showin gthe assistance graphic
(Y page 137)
Showing the assistanc egraphic X
Press the =or; button on the steering
wheel to select the Assist.
Assist. menu.
X Press 9or: to select Assistance
Assistance
graphic
graphic.
X Press a.
The displa yisinoperative. Service menu
In the Serv.
Serv. menu, you have the following
options:
R Calling up display messages (Y page 141)
R Checking the tyre pressure electronically
(Y page 240)
R Calling up the service due date
(Y page 216)
R Checking the engine oil level (Y page 213)Settings menu
Introduction In the
Settings
Settings menu, you have the following
options:
R Changing the instrument cluster settings
(Y page 137)
R Changing the time/date settings
(Y page 138)
R Changing the light settings (Y page 138)
R Changing the vehicle settings (Y page 139)
R Changing the auxiliary heating settings
(Y page 139) R
Changing the convenience settings
(Y pag e140)
R Restorin gthe factory settings (Y page 141)
Instrumen tcluster Selecting the uni
tofmeasurement for dis-
tance
The Display unit Speed-/odometer: Display unit Speed-/odometer: func-
tion allowsy ou to choose whether certain dis-
playsa ppear in kilometres or miles in the mul-
tifunction display.
You can determine whether the multifunction
display shows certain messages in miles or kil-
ometres.
X Press the =or; button on the steering
wheel to select the Settings Settingsmenu.
X Press the :or9 button to select the
Instrument cluster
Instrument cluster submenu.
X Press ato confirm.
X Press the :or9 button to select the
Display unit Speed-/odometer
Display unit Speed-/odometer function.
You will see the selected setting: km
kmorMiles
Miles.
X Press ato save the setting.
The selected unit of measurement for distance
applies to the following:
R digital speedometer in the Trip Tripmenu
R the total distance recorder and the trip meter
R trip computer
R current consumption and the range
R the navigation instruction sintheNavi
Navi menu
R ASSYST service interval display
Selecting permanent display You can determine whether the multifunction
displayp ermanently shows your speed or the
outside temperature.
X Press the =or; button on the steering
wheel to select the Settings
Settingsmenu.
X Press the :or9 button to select the
Instrument cluster
Instrument cluster submenu.
X Press ato confirm.
X Press the :or9 button to select the
Permanent display:
Permanent display: function.
You will see the selected setting: outside
outside
temperature
temperature orDig. speedo [mph]
Dig. speedo [mph].
X Press ato save the setting.
i The speed is displayed in mph. Menus and submenus
137On-boardcomputer and displays Z
Page 216 of 261

Note
sono illevel Depending on your drivin
gstyle ,the vehicle
consumes up to 0.8 litres of oi lper 1,000 km.
The oi lconsumption ma ybehighe rtha nt his
when the vehicl eisnew or if yo ufrequentl ydrive
at high engine speeds.
To check the oi llev el:
R park the vehicl eonalevel surface
R the engine shoul dbeswitched off for approx-
imatel yfivem inute sifthe engine is at normal
operating temperature
R if the engine is not at normal operating tem-
perature, e.g .ifthe engine wa sonlys tarted
briefly, wait approximately 30 minute sbefore
carrying out the measurement
Checking the oil level using the oil dip-
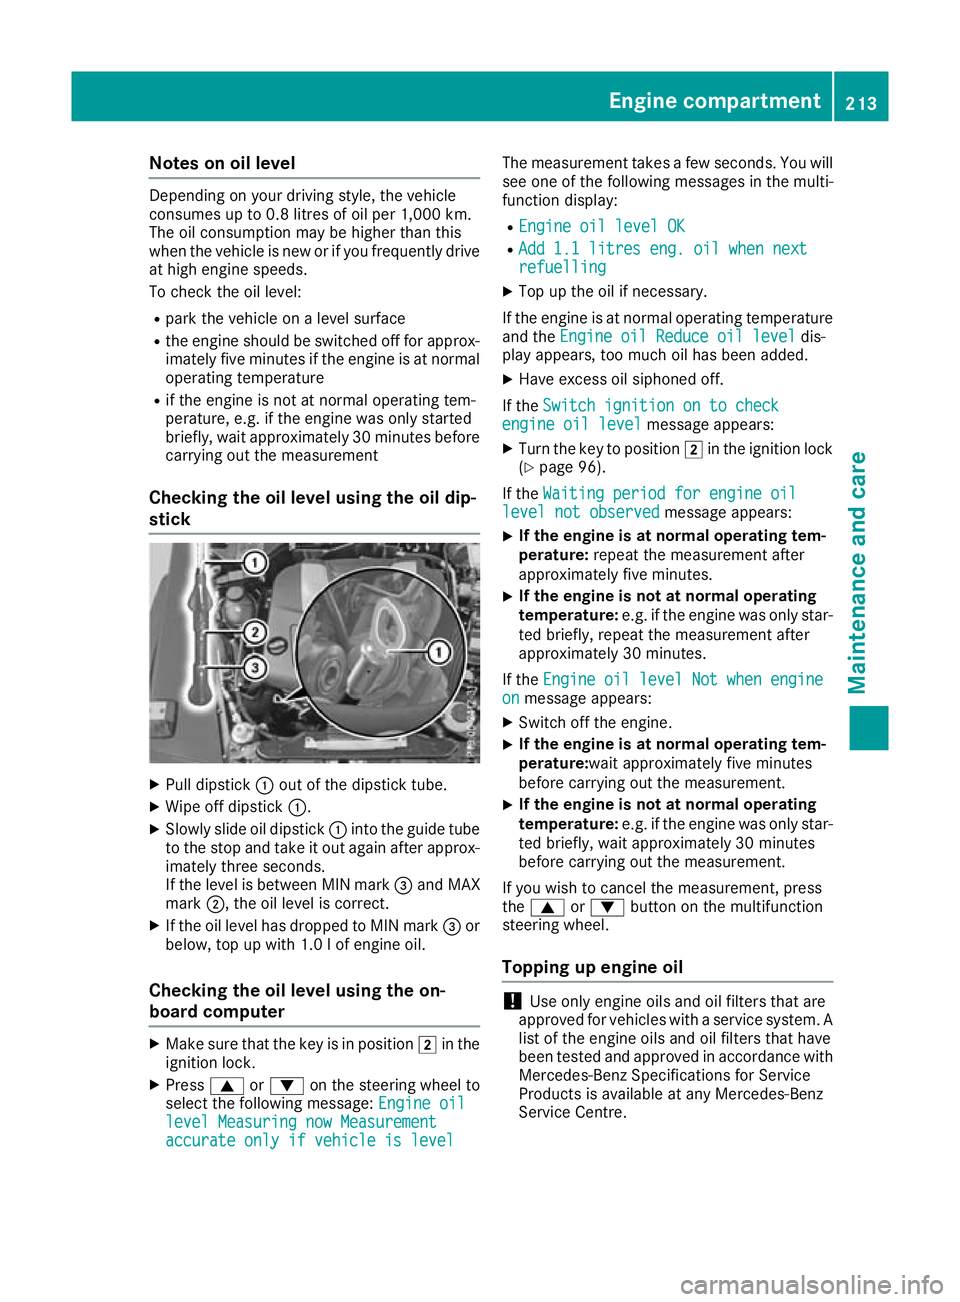
stick X
Pull dipstick :out of the dipstick tube.
X Wipe off dipstick :.
X Slowly slide oil dipstick :into the guide tube
to the stop and take it out again after approx- imately three seconds.
If the level is between MIN mark =and MAX
mark ;,the oil level is correct.
X If the oil level has dropped to MIN mark =or
below, top up with 1.0 lofe ngine oil.
Checking the oil level using the on-
board computer X
Make sure that the key is in position 2in the
ignition lock.
X Press 9or: on the steering wheel to
select the following message: Engine oil Engine oil
level Measuring now Measurement level Measuring now Measurement
accurate only if vehicle is level accurate only if vehicle is level The measurement takes
afew seconds. You will
see one of the following messages in the multi-
function display:
R Engine oil level OK Engine oil level OK
R Add 1.1 litres eng. oil when next
Add 1.1 litres eng. oil when next
refuelling refuelling
X Top up the oil if necessary.
If the engine is at normal operating temperature and the Engine oil Reduce oil level
Engine oil Reduce oil level dis-
play appears, too much oil has been added.
X Have excess oil siphoned off.
If the Switch ignition on to check
Switch ignition on to check
engine oil level
engine oil level message appears:
X Turn the key to position 2in the ignition lock
(Y page 96).
If the Waiting period for engine oil
Waiting period for engine oil
level not observed
level not observed message appears:
X If the engine is at normal operating tem-
perature:
repeat the measurement after
approximately five minutes.
X If the engine is not at normal operating
temperature:
e.g. if the engine was only star-
ted briefly, repeat the measurement after
approximately 30 minutes.
If the Engine oil level Not when engine Engine oil level Not when engine
on
on message appears:
X Switch off the engine.
X If the engine is at normal operating tem-
perature:wait approximately five minutes
before carrying out the measurement.
X If the engine is not at normal operating
temperature:
e.g. if the engine was only star-
ted briefly, wait approximately 30 minutes
before carrying out the measurement.
If you wish to cancel the measurement ,press
the 9 or: button on the multifunction
steering wheel.
Topping up engineo il !
Use only engine oils and oil filters that are
approved for vehicles with aservice system. A
list of the engine oils and oil filters that have
been tested and approved in accordance with
Mercedes-Benz Specifications for Service
Products is available at any Mercedes-Benz
Service Centre. Engine compartment
213Maintenance and care Z