2016 MERCEDES-BENZ G-CLASS SUV ESP
[x] Cancel search: ESPPage 81 of 261
Make sure that the interior lighting does not
remain switched on too long after the engine
has been switched off.
X To switch on: press thecsymbol on
switch B(Ypage 77).
X To switch off: move switchBto the centre
position (Y page 77).
Reading lamps X To switch on/off: press the respective p
button (Y page 77).
Rear interior lighting X To switch on/off: press thetbutton
(Y page 77).
i When you open
arear side door, the rear
interior lighting switches on. Then, you cannot
switch it off using the tbutton.
If you leave the front doors open for along
time, switch the rear interior lighting off. In
this way,y ou can avoid draining the battery.
Luggage compartment lighting X To switch on/off: press thetbutton
(Y page 77).
i If you open the rear door, the luggagec
om-
partment lighting switches on. Then, you can-
not switch it off using the tbutton.
If you leave the rear door open for along time,
switch the luggagec ompartmentlighting off.
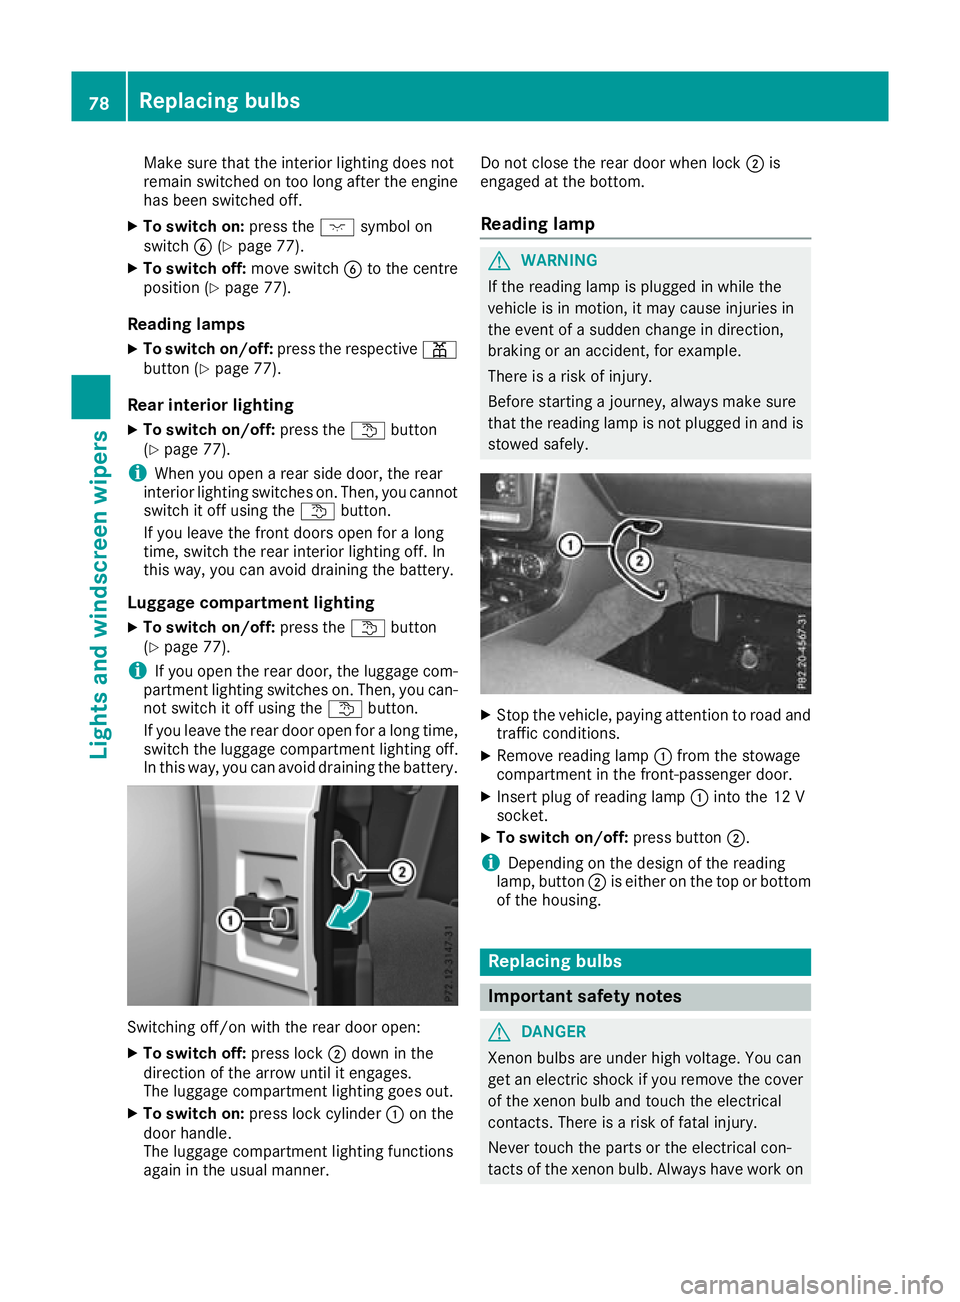
In this way,y ou can avoid draining the battery. Switching off/on with the rear door open:
X To switch off: press lock;down in the
direction of the arrow until it eng ages.
The luggage compartment lighting goe sout.
X To switc hon:press lock cylinder :on the
doo rhandle.
The luggage compartment lighting functions
agai nint he usua lmanner. Do not close the rea
rdoorw henlock ;is
engaged at the bottom.
Readin glamp G
WARNING
If the reading lamp is plugged in while the
vehicl eisinm otion, it may caus einjurie sin
the event of asudden change in direction,
braking or an accident, for example.
There is arisk of injury.
Before starting ajourney ,alwaysm ake sure
that the reading lamp is not plugged in and is stowed safely. X
Stop the vehicle, paying attentio ntoroada nd
traffic conditions.
X Remove reading lamp :from the stowage
compartment in the front-passenger door.
X Insert plug of reading lamp :into the 12 V
socket.
X To switc hon/off: press button ;.
i Depending on the desig
nofthe reading
lamp, button ;is either on the top or bottom
of the housing. Replacing bulbs
Importan
tsafety notes G
DANGER
Xenon bulbs are under high voltage. You can
get an electric shock if you remove th ecover
of th exenon bulb and touch th eelectrical
contacts. There is ariskoff atal injury.
Never touch th epartsort heelectrical con-
tacts of th exenon bulb. Always hav eworkon 78
Replacing bulbsLights
and windscreen wipers
Page 84 of 261
X
Turn the respective bulb anti-clockwise,
applying slight pressure, and pull it out of the
bulb holder.
X Insert the new bulb into the bulb holder and,
applying slight pressure, turn it clockwise
until it engages.
X Fit lens ;.
X Tighten screws :.
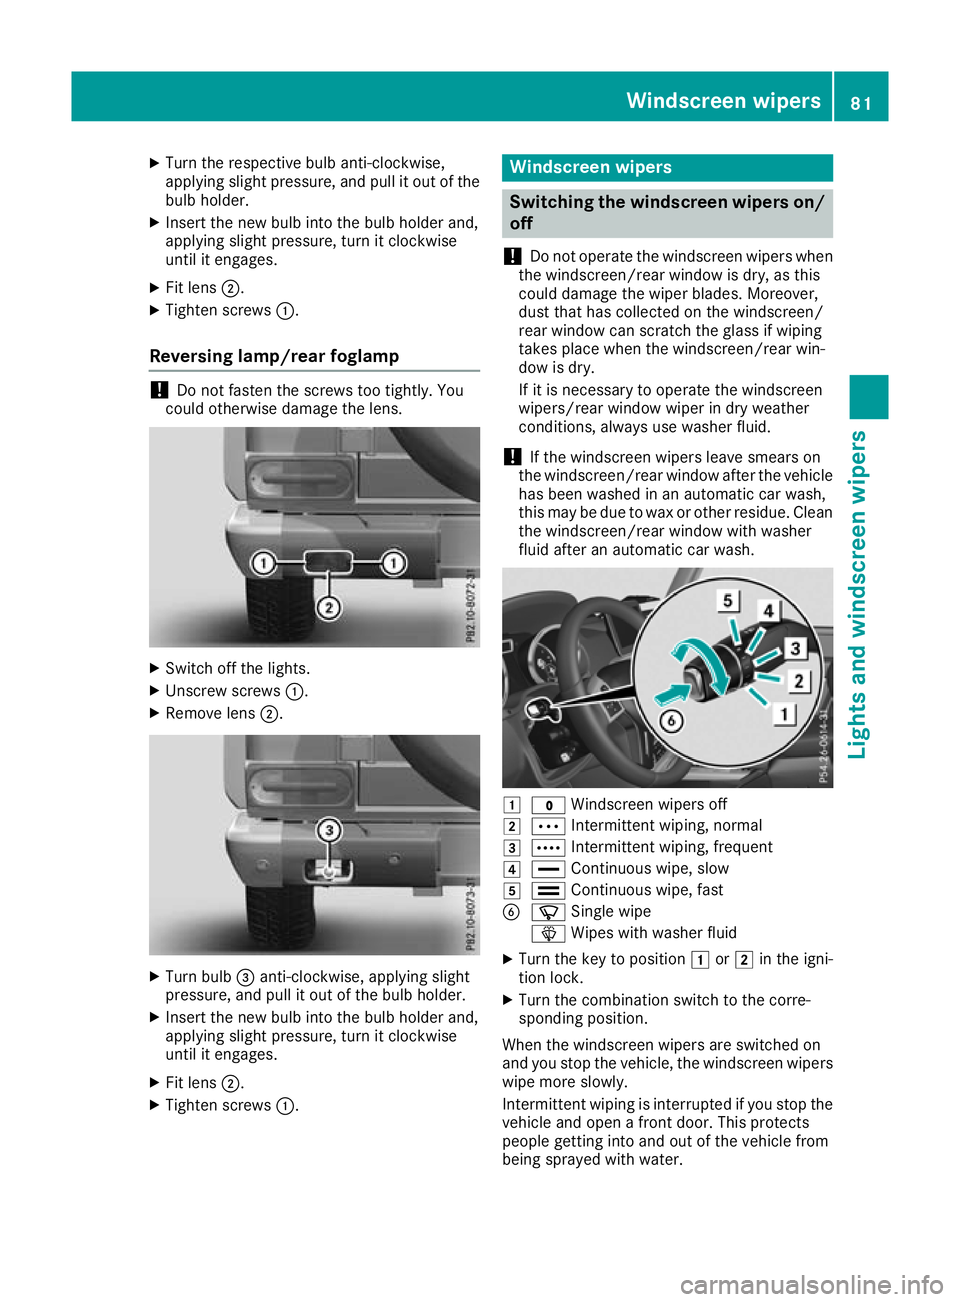
Reversing lamp/rear foglamp !
Do not fasten the screws too tightly. You
could otherwise damage the lens. X
Switch off the lights.
X Unscrew screws :.
X Remove lens ;. X
Turn bulb =anti-clockwise, applying slight
pressure, and pull it out of the bulb holder.
X Insert the new bulb into the bulb holder and,
applying slight pressure, turn it clockwise
until it engages.
X Fit lens ;.
X Tighten screws :. Windscreen wipers
Switching the windscreen wipers on/
off
! Do not operate the windscreen wipers when
the windscreen/rear window is dry, as this
could damage the wiper blades. Moreover,
dust that has collected on the windscreen/
rear window can scratc hthe glass if wiping
takes place when the windscreen/rear win-
dow is dry.
If it is necessary to operate the windscreen
wipers/rear window wiper in dry weather
conditions, always use washer fluid.
! If the windscreen wipers leave smears on
the windscreen/rear window after the vehicle has been washed in an automatic car wash,
this may be due to wax or other residue. Clean
the windscreen/rear window with washer
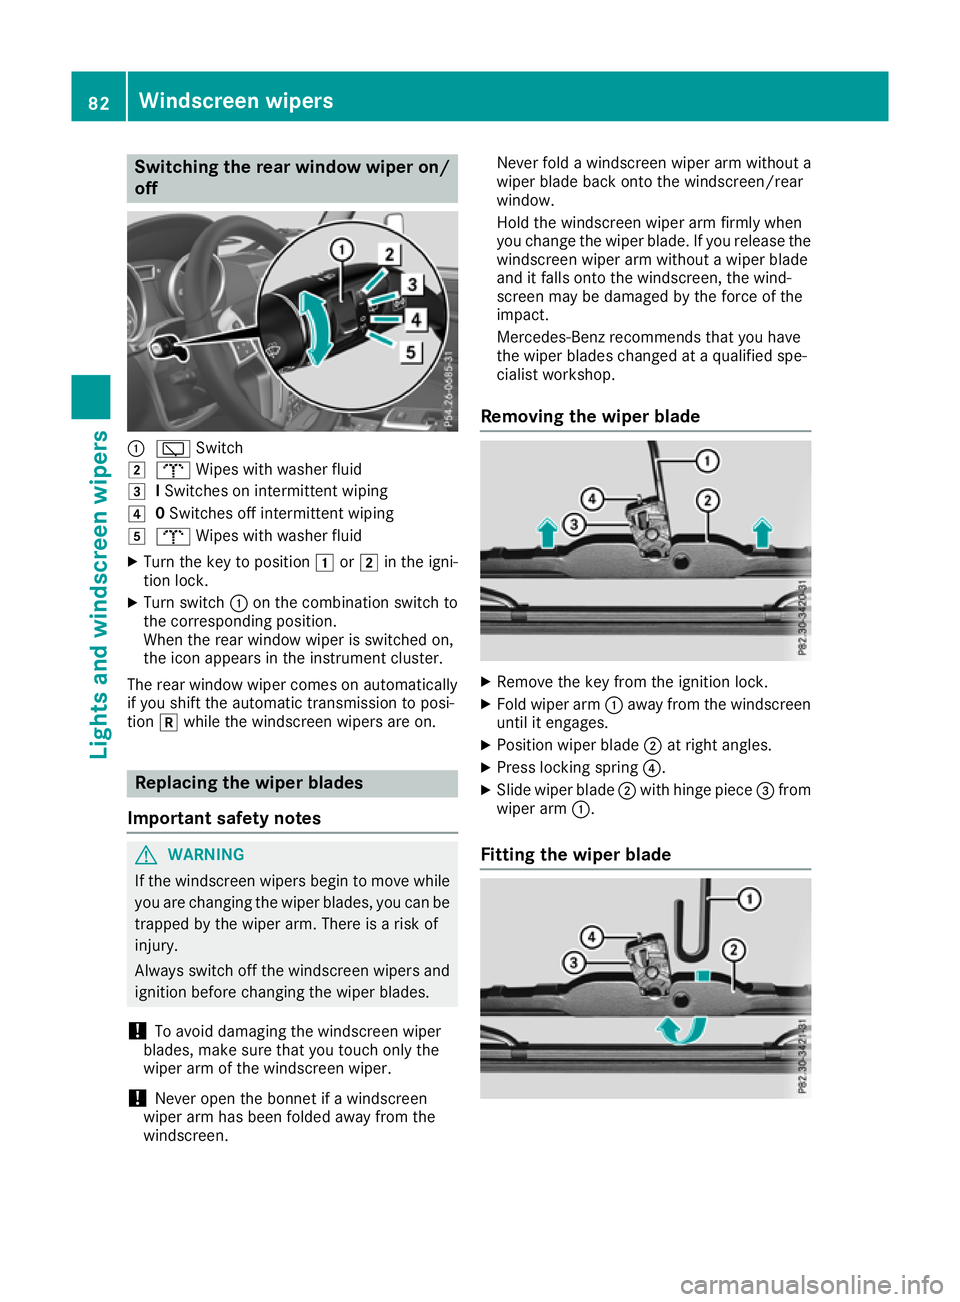
fluid after an automatic car wash. 1
$ Windscreen wipers off
2 Ä Intermittent wiping, normal
3 Å Intermittent wiping, frequent
4 ° Continuous wipe, slow
5 ¯ Continuous wipe, fast
B í Single wipe
î Wipes with washer fluid
X Turn the key to position 1or2 in the igni-
tion lock.
X Turn the combination switch to the corre-
sponding position.
When the windscreen wipers are switched on
and you stop the vehicle, the windscreen wipers
wipe more slowly.
Intermittent wiping is interrupted if you stop the
vehicle and open afron tdoor. This protects
people getting into and out of the vehicle from
being sprayed with water. Windscreen wipers
81Lightsand windscreen wipers Z
Page 85 of 261
Switching the rear window wiper on/
off :
è Switch
2 b Wipes with washer fluid
3 ISwitches on intermittent wiping
4 0Switches off intermittent wiping
5 b Wipes with washer fluid
X Turn the key to position 1or2 in the igni-
tio nlock.
X Turn switch :on the combination switch to
the corresponding position.
Whe nthe rea rwindow wiper is switched on,
the ico nappears in the instrument cluster.
The rea rwindow wiper come sonautomatically
if yo ushift the automatic transmissio ntoposi-
tion kwhil ethe windscreen wiper sare on. Replacing the wiper blades
Important safety notes G
WARNING
If the windscreen wipers begi ntomove while
you are changing the wiper blades, you can be trappe dbythe wiper arm. There is arisk of
injury.
Always switch off the windscreen wipers and
ignitio nbefore changing the wiper blades.
! To avoi
ddamaging the windscreen wiper
blades, make sure that you touch only the
wiper arm of the windscreen wiper.
! Never open the bonnet if
awindscreen
wiper arm has been folde dawayfrom the
windscreen. Never fold
awindscreen wipera rm withouta
wiperb ladeback onto the windscreen/rear
window.
Hold the windscreen wipera rm firmly when
you change the wiperb lade. If you release the
windscreen wipera rm withoutawiperblade
and it falls onto the windscreen, the wind-
screen may be damaged by the force of the
impact.
Mercedes-Benz recommends that you have
the wiperb lades changed at aqualifieds pe-
cialist workshop.
Removing the wiper blade X
Remove the key from the ignitio nlock.
X Fold wiper arm :away from th ewindscreen
until it engages.
X Position wiper blade ;at right angles.
X Press lockin gspring ?.
X Slide wiper blade ;withhinge piece =from
wiper arm :.
Fitting th ewiper blade 82
Windscreen wipersLight
sand windscreen wipers
Page 86 of 261
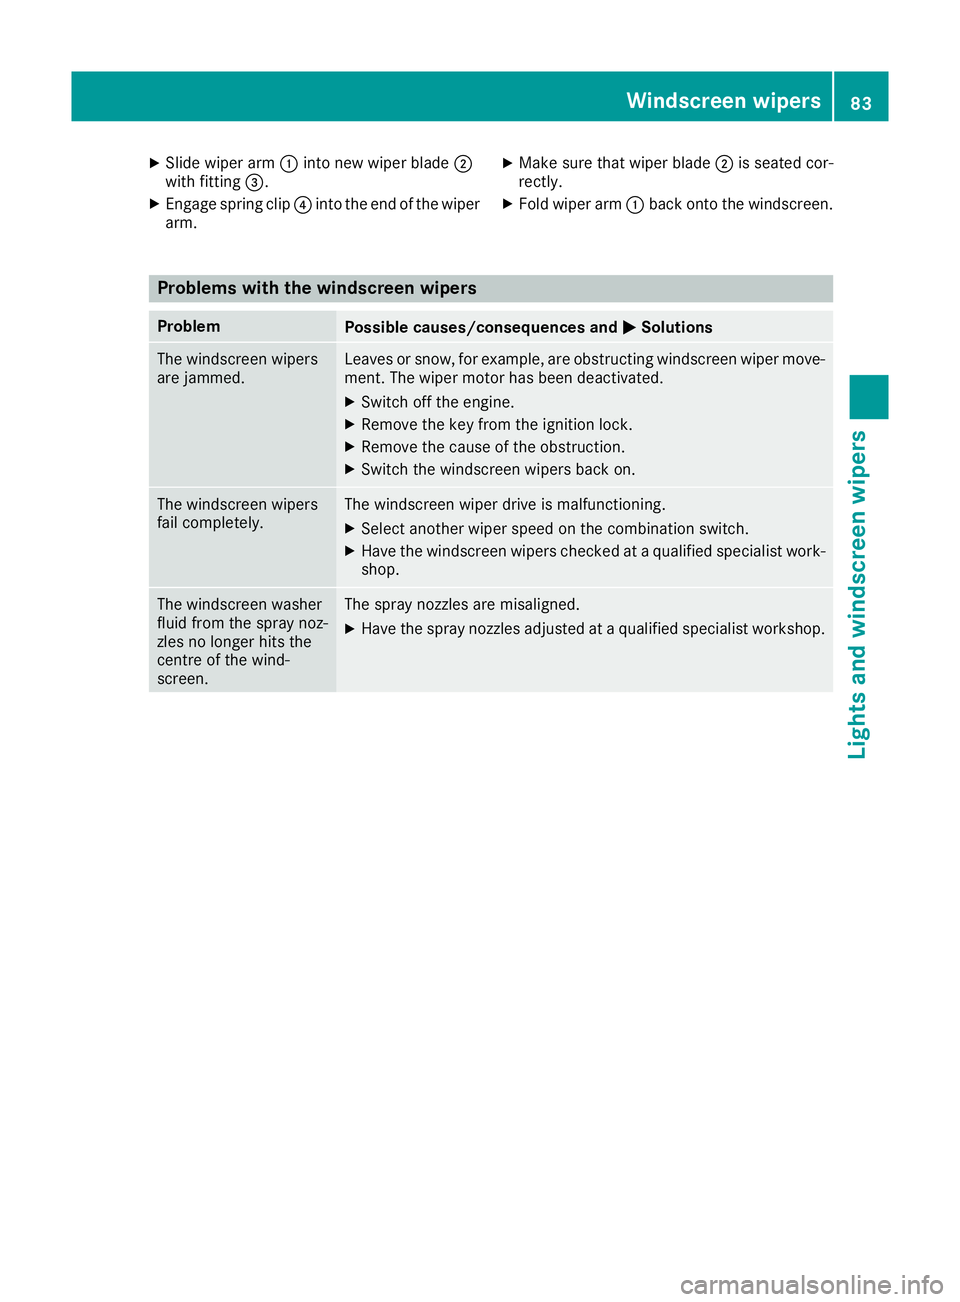
X
Slide wiper arm :into new wiper blade ;
with fitting =.
X Engag espring clip ?into the end of the wiper
arm. X
Mak esure that wiper blade ;is seated cor-
rectly.
X Fold wiper arm :back onto the windscreen. Problems with the windscreen wipers
Problem
Possible causes/consequences and
M
MSolutions The windscreen wipers
are jammed. Leaves or snow, for example, are obstructing windscreen wiper move-
ment. The wiper motor has been deactivated.
X Switch off the engine.
X Remove the key from the ignition lock.
X Remove the cause of the obstruction.
X Switch the windscreen wipers back on. The windscreen wipers
fail completely. The windscreen wiper drive is malfunctioning.
X Select another wiper speed on the combination switch.
X Have the windscreen wipers checked at aqualified specialist work-
shop. The windscreen washer
fluid from the spray noz-
zles no longer hits the
centre of the wind-
screen. The spray nozzles are misaligned.
X Have the spray nozzles adjusted at aqualified specialist workshop. Windscreenw
ipers
83Lightsand windscreen wipers Z
Page 92 of 261
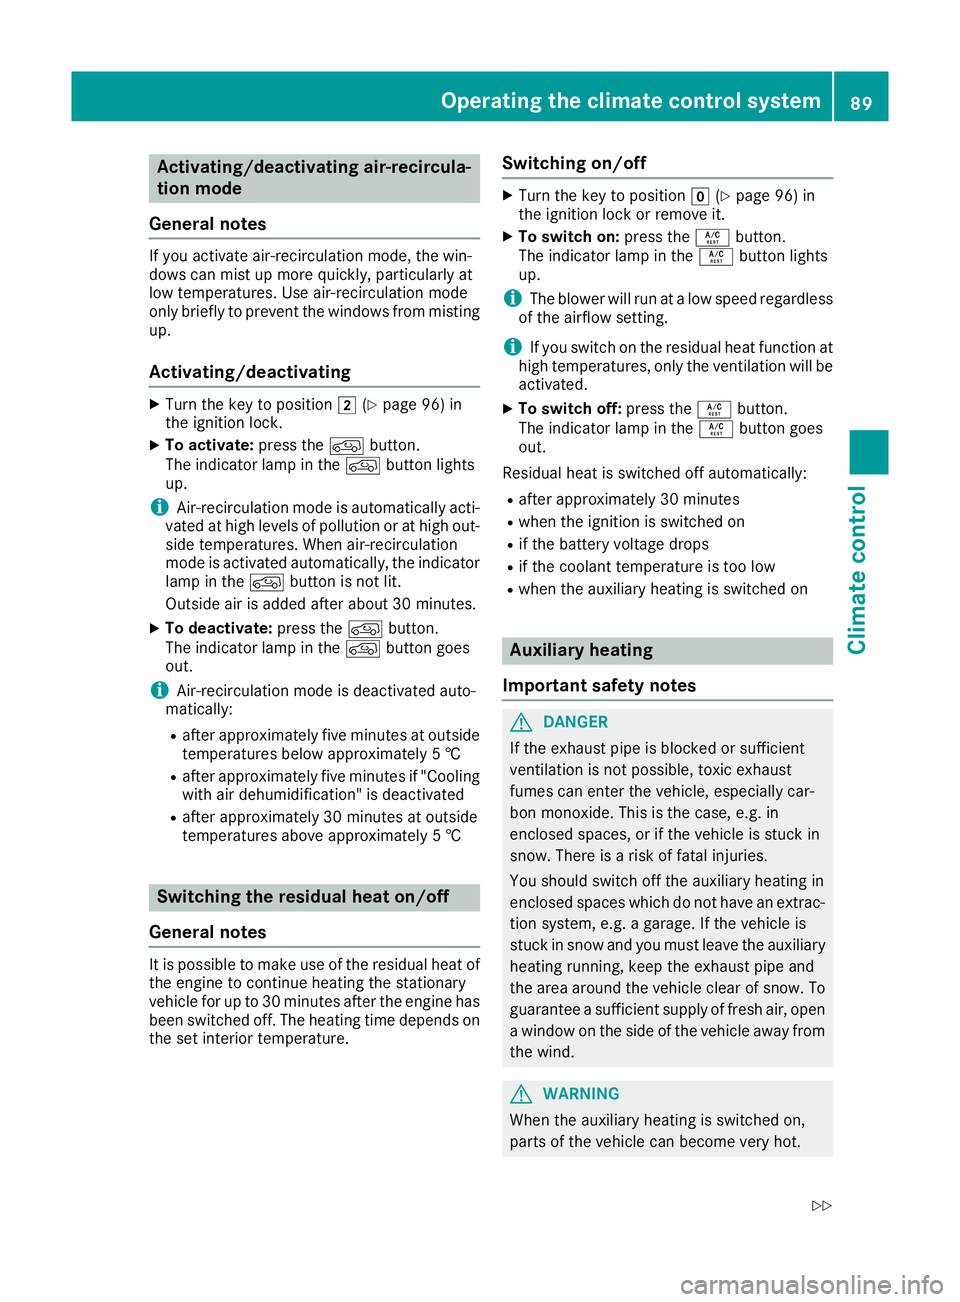
Activating/deactivating air-recircula-
tion mode
Genera lnotes If yo
uactivate air-recirculation mode, the win-
dows can mist up more quickly, particularly at
low temperatures. Use air-recirculation mode
only briefl ytoprevent the window sfrom misting
up.
Activating/deactivating X
Turn the key to position 2(Ypage 96) in
the ignition lock.
X To activa te:press the dbutton.
The indicator lamp in the dbutton lights
up.
i Air-recirculation mode is automatically acti-
vated at high levels of pollution or at high out-
side temperatures. When air-recirculation
mode is activated automatically, the indicator
lamp in the dbutton is not lit.
Outside air is added after about 30 minutes.
X To deactivate: press thedbutton.
The indicator lamp in the dbutton goes
out.
i Air-recirculation mode is deactivated auto-
matically:
R after approximately five minutes at outside
temperatures below approximately 5†
R after approximately five minutes if "Cooling
with air dehumidification" is deactivated
R after approximately 30 minutes at outside
temperatures above approximately 5†Switching the residual heat on/off
General notes It is possible to make use of the residual heat of
the engine to continue heating the stationary
vehicle for up to 30 minutes after the engine has
been switched off. The heating time depends on
the set interior temperature. Switching on/off X
Turn the key to position g(Ypage 96) in
the ignition lock or remove it.
X To switch on: press theÁbutton.
The indicator lamp in the Ábutton lights
up.
i The blower will run at
alow speed regardless
of the airflow setting.
i If you switch on the residual heat function at
high temperatures, only the ventilation will be
activated.
X To switch off: press theÁbutton.
The indicator lamp in the Ábutton goes
out.
Residua lheat is switched off automatically:
R after approximately 30 minutes
R when the ignition is switched on
R if the battery voltage drops
R if the coolant temperature is too low
R when the auxiliary heating is switched on Auxiliary heating
Important safety notes G
DAN
GER
If th eexhaust pipe is blocke dorsufficient
ventilation is no tpossible, toxic exhaust
fumes can ente rthe vehicle, especially car-
bon monoxide. This is th ecase, e.g. in
enclosed spaces, or if th evehicl eiss tuck in
snow. There is ariskoff atal injuries.
You should switch off th eauxiliary heating in
enclosed spaces whic hdonothav eane xtrac-
tion system, e.g. agarage. If th evehicl eis
stuck in snow and you mus tleav ethe auxiliary
heating running, keep th eexhaust pipe and
th ea rea around th evehicl eclear of snow. To
guarantee asufficien tsupply of fresh air, open
aw indow on th eside of th evehicl eaway from
th ew ind. G
WARNING
When th eauxiliary heating is switched on,
parts of the vehicl ecan become very hot. Operating the climate control system
89Climate control
Z
Page 95 of 261
appear
sontheremot econtrol display and the
runnin gtimeisz erom inutes.
Settin gthe departure time
Mak esure that th etimes et in th evehicle is
correc tbefore settin gthe departur etime.O th-
erwise, th eauxiliary heating may activat eatthe
wron gtimea nd at an unsuitable location. When
settin gthe departur etime, also observ ethe
important safety note s(Ypage 89).
X Briefly pres sthe u button.
X Pres sthe , or. button repeatedly
until th etimetobec hanged appear sonthe
display.
X Pres sthe u and^ button satthesame
time.
The Îsymbo lontheremot econtrol display
flashes.
X Pres sthe , or. button to set the
desired departur etime.
i The longer you pres
sthe , or. but-
ton, th efaster th etimec hanges.
X Pres sthe u and^ button satthesame
time.
The new departur etimeiss tored.
Activating th eset departure time
X Briefly pres sthe u button.
X Pres sthe , or. button repeatedly
until th edesired departur etimea ppear son
th ed isplay.
X Pres sthe u button.
The Ísymbol, th edepartur etimea nd,
dependin gontheselecte ddepartur etime,
th el etter A, BorCappear sonthedisplay.
Deactivatin gthe set departure time
X Briefly pres sthe u button.
The status of th eauxiliary heating is show non
th ed isplay.
X Pres sthe . button.
The first departur etim es toreda ppear sonthe
display.
X Pres sthe ^ button.
OFF is show nontheremot econtrol display. Replacing th
ebatterie sinthe remote
control Importan
tsafety notes G
WARNING
Batterie scontain toxic and corrosive substan-
ces. If batterie sare swallowed,itc an result in
severe health problems. There is arisk of fatal
injury.
Keep batterie sout of the reach of children. If
ab attery is swallowed,s eek medical attention
immediately. H
Environmental note Batteries contain pollutants.
It is illegal to dispose of them
with the household rubbish.
They must be collected sep-
arately and disposed of in anenvironmentall yresponsible
recycling system. Dispose of batteries in an
environmentall
yresponsible
manner. Take discharged
batteries to aquali fied spe-
cialist workshop or to acol-
lectio npoint for used batter-
ies.
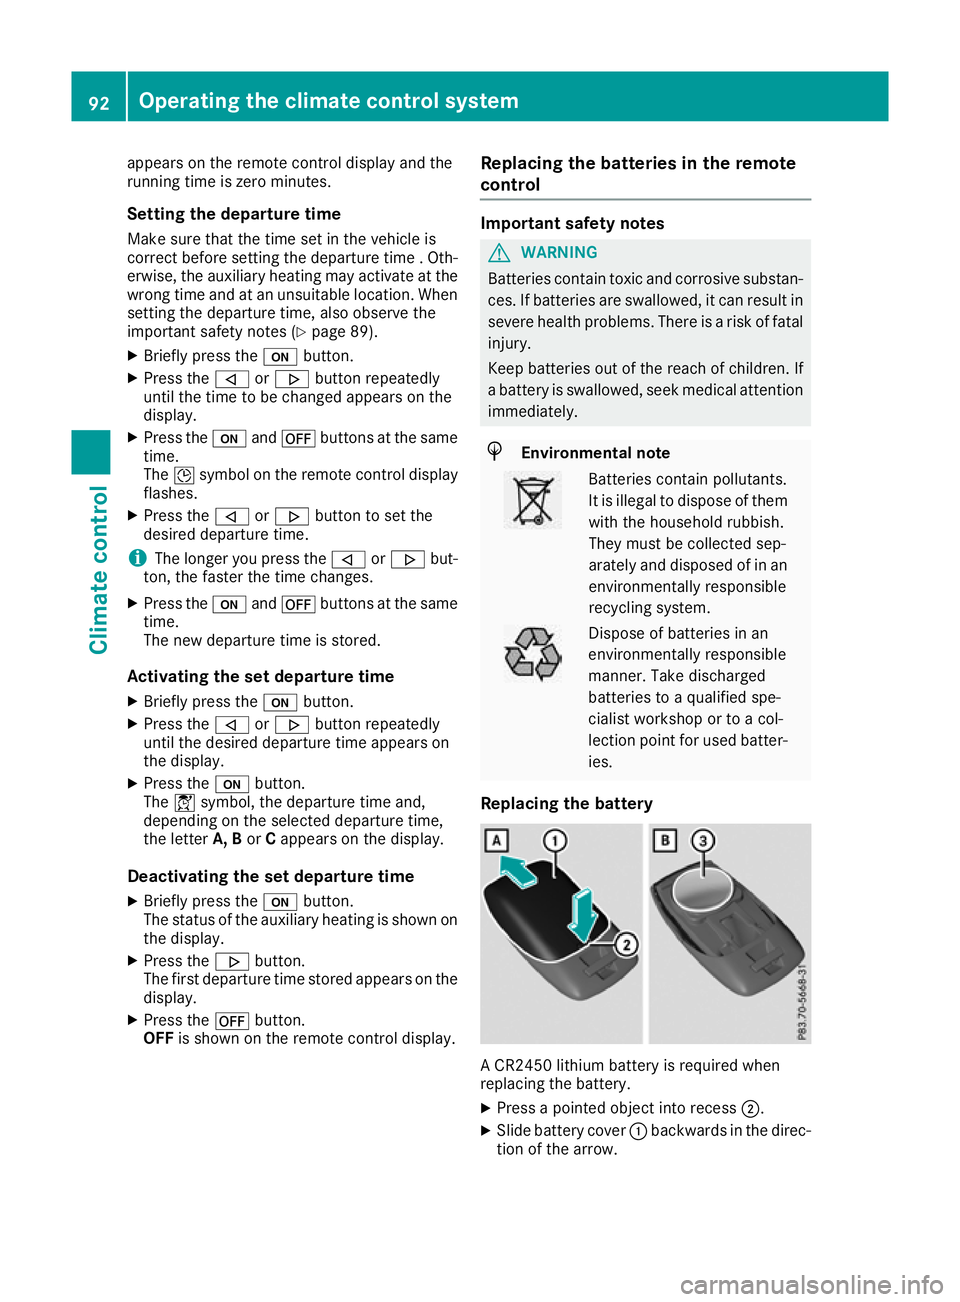
Replacin gthe battery AC
R2450 lithium battery is required when
replacing the battery.
X Press apointe dobject into recess ;.
X Slide battery cover :backwards in the direc-
tio noft he arrow. 92
Operatin
gthe climat econtrol systemClimat econt rol
Page 97 of 261
uncomfortable due to drafts
,procee dasfol-
lows:
XOpen th eside air vents.
X Open th ecentr eair vents.
X Open th erear air vents.
X Set th etem perature to 22 †.
The automatic climate control adjust sto
th es et temperature. Adjusting th
eair vents
Air vents are located: R on th elefta nd right-hand side of th edash-
board
R in th emiddle of th edashboard
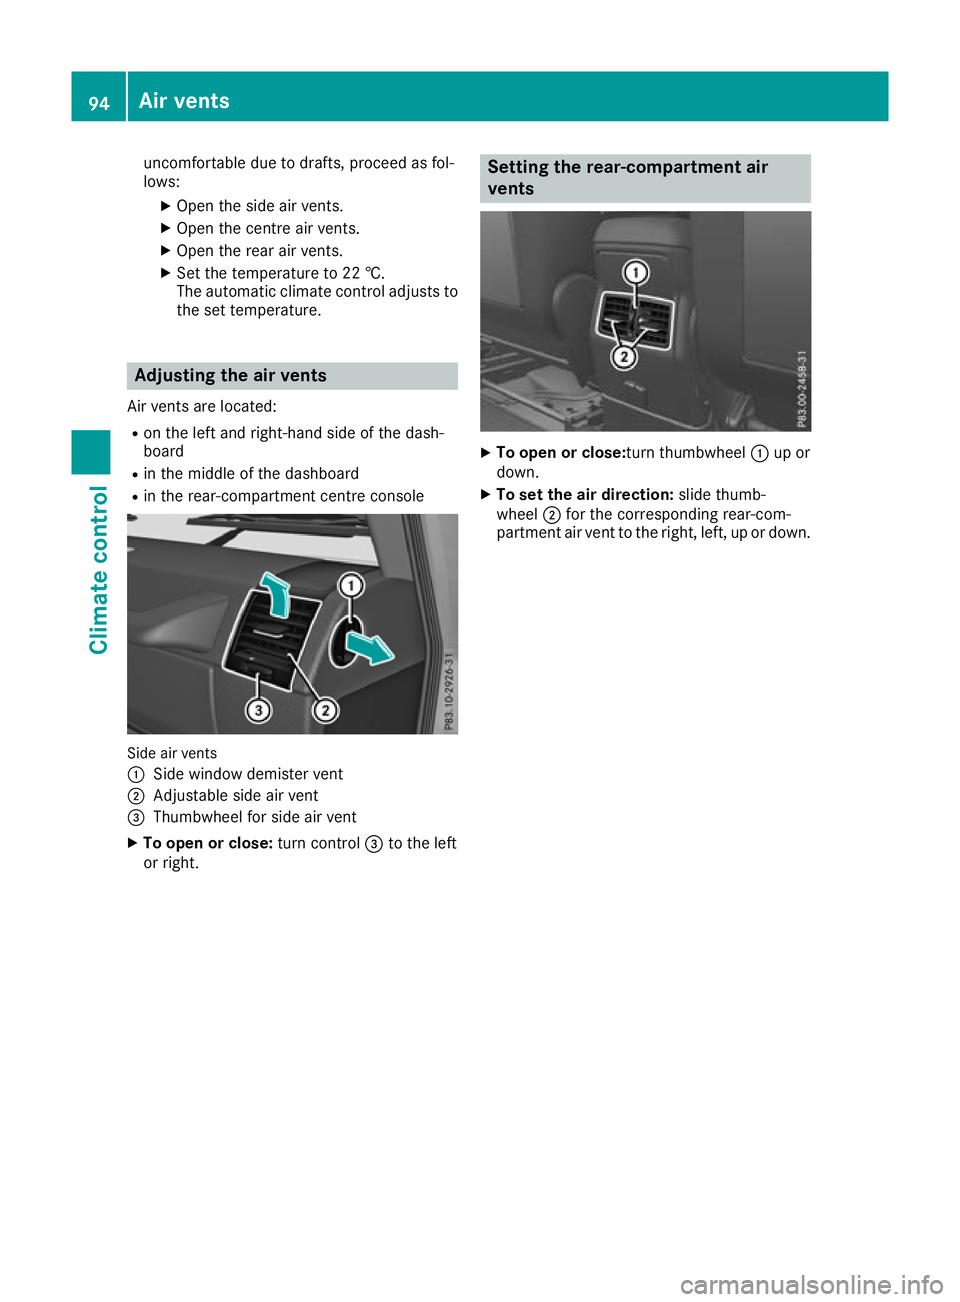
R in th erear-compartmen tcentre console Side air vents
:
Side windo wdemiste rvent
; Adjustable sid eairvent
= Thumbwhee lfor sid eairvent
X To ope norclose:turn control =to the left
or right. Settin
gthe rear-compartment air
vents X
To open or close:tur nthumbwheel :up or
down.
X To se tthe air direction: slidethumb-
wheel ;for the corresponding rear-com-
partment ai rvent to the right, left, up or down. 94
Airv
entsClimat econt rol
Page 98 of 261

Running-i
nnotes Importan
tsafety notes
In certain driving and driving safet ysystems ,the
sensor sadjust automatically while acertai ndis-
tance is bein gdriven after th evehicl ehas been
delivere dorafter repairs .Full system effective-
ness is no treached until th eend of this teach-in
process.
Brake pads/lining sand disc stha teither are new
or have been replace dachiev eoptimum braking
effec tonlya fter several hundre dkilometres of
driving .Compensat efor th ereduce dbraking
effec tbya pplyin ggreate rforce to th ebrake
pedal. Th
ef irs t1 500km
The mor eyou trea tthe engine with sufficient
car eatt he start, the mor esatisfie dyou will be
with the engine performance later on.
R Driv eatv aryingvehicl espeeds and engine
speeds for the first 1500 km
R Avoi doverstraining the vehicl eduringt his
period, e.g .drivin gatf ullt hrottle
R When shifting gear smanually, shift up in good
time ,befor et he rev counter needl ereaches
Ô of the wa ytothe red area of the rev counter
display
R Do not shift down agearm anuall yino rder to
brake
R Try to avoi ddepressing the accelerator pedal
beyond the pressure point (kickdown)
After 1500 km ,you maygradually bring the
vehicl euptof ullr oa da nd engine speeds.
Yo us houl dalsoo bserve these note sonrunning-
in if the engine or parts of the drive train on your vehicl ehaveb eenr eplaced.
Alway sobserve the maximum permissible
speed. Driving
Importan
tsafety notes G
WARNING
Objectsint he driver's footwel lcan impede
peda ltravel or block apeda lwhich is depressed. This jeopardises safe operatio
nof
the vehicle. There is arisk of an accident.
Stow all objects in the vehicle safely, so that
they cannot reach the driver' sfootwell. Make
sure the floormat sand carpet sare properly
secured so that they cannot slip and obstruct the pedals. Do not lay several floormat sor
carpet sontop of one another. G
WARNING
Unsuitable footwear can hinder correct usage of the pedals, e.g.:
R shoe swith thick soles
R shoes with high heels
R slippers
There is arisk of an accident.
Wears uitable footwea rtoensure correct
usage of the pedals. G
WARNING
If you switch off the ignitio nwhile driving,
safety-relevant functions are only available
with limitations, or not at all.T his couldaffect,
for example, the power steering and the brake
boosting effect. You willr equire considerably
more effort to steer and brake. There is arisk
of an accident.
Do not switch off the ignitio nwhile driving. G
WARNING
If the parking brake has not been fully
released when driving, the parking brake can:
R overheat and caus eafire
R lose its hold function.
There is arisk of fire and an accident. Release
the parking brake full ybefore driving off.
! Warm up the engine quickly. Do not use the
engine's full performance until it has reached operating temperature.
Only set the automatic transmission to the
respective drive positions when the vehicl eis
stationary.
Where possible,a voids pinning the drive
wheels when pulling awayons lippery roads.
Otherwise, you coul ddamage the drive train. Driving
95Drivingand parking Z