2016 MERCEDES-BENZ G-CLASS SUV reset
[x] Cancel search: resetPage 179 of 261

X
Press the PHONE button.
X Select O.
X Select BT name
BT name.
X Enter the desired Bluetooth ®
name.
X To save aBluetooth ®
name: selectOK
OK.
X To delete individua lcharacters: select
¨.
X To switch to number entry: selectG.
i The new Bluetooth ®
name of the multimedia
system does not appear on the Bluetooth ®
devices that have already been paired. In
order for the new Bluetooth ®
name to appear,
Bluetooth ®
devices already paired must be
unpaired (Y page 175). In addition, the mul-
timedia system must be deleted from the list
of paired devices on the Bluetooth ®
device
(see the manufacturer's operating instruc-
tions). The Bluetooth ®
device must then be
paired once more (Y page 174).Radio
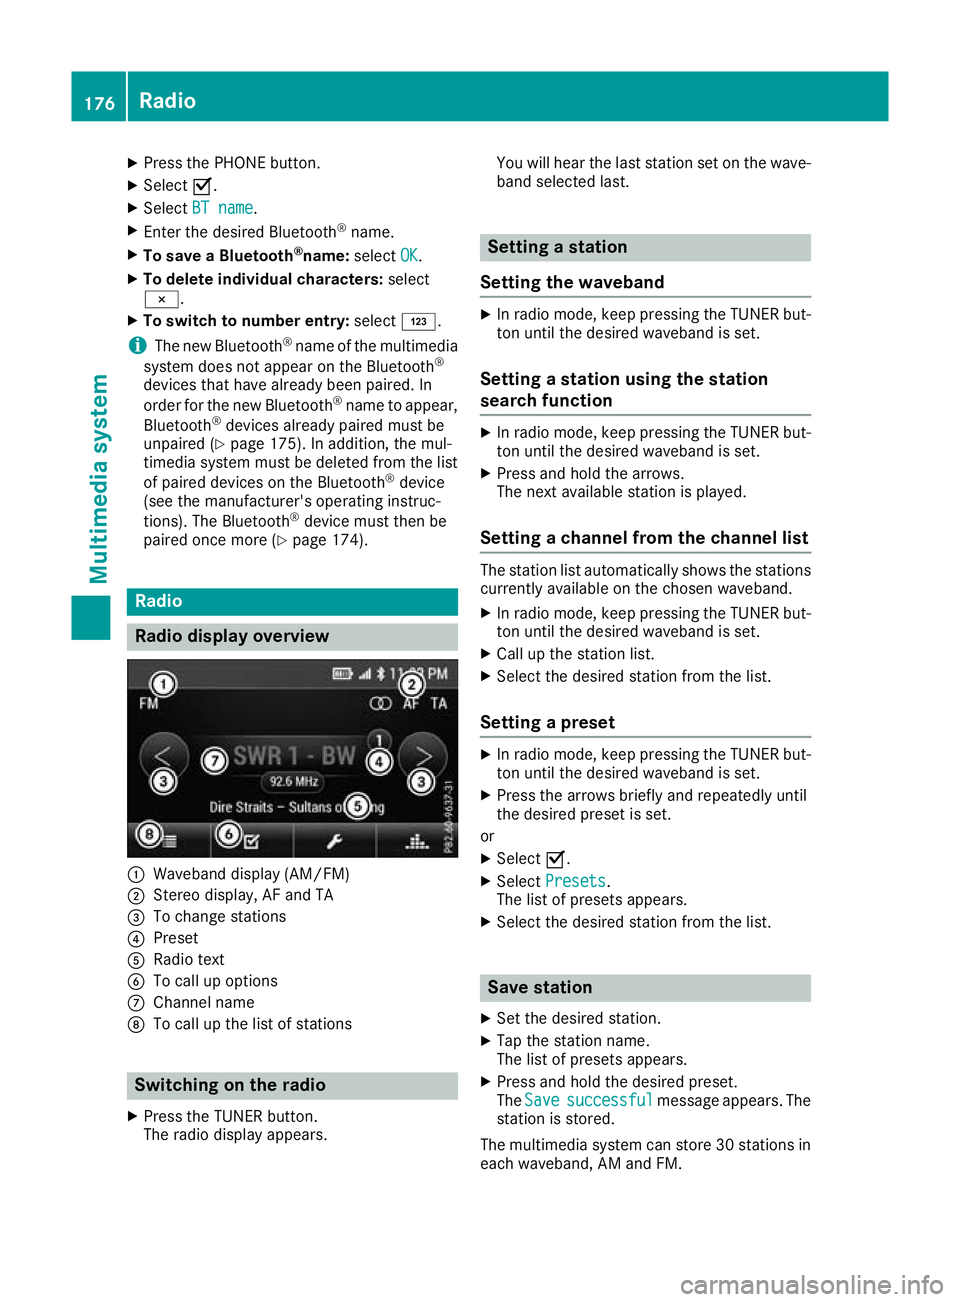
Radio display overv
iew:
Waveband display (AM/FM)
; Stereo display, AF and TA
= To change stations
? Preset
A Radio text
B To call up options
C Channel name
D To call up the list of stations Switching on the radio
X Press the TUNER button.
The radio display appears. You will hear the last station set on the wave-
band selected last. Setting
astation
Setting the waveband X
In radio mode, keep pressin gthe TUNER but-
ton until the desire dwaveband is set.
Setting astation using the station
search function X
In radiom ode, keep pressing the TUNER but-
ton until the desire dwaveband is set.
X Press and hold the arrows.
The next available station is played.
Setting achanne lfrom the channell ist The statio
nlist automatically shows the stations
currently availabl eonthe chosen waveband.
X In radio mode, keep pressing the TUNER but-
ton until the desired waveband is set.
X Call up the station list.
X Select the desired station from the list.
Setting apreset X
In radio mode, keep pressing the TUNER but-
ton until the desired waveband is set.
X Press the arrows briefly and repeatedly until
the desired preset is set.
or X Select O.
X Select Presets Presets.
The list of preset sappears.
X Select the desire dstation from the list. Save station
X Set the desired station.
X Tap the station name.
The list of presets appears.
X Press and hold the desired preset.
The Save Save successful
successful message appears. The
station is stored.
The multimedia system can store 30 stations in each waveband,A Mand FM. 176
RadioMultimedia system
Page 186 of 261

X
Enter the desired house numbe rorcrossing
street.
The results list appear sbelow the input line.
X To complete the address entry: select the
address in the results list.
The location is shown on the map.
X Select Select as Destination Select as Destination.
The route is being calculated.
X To start rout eguidance: selectStart
Start Nav‐
Nav‐
igation
igation.
Selecting adestinatio nfromp oints of
interest (POI) X
Pres sthe NAVI button.
The main menu appears.
X Select New Route
New Route.
X Select Places
Places.
Al ist with preset categories appears.
X Select the desired category.
Al ist of points of interest appears.
or X Select Search by Name or Category Search by Name or Category.
X Select Around Here
Around Here.
X Select the area in which the point of interest is
to be found.
If ad estination is selected, Along AlongRoute
Routeand
Around Destination
Around Destination can be selected.
X IfIn aTown
In aTown has been selected: enter the
town.
X Select the desired main category.
X Select the desired subcategory.
Al ist of points of interest appears.
X Select the desired POI.
The location is shown on the map.
X Select Select as Destination Select as Destination.
The route is being calculated.
X To start route guidance: selectStart
Start Nav‐
Nav‐
igation
igation.
Selecting adestination from the desti-
nation memory At least one location must be saved in "Saved
Loc ation".
X Press the NAVI button.
The main menu appears.
X Select New Route
New Route.
X Select Saved Location
Saved Location.
The list of saved locations appears. or
X Select ★.
The lis tofsaved locations appears.
X Select the desired location.
The location is shown on the map.
X Select Select as Destination Select as Destination.
The route is being calculated.
X To startr oute guidance: selectStart Start Nav‐
Nav‐
igation
igation.
Selecting adestination from the list of
last destinations X
Press the NAVI button.
The main menu appears.
X Select New Route
New Route.
X Select Last Destinations Last Destinations.
The list of your last destinations appears.
X Select the desired destination.
The location is shown on the map.
X Select Select as Destination Select as Destination.
The route is being calculated.
X To startr outeguidance: selectStart
Start Nav‐
Nav‐
igation
igation.
Selecting adestination from the saved
routes Requirement
:atleast on erout em ustbes aved
in "Saved Routes".
X Press th eNAVIbutton.
The main men uappears.
X Select New Route
New Route.
X Select Saved Routes
Saved Routes .
The list of saved routes appears.
X Selec tthe desired route.
The rout elist appears.
X To star troute calculation:select Calcu‐
Calcu‐
lat eR oute
lat eR oute.
X To star troute guidance: selectStart
Start Nav‐
Nav‐
igation
igation.
Entering adestination using coordi-
nates X
Pres sthe NAVI button.
The main menu appears.
X Select New Route
New Route.
X Select Coordinates
Coordinates.
X Enter the desired latitude. Navigati
on
183Multimedi asystem Z
Page 234 of 261

X
When the vehicle is stationary, depress the
brake pedal and keep it depressed.
X Shift the transfer case to position Neutral
(Y page 125).
X Shift the automatic transmission to position
N.
X Leave the key in position 2in the ignition
lock.
X Release the brake pedal.
X Release the parking brake.
X Switc hont he hazard warning lamps
(Y page 76).
In order to signal achange of direction when
towing the vehicle with the hazard warning
lamps switched on, use the combination switch
as usual. In this case, only the turn signals for
the desired direction flash. When you reset the
combination switch, the hazard warning lamps
start flashing again.
i The automatic transmission can only
change gear when the batter yhas sufficient
charge.
If you cannot shift the automatic transmission
to position N,the propeller shafts to the
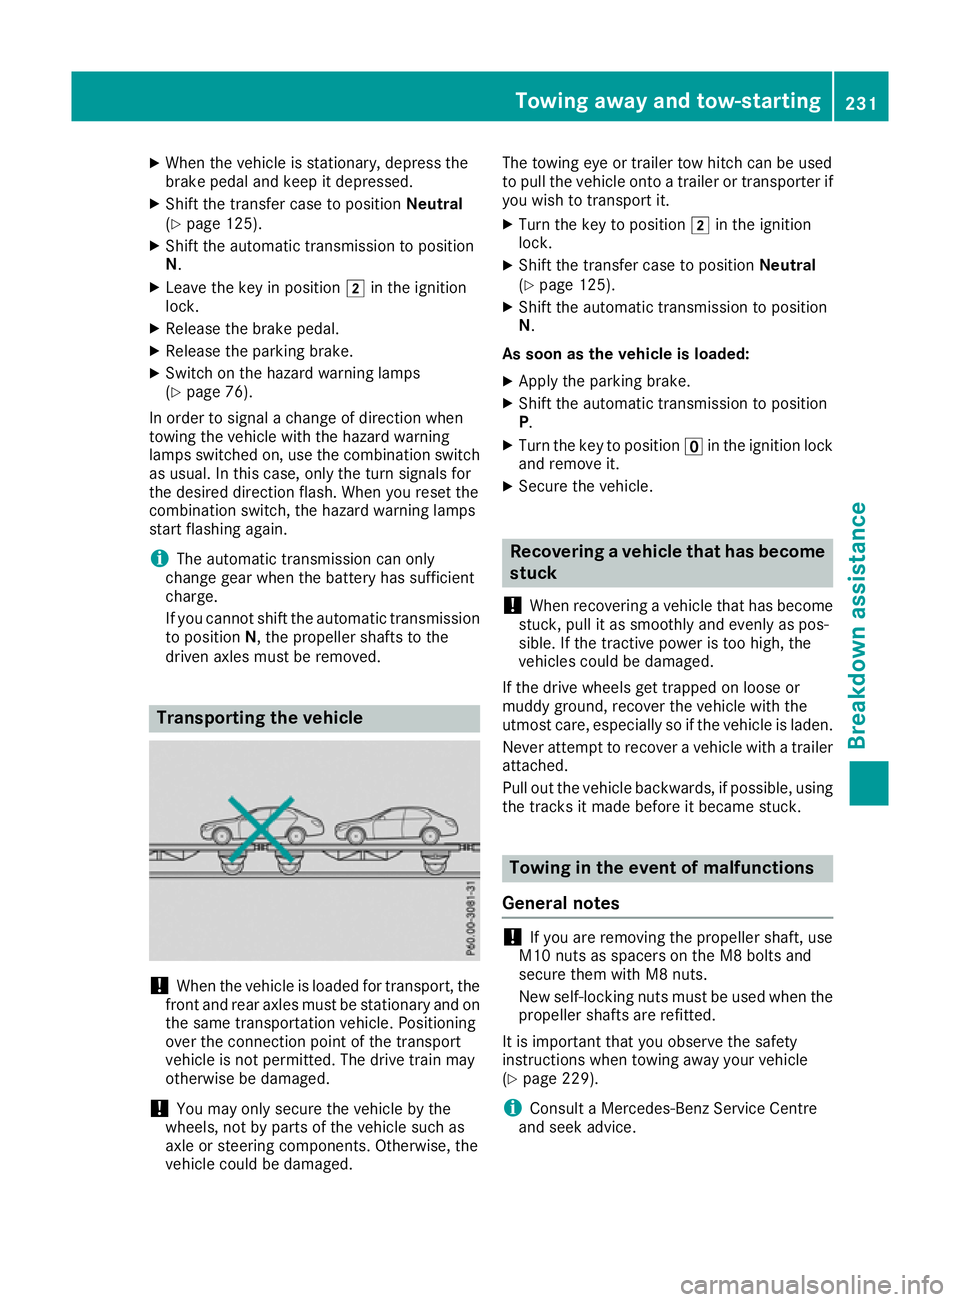
driven axles must be removed. Transporting thev
ehicle !
Whe
nthe vehicle is loadedf or transport, the
front and rear axles must be stationary and on the same transportation vehicle. Positioning
over the connection point of the transport
vehicle is not permitted. The drive train may
otherwise be damaged.
! You may only secure the vehicle by the
wheels, not by parts of the vehicle such as
axle or steering components. Otherwise, the
vehicle could be damaged. The towing eye or trailer tow hitch can be used
to pull the vehicle onto
atrailer or transporter if
you wish to transport it.
X Turn the key to position 2in the ignition
lock.
X Shift the transfer case to position Neutral
(Y page 125).
X Shift the automatic transmission to position
N.
As soon as the vehicle is loaded:
X Apply the parking brake.
X Shift the automatic transmission to position
P.
X Turn the key to position uin the ignition lock
and remove it.
X Secure the vehicle. Recovering
avehicle that has become
stuck
! Whe
nrecovering avehicl ethat ha sbecome
stuck, pull it as smoothly and evenly as pos-
sible .Ifthe tractive power is too high, the
vehicles could be damaged.
If the drive wheel sget trapped on loose or
muddy ground ,recover the vehicl ewitht he
utmost care ,especially so if the vehicl eisladen.
Neve rattempt to recover avehicl ewithat railer
attached.
Pull ou tthe vehicl ebackwards ,ifpossible ,using
the tracks it mad ebefore it became stuck. Towin
ginthe even tofm alfunctions
General notes !
If you are removing the propelle
rshaft, use
M10 nuts as spacers on the M8 bolts and
secure them with M8 nuts.
New self-locking nuts must be used when the propellers hafts are refitted.
It is important that you observe the safety
instructionsw hen towing awayy our vehicle
(Y page 229).
i Consult
aMercedes-Benz Service Centre
and seek advice. To
wing away and tow-starting
231Breakdown assis tance Z