2016 MERCEDES-BENZ G-Class warning light
[x] Cancel search: warning lightPage 108 of 302

XTurn the SmartKey to position2(Ypage 112)
in the ignition lock.
XTo activate: press the¬button.
The indicator lamp in the ¬button lights
up.
The climate control system switches to the
following functions:
Rcooling with air dehumidification (only with
engine running)
Rhigh airflow (depending on the outside tem-
perature)
Rhigh temperature (depending on the out-
side temperature)
Rair distribution to the windshield and front
side windows
Rair-recirculation mode off
XTo deactivate: press the¬button.
The indicator lamp in the ¬button goes
out. The previously selected settings are
restored. The cooling with air dehumidifica-
tion function remains on. Air-recirculation
mode remains deactivated.
or
XPress the Ãbutton.
The indicator lamp in the ¬button goes
out. Airflow and air distribution are set to
automatic mode.
or
XTurn controls :orB clockwise or counter-
clockwise (Ypage 100).
or
XPress the KorI button.
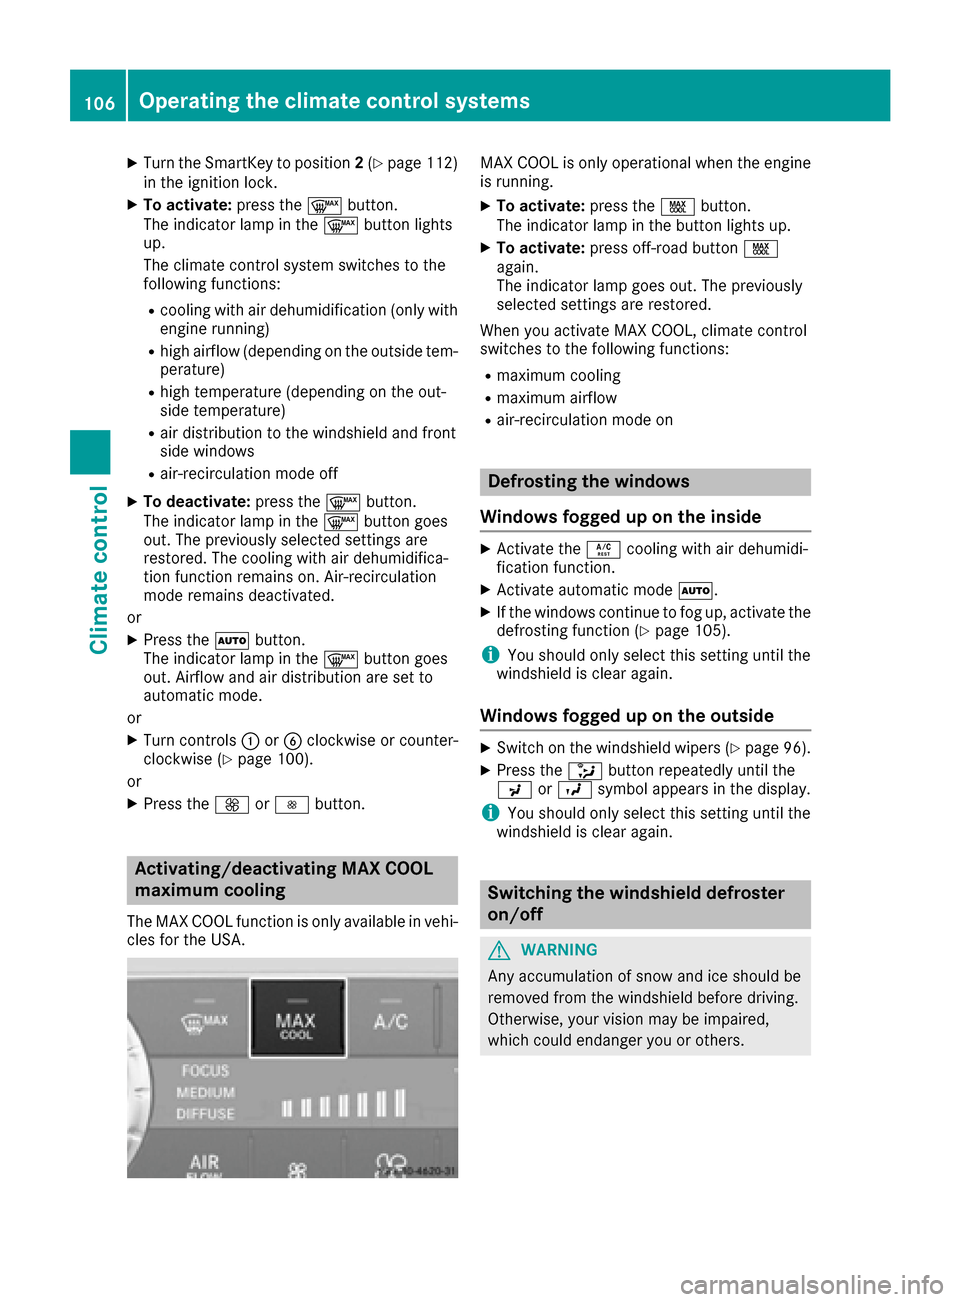
Activating/deactivating MAX COOL
maximum cooling
The MAX COOL function is only available in vehi-
cles for the USA.
MAX COOL is only operational when the engine
is running.
XTo activate: press theÙbutton.
The indicator lamp in the button lights up.
XTo activate: press off-road button Ù
again.
The indicator lamp goes out. The previously
selected settings are restored.
When you activate MAX COOL, climate control
switches to the following functions:
Rmaximum cooling
Rmaximum airflow
Rair-recirculation mode on
Defrosting the windows
Windows fogged up on the inside
XActivate the Ácooling with air dehumidi-
fication function.
XActivate automatic mode Ã.
XIf the windows continue to fog up, activate the
defrosting function (Ypage 105).
iYou should only select this setting until the
windshield is clear again.
Windows fogged up on the outside
XSwitch on the windshield wipers (Ypage 96).
XPress the _button repeatedly until the
P orO symbol appears in the display.
iYou should only select this setting until the
windshield is clear again.
Switching the windshield defroster
on/off
GWARNING
Any accumulation of snow and ice should be
removed from the windshield before driving.
Otherwise, your vision may be impaired,
which could endanger you or others.
106Operating the climate control systems
Climate control
Page 110 of 302

XTo deactivate:press thedbutton.
The indicator lamp in the dbutton goes
out.
iAir-recirculation mode switches off auto-
matically:
Rafter approximately five minutes at outside
temperatures below approximately 41 ‡
Rafter approximately five minutes if cooling
with air dehumidification is deactivated
Rafter approximately 30 minutes at outside
temperatures above approximately 41 ‡
(5 †)
Convenience opening or closing using
the air-recirculation button
GWARNING
When the convenience closing feature is oper- ating, parts of the body could become trapped
in the closing area of the side window and the
sliding sunroof. There is a risk of injury.
Observe the complete closing procedure
when the convenience closing feature is oper-
ating. Make sure that no body parts are in
close proximity during the closing procedure.
GWARNING
During convenience opening parts of the body could be drawn in or become trapped
between the side window and window frame.
There is a risk of injury.
Make sure that nobody touches the side win-
dow during the opening procedure. If some-
one becomes trapped, immediately press
the W switch in the door to stop the move-
ment of the side windows. To continue closing
the side window, pull on the Wswitch.
XConvenience closing feature: press and
hold the grocker switch up or down until
the side windows and the sliding sunroof start
to close automatically.
The indicator lamp above the grocker
switch lights up. Air-recirculation mode is
activated.
If you manually open the side windows or the
sliding sunroof after closing with the conve- nience closing feature, they will remain in this
position when opened.
If parts of the body are in the closing area during
convenience closing, proceed as follows:
XPress the Wbutton to stop the side win-
dows.
The side window stops.
XTo then open the side windows, press the
W button again.
XPress the 3switch to stop the sliding sun-
roof.
The sliding sunroof stops.
XTo then open the sliding sunroof, pull back on
the 3 switch.
XConvenience opening feature: press and
hold the grocker switch up or down until
the side windows and the sliding sunroof start
to open automatically.
The indicator lamp above the grocker
switch goes out. Air-recirculation mode is
deactivated.
Activating/deactivating the residual
heat function
The "residual heat" function is only available in
Canada.
It is possible to make use of the residual heat of
the engine to continue heating the stationary
vehicle for up to 30 minutes after the engine has
been switched off. The heating time depends on the coolant temperature and on the interior tem-
perature that has been set.
iThe blower will run at a low speed regardless
of the airflow setting.
iIf you activate the residual heat function at
high temperatures, only the ventilation will be
activated.
XTurn the SmartKey to position 0(Ypage 112)
in the ignition lock or remove it.
XTo activate: press theÁbutton.
The indicator lamp in the Ábutton lights
up.
108Operating the climate control systems
Climate control
Page 114 of 302

Wear suitable footwear to ensure correct
usage of the pedals.
GWARNING
If you switch off the ignition while driving,
safety-relevant functions are only available
with limitations, or not at all. This could affect, for example, the power steering and the brake
boosting effect. You will require considerably
more effort to steer and brake. There is a risk
of an accident.
Do not switch off the ignition while driving.
GWARNING
If the parking brake has not been fully
released when driving, the parking brake can:
Roverheat and cause a fire
Rlose its hold function.
There is a risk of fire and an accident. Release
the parking brake fully before driving off.
!Warm up the engine quickly. Do not use the
engine's full performance until it has reached
operating temperature.
Only shift the automatic transmission to the
desired drive position when the vehicle is sta-
tionary.
Where possible, avoid spinning the drive
wheels when pulling away on slippery roads.
You could otherwise damage the drive train.
!Avoid high engine speeds when the engine
is cold. The engine's service life could other-
wise be significantly shortened. Do not use
the engine's full performance until it has
reached operating temperature.
!AMG vehicles: at low engine oil tempera-
tures below 68 ‡ (+20 †), the maximum
engine speed is restricted in order to protect the engine. To protect the engine and main-
tain smooth engine operation, avoid driving at
full throttle when the engine is cold.
SmartKey positions
gTo remove the SmartKey
1Power supply for some consumers, such as
the windshield wipers
2Ignition (power supply for all consumers)
and drive position
3To start the engine
As soon as the ignition is switched on, all the
indicator lamps in the instrument cluster light
up. If an indicator lamp does not go out after
starting the engine or lights up while driving, see
(
Ypage 205).
If the SmartKey is in position 0in the ignition
lock for an extended period of time, it can no
longer be turned in the ignition lock. The steer-
ing is then locked. To unlock, remove the Smart-
Key and reinsert it into the ignition lock.
The steering is locked when you remove the
SmartKey from the ignition lock.
XRemove the SmartKey when the engine is
switched off.
The starter battery could otherwise be dis-
charged.
If you cannot turn the SmartKey in the ignition
lock, the starter battery may not be charged
sufficiently.
XCheck the starter battery and charge it if nec-
essary (Ypage 252).
or
XJump-start the vehicle (Ypage 254).
iYou can only remove the SmartKey if:
Rthe SmartKey is in position 0in the ignition
lock.
Rthe automatic transmission selector lever
is in P.
112Driving
Driving and parking
Page 119 of 302

Problems with the engine
ProblemPossible causes/consequences andMSolutions
The engine does not
start. The starter motor
can be heard.RThere is a malfunction in the engine electronics.
RThere is a malfunction in the fuel supply.
XTurn the SmartKey back to position0in the ignition lock before
attempting to start the engine again.
XTry to start the engine again (Ypage 113). Avoid excessively long
and frequent attempts to start the engine, as this (Ypage 112) will
drain the battery.
If the engine does not start after several attempts:
XConsult a qualified specialist workshop.
The engine does not
start. The starter motor
can be heard. The yellow
reserve fuel warning
lamp is lit and the needle
of the fuel gage display
shows 0.The fuel tank is empty.
XRefuel the vehicle.
The engine does not
start. You cannot hear
the starter motor.The on-board voltage is too low because the battery is too weak or
discharged.
XJump-start the vehicle (Ypage 254).
If the engine does not start despite attempts to jump-start it:
XConsult a qualified specialist workshop.
The starter motor was exposed to a thermal load that was too high.
XAllow the starter motor to cool down for approximately two minutes.
XTry to start the engine again.
If the engine still does not start:
XConsult a qualified specialist workshop.
The engine is not running
smoothly and is misfir-
ing.There is a malfunction in the engine electronics or in a mechanical
component of the engine management system.
XOnly depress the accelerator pedal slightly.
Otherwise, non-combusted fuel may get into the catalytic converter
and damage it.
XHave the cause rectified immediately at a qualified specialist work-
shop.
Driving117
Driving and parking
Z
Page 120 of 302

ProblemPossible causes/consequences andMSolutions
The coolant temperature
gage shows a value
above 248 ‡ (120 †). A
display message may
also appear in the multi-
function display and a
warning tone may sound.The coolant level is too low. The coolant is too hot and the engine is no
longer being cooled sufficiently.
XStop as soon as possible and allow the engine and the coolant to
cool down.
XCheck the coolant level (Ypage 238). Observe the warning notes
as you do so and add coolant if necessary.
If the coolant level is correct, the radiator fan may be faulty. The cool-
ant is too hot and the engine is no longer being cooled sufficiently.
XAt coolant temperatures below 248 ‡(120 †), drive to the nearest
qualified specialist workshop.
XAvoid heavy loads on the engine as you do so, e.g. driving in moun-
tainous terrain and stop-and-go traffic.
Adjustable damping
General notes
With the adjustable damping you can choose
between two different suspension settings.
Suspension settings
COMFComfortable suspension setting
SportSports suspension setting
Selecting the suspension setting
Program selector button in the center console
iIf you select the sports suspension setting,
the vehicle will dampen more roughly.
XPress SPORT on program selector button :.
The indicator lamp lights up. SPORTis shown
in the multifunction display. The sports sus-
pension setting is selected.
iIf you select the comfortable suspension
setting, the vehicle will dampen more
smoothly.
XPress COMF on program selector button :.
The indicator lamp lights up. COMFis shown
in the multifunction display. The comfortable
suspension setting is selected.
Automatic transmission
Important safety notes
GWARNING
If the engine speed is above the idling speed
and you engage transmission position Dor R,
the vehicle could pull away suddenly. There is
a risk of an accident.
When engaging transmission position Dor R,
always firmly depress the brake pedal and do not simultaneously accelerate.
GWARNING
The automatic transmission switches to neu-
tral position Nwhen you switch off the engine.
The vehicle may roll away. There is a risk of an
accident.
After switching off the engine, always switch
to parking position P. Prevent the parked vehi-
cle from rolling away by applying the parking
brake.
118Automatic transmission
Driving and parking
Page 130 of 302

!Overfilling the fuel tank could damage the
fuel system.
!Take care not to spill any fuel on painted
surfaces. You could otherwise damage the
paintwork.
!Use a filter when refueling from a fuel can.
Otherwise, the fuel lines and/or injection sys-
tem could be blocked by particles from the
fuel can.
If you overfill the fuel tank, pressure may build
up in the fuel tank. This could cause fuel to spray
out when the fuel pump nozzle is removed.
There is a risk of injury. The fuel tank is full when
the fuel pump nozzle first switches off. End the
refueling process.
For further information on fuel and fuel quality
(
Ypage 289).
Refueling
Vehicles with a fuel filler flap
Example: G 550 fuel filler cap
:
To open the fuel filler flap
;Tire pressure table
=Fuel type
?To insert the fuel filler cap
When you open or close the vehicle with the
SmartKey, the fuel filler flap is automatically
unlocked or locked.
The position of the fuel filler cap is displayed
8 in the instrument cluster. The arrow next
to the filling pump indicates the side of the vehi-
cle. The fuel filler flap is located to the rear on
the right.
Opening the fuel filler cap
:To open the fuel filler flap
;Tire pressure table
=Fuel type
?To insert the fuel filler cap
XSwitch the engine off.
iWhen the engine is running and the fuel filler
flap is open, the yellow reserve fuel warning
lamp and the =(USA only) or ;(Can-
ada only) Check Engine warning lamp may
light up.
Further information about warning and indi-
cator lamps in the instrument cluster can be
found in the Digital Operator's Manual.
XRemove the SmartKey from the ignition lock.
XTurn the fuel filler cap counterclockwise and
remove it.
XInsert the fuel filler cap into the holder
bracket on the inside of filler flap ?.
Refueling
XCompletely insert the filler neck of the fuel
pump nozzle into the tank and refuel.
iDo not add any more fuel after the pump
stops filling for the first time. Otherwise, fuel
may leak out.
Closing
XReplace the fuel filler cap and turn it clock-
wise. The fuel filler cap audibly engages.
XClose the fuel filler flap.
iClose the fuel filler flap before locking the
vehicle. A locking pin otherwise prevents the
fuel filler flap from closing after the vehicle
has been locked.
128Refueling
Driving and parking
Page 133 of 302

Do not switch off the ignition while driving.
Switching off the engine
Important safety notes
GWARNING
If you switch off the ignition while driving,
safety-relevant functions are only available
with limitations, or not at all. This could affect, for example, the power steering and the brake
boosting effect. You will require considerably
more effort to steer and brake. There is a risk
of an accident.
Do not switch off the ignition while driving.
GWARNING
The automatic transmission switches to neu-
tral position Nwhen you switch off the engine.
The vehicle may roll away. There is a risk of an
accident.
After switching off the engine, always switch
to parking position P. Prevent the parked vehi-
cle from rolling away by applying the parking
brake.
Vehicles with automatic transmission
XShift the transmission to position P.
XTurn the SmartKey to position 0in the ignition
lock and remove it (Ypage 112).
The immobilizer is activated.
XApply the parking brake firmly.
XTurn the steering wheel until the steering
wheel lock engages.
iIf you switch off the engine using the Smart-
Key and then remove the SmartKey from the
ignition lock or open one of the front doors,
the automatic transmission automatically
shifts to park position P.
iThe SmartKey can only be removed if the
automatic transmission is in position P.
Parking brake
GWARNING
If you must brake the vehicle with the parking brake, the braking distance is considerably
longer and the wheels could lock. There is an
increased danger of skidding and accidents.
Only use the parking brake to brake the vehi-
cle when the service brake is faulty. Do not
apply the parking brake too firmly. If the
wheels lock, release the parking brake until
the wheels begin turning again.
GWARNING
If you leave children unsupervised in the vehi-
cle, they could set it in motion by, for example:
Rrelease the parking brake.
Rshift the automatic transmission out of the
parking position P.
Rstart the engine.
In addition, they may operate vehicle equip-
ment and become trapped. There is a risk of
an accident and injury.
When leaving the vehicle, always take the
SmartKey with you and lock the vehicle. Never
leave children unsupervised in the vehicle.
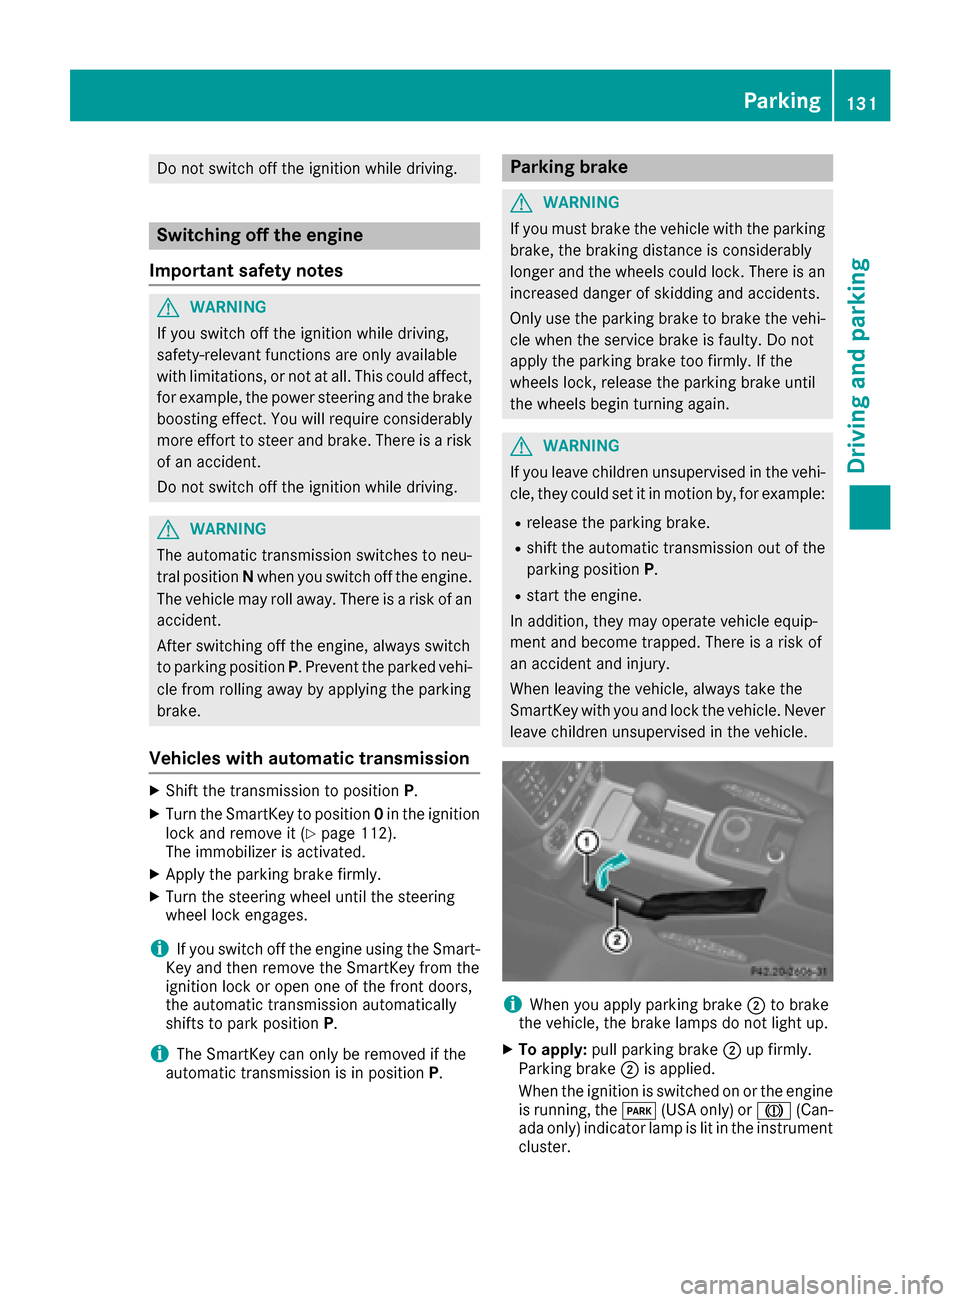
iWhen you apply parking brake ;to brake
the vehicle, the brake lamps do not light up.
XTo apply: pull parking brake ;up firmly.
Parking brake ;is applied.
When the ignition is switched on or the engine
is running, the F(USA only) or J(Can-
ada only) indicator lamp is lit in the instrument
cluster.
Parking131
Driving an d parking
Z
Page 135 of 302

affect your reflexes, perceptions and judg-
ment.
The possibility of a serious or even fatal acci-dent are greatly increased when you drink or
take drugs and drive.
Do not drink or take drugs and drive or allow
anyone to drive who has been drinking or tak-
ing drugs.
Pedals
GWARNING
Objects in the driver's footwell can restrict the pedal travel or obstruct a depressed pedal.
The operating and road safety of the vehicle is
jeopardized. There is a risk of an accident.
Make sure that all objects in the vehicle are
stowed correctly, and that they cannot enter
the driver's footwell. Install the floormats
securely and as specified in order to ensure
sufficient clearance for the pedals. Do not use
loose floormats and do not place floormats on
top of one another.
Emission control
GWARNING
Inhalation of exhaust gas is hazardous to your
health. All exhaust gas contains carbon mon-
oxide (CO), and inhaling it can cause uncon-
sciousness and possible death.
Do not run the engine in confined areas (such as a garage) which are not properly ventilated.
If you think that exhaust gas fumes are enter-
ing the vehicle while driving, have the cause
determined and corrected immediately. If you
must drive under these conditions, drive only
with at least one window fully open at all
times.
Certain engine systems are designed to keep
the level of poisonous components in exhaust
fumes within legal limits.
These systems only work at peak efficiency if
they are serviced exactly in accordance with the
manufacturer's specifications. For this reason,
all work on the engine should only be carried out by qualified and authorized Mercedes-Benz
technicians.
The engine settings must not be changed under
any circumstances. Furthermore, all specific
service work must be carried out at regular
intervals and in accordance with the Mercedes-
Benz service requirements. Details can be found
in the Maintenance Booklet.
Braking
Important safety notes
GWARNING
If you activate the LOW off-road gear while
driving on a slippery road surface, the wheels
may lose traction:
Rif you remove your foot from the accelera-
tor pedal when driving
Rif off road ABS intervenes when braking
If the wheels lose traction. the vehicle can no
longer be steered. There is an increased dan- ger of skidding and accidents.
Never activate the LOW off-road gear while
driving on a slippery road surface.
Downhill gradients
!On long and steep gradients, you must
reduce the load on the brakes by shifting early
to a lower gear. This allows you to take
advantage of the engine braking effect and
helps avoid overheating and excessive wear
of the brakes.
When you take advantage of the engine brak-
ing effect, a drive wheel may not turn for some
time, e.g. on a slippery road surface. This
could cause damage to the drive train. This
type of damage is not covered by the
Mercedes-Benz warranty.
Heavy and light loads
GWARNING
If you rest your foot on the brake pedal while
driving, the braking system can overheat. This increases the stopping distance and can even
cause the braking system to fail. There is a
risk of an accident.
Driving tips133
Driving and parking
Z