2016 MERCEDES-BENZ G-Class ad blue
[x] Cancel search: ad bluePage 2 of 302

Publication details
Internet
Further information about Mercedes-Benz vehi-
cles and about Daimler AG can be found on the
following websites:
http://www.mbusa.com (USA only)
http://www.mercedes-benz.ca (Canada only)
Editorial office
©Daimler AG: Not to be reprinted, translated or
otherwise reproduced, in whole or in part, with-
out written permission from Daimler AG.
Vehicle manufacturer
Daimler AG
Mercedesstraße 137
70327 Stuttgart
Germany
Symbols
Registered trademarks:
RBluetooth®is a registered trademark of Blue-
tooth SIG Inc.
RDTS is a registered trademark of DTS, Inc.
RDolby and MLP are registered trademarks of
DOLBY Laboratories.
RBabySmart™, ESP®and PRE-SAFE®are reg-
istered trademarks of Daimler AG.
RHomeLink®is a registered trademark of
Prince.
RiPod®and iTunes®are registered trademarks
of Apple Inc.
RLogic7®is a registered trademark of Harman
International Industries.
RMicrosoft®and Windows media®are regis-
tered trademarks of Microsoft Corporation.
RSIRIUS is a registered trademark of Sirius XM
Radio Inc.
RHD Radio is a registered trademark of iBiquity
Digital Corporation.
RGracenote®is a registered trademark of
Gracenote, Inc.
RZAGATSurvey®and related brands are regis-
tered trademarks of ZagatSurvey, LLC.
In this Operator's Manual you will find the fol-
lowing symbols:
GWARNING
Warning notes make you aware of dangers
which could pose a threat to your health or
life, or to the health and life of others.
HEnvironmental note
Environmental notes provide you with infor-
mation on environmentally aware actions or
disposal.
!Notes on material damage alert you to dan-
gers that could lead to damage to your vehi-
cle.
iPractical tips or further information that
could be helpful to you.
X This symbol indicates an instruction
that must be followed.
X Several of these symbols in succession
indicate an instruction with several
steps. (Y
page)
This symbol tells you where you can find
more information about a topic.
YY This symbol indicates a warning or an
instruction that is continued on the next
page.
Dis‐
playThis font indicates a display in the mul-
tifunction display/COMAND display.
~ This symbol tells you that you can find
further information in the Digital Oper-
ator's Manual.
Parts of the software in the vehicle are protected
by copyright
©2005 The FreeType Project
http://www.freetype.org. All rights reserved.
As at 09.02.2015
Page 79 of 302

The system automatically switches off
approximately 35 minutes after it is set to
level1.
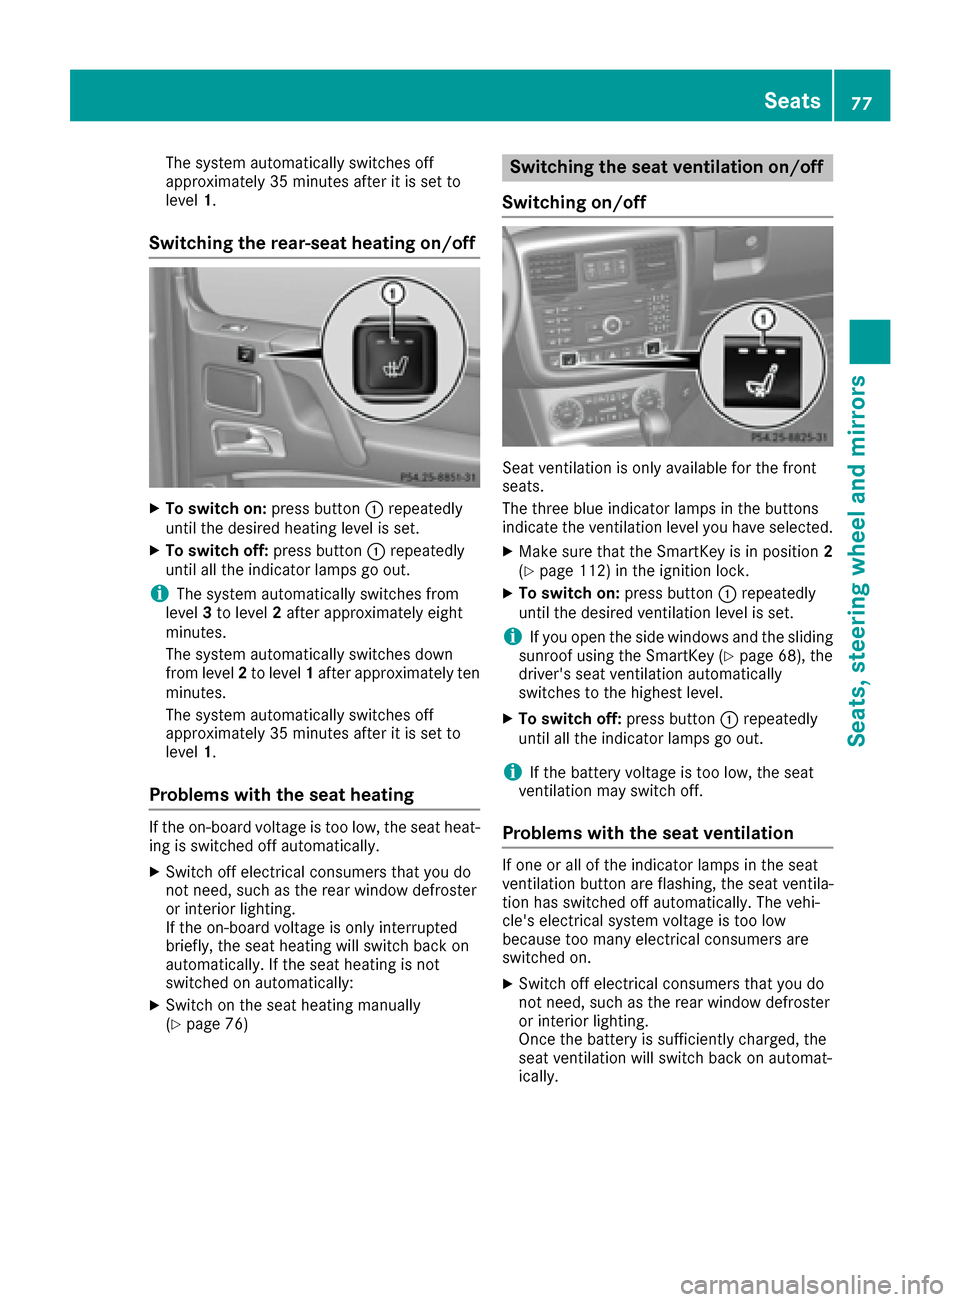
Switching the rear-seat heating on/off
XTo switch on: press button:repeatedly
until the desired heating level is set.
XTo switch off: press button:repeatedly
until all the indicator lamps go out.
iThe system automatically switches from
level 3to level 2after approximately eight
minutes.
The system automatically switches down
from level 2to level 1after approximately ten
minutes.
The system automatically switches off
approximately 35 minutes after it is set to
level 1.
Problems with the seat heating
If the on-board voltage is too low, the seat heat-
ing is switched off automatically.
XSwitch off electrical consumers that you do
not need, such as the rear window defroster
or interior lighting.
If the on-board voltage is only interrupted
briefly, the seat heating will switch back on
automatically. If the seat heating is not
switched on automatically:
XSwitch on the seat heating manually
(Ypage 76)
Switching the seat ventilation on/off
Switching on/off
Seat ventilation is only available for the front
seats.
The three blue indicator lamps in the buttons
indicate the ventilation level you have selected.
XMake sure that the SmartKey is in position 2
(Ypage 112) in the ignition lock.
XTo switch on: press button:repeatedly
until the desired ventilation level is set.
iIf you open the side windows and the sliding
sunroof using the SmartKey (Ypage 68), the
driver's seat ventilation automatically
switches to the highest level.
XTo switch off: press button:repeatedly
until all the indicator lamps go out.
iIf the battery voltage is too low, the seat
ventilation may switch off.
Problems with the seat ventilation
If one or all of the indicator lamps in the seat
ventilation button are flashing, the seat ventila-
tion has switched off automatically. The vehi-
cle's electrical system voltage is too low
because too many electrical consumers are
switched on.
XSwitch off electrical consumers that you do
not need, such as the rear window defroster
or interior lighting.
Once the battery is sufficiently charged, the
seat ventilation will switch back on automat-
ically.
Seats77
Seats, steering wheel and mirrors
Z
Page 90 of 302

the ignition, the automatic headlamp cleaning
system is reset and counting is resumed from 0.
Combination switch
Turn signal
:High-beam headlamps
;Turn signal, right
=High-beam flasher
?Turn signal, left
XTo indicate briefly: press the combination
switch briefly to the pressure point in the
direction of arrow ;or?.
The corresponding turn signal flashes three
times.
XTo indicate: press the combination switch
beyond the pressure point in the direction of
arrow ;or?.
High-beam headlamps
:High-beam headlamps
;Turn signal, right
=High-beam flasher
?Turn signal, left
XTo switch on the high-beam headlamps:
turn the SmartKey in the ignition lock to posi-
tion 2or start the engine.
XTurn the light switch to LorÃ.
XPress the combination switch beyond the
pressure point in the direction of arrow :.
In the Ãposition, the high-beam head-
lamps are only switched on when it is dark and
the engine is running.
The blue Kindicator lamp in the instru-
ment cluster lights up when the high-beam
headlamps are switched on.
XTo switch off the high-beam headlamps:
move the combination switch back to its nor-
mal position.
The blue Kindicator lamp in the instru-
ment cluster goes out.
High-beam flasher
:High-beam headlamps
;Turn signal, right
=High-beam flasher
?Turn signal, left
XTo switch on: turn the SmartKey in the igni-
tion lock to position 1or 2, or start the engine.
XPull the combination switch briefly in the
direction of arrow =.
88Exterior lighting
Lights andwindshield wiper s
Page 179 of 302

XTo select the next/previous scene:briefly
press the 9or: button.
XTo select a scene from the scene list
(rapid scrolling): press and hold the 9
or : button until desired scene ;has
been reached.
Telephone menu
Introduction
GWARNING
If you operate information systems and com-
munication equipment integrated in the vehi-
cle while driving, you will be distracted from
traffic conditions. You could also lose control
of the vehicle. There is a risk of an accident.
Only operate the equipment when the traffic
situation permits. If you are not sure that this
is possible, park the vehicle paying attention
to traffic conditions and operate the equip-
ment when the vehicle is stationary.
When telephoning, you must observe the legal
requirements for the country in which you are
currently driving.
XSwitch on the mobile phone (see the separate
operating instructions).
XSwitch on COMAND (see the separate oper-
ating instructions).
XEstablish a Bluetooth®connection to
COMAND, see the separate operating instruc-
tions.
XPress the =or; button on the steering
wheel to select the Telmenu.
You will see one of the following display mes-
sages in the multifunction display:
RPhone READYor the name of the network
provider: the mobile phone has found a net-
work and is ready to receive.
RPhone No Service: there is no network
available or the mobile phone is searching for a network.
Accepting a call
Example: incoming call
If someone calls you when you are in the Telmenu, a display message appears in the multi-
function display.
XPress the6button on the steering wheel
to accept an incoming call.
You can accept a call even if you are not in the
Tel
menu.
Rejecting or ending a call
XPress the ~button on the steering wheel.
You can end or reject a call even if you are not in
the Tel
menu.
Dialing a number from the phone book
XPress the =or; button on the steering
wheel to select the Telmenu.
XPress the9,:ora button to
switch to the phone book.
XPress the 9or: button to select the
desired name.
or
XTo begin rapid scrolling: press and hold the
9 or: button for longer than one sec-
ond.
Rapid scrolling stops when you release the
button or reach the end of the list.
XIf only one telephone number is stored for
a name: press the 6ora button to
start dialing.
or
XIf there is more than one number for a
particular name: press the6ora
button to display the numbers.
XPress the 9or: button to select the
number you want to dial.
XPress the 6ora button to start dialing.
Menus and submenus177
On-board computer and displays
Z
Page 184 of 302

AMG menu in AMG vehicles
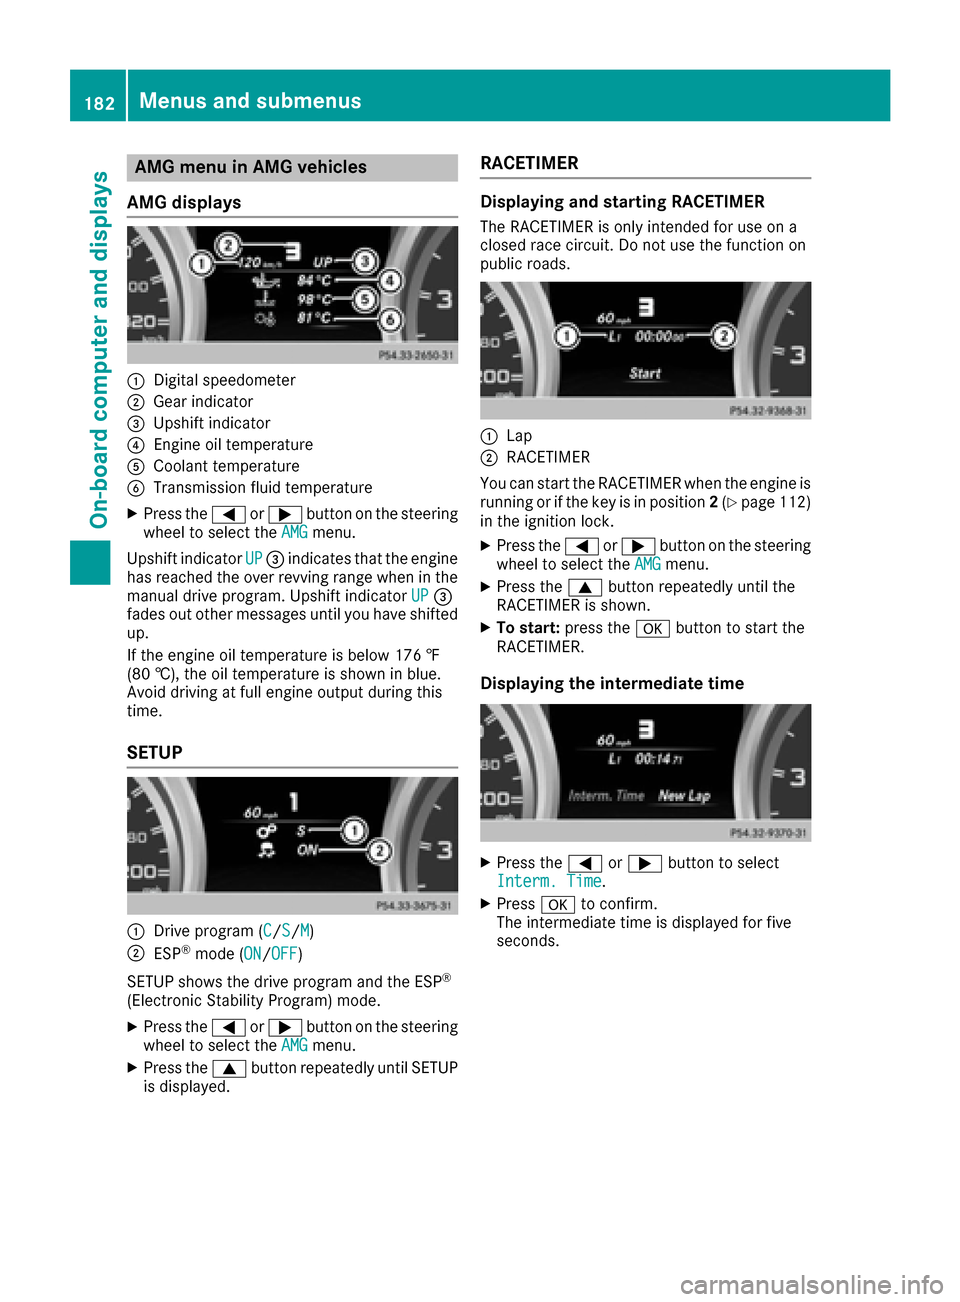
AMG displays
:Digital speedometer
;Gear indicator
=Upshif tindicator
?Engin eoil temperature
ACoolan ttemperature
BTransmission fluid temperature
XPress th e= or; buttonon th esteering
whee lto select th eAMGmenu.
Upshif tindicator UP
=indicates that th eengin e
has reached th eove rrevvin grange when in th e
manual drive program .Upshif tindicator UP
=
fade sout other message suntil you hav eshifte d
up.
If th eengin eoil temperature is belo w17 6 ‡
(80 †) ,the oi ltemper ature is shown in blue.
Avoid driving at full engine output during this
time.
SETUP
:Drive program (C/S/M)
;ESP®mode ( ON/OFF)
SETUP shows the drive program and the ESP
®
(Electronic Stability Program) mode.
XPress the =or; button on the steering
wheel to select the AMGmenu.
XPress the9button repeatedly until SETUP
is displayed.
RACETIMER
Displaying and starting RACETIMER
The RACETIMER is only intended for use on a
closed race circuit. Do not use the function on
public roads.
:Lap
;RACETIMER
You can start the RACETIMER when the engine is
running or if the key is in position 2(
Ypage 112)
in the ignition lock.
XPress the =or; button on the steering
wheel to select the AMGmenu.
XPress the9button repeatedly until the
RACETIMER is shown.
XTo start: press the abutton to start the
RACETIMER.
Displaying the intermediate time
XPress the =or; button to select
Interm. Time.
XPress ato confirm.
The intermediate time is displayed for five
seconds.
182Menus and submenus
On-board computer and displays