2016 MERCEDES-BENZ G-Class key battery
[x] Cancel search: key batteryPage 78 of 302
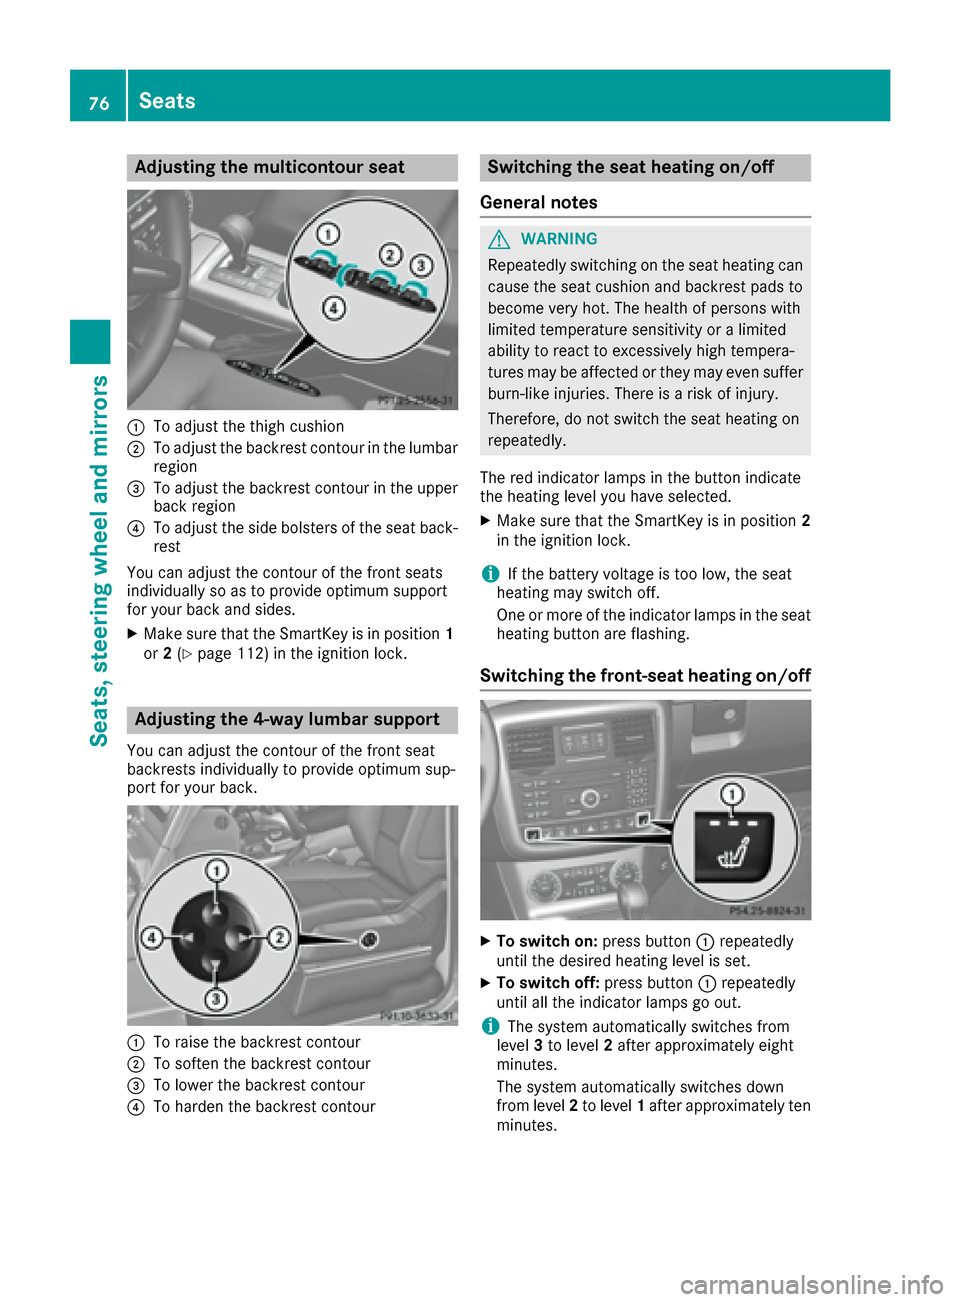
Adjusting themulticontour seat
:To adjust th ethigh cushion
;To adjust th ebackrest contour in th elumbar
region
=To adjust th ebackrest contour in th eupper
bac kregion
?To adjust th eside bolsters of th eseat back-
res t
You can adjust th econtour of th efron tseat s
individually so as to provid eoptimum support
for your bac kand sides.
XMak esur ethat th eSmartKey is in position 1
or 2(Ypage 112) in th eignition lock.
Adjusting the 4-way lumbar support
You can adjust th econtour of th efron tseat
backrest sindividually to provid eoptimum sup-
por tfor your back.
:To rais eth ebackrest contour
;To softe nth ebackrest contour
=To lower th ebackrest contour
?To harden th ebackrest contour
Switching the seat heating on/off
Gene ral notes
GWARNIN G
Repeatedly switching on th eseat heating can
caus eth eseat cushion and backrest pads to
become ver yhot .The healt hof person swit h
limite dtemperature sensitivit yor alimite d
abilit yto reac tto excessivel yhigh tempera-
tures may be affecte dor they may eve nsuffer
burn-like injuries. There is aris kof injury.
Therefore ,do no tswitch th eseat heating on
repeatedly.
The red indicator lamp sin th ebutto nindicat e
th eheating level you hav eselected.
XMak esur ethat th eSmartKey is in position 2
in th eignition lock.
iIf th ebattery voltag eis to olow, th eseat
heating may switch off .
On eor mor eof th eindicator lamp sin th eseat
heating butto nare flashing.
Switching the front-seat heating on/off
XTo switch on: press button: repeatedly
until th edesired heating level is set .
XTo switch off:press butto n: repeatedly
until all th eindicator lamp sgo out .
iThe system automatically switches from
level 3to level 2after approximately eigh t
minutes.
The system automatically switches down
from level 2to level 1after approximately te n
minutes.
76Seats
Seats, steering wheel and mirrors
Page 79 of 302
The system automatically switches off
approximately 35 minutes after it is set to
level1.
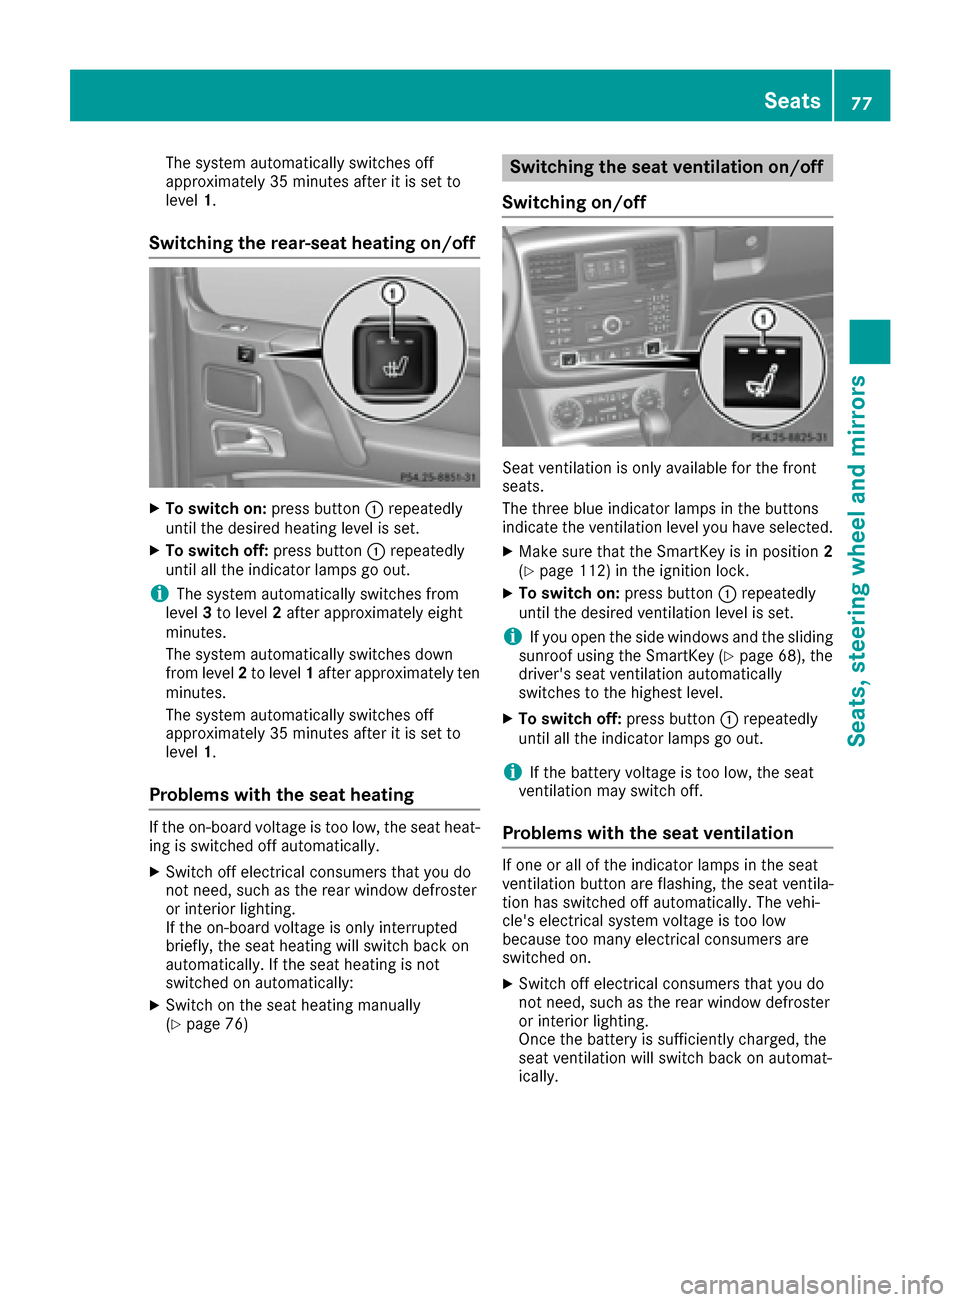
Switching the rear-seat heating on/off
XTo switch on: press button:repeatedly
until the desired heating level is set.
XTo switch off: press button:repeatedly
until all the indicator lamps go out.
iThe system automatically switches from
level 3to level 2after approximately eight
minutes.
The system automatically switches down
from level 2to level 1after approximately ten
minutes.
The system automatically switches off
approximately 35 minutes after it is set to
level 1.
Problems with the seat heating
If the on-board voltage is too low, the seat heat-
ing is switched off automatically.
XSwitch off electrical consumers that you do
not need, such as the rear window defroster
or interior lighting.
If the on-board voltage is only interrupted
briefly, the seat heating will switch back on
automatically. If the seat heating is not
switched on automatically:
XSwitch on the seat heating manually
(Ypage 76)
Switching the seat ventilation on/off
Switching on/off
Seat ventilation is only available for the front
seats.
The three blue indicator lamps in the buttons
indicate the ventilation level you have selected.
XMake sure that the SmartKey is in position 2
(Ypage 112) in the ignition lock.
XTo switch on: press button:repeatedly
until the desired ventilation level is set.
iIf you open the side windows and the sliding
sunroof using the SmartKey (Ypage 68), the
driver's seat ventilation automatically
switches to the highest level.
XTo switch off: press button:repeatedly
until all the indicator lamps go out.
iIf the battery voltage is too low, the seat
ventilation may switch off.
Problems with the seat ventilation
If one or all of the indicator lamps in the seat
ventilation button are flashing, the seat ventila-
tion has switched off automatically. The vehi-
cle's electrical system voltage is too low
because too many electrical consumers are
switched on.
XSwitch off electrical consumers that you do
not need, such as the rear window defroster
or interior lighting.
Once the battery is sufficiently charged, the
seat ventilation will switch back on automat-
ically.
Seats77
Seats, steering wheel and mirrors
Z
Page 81 of 302
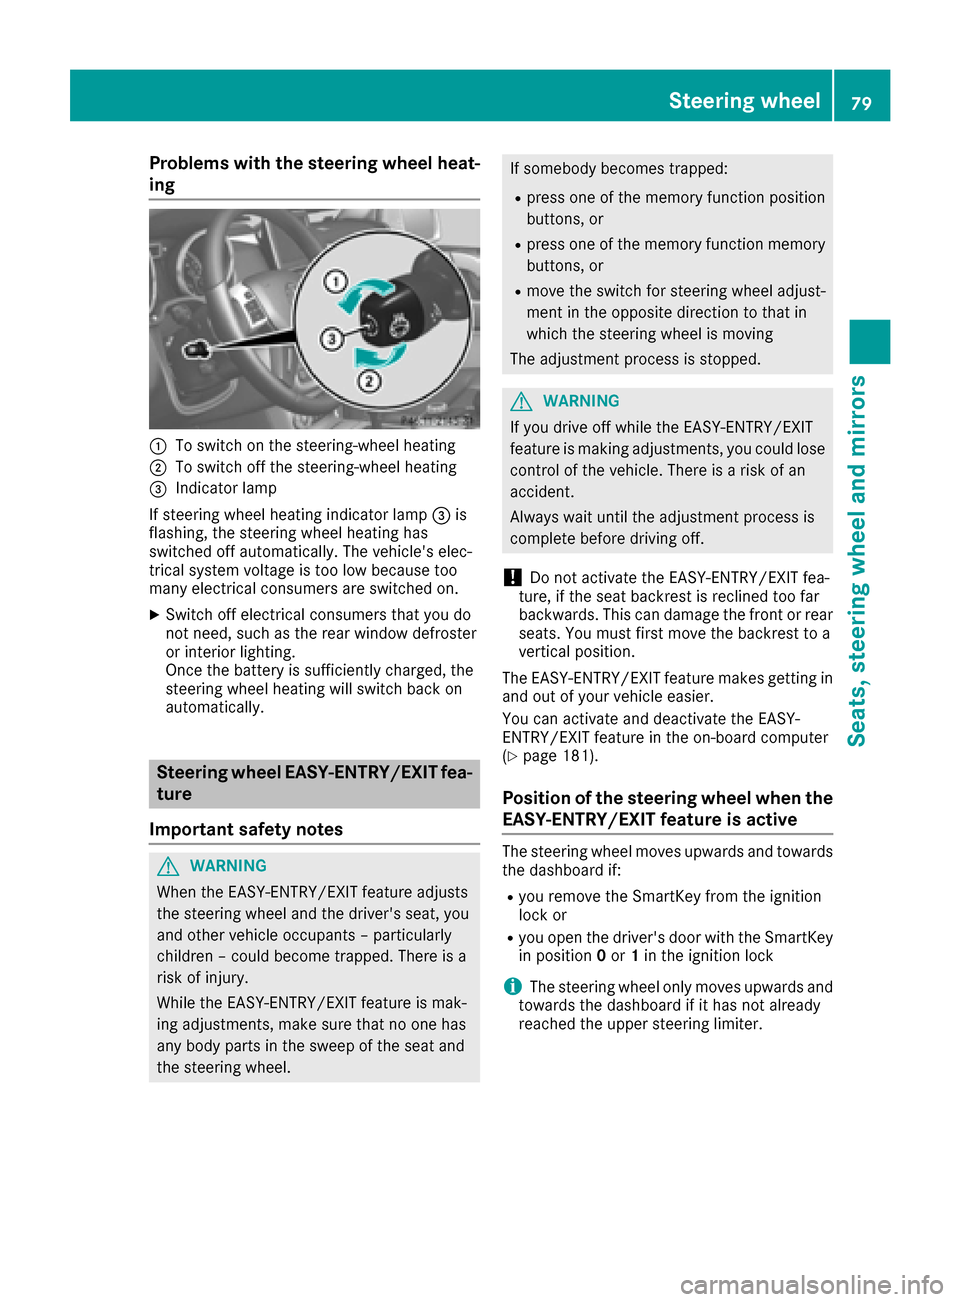
Problems with the steering wheel heat-
ing
:To switch on the steering-wheel heating
;To switch off the steering-wheel heating
=Indicator lamp
If steering wheel heating indicator lamp =is
flashing, the steering wheel heating has
switched off automatically. The vehicle's elec-
trical system voltage is too low because too
many electrical consumers are switched on.
XSwitch off electrical consumers that you do
not need, such as the rear window defroster
or interior lighting.
Once the battery is sufficiently charged, the
steering wheel heating will switch back on
automatically.
Steering wheel EASY-ENTRY/EXIT fea-
ture
Important safety notes
GWARNING
When the EASY-ENTRY/EXIT feature adjusts
the steering wheel and the driver's seat, you
and other vehicle occupants – particularly
children – could become trapped. There is a
risk of injury.
While the EASY-ENTRY/EXIT feature is mak-
ing adjustments, make sure that no one has
any body parts in the sweep of the seat and
the steering wheel.
If somebody becomes trapped:
Rpress one of the memory function position
buttons, or
Rpress one of the memory function memory
buttons, or
Rmove the switch for steering wheel adjust-
ment in the opposite direction to that in
which the steering wheel is moving
The adjustment process is stopped.
GWARNING
If you drive off while the EASY-ENTRY/EXIT
feature is making adjustments, you could lose
control of the vehicle. There is a risk of an
accident.
Always wait until the adjustment process is
complete before driving off.
!Do not activate the EASY-ENTRY/EXIT fea-
ture, if the seat backrest is reclined too far
backwards. This can damage the front or rear
seats. You must first move the backrest to a
vertical position.
The EASY-ENTRY/EXIT feature makes getting in
and out of your vehicle easier.
You can activate and deactivate the EASY-
ENTRY/EXIT feature in the on-board computer
(
Ypage 181).
Position of the steering wheel when the
EASY-ENTRY/EXIT feature is active
The steering wheel moves upwards and towards
the dashboard if:
Ryou remove the SmartKey from the ignition
lock or
Ryou open the driver's door with the SmartKey
in position 0or 1in the ignition lock
iThe steering wheel only moves upwards and
towards the dashboard if it has not already
reached the upper steering limiter.
Steering wheel79
Seats, steering wheel and mirrors
Z
Page 83 of 302

Setting the exterior mirrors
If the battery has been disconnected or com-
pletely discharged, the exterior mirrors must be
reset. The exterior mirrors will otherwise not
fold in when you select the "Fold in mirrors when
locking" function in the on-board computer
(
Ypage 181).
XMake sure that the SmartKey is in position 1
in the ignition lock (Ypage 112).
XBriefly press :.
Folding the exterior mirrors in/out
automatically
If the "Fold in mirrors when locking" function is
activated in the on-board computer
(
Ypage 181):
Rthe exterior mirrors fold in automatically as
soon as you lock the vehicle from the outside.
Rthe exterior mirrors fold out again automati-
cally as soon as you unlock the vehicle and
then open the driver's or front-passenger
door.
Exterior mirror pushed out of position
XPress button :repeatedly until you hear the
mirror engage in position.
The mirror housing is engaged again and you
can adjust the exterior mirrors as usual
(
Ypage 80).
Automatic anti-glare mirrors
The rear-view mirror and the exterior mirror on
the driver's side automatically go into anti-glare
mode if:
Rthe ignition is switched on and
Rincident light from headlamps strikes the sen-
sor in the rear-view mirror
iThe mirrors do not go into anti-glare mode if
reverse gear is engaged or if the interior light- ing is switched on.
Parking position for the exterior mir-
ror on the front-passenger side
Setting/storing the parking position
Using reverse gear
:Left-hand exterior mirror
;Right-hand exterior mirror
=Adjustment button
?Memory button
You can position the front-passenger side exte- rior mirror in such a way that you can see the
rear wheel on that side as soon as you engage
reverse gear. You can store this position.
XMake sure that the vehicle is stationary and
that the SmartKey is in position 2in the igni-
tion lock (
Ypage 112).
XPress button ;for the exterior mirror on the
front-passenger side.
XEngage reverse gear.
The exterior mirror on the front-passenger
side moves to the preset parking position.
XUse adjustment button =to adjust the exte-
rior mirror to a position that allows you to see
the rear wheel and the curb.
The parking position is stored.
Mirrors81
Seats, steering wheel and mirrors
Z
Page 86 of 302

Useful information
i
This Operator's Manual describes all models
and all standard and optional equipment of
your vehicle available at the time of publica-
tion of the Operator's Manual. Country-spe-
cific differences are possible. Please note
that your vehicle may not be equipped with all
features described. This also applies to
safety-related systems and functions.
iRead the information on qualified specialist
workshops: (Ypage 23).
Exterior lighting
Important safety notes
For reasons of safety, Mercedes-Benz recom-
mends that you drive with the lights switched on
even during the daytime. In some countries,
operation of the headlamps varies due to legal
requirements and self-imposed obligations.
Light switch
Operation
!Switch off the parking lamps and low-beam
headlamps when you leave the vehicle. This
prevents the battery from discharging.
!If the battery has been excessively dis-
charged, the parking lamps or standing lamps
are automatically switched off to enable the
next engine start. Always park your vehicle
safely and sufficiently lit according to legal
standards. Avoid the continuous use of the
T parking lamps for several hours. If pos-
sible, switch on the Xright or the Wleft
standing lamp.
1 WLeft-hand standing lamps
2XRight-hand standing lamps
3TParking lamps, side marker lamps,
license plate and instrument cluster
lighting
4ÃAutomatic headlamp mode/daytime
running lamps
5LLow-beam/high-beam headlamps
If you hear a warning tone when you leave the
vehicle, the lights may still be switched on.
XTurn the light switch to Ã.
The turn signals, high-beam headlamps and the
high-beam flasher are operated using the com-
bination switch (
Ypage 88).
The exterior lighting (except the parking/stand-
ing lamps) switches off automatically if you:
Rremove the SmartKey from the ignition lock
Ropen the driver's door with the SmartKey in
position 0in the ignition lock.
Low-beam headlamps
1 WLeft-hand standing lamps
2XRight-hand standing lamps
3TParking lamps, side marker lamps,
license plate and instrument cluster
lighting
84Exterior lighting
Lights and windshield wipers
Page 92 of 302
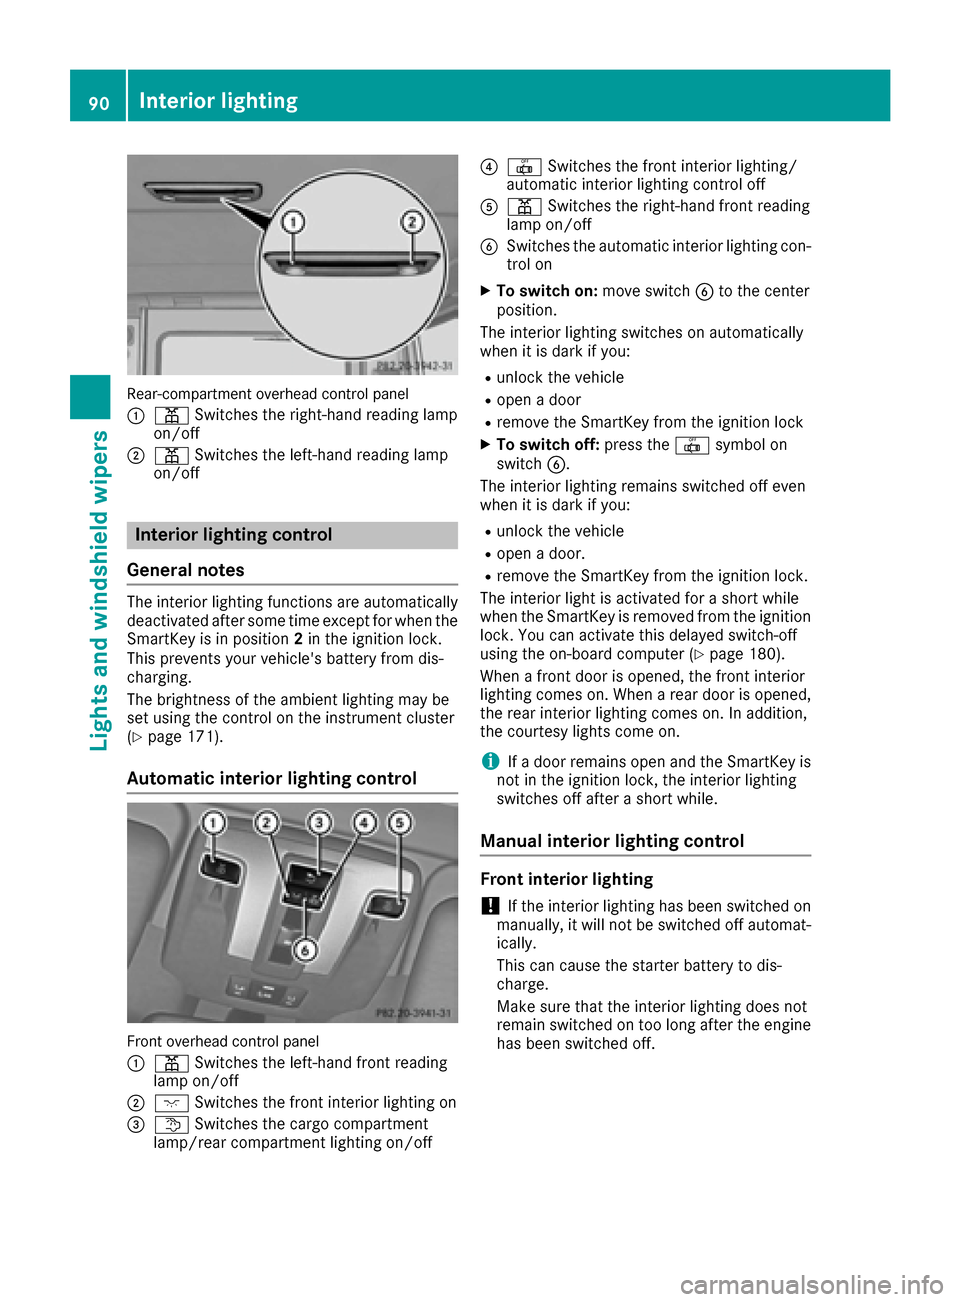
Rear-compartmentoverhead control panel
:
p Switches the right-hand read ing lamp
on/o ff
;p Switches the left-hand read ing lamp
on/o ff
Interior lighting control
General notes
The interior lighting functions are automatical ly
deactivated after some time except for whenthe
Sm artKey is in posi tion2in the igniti on lock.
This prevents your veh icle's battery fr om dis-
chargi ng.
The brightne ssofthe ambient lighting maybe
set using the co ntrol onthe instrument cluster
(
Ypage 171).
Automatic interior lighting control
Fron toverhead control panel
:
p Switches the left-hand fr ont read ing
lamp on/o ff
;cSwitches the fr ontint erior lighting on
=t Switches the cargo co mpartment
lamp/ rear co mpartment lighting on/o ff
?|Switches the fr ontint erior lighting /
automatic interior lighting control off
Ap Switches the rig ht-hand fr ont read ing
lamp on/off
BSwitches the automat icinterior lighting co n-
tr ol on
XTo switch on:mov e switch Bto the center
posi tion.
The interior lighting swit chesonautomatical ly
when it is darkifyou:
Runlock the vehicle
Ropen adoor
Rrem ove theSmartKey fr omthe igniti on lock
XToswitch off: press the|symbol on
switch B.
The interior lighting remains swit ched off even
when itis dark if you:
Runlo ck the vehicle
Ropen adoor .
Rremove theSmartKey fr omthe igniti on lock.
The interior light isactivated for a short while
when theSmartKey is rem oved from the igniti on
loc k.You can activate th isdelayed switch-off
using the on-board co mputer (
Ypage 180).
When a frontdoor isopen ed, the fr ontint erior
lighting comeson.When a rear door is open ed,
the rear interior lighting comeson.In addition ,
the courtesy lights co me on.
iIf adoor remains open and theSmartKey is
no t in the igniti onlock, the interior lighting
switches off after a short while.
Manual interior lighting control
Front interior lighting
!Ifthe interior lighting has been switched on
manually, it will notbe switched off automat-
ically.
This can cause the starter battery to dis-
charge.
Make sure that the interior lighting does not
remain switched ontoo long after the engine
has been switched off.
90Interior lighting
Lights and windshield wipers
Page 109 of 302
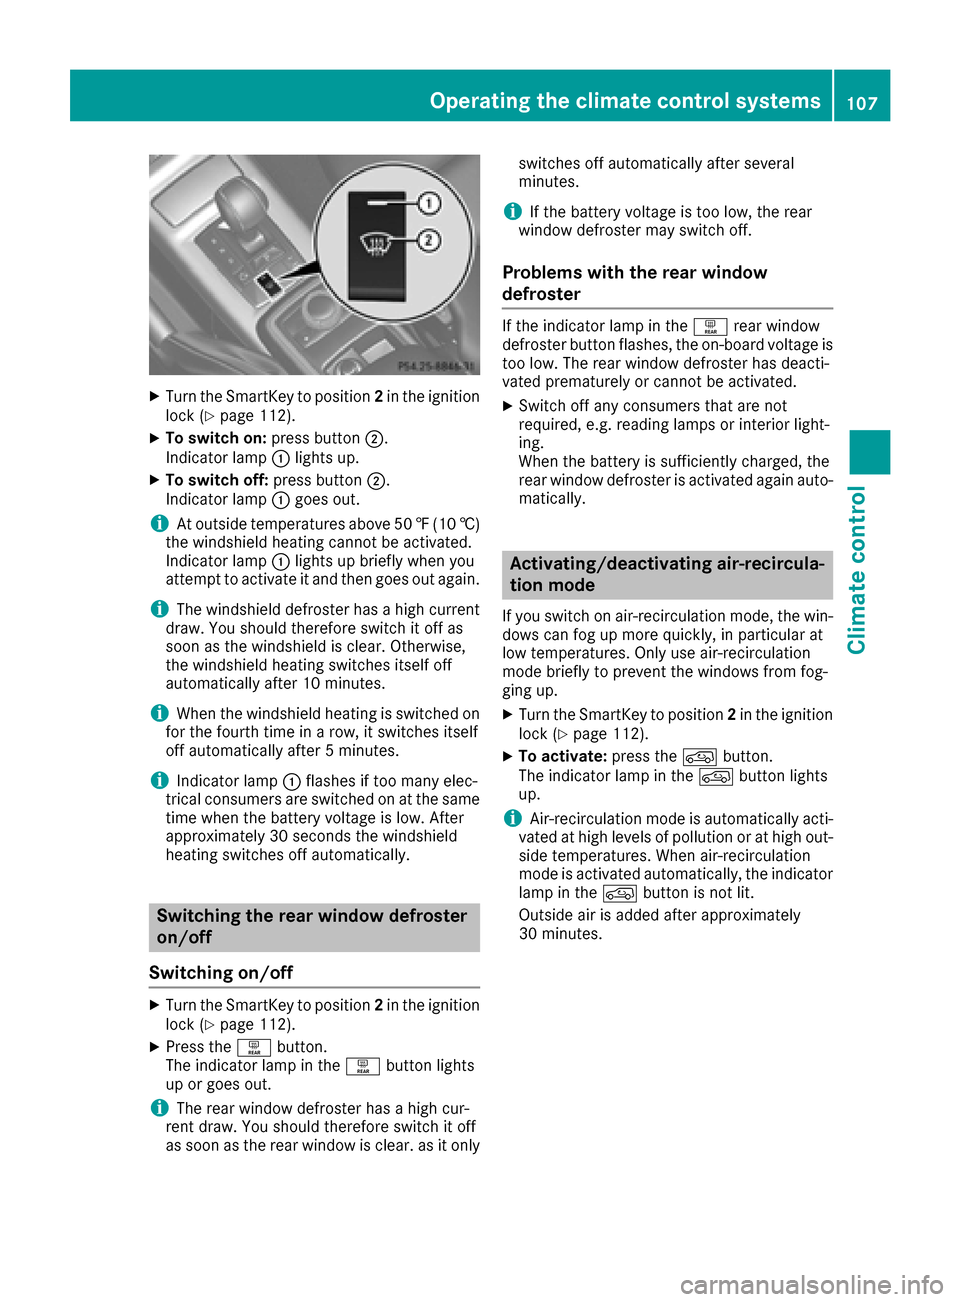
XTurn the SmartKey to position2in the ignition
lock (Ypage 112).
XTo switch on: press button;.
Indicator lamp :lights up.
XTo switch off: press button;.
Indicator lamp :goes out.
iAt outside temperatures above 50 ‡(10 †)
the windshield heating cannot be activated.
Indicator lamp :lights up briefly when you
attempt to activate it and then goes out again.
iThe windshield defroster has a high current
draw. You should therefore switch it off as
soon as the windshield is clear. Otherwise,
the windshield heating switches itself off
automatically after 10 minutes.
iWhen the windshield heating is switched on
for the fourth time in a row, it switches itself
off automatically after 5 minutes.
iIndicator lamp :flashes if too many elec-
trical consumers are switched on at the same
time when the battery voltage is low. After
approximately 30 seconds the windshield
heating switches off automatically.
Switching the rear window defroster
on/off
Switching on/off
XTurn the SmartKey to position 2in the ignition
lock (Ypage 112).
XPress the ªbutton.
The indicator lamp in the ªbutton lights
up or goes out.
iThe rear window defroster has a high cur-
rent draw. You should therefore switch it off
as soon as the rear window is clear. as it only switches off automatically after several
minutes.
iIf the battery voltage is too low, the rear
window defroster may switch off.
Problems with the rear window
defroster
If the indicator lamp in the ªrear window
defroster button flashes, the on-board voltage is
too low. The rear window defroster has deacti-
vated prematurely or cannot be activated.
XSwitch off any consumers that are not
required, e.g. reading lamps or interior light-
ing.
When the battery is sufficiently charged, the
rear window defroster is activated again auto- matically.
Activating/deactivating air-recircula-
tion mode
If you switch on air-recirculation mode, the win-
dows can fog up more quickly, in particular at
low temperatures. Only use air-recirculation
mode briefly to prevent the windows from fog-
ging up.
XTurn the SmartKey to position 2in the ignition
lock (Ypage 112).
XTo activate: press thedbutton.
The indicator lamp in the dbutton lights
up.
iAir-recirculation mode is automatically acti-
vated at high levels of pollution or at high out-
side temperatures. When air-recirculation
mode is activated automatically, the indicator
lamp in the dbutton is not lit.
Outside air is added after approximately
30 minutes.
Operating the climate control systems107
Climate control
Z
Page 114 of 302

Wear suitable footwear to ensure correct
usage of the pedals.
GWARNING
If you switch off the ignition while driving,
safety-relevant functions are only available
with limitations, or not at all. This could affect, for example, the power steering and the brake
boosting effect. You will require considerably
more effort to steer and brake. There is a risk
of an accident.
Do not switch off the ignition while driving.
GWARNING
If the parking brake has not been fully
released when driving, the parking brake can:
Roverheat and cause a fire
Rlose its hold function.
There is a risk of fire and an accident. Release
the parking brake fully before driving off.
!Warm up the engine quickly. Do not use the
engine's full performance until it has reached
operating temperature.
Only shift the automatic transmission to the
desired drive position when the vehicle is sta-
tionary.
Where possible, avoid spinning the drive
wheels when pulling away on slippery roads.
You could otherwise damage the drive train.
!Avoid high engine speeds when the engine
is cold. The engine's service life could other-
wise be significantly shortened. Do not use
the engine's full performance until it has
reached operating temperature.
!AMG vehicles: at low engine oil tempera-
tures below 68 ‡ (+20 †), the maximum
engine speed is restricted in order to protect the engine. To protect the engine and main-
tain smooth engine operation, avoid driving at
full throttle when the engine is cold.
SmartKey positions
gTo remove the SmartKey
1Power supply for some consumers, such as
the windshield wipers
2Ignition (power supply for all consumers)
and drive position
3To start the engine
As soon as the ignition is switched on, all the
indicator lamps in the instrument cluster light
up. If an indicator lamp does not go out after
starting the engine or lights up while driving, see
(
Ypage 205).
If the SmartKey is in position 0in the ignition
lock for an extended period of time, it can no
longer be turned in the ignition lock. The steer-
ing is then locked. To unlock, remove the Smart-
Key and reinsert it into the ignition lock.
The steering is locked when you remove the
SmartKey from the ignition lock.
XRemove the SmartKey when the engine is
switched off.
The starter battery could otherwise be dis-
charged.
If you cannot turn the SmartKey in the ignition
lock, the starter battery may not be charged
sufficiently.
XCheck the starter battery and charge it if nec-
essary (Ypage 252).
or
XJump-start the vehicle (Ypage 254).
iYou can only remove the SmartKey if:
Rthe SmartKey is in position 0in the ignition
lock.
Rthe automatic transmission selector lever
is in P.
112Driving
Driving and parking