Page 57 of 246

Setting the interior welcome light
XCall upVehicle Settings(Ypage 54).
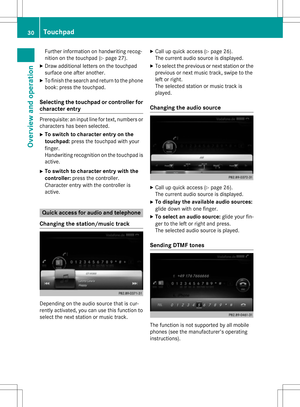
XTo select Interior welcome light: turn
and press the controller.
XPress the controller.
The function is switched on or off, depend-
ing on the previous status.
You can find further information on the inte-
rior lighting in the vehicle Operator's Manual.
Switching locator lighting on/off
If you switch on the LocatorLightingfunc-
tion, the exterior lighting is switched on for a
short time when it is dark. The light switch
must be set to Ã.
The exterior lighting remains on for
40 seconds after the vehicle is unlocked.
When you start the engine, the locator light-
ing is switched off and automatic headlamp
mode is activated.
You can find further information on the auto-
matic headlamp mode in the vehicle Opera-
tor's Manual.
XCall up Vehicle Settings(Ypage 54).
XTo select Locator Lighting: turn and
press the controller.
XPress the controller.
The function is switched on or off, depend-
ing on the previous status.
You can find further information on the lock-
ing feature in the vehicle Operator's Manual.
iThere may be fewer settings or none
depending on your vehicle's equipment.
Setting the delayed switch-off time
Interior lighting delayed switch-off
The interior lighting is activated for the dura-
tion of the delayed switch-off time when the
SmartKey is removed from the ignition lock.
XCall up Vehicle Settings(Ypage 54).
XTo select Interior Lighting Delayed
Switch-off: turn and press the controller.
The setting element is active.
XTo change the delayed switch-off time: turn the controller.
You can find further information on the inte-
rior lighting in the vehicle Operator's Manual.
Exterior lighting delayed switch-off
If you switch on the Exterior Lighting
Delayed Switch-offfunction, the exterior
lighting is switched on for a short time after
the engine is switched off. The light switch
must be set to Ã.
The exterior lighting remains on for
60 seconds after the engine is switched off. If
you close all the doors and the tailgate, the
exterior lighting switches off after the set
time.
XCall up Vehicle Settings(Ypage 54).
XTo select Exterior Lighting Delayed
Switch-off: turn and press the controller.
The setting element is active.
XTo change the delayed switch-off time: turn the controller.
Displaying energy consumption and
generated electrical energy
A bar graph displays the energy consumption
and the generated electrical energy.
XCall up Vehicle Settings(Ypage 54).
XTo select Consumption: turn and press the
controller.
The energy consumption and the generated
electrical energy for the last 15 minutes of
the journey is shown.
For further information on energy consump-
tion, see the vehicle Operator's Manual.
Displaying the fuel consumption
A bar graph displays the fuel consumption.
Vehicle settings55
Vehicle functions
Z
Page 58 of 246

XCallupVehicle Settings(Ypage 54 ).
XTo select Consumption: turn and press the
controller.
The fuel consumption for the last
15 minutes of the journey isshown.
Switching the ionization on/off
The ionization has a cleansing effect on the air
in the veh icleinterior. You can find further
information on the ionization inthe vehicle
Operator's Manual.
XCall upVehicle Settings(Ypage 54 ).
XTo select Ionization: turn and press the
controller.
The ionization isswitched on or off ,
depe nding on the previous status: press
and turn the controller.
Ex iting a menu
XPress the %button.
Seats
Overview
You can configure the following seat func-
tionsinthe menu:
RBackrest sidebolsters
RLumbar
RSeat cushion
RMassage
RDynamics
RSeat heating balance
iThere may befewer settings or none
depe nding on your vehicle's equipment.
Selecting the adjustment function
and seat
XPress the Øbutton on the COMAND
control panel.
or
XTo select Vehiclefrom the main function
bar: turn and press the controller.
The veh iclemenu is disp layed.
XTo select Seat Settings: turn and press
the controller.
The seat settings menu isshown.
or
XPress the Tbutton on the controller.
The seat settings menu isshown.
XTo select the required seat function: turn
and press the controller.
XTo switch between DriverandFront
Passenger: slide 1 the controller.
Adjustment functions
Adjusting the backrest side bolsters
XCall up the seat functions (Ypage 56 ).
XTo select Backrest Sides: turn and press
the controller.
XTo change the setting: turn the controller.
You willsee the changes you have made in
the settings display.
XTo exit the menu: press the %button.
Adjusting the seat contour in the lum-
bar region of the seat backrest
This function allows you to adjust the air
cushions inthe lumbar region of the backrest
(4-way lumbar support ).
XCallup the seat functions (Ypage 56).
XTo select Lumbar: turn and press the con-
troller.
XTo act ivate the setting element: press the
controller.
XTo change the setting: slide 4or1
the controller.
The change will be visible in the setting ele-
ment.
XTo exit the menu: press the %button.
56Seats
Vehicle functions
Page 59 of 246

Adjusting the seat cushion
XCall up theseat function s (Ypage 56).
XTo select SeatSurfac e:tur nand press
th econtroller .
XTo selectaseat :slide 1 thecontroller .
XTo changeth esetting :tur nth econtroller .
You will see th echanges you hav emade in
th esetting sdisplay.
XTo exit th emenu: press th e% button.
Adjusting the driving dynamics
XCall up th eseat function s (Ypage 56).
XTo selectaseat :slide 1 thecontroller .
XTo select DynamicMulticontour Sea t:
tur nand press th econtroller .
You can select :
R0: Off
R1:Level 1(weak )
R2:Level 2(strong)
XTo select th esetting :tur nth econtroller .
XTo exit th emenu: press th e% button.
Massage programs
Overview
You can select th efollowin gmassage pro -
grams:
RRelaxing Massag e
Massage theentire back, rising waves,
soothing downward movement s
RActivatingMassag e
Mobilizing massage and rising and
descendin gdynamic wave s
RClassicMassag e
Single and twi nwave smoving upwards
across th eentire bac k
RMobilizin gMassag e
Mobilization via stronger single and twi n
wave smoving upward sacross th eentire
bac k
Selecting a massage program
XCall up th eseat function s (Ypage 56).
XTo select Massage:tur nand pre ssthecon-
troller .
XTo select aseat :slide 1 thecontroller .
XTo select massage program s:tur nand
pre ssthecontroller .
The massage program run sfor approx -
imately 15 to 25 minute s,depending on th e
setting .
XTo exit th emenu: pressthe% button.
Seat heating balance
The balance function control sth edistribution
of heat for th eseat backr estand seat cush-
ion .
The balance function influence sth ecurrentl y
set heating level of th eseat heating (see th e
vehicl eOperator' sManual).
XCall up th eseat function s (Ypage 56).
XTo selectSeatHeatin gBalanc e:tur n
and pre ssthecontroller .
XTo selectaseat :slide 1 thecontroller .
XTo changeth esetting :tur nth econtroller .
You will seethechanges you hav emade in
th e setting sdisplay.
The setting srepresen tth efollowing:
R0— thebackrest and seat cushion are
evenly heated according to th e setting
selected wit hth eseat heating button.
R1to 3—th eheat output to th eseat cushion
is reduce don elevel at atime.
R-1to -3—th eheat output to th ebackr estis
reduce don elevel at atime.
XTo exit th emenu: press th e% button.
Resetting all ad justments
XCall up th eseat function s (Ypage 56).
XSelect aseat .
Seats57
Vehicle functions
Z
Page 60 of 246

XTo selectReset: turn and press the con-
troller.
XTo select a seat: slide 1the controller.
XTo reset: press the controller.
A prompt appears.
XTo select YesorNo: turn and press the con-
troller.
If you select No
the process is canceled.
After selecting Yes
all seat adjustments are
reset to the default values (factory setting).
360° camera
General notes
The 360° camera surveys the vehicle sur-
roundings and assists you, for example when
parking or at exits with reduced visibility.
The 360° camera is only an aid. It is not a
replacement for your attention to your imme-
diate surroundings. You are always responsi-
ble for safe maneuvering and parking. Make
sure that no persons or animals are in the
maneuvering range.
Further information on the 360°camera can
be found in the vehicle Operator's Manual.
Displaying the 360° camera image
The 360° camera image can be displayed if:
Ryour vehicle is equipped with a 360° cam-
era
Rthe 360° Camerafunction is activated;
(see the vehicle Operator's Manual)
XPress the Øbutton on the COMAND
control panel.
or
XPress Vehiclein the main function bar.
The vehicle menu is displayed.
XSelect 360° Camera.
The 360° camera image appears in split-
screen mode. You will see the previous view on the display
if, when the function is switched on:
Ryou turn the SmartKey to position
1in the
ignition lock
Ryou select transmission position P
Rwhen you are driving at moderate speeds
Switching the display off manually
XTo select &: slide 6and press the con-
troller.
Switching the display on automatically
XYou can automatically switch the 360 cam-
era display using reverse gear
(
Ypage 58).
Switching the 360° camera auto-
matic mode on/off
This function activates the 360° camera
when reverse gear is engaged.
XPress the Øbutton on the COMAND
control panel.
or
XPress Vehiclein the main function bar.
The vehicle menu is displayed.
XTo switch to the menu bar: slide6the
controller.
XTo select System Settings: turn and
press the controller.
XTo select 360°Camera: turn and press the
controller.
The 360° Camera
menu appears.
XSelect Activation by R gear.
The function is switched on Oor off ª,
depending on the previous status.
Opening the camera cover for clean-
ing
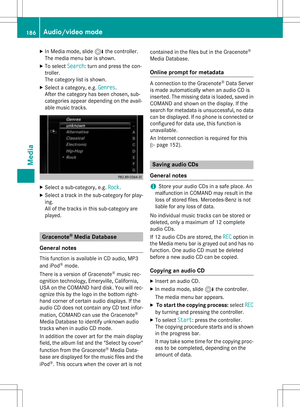
XTo select OpenCameraCoverin the 360°
camera menu: turn the controller and press
to confirm.
The Please
Wait...message appears for
approximately three seconds.
58360° camera
Vehicle functions
Page 61 of 246

The camera cover opens.
The camera cover closes automatically if:
Rthe ignition is switched off
Rthe vehicle exceeds a moderate speed
Rear view camera
General notes
The rear view camera covers the immediate
surroundings of the vehicle and assists you
when parking.
The rear view camera is only an aid. It is not a
replacement for your attention to your imme-
diate surroundings. You are always responsi- ble for safe maneuvering and parking. When
maneuvering or parking, make sure that there
are no persons, animals or objects in the area in which you are maneuvering.
You can find further information about the
rear view camera in the vehicle Operator's
Manual.
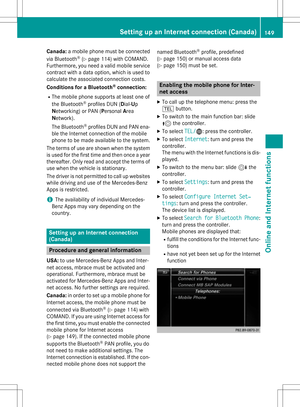
Switching the rear view camera auto-
matic mode on/off
This function activates the rear view camera
when reverse gear is engaged.
XPress the Øbutton on the COMAND
control panel.
or
XPress Vehiclein the main function bar.
The vehicle menu is displayed.
XSlide 6the controller.
XTo select System Settings: turn and
press the controller.
XSelect Rear View Camera.
The Rear View Camera
menu appears.
XSelect Activation by R gear.
The function is switched on Oor off ª,
depending on the previous status.
When you start the vehicle and engage
reverse gear, the area behind the vehicle is
shown with guide lines in the display. You can find further information about the rear
view camera in the vehicle Operator's Man-
ual.
Opening the camera cover for clean-
ing
XTo select
Open Camera Coverin the rear
view camera menu: turn and press the con-
troller.
The Please
Wait...message appears for
approximately three seconds.
The camera cover opens.
The camera cover closes automatically if:
Rthe ignition is switched off
Rthe vehicle pulls away
DYNAMIC SELECT
General notes
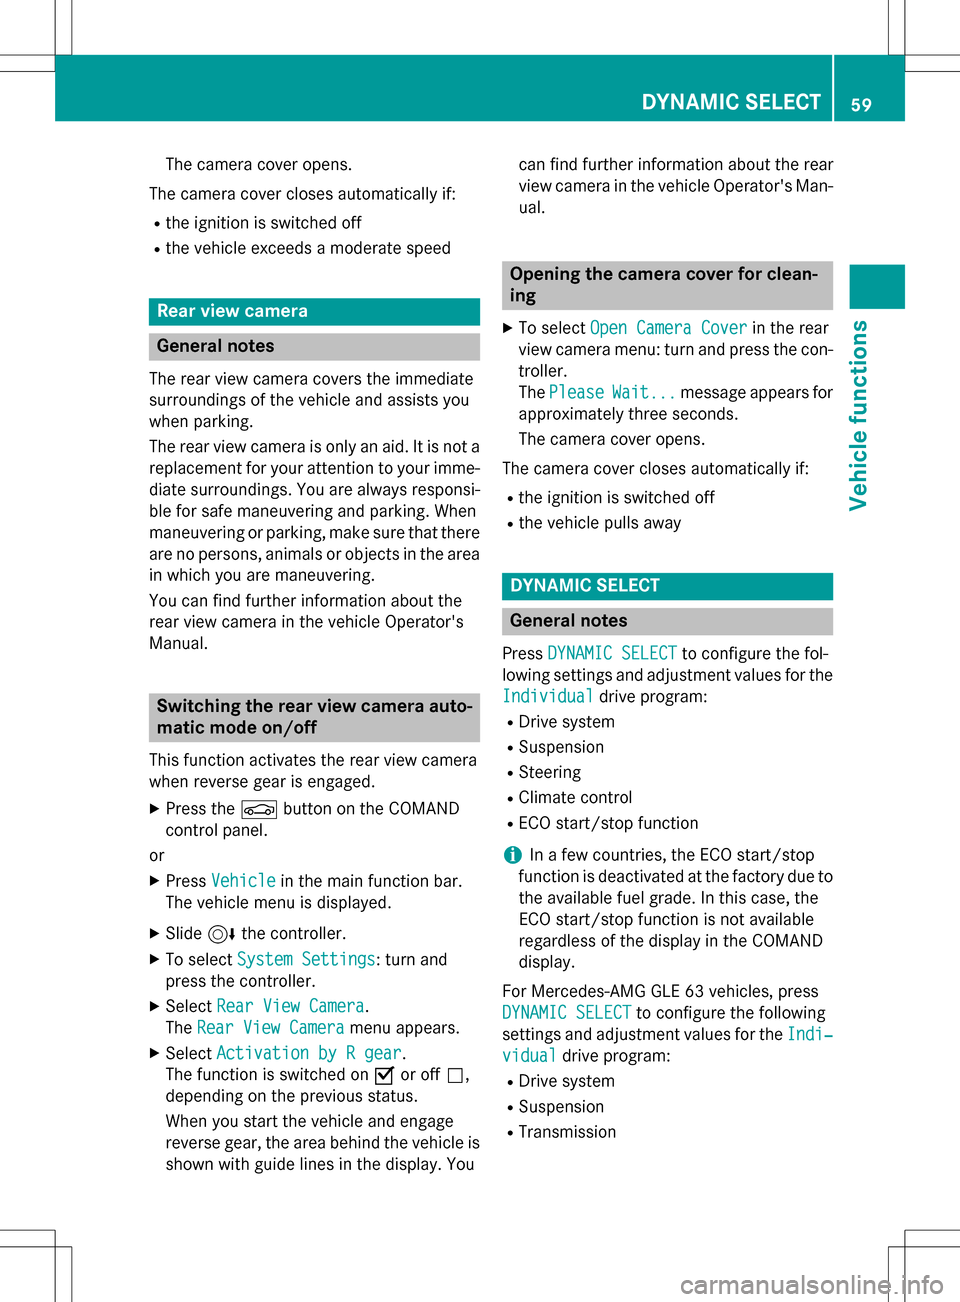
Press DYNAMIC SELECTto configure the fol-
lowing settings and adjustment values for the
Individual
drive program:
RDrive system
RSuspension
RSteering
RClimate control
RECO start/stop function
iIn a few countries, the ECO start/stop
function is deactivated at the factory due to the available fuel grade. In this case, the
ECO start/stop function is not available
regardless of the display in the COMAND
display.
For Mercedes-AMG GLE 63 vehicles, press
DYNAMIC SELECT
to configure the following
settings and adjustment values for the Indi‐
vidualdrive program:
RDrive system
RSuspension
RTransmission
DYNAMIC SELECT59
Vehicle functions
Z
Page 62 of 246

iThere may be fewer settings or none
depending on your vehicle's equipment.
For further information on the Individual
drive program, see the vehicle Operator's
Manual.
Configuration via the controller
XPress theØbutton.
or
XPress Vehiclein the main function bar.
The vehicle menu is displayed.
XTo select DYNAMIC SELECT: turn and press
the controller.
The menu for setting the Individual
drive
program appears.
XTo select Drive,Suspension, Steering,
Climate Control
or Eco Start/Stop
Function: turn and press the controller.
XFor Mercedes-AMG GLE 63 vehicles, to
select Drive
,Suspensionor Transmis‐
sion: turn and press the controller.
XTo select individual settings: turn and
press the controller.
Configuration via the DYNAMIC
SELECT controller
i
There may be fewer settings depending
on your vehicle's equipment.
XUse the DYNAMIC SELECT controller to
select the Individual
drive program (see
the vehicle Operator's Manual).
A window appears after a short while.
XTo confirm Adjust: press the controller.
The menu for setting the Individual
drive
program appears.
XTo select Drive,Suspension, Steering,
Climate Control
or Eco Start/Stop
Function: turn and press the controller.
XFor Mercedes-AMG GLE 63 vehicles, to
select Drive
,Suspensionor Transmis‐
sion: turn and press the controller.
XTo select individual settings: turn and
press the controller.
Setting options
You can choose from the following settings
for the drive:
CComfort
SSport
S+Sport +
MManual
EEco
You can make the following settings for the
suspension:
CComfort
SSport
S+Sport +
You can make the following settings for the
steering:
CComfort
SSport
You can choose from the following settings
for climate control:
EEco
CComfort
60DYNAMIC SELECT
Vehicle functions
Page 63 of 246
You can choose from the following settings
for the ECO start/stop function:
ONSwitches the ECO
start/stop function
on
UnlitSwitches the ECO
start/stop function
off
Setting options (Mercedes-AMG GLE
vehicles)
You can choose from the following settings
for the drive:
RRace
CComfort
SSport
S+Sport +
You can make the following settings for the
suspension:
CComfort
SSport
S+Sport +
You can choose from the following settings
for the transmission:
DAutomatic
Mmanually
You can find further information on the indi-
vidual drive program in the vehicle Operator's
Manual.
DYNAMIC SELECT61
Vehicle functions
Z
Page 64 of 246