Page 33 of 246

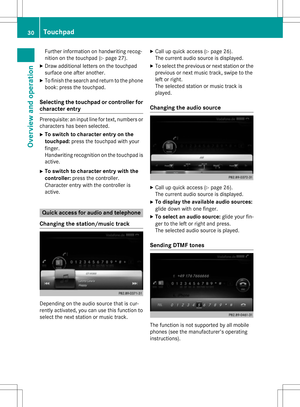
XCallupquic k access during a call
(
Ypage 26).
XTo select cha racters: glide your finger to
the left or right and press.
Every character selected will betransmit-
ted immediately.
Basic functions
Switching COMAND on/off
XPress the qcontrol knob.
When you switch on COMAND, a warning
message willappear. COMAND calls up the
previously selected menu.
If you switch off COMAND, playback of the
current media source will also be switched
off.
Adjusting the volume
Adjusting the volume for media sources
XTurn the qcontrol knob.
or
XPress the WorX button on the mul-
tifunction steering wheel.
The volume of the med iasource currently
selected changes.
Adjusting the volume for traffic
announcements and navigation
announcements
During traff icor navigation announcements:
XTurn the qcontrol knob.
or
XPress the WorX button on the mul-
tifunction steering wheel.
iYou can set the volume for navigation
announcements to bedifferent from the
volume of the respective med iasource.
Adjusting the volume for phone calls
You can adjust the volume for hands-free
mode during a telephone call.
XTurn the qcontrol knob.
or
XPress the WorX button on the mul-
tifunction steering wheel.
iSe tting the volume for the Voice Control
System voice output, see the separate
operating instructions.
Switching the sound on or off
Media source sound
XPress the 8button on the COMAND
controller or the multifunction steering
wheel.
The sound isswitched off. Ifthe audio out-
put isswitched off, the status line willshow
the 8 symbol. Ifyou switch the med ia
source or change the volume, the sound is
automatical lyswitched on.
iEven ifthe sound isswitched off, you will
still hear navigation system announce-
ments.
Switching navigation announcements
off and on again
XTo switch navigation announcemen ts
off: press the 8button during an
announcement.
The Spoken
drivingrecommendations
have been deactivated.message
appears.
XTo switch navigation announcemen ts
back on: switch COMAND off and then on
again (
Ypage 31 ).
or
XSt art a new route calculation (Ypage 71 ).
Basic functions31
Overview and operation
Page 34 of 246

or
XSelect+: while route guidance is active,
show the menu and press the controller
(
Ypage 90).
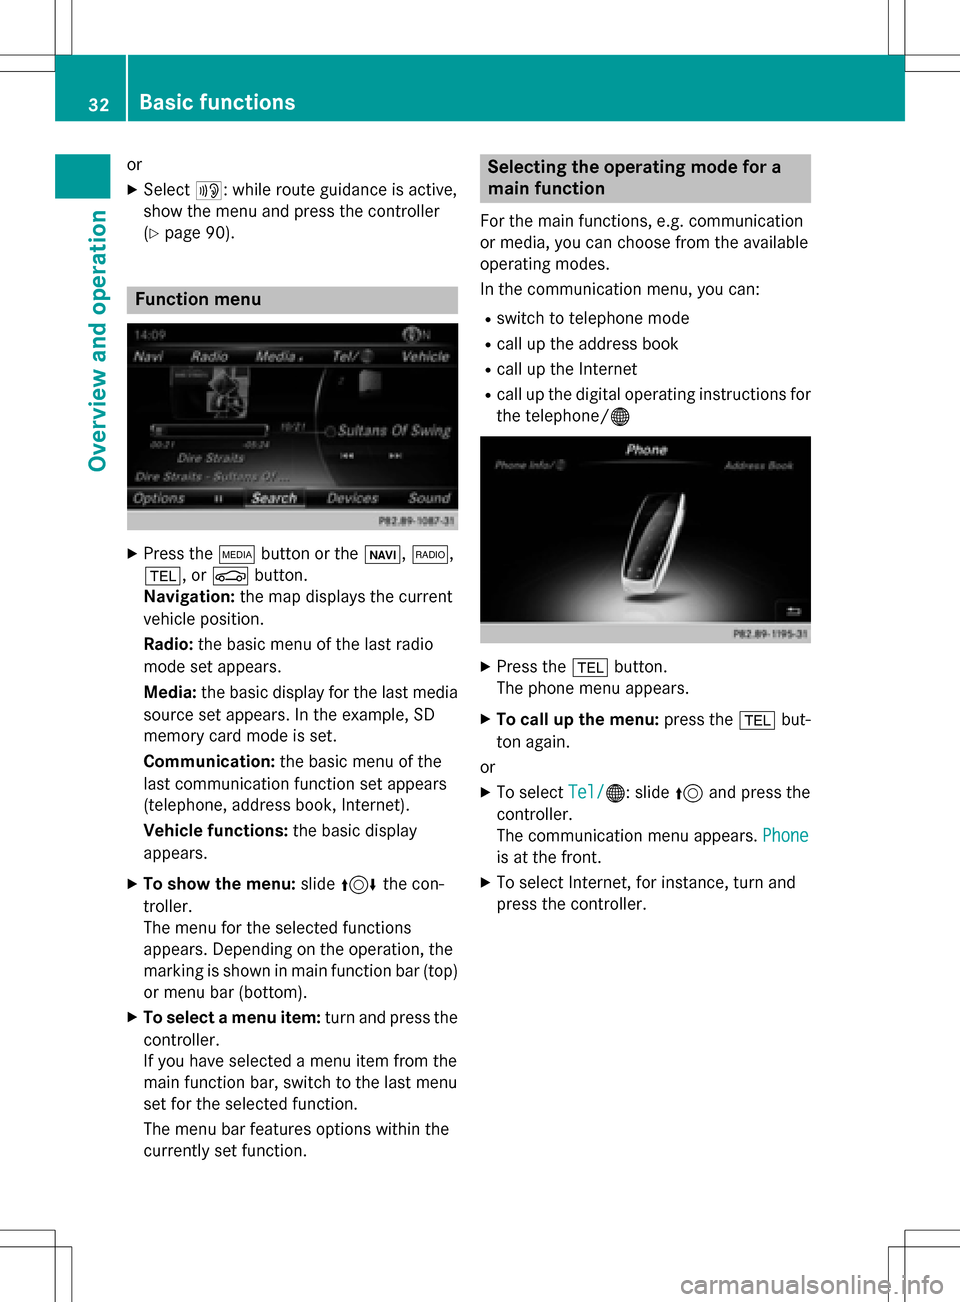
Function menu
XPress the Õbutton or the ß,$,
%, or Øbutton.
Navigation: the map displays the current
vehicle position.
Radio: the basic menu of the last radio
mode set appears.
Media: the basic display for the last media
source set appears. In the example, SD
memory card mode is set.
Communication: the basic menu of the
last communication function set appears
(telephone, address book, Internet).
Vehicle functions: the basic display
appears.
XTo show the menu: slide4 the con-
troller.
The menu for the selected functions
appears. Depending on the operation, the
marking is shown in main function bar (top) or menu bar (bottom).
XTo select a menu item: turn and press the
controller.
If you have selected a menu item from the
main function bar, switch to the last menu
set for the selected function.
The menu bar features options within the
currently set function.
Selecting the operating mode for a
main function
For the main functions, e.g. communication
or media, you can choose from the available
operating modes.
In the communication menu, you can:
Rswitch to telephone mode
Rcall up the address book
Rcall up the Internet
Rcall up the digital operating instructions for
the telephone/®
XPress the %button.
The phone menu appears.
XTo call up the menu: press the%but-
ton again.
or
XTo select Tel/®: slide5and press the
controller.
The communication menu appears. Phone
is at the front.
XTo select Internet, for instance, turn and
press the controller.
32Basic functions
Overview and operation
Page 35 of 246

Character entry (telephony)
Entering characters using the charac-
ter bar
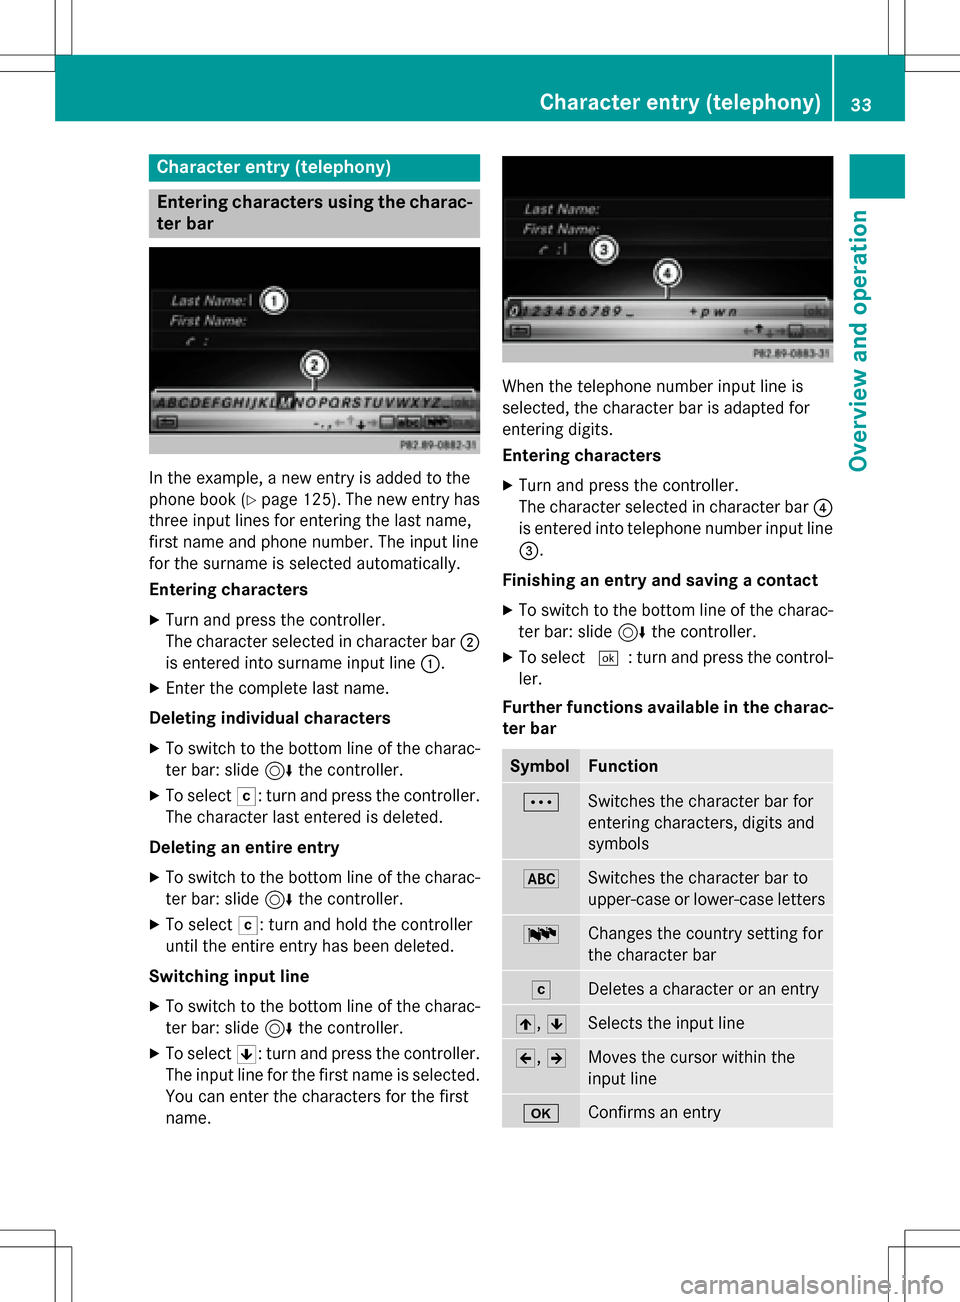
In the example, a new entry is added to the
phone book (
Ypage 125). The new entry has
three input lines for entering the last name,
first name and phone number. The input line
for the surname is selected automatically.
Entering characters
XTurn and press the controller.
The character selected in character bar ;
is entered into surname input line :.
XEnter the complete last name.
Deleting individual characters
XTo switch to the bottom line of the charac-
ter bar: slide 6the controller.
XTo select F: turn and press the controller.
The character last entered is deleted.
Deleting an entire entry
XTo switch to the bottom line of the charac-
ter bar: slide 6the controller.
XTo select F: turn and hold the controller
until the entire entry has been deleted.
Switching input line
XTo switch to the bottom line of the charac-
ter bar: slide 6the controller.
XTo select 5: turn and press the controller.
The input line for the first name is selected.
You can enter the characters for the first
name.
When the telephone number input line is
selected, the character bar is adapted for
entering digits.
Entering characters
XTurn and press the controller.
The character selected in character bar ?
is entered into telephone number input line
=.
Finishing an entry and saving a contact
XTo switch to the bottom line of the charac-
ter bar: slide 6the controller.
XTo select ¬: turn and press the control-
ler.
Further functions available in the charac-
ter bar
SymbolFunction
ÄSwitches the character bar for
entering characters, digits and
symbols
*Switches the character bar to
upper-case or lower-case letters
BChanges the country setting for
the character bar
FDeletes a character or an entry
4, 5Selects the input line
2,3Moves the cursor within the
input line
bConfirms an entry
Character entry (telephony)33
Overview and operation
Page 36 of 246

SymbolFunction
%Cancels input
SInserts a paragraph
Entering characters using the number
keypad
If an input line for text or numbers is selected,
the number keypad is used for the character
entry.
XFor example, to enter the letterc: press the
l number key briefly three times in suc-
cession.
An additional display area is shown with all
the available characters. Press the key
repeatedly to go through the characters
until c
is highlighted.
XWait until the character display goes out.
The letter c
is entered in the input line.
Character entry (navigation)
Entering characters using the charac-
ter bar
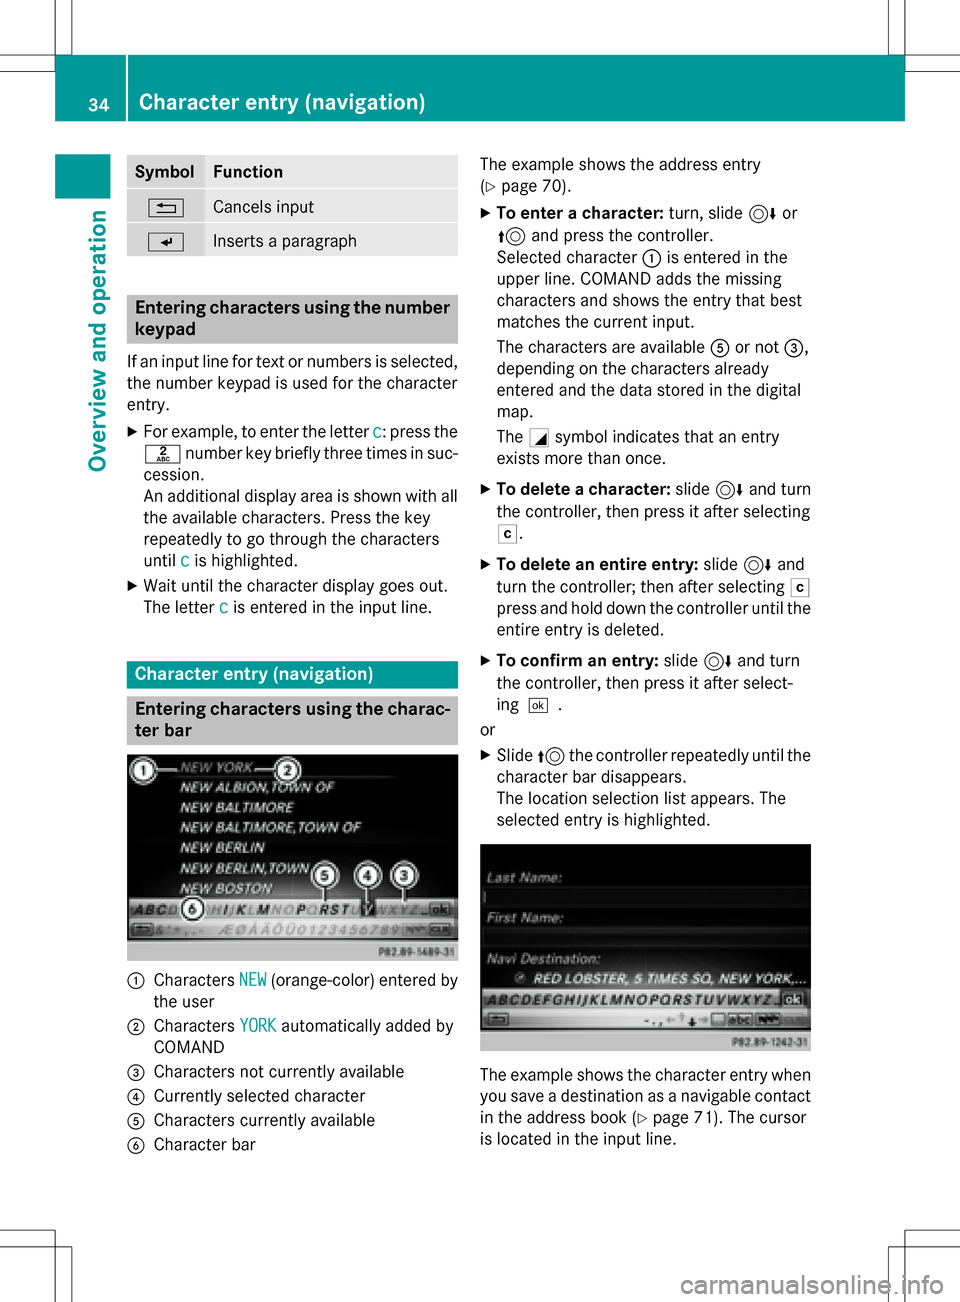
:Characters NEW(orange-color) entered by
the user
;Characters YORKautomatically added by
COMAND
=Characters not currently available
?Currently selected character
ACharacters currently available
BCharacter bar The example shows the address entry
(
Ypage 70).
XTo enter a character:
turn, slide6or
5 and press the controller.
Selected character :is entered in the
upper line. COMAND adds the missing
characters and shows the entry that best
matches the current input.
The characters are available Aor not =,
depending on the characters already
entered and the data stored in the digital
map.
The Gsymbol indicates that an entry
exists more than once.
XTo delete a character: slide6and turn
the controller, then press it after selecting
F.
XTo delete an entire entry: slide6and
turn the controller; then after selecting F
press and hold down the controller until the
entire entry is deleted.
XTo confirm an entry: slide6and turn
the controller, then press it after select-
ing¬.
or
XSlide 5the controller repeatedly until the
character bar disappears.
The location selection list appears. The
selected entry is highlighted.
The example shows the character entry when
you save a destination as a navigable contact
in the address book (
Ypage 71). The cursor
is located in the input line.
34Character entry (navigation)
Overview and operation
Page 37 of 246

XTo select an input line:slide6and turn
the controller, then press it after selecting
4 or5.
or
XSlide 5the controller repeatedly until the
character bar disappears.
XTurn and press the controller.
XTo move the cursor: select the input line.
XSlide6and turn the controller, then
press it after selecting 2or3.
XTo change the character bar language:
slide 6and turn the controller, then
press it after selecting B.
A menu appears.
XTurn and press the controller.
The character set for the selected language
is set.
The character bar entry functions are listed in
the table.
SymbolFunction
ÄSwitches between digits and
symbols
*Switches the character bar from
uppercase to lowercase letters
BChanges the character bar lan-
guage
FDeletes a character or an entry
èSwitches to keyword search
(
Ypage 72)
4, 5Selects the input line
SymbolFunction
2,3Moves the cursor within the
input line
¬Confirms an entry
&Cancels input
Entering characters using the number
keypad
XPress one of the number keypad buttons,
e.g. l, once or repeatedly in quick suc-
cession.
The character appears at the bottom of the
display when the key is pressed. The first
available letter is highlighted.
You see which characters you can enter
with that key. Each time the key is pressed,
the next character is selected.
XWait until the character display goes out.
The entries matching your input are shown in the list.
Favorites
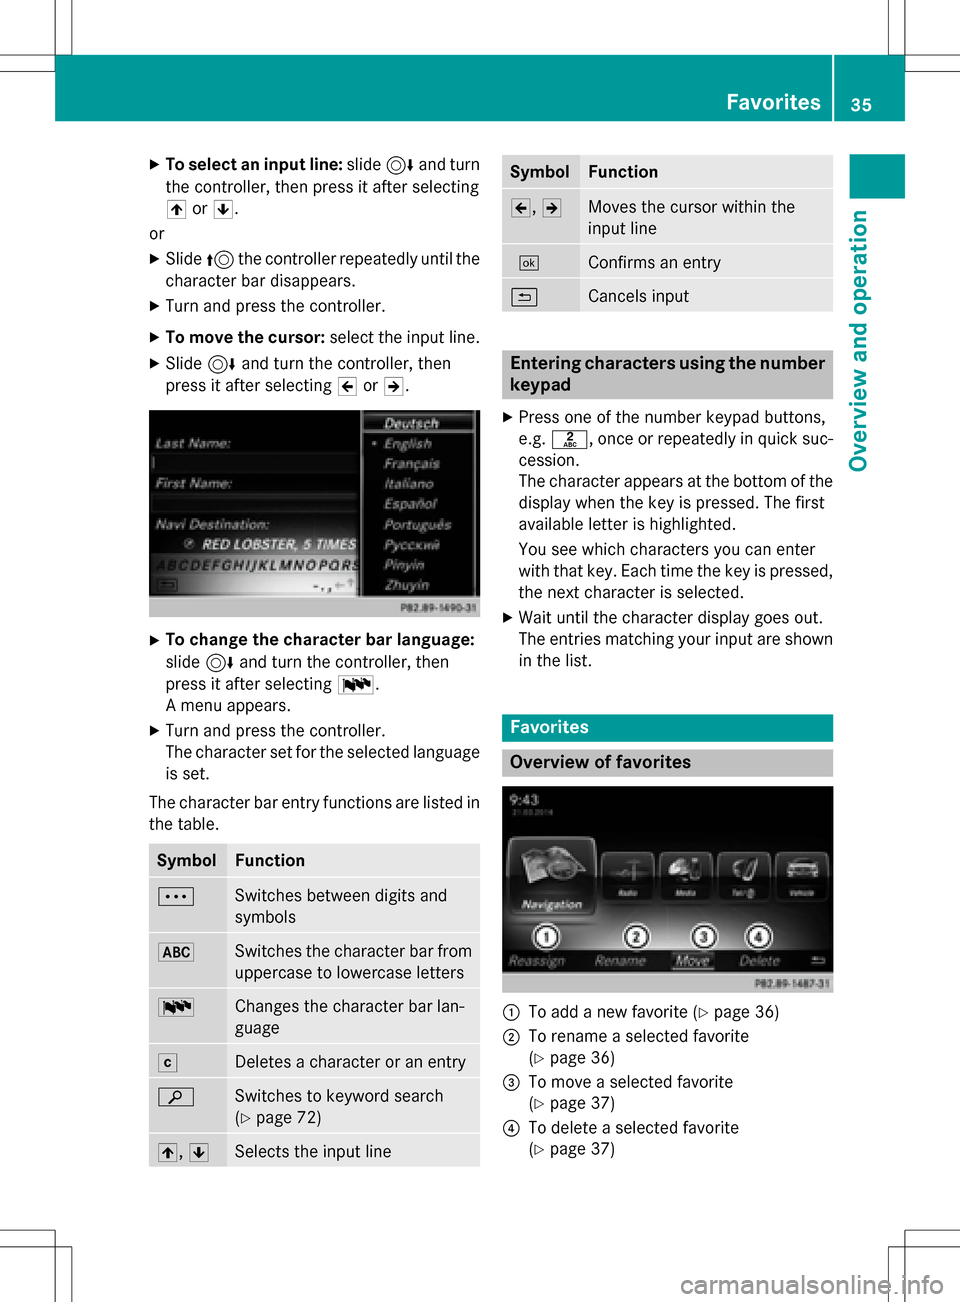
Overview of favorites
:To add a new favorite (Ypage 36)
;To rename a selected favorite
(
Ypage 36)
=To move a selected favorite
(
Ypage 37)
?To delete a selected favorite
(
Ypage 37)
Favorites35
Overview and operation
Page 38 of 246

XTo display the favorites overview:press
the favorites button on the controller.
The favorites are displayed.
XTo show the menu bar: slide6the con-
troller.
You can manage a total of 20 favorites.
Further information on how to select and dis-
play a favorite (
Ypage 36).
Displaying and selecting favorites
XPress the favorites button on the controller. The favorites are displayed.
XTo call up a favorite: turn and press the
controller.
Adding favorites
Adding predefined favorites
XPress the favorites button on the controller. The favorites are displayed.
XTo show the menu bar: slide6the con-
troller.
XTo select Reassign, turn and press the
controller.
The categories for the available favorites
are displayed:
RNavigation
REntertainment
RTel
RVehicle
XTo select a category: turn the controller
and press to confirm.
The corresponding favorites are displayed.
XTo select a favorite: turn and press the
controller.
XTo store a favorite in the desired order:
turn and press the controller.
The favorite has been added.
If a favorite is stored over another favorite,
this is then deleted.
Adding your own favorites
You can create your own favorites to help you
to use these functions, for example:
Rcalling up telephone numbers from the tele- phone book
Rselecting a radio station
Rskipping to a specific point in a track or
audio book
Rcalling up preferred media
Rselecting navigation destinations for route
calculation
The example shows how to save a telephone
number from the phone book as a favorite.
XCall up the phone book.
XSearch for the contact and display the
phone number.
XTo store a phone number as a favorite:
press and hold the favorites button on the
controller until the favorites are displayed.
XTo store a favorite in the desired order:
turn and press the controller.
The favorite is added.
If a favorite is stored over another favorite,
this is then deleted.
Renaming favorites
XPress the favorites button on the controller.
The favorites are displayed.
XTo select a favorite to be renamed: turn
the controller.
XTo show the menu bar: slide6the con-
troller.
XTo select Rename, turn and press the con-
troller.
XEnter characters using the controller.
XTo finish the entry: select OK.
The favorite is renamed.
36Favorites
Overview and operation
Page 39 of 246
Moving favorites
XPress the favorites button on the controller.The favorites are displayed.
XTo select a favorite to be moved: turn the
controller.
XTo show the menu bar: slide6the con-
troller.
XTo select Move: turn and press the control-
ler.
XTo store a favorite in the desired order:
turn and press the controller.
The favorite is moved.
If a favorite is stored over another favorite,
this is then deleted.
Deleting favorites
XPress the favorites button on the controller.
The favorites are displayed.
XTo select a favorite to be deleted: turn
the controller.
XTo show the menu bar: slide6the con-
troller.
XTo select Delete: turn and press the con-
troller.
XTo select YesorNo: turn and press the con-
troller.
If you select Yes
the favorite is deleted. No
cancels the procedure.
Favorites37
Overview and operation
Page 40 of 246