Page 97 of 246

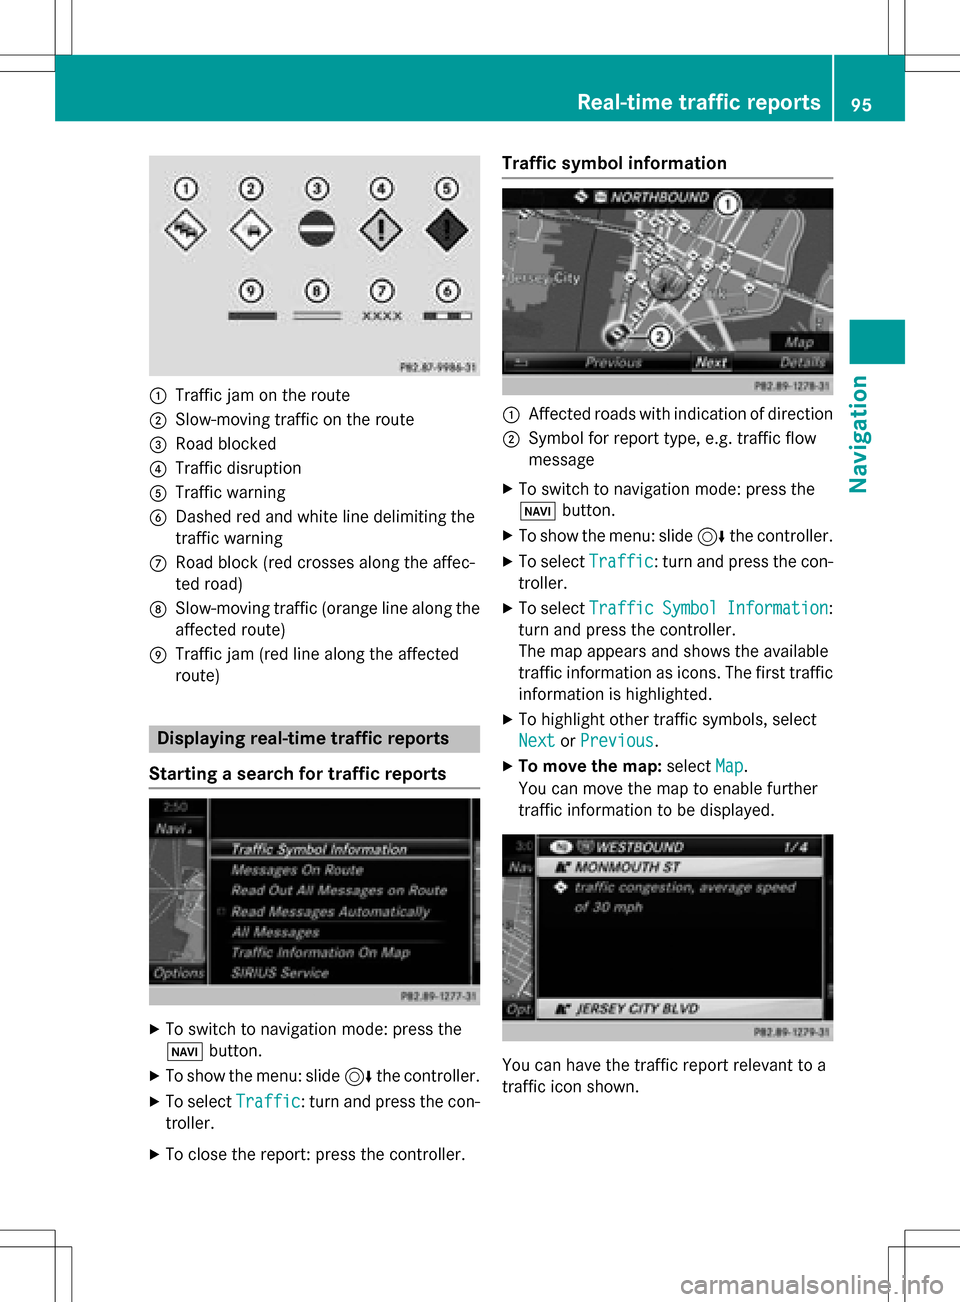
:Traffic jam on the route
;Slow-moving traffic on the route
=Road blocked
?Traffic disruption
ATraffic warning
BDashed red and white line delimiting the
traffic warning
CRoad block (red crosses along the affec-
ted road)
DSlow-moving traffic (orange line along the
affected route)
ETraffic jam (red line along the affected
route)
Displaying real-time traffic reports
Starting a search for traffic reports
XTo switch to navigation mode: press the
Ø button.
XTo show the menu: slide 6the controller.
XTo select Traffic: turn and press the con-
troller.
XTo close the report: press the controller.
Traffic symbol information
:Affected roads with indication of direction
;Symbol for report type, e.g. traffic flow
message
XTo switch to navigation mode: press the
Ø button.
XTo show the menu: slide 6the controller.
XTo select Traffic: turn and press the con-
troller.
XTo select TrafficSymbolInformation:
turn and press the controller.
The map appears and shows the available
traffic information as icons. The first traffic
information is highlighted.
XTo highlight other traffic symbols, select
Next
or Previous.
XTo move the map: selectMap.
You can move the map to enable further
traffic information to be displayed.
You can have the traffic report relevant to a
traffic icon shown.
Real-time traffic reports95
Navigation
Z
Page 98 of 246

XTo selectDetails: turn and press the con-
troller.
The report shows the following information:
RState/province, road and display of the
affected direction
RSection of the road to which the traffic
report applies
RTraffic icon and traffic report
XTo close the detailed display: press the
% button.
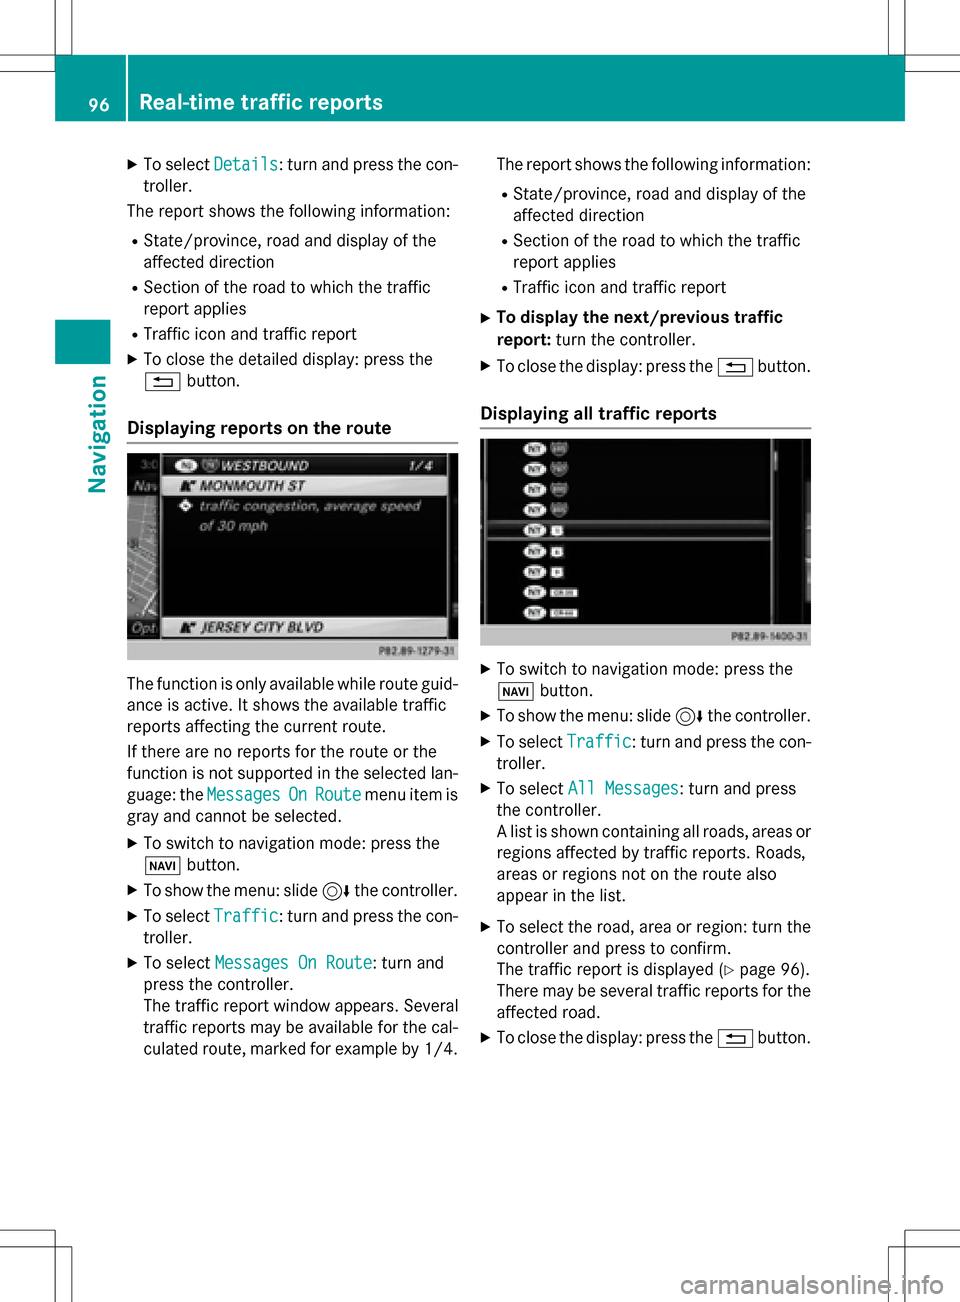
Displaying reports on the route
The function is only available while route guid-
ance is active. It shows the available traffic
reports affecting the current route.
If there are no reports for the route or the
function is not supported in the selected lan-
guage: the Messages
OnRoutemenu item is
gray and cannot be selected.
XTo switch to navigation mode: press the
Ø button.
XTo show the menu: slide 6the controller.
XTo select Traffic: turn and press the con-
troller.
XTo select Messages On Route: turn and
press the controller.
The traffic report window appears. Several
traffic reports may be available for the cal-
culated route, marked for example by 1/4. The report shows the following information:
RState/province, road and display of the
affected direction
RSection of the road to which the traffic
report applies
RTraffic icon and traffic report
XTo display the next/previous traffic
report:
turn the controller.
XTo close the display: press the %button.
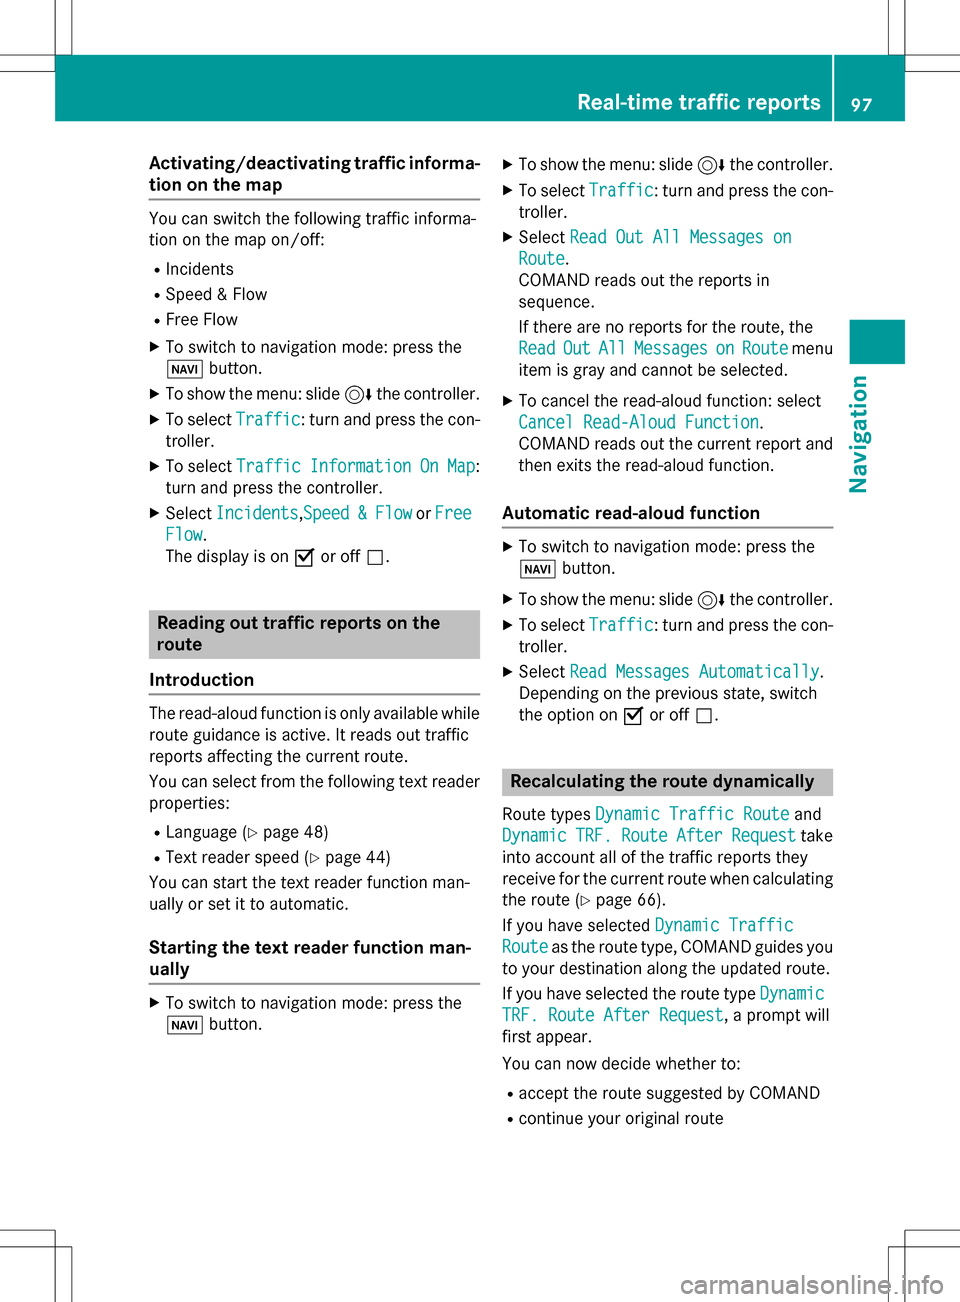
Displaying all traffic reports
XTo switch to navigation mode: press the
Ø button.
XTo show the menu: slide 6the controller.
XTo select Traffic: turn and press the con-
troller.
XTo select All Messages: turn and press
the controller.
A list is shown containing all roads, areas or
regions affected by traffic reports. Roads,
areas or regions not on the route also
appear in the list.
XTo select the road, area or region: turn the
controller and press to confirm.
The traffic report is displayed (
Ypage 96).
There may be several traffic reports for the
affected road.
XTo close the display: press the %button.
96Real-time traffic reports
Navigation
Page 99 of 246

Activating/deactivating traffic informa-
ti on on themap
You can switch th efollowin gtraffic informa-
tion on th emap on/off :
RIncidents
RSpeed&Flo w
RFree Flo w
XTo switch to navigation mode: press th e
Ø button.
XTo sho wthemenu: slide 6thecontroller .
XTo selectTraffic:tur nand press th econ-
troller .
XTo select TrafficInformationOnMap:
tur nand press th econtroller .
XSelectIncidents,Speed&Flo worFre e
Flow.
The display is on Oor off ª.
Reading out traffic rep ortson the
rou te
Introd uction
The read-aloud function is only available while
routeguidance is active .It read sout traffic
report saffecting th ecurren troute.
You can select from th efollowin gte xt reader
properties:
RLanguage (Ypage 48)
RTextreader spee d (Ypage 44)
You can start th ete xt reader function man -
ually or set it to automatic.
Starting the text reader function man-
ually
XTo switch to navigation mode: press th e
Ø button.
XTo sho wthemenu: slide 6thecontroller .
XTo selectTraffic:tur nand pre ssthecon-
troller .
XSelectRea dOut All Messages on
Route.
COMAND read sout th ereport sin
sequence.
If there are no report sfor th eroute, th e
Rea d
OutAllMessagesonRoutemen u
item is gray and canno tbe selected.
XTo cance lth eread-aloud function :select
Cancel Read-Alou dFunction
.
COMAND read sout th ecurren treport and
then exit sth eread-aloud function .
Automa tic read-aloud function
XTo switch to navigation mode: pre ssthe
Ø button.
XTo sho wthemenu: slide 6thecontroller .
XTo selectTraffic:tur nand pre ssthecon-
troller .
XSelectRea dMessages Automaticall y.
Dependin gon th eprevious state,switch
th eoption on Oor off ª.
Recalculating the route dynamically
Rout etypes Dynami cTraffi cRouteand
Dynami c
TRF.RouteAfterReques ttake
int oaccoun tall of th etraffic report sthey
receiv efor th ecurren trout ewhen calculating
th erout e (
Ypage 66).
If you hav eselected DynamicTraffi c
Routeas therout etype, COMAND guide syou
to your destination alon gth eupdated route.
If you hav eselected th erout etyp eDynami c
TRF.Route After Reques t, aprompt will
first appear .
You can no wdecide whether to :
Raccept therout esuggested by COMAND
Rcontinu eyour original rout e
Real-time traffic reports97
Navigation
Z
Page 100 of 246

XTo accept the proposed detour: press the
controller.
XTo reject the proposed detour and continue
with the original route: turn the controller
and press to confirm.
The original route is continued.
Storing destinations
General notes
In the "Last destinations" memory, the fol-
lowing are stored:
Rdestinations and intermediate destinations
according to the route calculation
Rthe current vehicle position or the crosshair
position, if these are saved
Rpersonal routes
If the memory is full, COMAND overwrites the
oldest destination.
You can save destinations permanently in the
address book (
Ypage 98) and on an SD
memory card (
Ypage 99). For instance, this
is possible immediately after entering an
address.
For further information on the address book,
see (
Ypage 127)
Storing the destination in the address
book
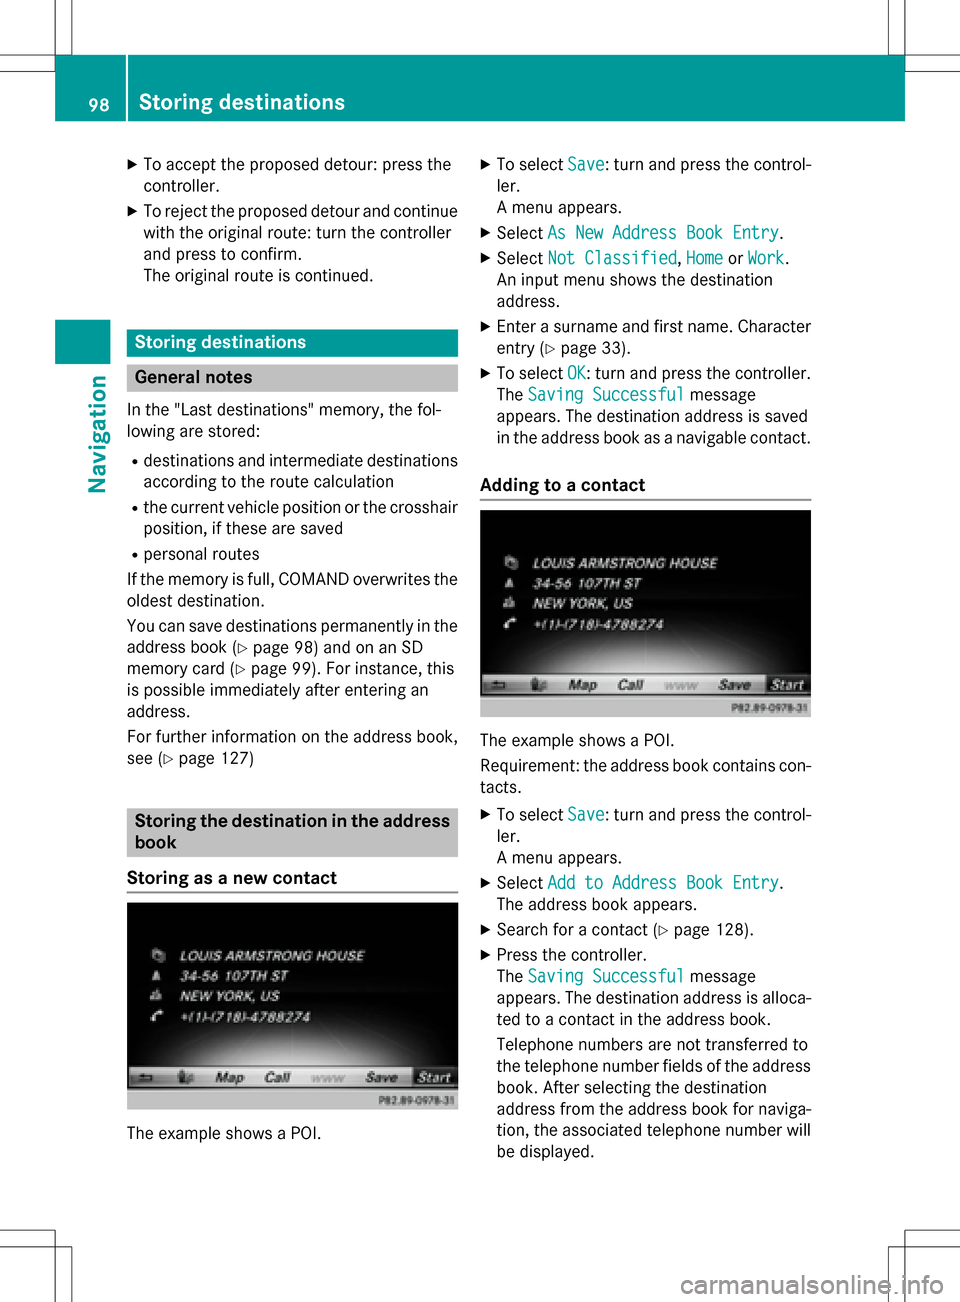
Storing as a new contact
The example shows a POI.
XTo select Save: turn and press the control-
ler.
A menu appears.
XSelect As New Address Book Entry.
XSelectNot Classified,Homeor Work.
An input menu shows the destination
address.
XEnter a surname and first name. Character
entry (
Ypage 33).
XTo select OK: turn and press the controller.
The Saving Successful
message
appears. The destination address is saved
in the address book as a navigable contact.
Adding to a contact
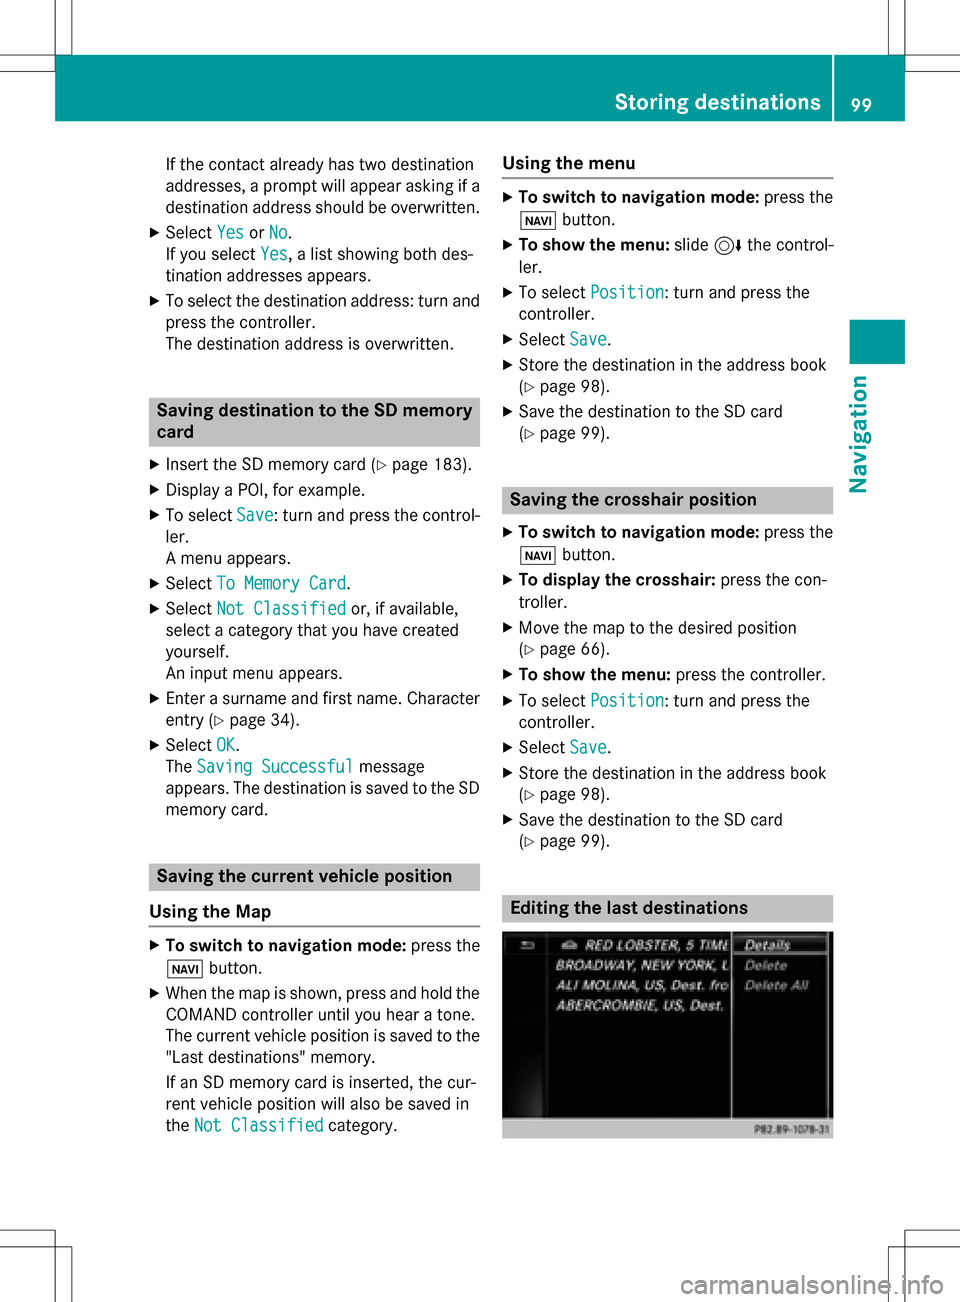
The example shows a POI.
Requirement: the address book contains con-
tacts.
XTo select Save: turn and press the control-
ler.
A menu appears.
XSelect Add to Address Book Entry.
The address book appears.
XSearch for a contact (Ypage 128).
XPress the controller.
The Saving Successful
message
appears. The destination address is alloca-
ted to a contact in the address book.
Telephone numbers are not transferred to
the telephone number fields of the address
book. After selecting the destination
address from the address book for naviga-
tion, the associated telephone number will
be displayed.
98Storing destinations
Navigation
Page 101 of 246

If the contact already has two destination
addresses, a prompt will appear asking if a
destination address should be overwritten.
XSelectYesorNo.
If you select Yes
, a list showing both des-
tination addresses appears.
XTo select the destination address: turn and
press the controller.
The destination address is overwritten.
Saving destination to the SD memory
card
XInsert the SD memory card (Ypage 183).
XDisplay a POI, for example.
XTo select Save: turn and press the control-
ler.
A menu appears.
XSelect To Memory Card.
XSelectNot Classifiedor, if available,
select a category that you have created
yourself.
An input menu appears.
XEnter a surname and first name. Character
entry (
Ypage 34).
XSelect OK.
The Saving Successful
message
appears. The destination is saved to the SD
memory card.
Saving the current vehicle position
Using the Map
XTo switch to navigation mode: press the
ß button.
XWhen the map is shown, press and hold the
COMAND controller until you hear a tone.
The current vehicle position is saved to the
"Last destinations" memory.
If an SD memory card is inserted, the cur-
rent vehicle position will also be saved in
theNot Classified
category.
Using the menu
XTo switch to navigation mode: press the
ß button.
XTo show the menu: slide6the control-
ler.
XTo select Position: turn and press the
controller.
XSelect Save.
XStore the destination in the address book
(
Ypage 98).
XSave the destination to the SD card
(
Ypage 99).
Saving the crosshair position
XTo switch to navigation mode: press the
ß button.
XTo display the crosshair: press the con-
troller.
XMove the map to the desired position
(
Ypage 66).
XTo show the menu: press the controller.
XTo selectPosition: turn and press the
controller.
XSelect Save.
XStore the destination in the address book
(
Ypage 98).
XSave the destination to the SD card
(
Ypage 99).
Editing the last destinations
Storing destinations99
Navigation
Z
Page 102 of 246

XTo switch to navigation mode:press the
ß button.
XTo show the menu: slide6the control-
ler.
XTo select Destination: turn and press the
controller.
XSelect From Last Destinations.
The "Last destinations" memory appears.
XTo save the destination: select the desti-
nation.
The destination address appears.
XStore the destination in the address book
(
Ypage 98).
XSave the destination to the SD card
(
Ypage 99).
XTo view the details: while in the "Last des-
tinations" memory, turn the controller and
highlight the entry.
XSlide 9the controller.
A menu appears.
XTo select Details: press the controller.
iThe destination address can be changed if
desired.
XTo delete one or all destinations: while in
the "Last destinations" memory, turn the
controller and highlight the entry.
XSlide 9the controller.
A menu appears.
XTo select DeleteorDelete All: turn and
press the controller.
A prompt appears.
XSelect YesorNo.
Selecting Yes
deletes the selected desti-
nation or all destinations.
Map functions
General notes
Company logos displayed on the map are
trademarks of the respective companies and
used solely for the purpose of indicating the
locations of these companies. The use of such
logos on the map does not indicate approval of, support of or advertising by these compa-
nies for the navigation system itself.
Map settings
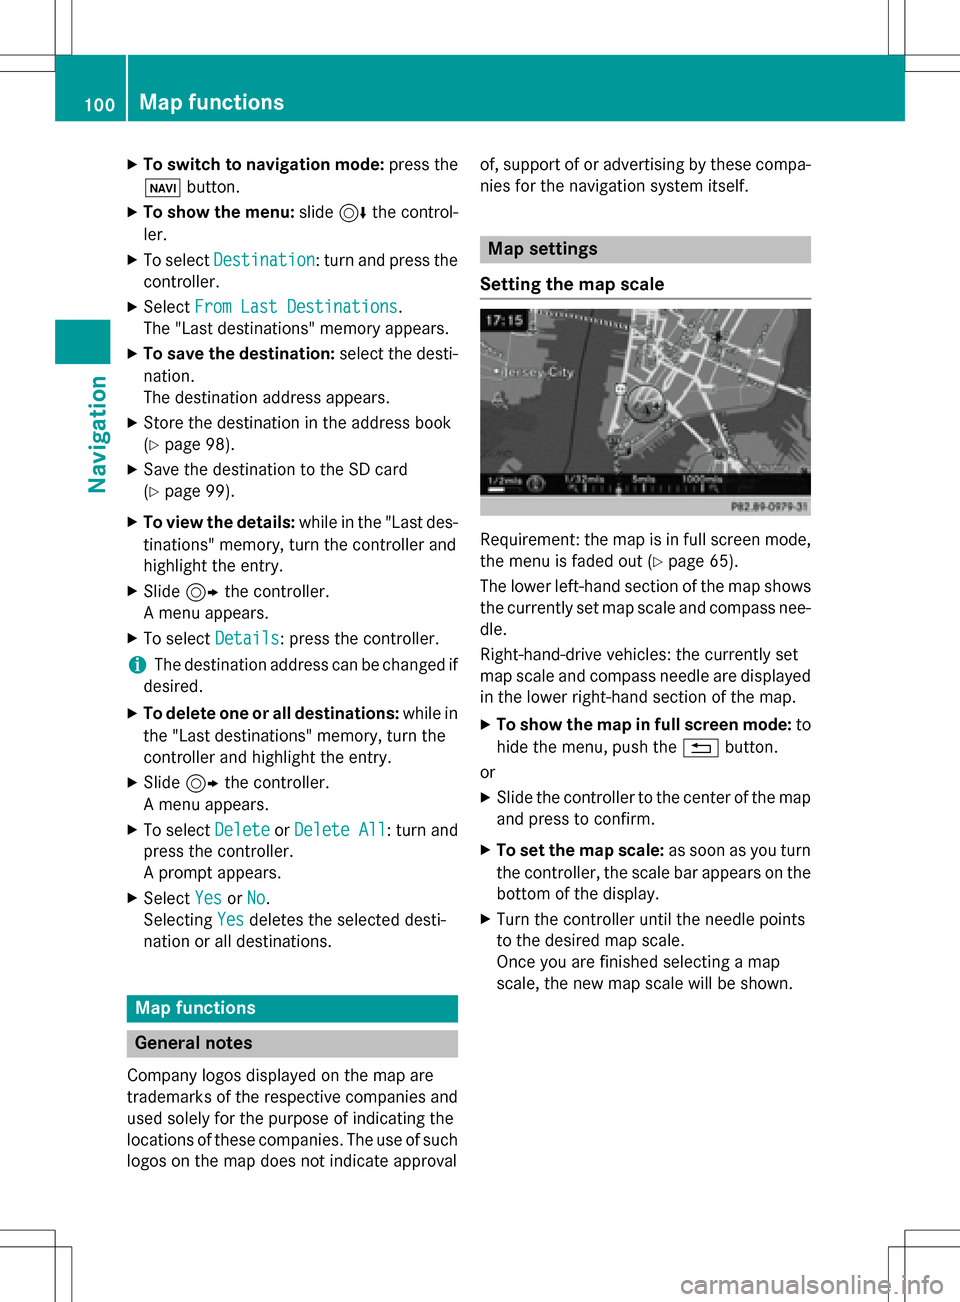
Setting the map scale
Requirement: the map is in full screen mode,
the menu is faded out (
Ypage 65).
The lower left-hand section of the map shows
the currently set map scale and compass nee-
dle.
Right-hand-drive vehicles: the currently set
map scale and compass needle are displayed
in the lower right-hand section of the map.
XTo show the map in full screen mode: to
hide the menu, push the %button.
or
XSlide the controller to the center of the map
and press to confirm.
XTo set the map scale: as soon as you turn
the controller, the scale bar appears on the bottom of the display.
XTurn the controller until the needle points
to the desired map scale.
Once you are finished selecting a map
scale, the new map scale will be shown.
100Map functions
Navigation
Page 103 of 246

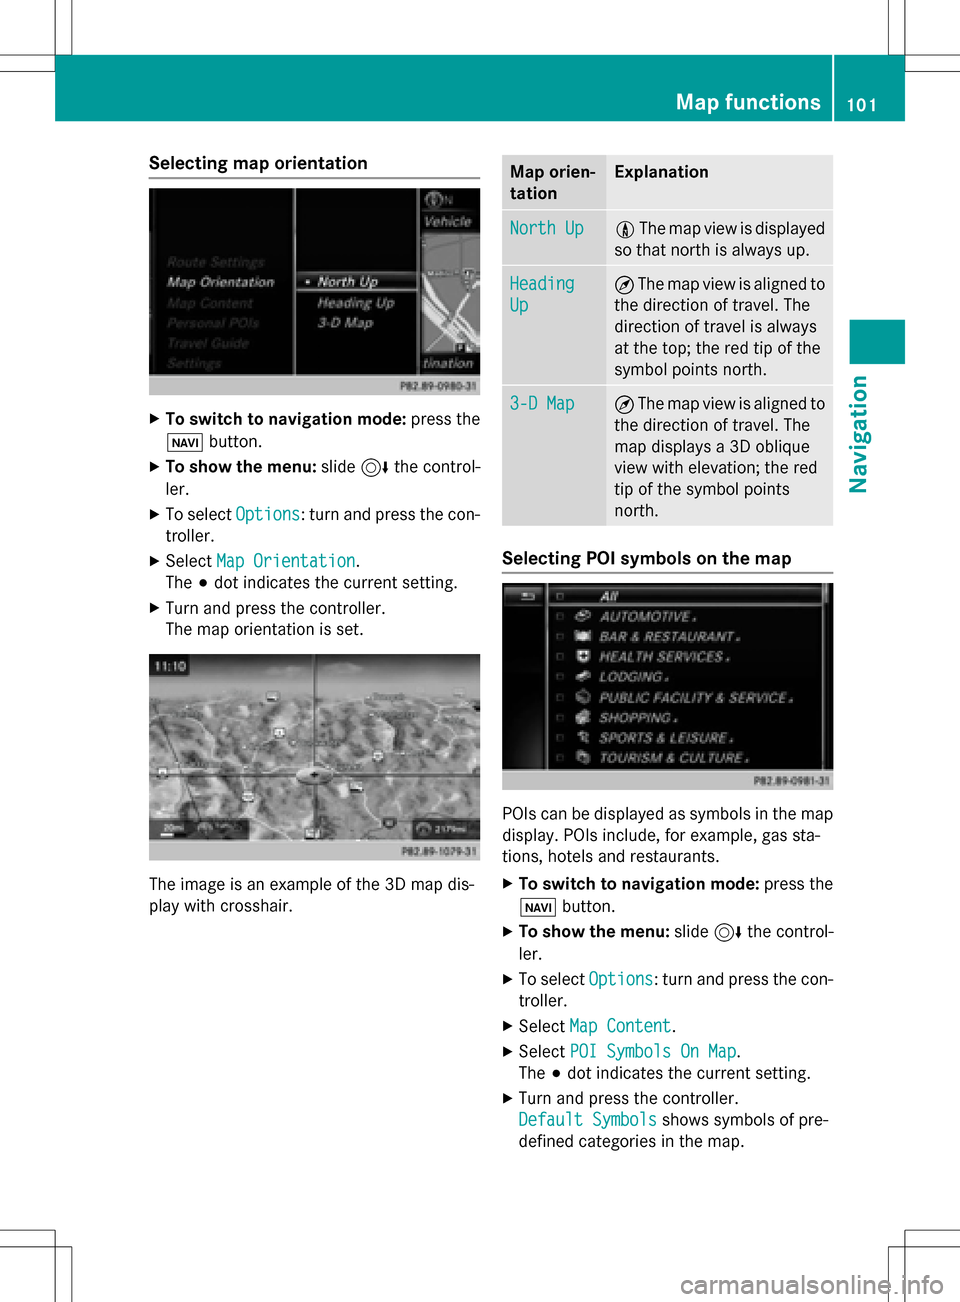
Selecting map orientation
XTo switch to navigation mode:press the
ß button.
XTo show the menu: slide6the control-
ler.
XTo select Options: turn and press the con-
troller.
XSelect Map Orientation.
The #dot indicates the current setting.
XTurn and press the controller.
The map orientation is set.
The image is an example of the 3D map dis-
play with crosshair.
Map orien-
tationExplanation
North Up0 The map view is displayed
so that north is always up.
Heading
Up
¤ The map view is aligned to
the direction of travel. The
direction of travel is always
at the top; the red tip of the
symbol points north.
3-D Map¤ The map view is aligned to
the direction of travel. The
map displays a 3D oblique
view with elevation; the red
tip of the symbol points
north.
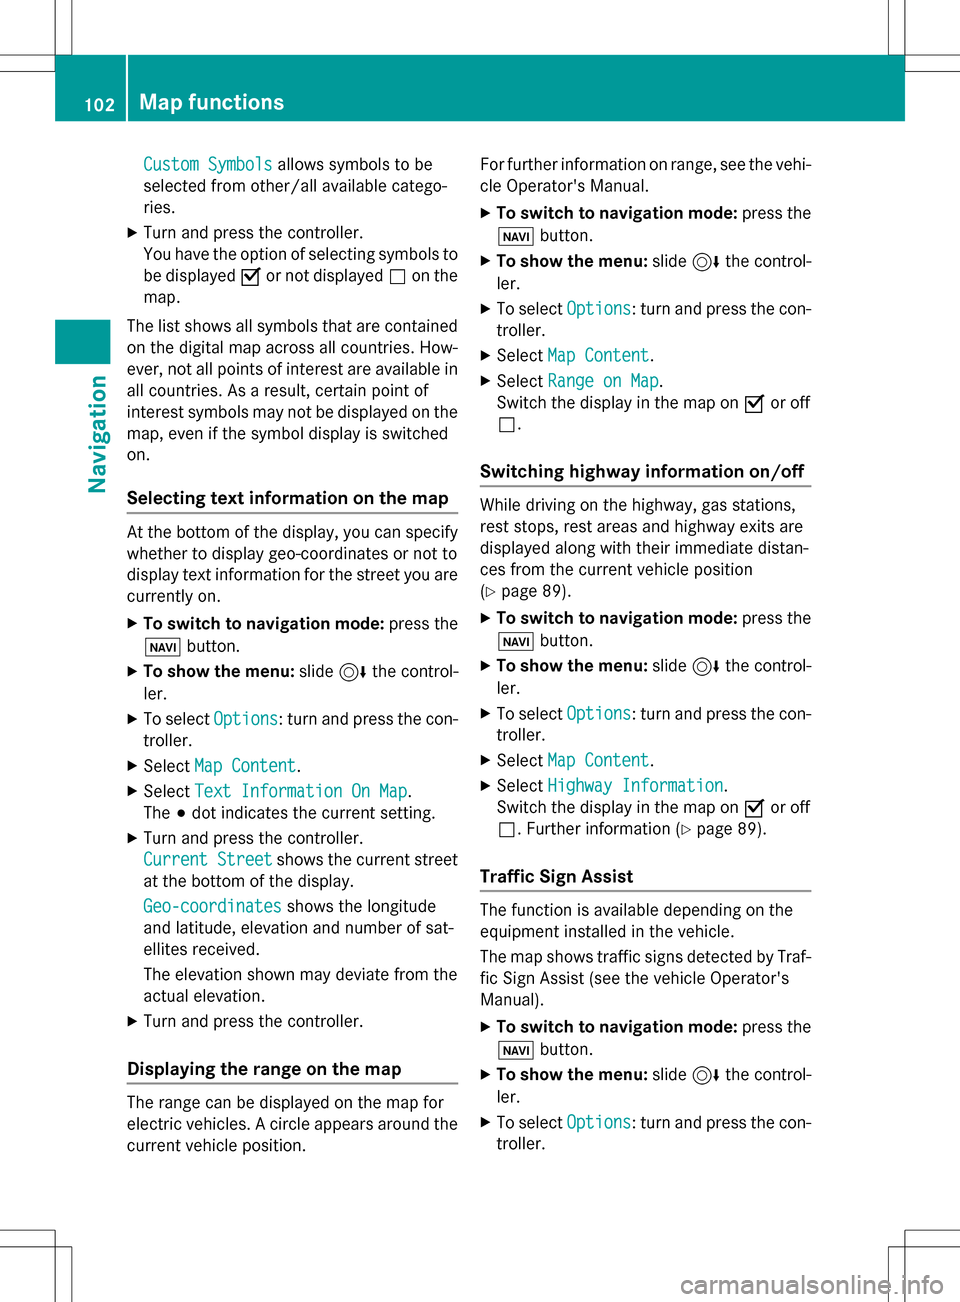
Selecting POI symbols on the map
POIs can be displayed as symbols in the map
display. POIs include, for example, gas sta-
tions, hotels and restaurants.
XTo switch to navigation mode: press the
ß button.
XTo show the menu: slide6the control-
ler.
XTo select Options: turn and press the con-
troller.
XSelect Map Content.
XSelectPOI Symbols On Map.
The #dot indicates the current setting.
XTurn and press the controller.
Default Symbols
shows symbols of pre-
defined categories in the map.
Map functions101
Navigation
Z
Page 104 of 246

Custom Symbolsallows symbols to be
selected from other/all available catego-
ries.
XTurn and press the controller.
You have the option of selecting symbols to
be displayed Oor not displayed ªon the
map.
The list shows all symbols that are contained
on the digital map across all countries. How-
ever, not all points of interest are available in
all countries. As a result, certain point of
interest symbols may not be displayed on the
map, even if the symbol display is switched
on.
Selecting text information on the map
At the bottom of the display, you can specify
whether to display geo-coordinates or not to
display text information for the street you are
currently on.
XTo switch to navigation mode: press the
ß button.
XTo show the menu: slide6the control-
ler.
XTo select Options: turn and press the con-
troller.
XSelect Map Content.
XSelectText Information On Map.
The #dot indicates the current setting.
XTurn and press the controller.
Current Street
shows the current street
at the bottom of the display.
Geo-coordinates
shows the longitude
and latitude, elevation and number of sat-
ellites received.
The elevation shown may deviate from the
actual elevation.
XTurn and press the controller.
Displaying the range on the map
The range can be displayed on the map for
electric vehicles. A circle appears around the
current vehicle position. For further information on range, see the vehi-
cle Operator's Manual.
XTo switch to navigation mode:
press the
ß button.
XTo show the menu: slide6the control-
ler.
XTo select Options: turn and press the con-
troller.
XSelect Map Content.
XSelectRange on Map.
Switch the display in the map on Oor off
ª.
Switching highway information on/off
While driving on the highway, gas stations,
rest stops, rest areas and highway exits are
displayed along with their immediate distan-
ces from the current vehicle position
(
Ypage 89).
XTo switch to navigation mode: press the
ß button.
XTo show the menu: slide6the control-
ler.
XTo select Options: turn and press the con-
troller.
XSelect Map Content.
XSelectHighway Information.
Switch the display in the map on Oor off
ª. Further information (
Ypage 89).
Traffic Sign Assist
The function is available depending on the
equipment installed in the vehicle.
The map shows traffic signs detected by Traf-
fic Sign Assist (see the vehicle Operator's
Manual).
XTo switch to navigation mode: press the
ß button.
XTo show the menu: slide6the control-
ler.
XTo select Options: turn and press the con-
troller.
102Map functions
Navigation