2016 MERCEDES-BENZ CLS-Class buttons
[x] Cancel search: buttonsPage 7 of 246

Starting playback if the Blue-
tooth®audio device has been
stopped ......................................... 194
Telephony ...................................... 114
Telephony notes ............................ 112
Buttons and controller ........................ 24
C
Call lists
Displaying details ........................... 135
Opening and selecting an entry ..... 135
Saving an entry in the address
book .............................................. 136
Camera
360° camera (COMAND) ................. 58
Rear view camera ............................ 59
Car pool lanes ...................................... 68
Category list (music search) ............ 188
CD
Fast forward/fast rewind ............... 185
Inserting ........................................ 182
Inserting/loading (DVD changer) ... 182
Inserting/loading (Rear Seat
Entertainment System) .................. 232
Notes on discs ............................... 181
Removing/ejecting (Rear Seat
Entertainment System) .................. 232
Selecting a track ............................ 185
Sound settings (balance, bass,
fader, treble) .................................. 206
CD mode
Playback options ........................... 184
Character entry
Phone book ...................................... 33
Characters
Entering (navigation) ........................ 34
Clear button ......................................... 25
Climate control
Ionization (COMAND) ....................... 56
COMAND
Active multicontour seat .................. 56
Basic functions ................................ 31
Components .................................... 20
Control panel ................................... 23
Controller ......................................... 24
Display ............................................. 21
Functions ......................................... 20 Multicontour seat ............................ 56
Seat functions .................................. 56
Switching on/off .............................. 31
COMAND display
Cleaning instructions ....................... 22
Setting ............................................. 40
Contacts
Deleting ......................................... 133
Importing ....................................... 133
Controller ............................................. 24
Cordless headphones
Changing batteries ........................ 229
Indicator lamp ................................ 227
Rear Seat Entertainment System ... 227
Selecting the screen ...................... 228
D
Date format, setting ............................ 43
Day design, setting ............................. 40
Delayed switch-off
Interior lighting ................................ 55
Delayed switch-off time
Setting (COMAND) ........................... 55
Destination
Saving to SD memory card .............. 99
Storing in the address book ............. 98
Destination (navigation)
Entering a destination using the
map ................................................. 78
Entering a point of interest .............. 75
Entering using geo-coordinates ....... 82
Entering using Mercedes-Benz
Apps ................................................ 82
Keyword search ............................... 72
Saving .............................................. 98
Selecting an address book con-
tact as a destination ........................ 74
Selecting from the list of last des-
tinations ........................................... 74
Destination/route download
Deleting a destination from the
server ............................................ 157
Displaying destinations in the
vehicle ........................................... 156
Displaying the vehicle identifica-
tion number (VIN) .......................... 157
Importing destinations ................... 157
Index5
Page 22 of 246

Overview
Components
:Display (Ypage 21)
;COMAND control panel (Ypage 23)
=Controller and buttons (Ypage 24)
COMAND consists of:
Rthe display
Rthe COMAND control panel with a single drive or DVD changer
Rthe controller and buttons
Rthe touchpad
Rtwo connection options for USB devices or via Media Interface in the center console
An iPod
®is connected via USB cable.
Functions
RHD FM radio and HD AM radio/satellite
radio
RMedia
-Media support: audio CD, MP3 CD, DVD
video, two connection options for USB or
via Media Interface, SD card, Bluetooth
®
audio
An iPod
®, for example, can be connected
directly to the USB via the integrated
Media Interface.
-Music search using all media
RSound system You can select from two sound systems:
-harman/kardon®Logic7®surround
sound system
-Bang & Olufsen BeoSound AMG sound
system
20Overview
Overview and operation
Page 26 of 246
FunctionPage
GAccepts a call119
Makes a call119
Redial119
Accepts a new call when a
call is being made (call wait-
ing)
122
HRejects a call119
Ends an active call123
ISwitches the mute function
on/off
31
Switches off navigation
announcements
31
FunctionPage
JSwitches to navigation
mode
65
Calls up the navigation sys-
tem menu
107
KCalls up the telephone
menu
113
LCalls up vehicle settings54
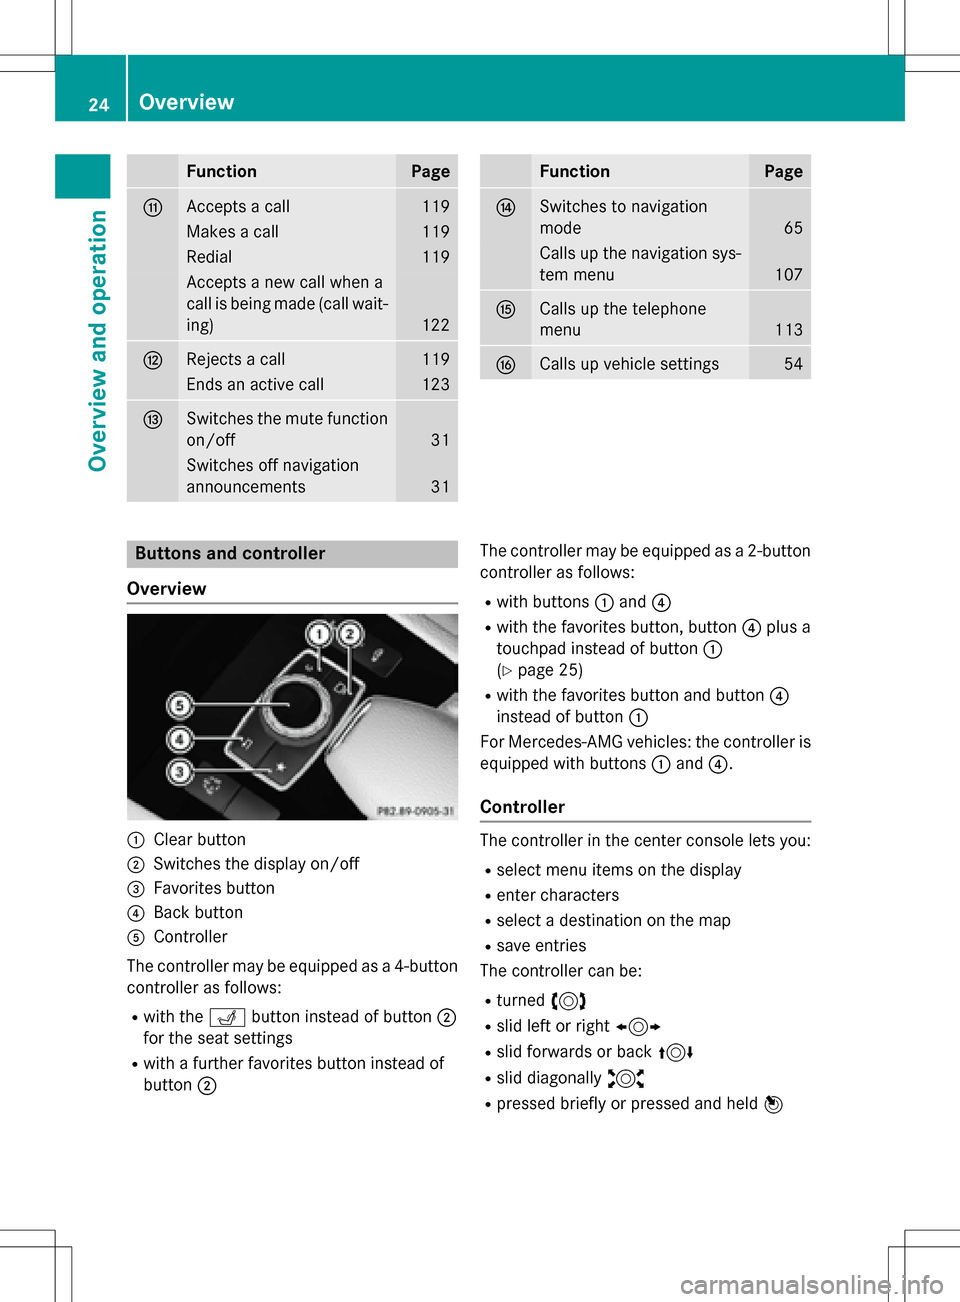
Buttons and controller
Overview
:Clear button
;Switches the display on/off
=Favorites button
?Back button
AController
The controller may be equipped as a 4-button
controller as follows:
Rwith the Tbutton instead of button ;
for the seat settings
Rwith a further favorites button instead of
button ; The controller may be equipped as a 2-button
controller as follows:
Rwith buttons
:and ?
Rwith the favorites button, button ?plus a
touchpad instead of button :
(
Ypage 25)
Rwith the favorites button and button ?
instead of button :
For Mercedes-AMG vehicles: the controller is
equipped with buttons :and ?.
Controller
The controller in the center console lets you:
Rselect menu items on the display
Renter characters
Rselect a destination on the map
Rsave entries
The controller can be:
Rturned 3
Rslid left or right 1
Rslid forwards or back 4
Rslid diagonally2
Rpressed briefly or pressed and held 7
24Overview
Overview and operation
Page 37 of 246
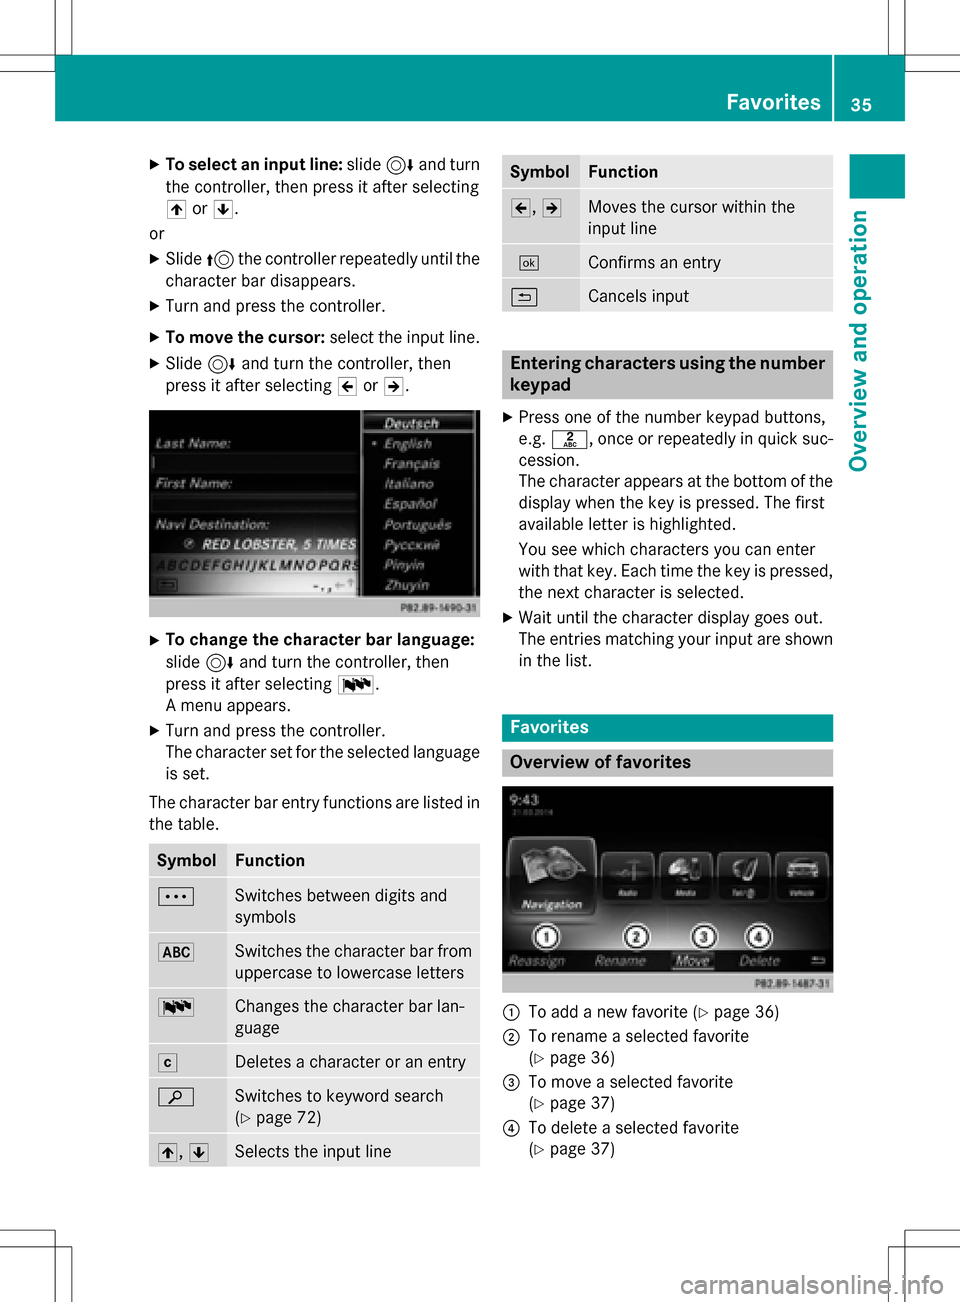
XTo select an input line:slide6and turn
the controller, then press it after selecting
4 or5.
or
XSlide 5the controller repeatedly until the
character bar disappears.
XTurn and press the controller.
XTo move the cursor: select the input line.
XSlide6and turn the controller, then
press it after selecting 2or3.
XTo change the character bar language:
slide 6and turn the controller, then
press it after selecting B.
A menu appears.
XTurn and press the controller.
The character set for the selected language
is set.
The character bar entry functions are listed in
the table.
SymbolFunction
ÄSwitches between digits and
symbols
*Switches the character bar from
uppercase to lowercase letters
BChanges the character bar lan-
guage
FDeletes a character or an entry
èSwitches to keyword search
(
Ypage 72)
4, 5Selects the input line
SymbolFunction
2,3Moves the cursor within the
input line
¬Confirms an entry
&Cancels input
Entering characters using the number
keypad
XPress one of the number keypad buttons,
e.g. l, once or repeatedly in quick suc-
cession.
The character appears at the bottom of the
display when the key is pressed. The first
available letter is highlighted.
You see which characters you can enter
with that key. Each time the key is pressed,
the next character is selected.
XWait until the character display goes out.
The entries matching your input are shown in the list.
Favorites
Overview of favorites
:To add a new favorite (Ypage 36)
;To rename a selected favorite
(
Ypage 36)
=To move a selected favorite
(
Ypage 37)
?To delete a selected favorite
(
Ypage 37)
Favorites35
Overview and operation
Page 184 of 246
CRemaining playingtime of th ecurren t
track
DElapse dplaybac ktime for th ecurren t
track
EGraphic time display
FAlbum cover (if available)
Inserting and removing adis c fr om
th esingle CD/DVD dr ive
XTo insert:press theþ buttonon th e
single drive.
If there is adisc already inserted, it will be
ejected.
XInser t adisc into th edisc slot wit hth eprin-
te dside facin gupwards.
The drive closes and th edisc is played .
If th eCD/DV Dis operate din Medi amode,
th ecorrespondin gbasic men uwill be
shown. If th eCD/DV Dis started usin g
another application (e.g. navigation), th e
display will no tchange.
iThe drive may no tbe able to play disc s
wit hcopy protection .
XTo remove:press theþ button.
The drive ejects th edisc .
XRemove th eejecte ddisc from th eslot .
If you do no ttak eth edisc out of th eslot ,it
is draw nin again automatically after ashort
while .
Inserting discs int oth eDVD changer
The DV Dchanger has amagazine wit hsix
trays.
XTo inser tth eCD/DVD int oth emaga-
zin etray :press th eV button.
The magazine men uappears.
XTo select th emagazine tray to be filled:
tur nand press th econtroller or press th e
number buttons (1-6) on COMAND .
The DV Dchanger switches to th eselected
magazine tray.
The Please Wait.. .
message appears.
You will then see th ePlease insert
dis c1.message .
XInsert adisc into th edisc slot wit hth eprin-
te dside facin gupwards.
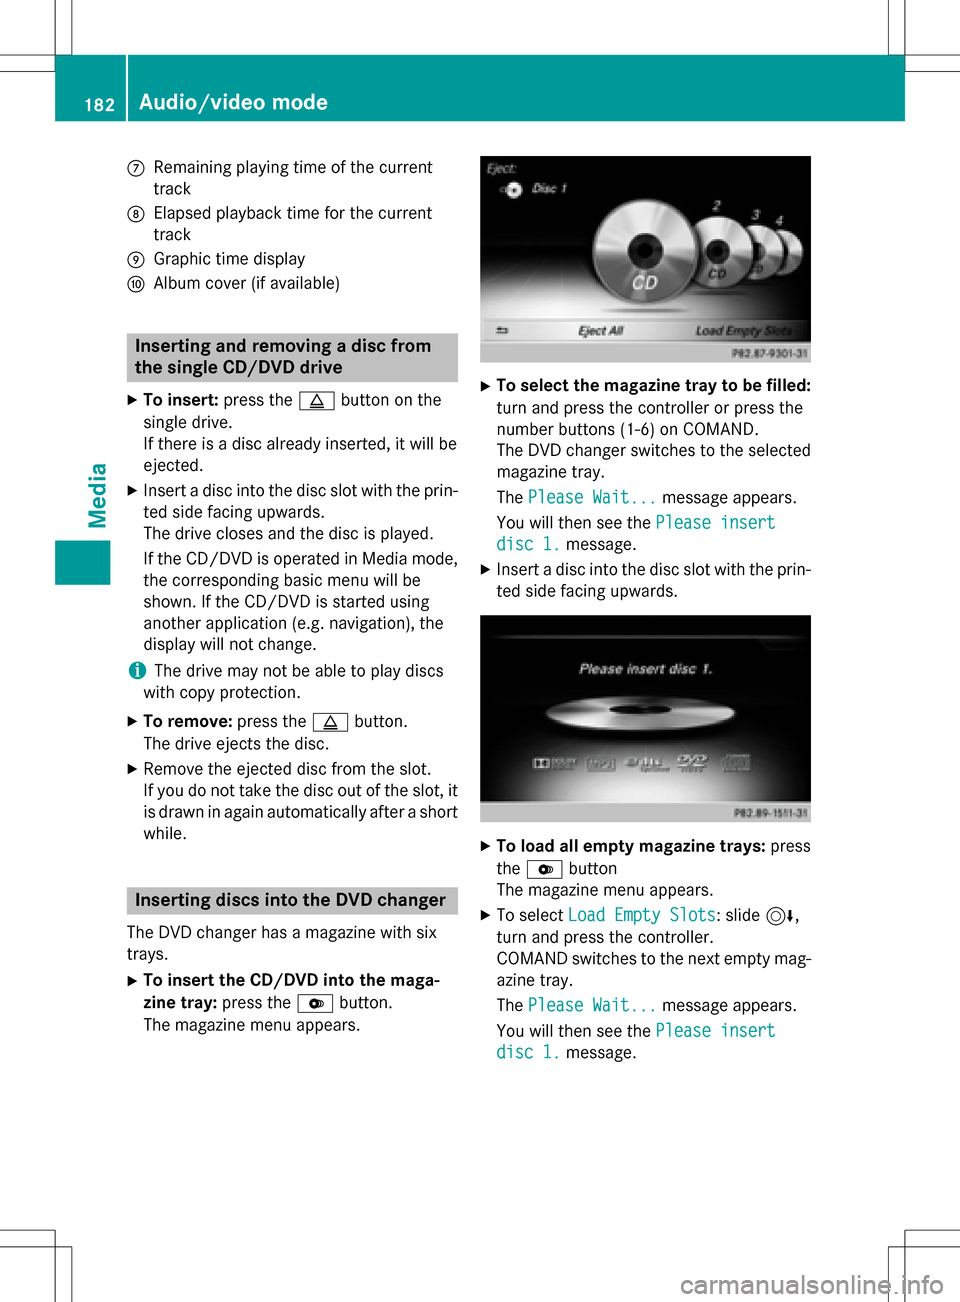
XTo load all empt ymagazine trays: press
th eV button
The magazine men uappears.
XTo select LoadEmpty Slots:slid e6,
tur nand press th econtroller .
COMAND switches to th enext empty mag -
azine tray.
The Please Wait.. .
message appears.
You will then see th ePlease insert
dis c1.message .
182Audio/video mode
Media
Page 185 of 246
XInsert a disc into the disc slot with the prin-
ted side facing upwards.
Once the disc is loaded, the DVD changer
switches to the next empty tray.
XRepeat these steps until all magazine trays
are filled.
The DVD changer plays the last inserted
disc.
XTo exit the DVD changer menu:press the
V button.
Ejecting discs from the DVD changer
i
If you remove one disc while playing
another disc, the DVD changer interrupts
playback. Playback continues once the disc has been ejected.
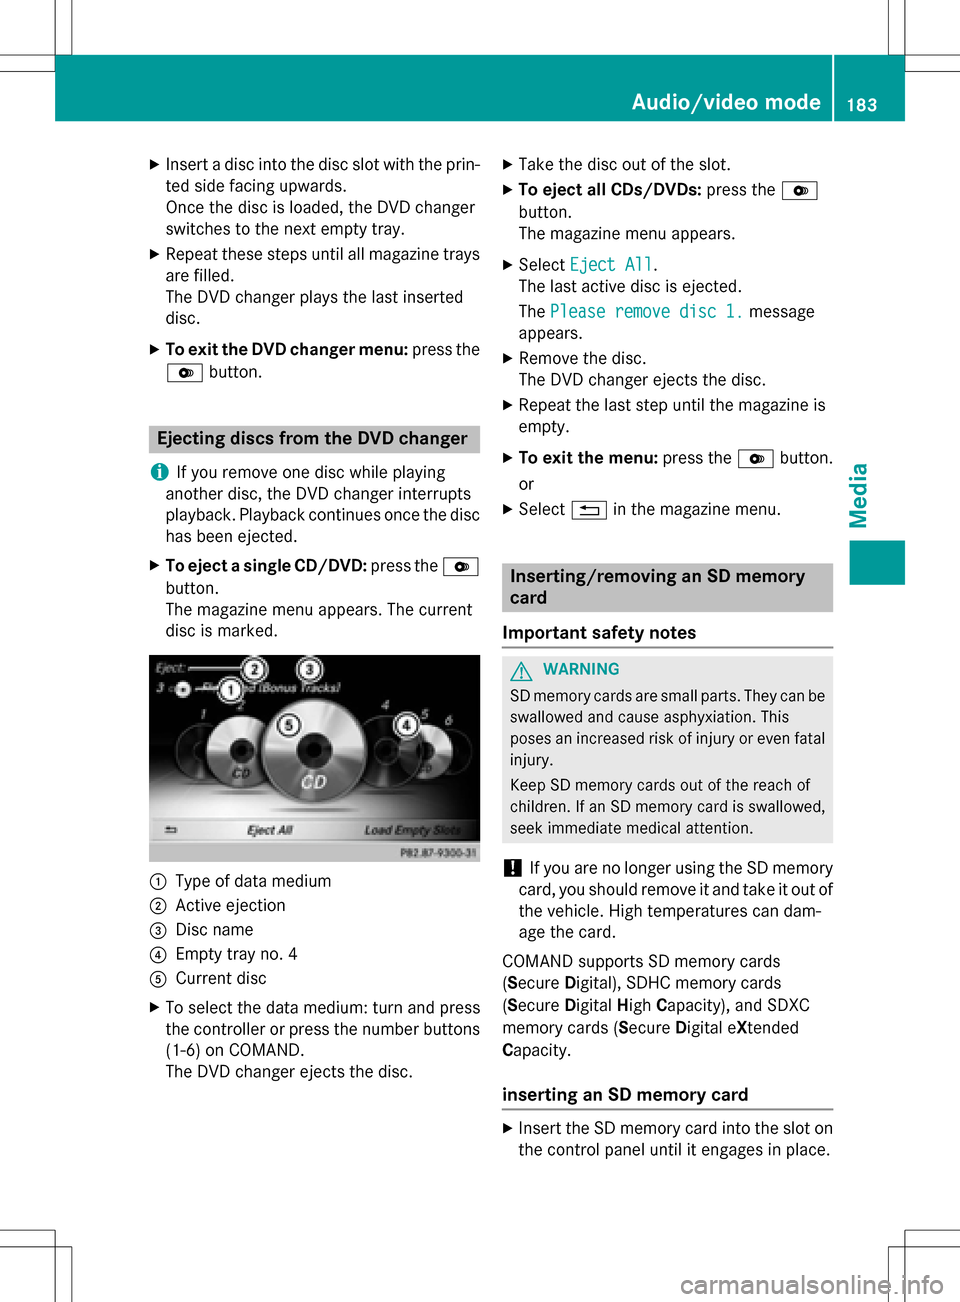
XTo eject a single CD/DVD: press theV
button.
The magazine menu appears. The current
disc is marked.
:Type of data medium
;Active ejection
=Disc name
?Empty tray no. 4
ACurrent disc
XTo select the data medium: turn and press
the controller or press the number buttons
(1-6) on COMAND.
The DVD changer ejects the disc.
XTake the disc out of the slot.
XTo eject all CDs/DVDs: press theV
button.
The magazine menu appears.
XSelect Eject All.
The last active disc is ejected.
The Please remove disc 1.
message
appears.
XRemove the disc.
The DVD changer ejects the disc.
XRepeat the last step until the magazine is
empty.
XTo exit the menu: press theVbutton.
or
XSelect %in the magazine menu.
Inserting/removing an SD memory
card
Important safety notes
GWARNING
SD memory cards are small parts. They can be
swallowed and cause asphyxiation. This
poses an increased risk of injury or even fatal injury.
Keep SD memory cards out of the reach of
children. If an SD memory card is swallowed,
seek immediate medical attention.
!If you are no longer using the SD memory
card, you should remove it and take it out of
the vehicle. High temperatures can dam-
age the card.
COMAND supports SD memory cards
(Secure Digital), SDHC memory cards
(Secure Digital HighCapacity), and SDXC
memory cards (Secure Digital eXtended
Capacity.
inserting an SD memory card
XInsert the SD memory card into the slot on
the control panel until it engages in place.
Audio/video mode183
Media
Z
Page 197 of 246

Some mobile phones impair function with
regard to the following criteria:
Rthe number of tracks that can be selected
Rthe time period until the next or previous
track is played
XSwitch the multifunction steering wheel to
the media menu (see the vehicle Operator's
Manual).
XTo skip forwards or backwards to a
track:press the 9or: button on
the multifunction steering wheel.
XRapid scroll: press and hold the 9
or : button on the multifunction steer-
ing wheel until the desired track is reached.
If you press and hold the 9or:
buttons, the rapid scrolling speed increa-
ses after a short time.
Further ways to select tracks (
Ypage 185).
iIn rapid scroll, track names are not
shown, but instead only Track1, Track2 etc.
The playback times for the tracks played
are not displayed. This is available as an
optional function starting with AVRCP Ver-
sion 1.3. There is also no music search
option available with Bluetooth
®Audio.
Selecting playback options
If the Bluetooth®audio device supports the
corresponding function, the following options
are available:
RNormal Track Sequence: the tracks are
played in the normal order (e.g. track 1, 2, 3
etc.).
Audio data playback is determined by the
order in which the tracks are written to the
data medium. Alphabetical order is the
most common. Once all the tracks in a folder have been played, the tracks in the
next folder are played.
RRandomTrackList: the current track list
is played in random order (e.g. 3, 8, 5 etc.).
RRandom Medium: all tracks on the data
medium are played in random order (e.g.
track 3, 8, 5 etc.).
Playback options are optional functions
and are not, or only partially, supported by
Bluetooth
®audio devices.
Selecting playback options
XTo select Options: turn and press the con-
troller.
XSelect Playback Mode.
A # dot indicates the current setting.
XSelect the desired option.
If you select Random Track List
you will
see a corresponding message in the display
or selection window.
Increasing the volume on COMAND
XTo select Options: slide6and press the
controller.
XTo select Volume: turn and press the con-
troller.
A menu appears. The #dot indicates the
current setting.
XSelect StandardorBoost.
Information on sound settings
(
Ypage 206).
Operation with the Media Interface
General notes
Media Interface is a universal interface for the
connection of mobile audio and video devi-
ces. Media Interface in COMAND has two
USB connections.
The USB connection sockets are located in
the stowage compartment under the armrest.
Operation with the Media Interface195
Media
Z
Page 228 of 246
You can switch the screens back on. How-
ever, this will discharge the starter battery.
XPoint the remote control at the rear-com-
partment screen which has been selected
for remote operation.
XPress button:on the remote control
(
Ypage 225).
The rear screen switches on or off.
Switching the button lighting on/off
XPress button ;on the remote control
(
Ypage 225).
Depending on the previous status, the but-
ton lighting is switched on or off.
iIf you do not use the remote control for
about 15 seconds, the button lighting
switches off automatically.
Switching the sound on or off
XPress button Bon the remote control
(
Ypage 225).
The sound is switched on/off.
Selecting a menu/menu item and con-
firming your selection
XSelect a menu item using the =;
9: buttons on the remote control
and press the 9button to confirm.
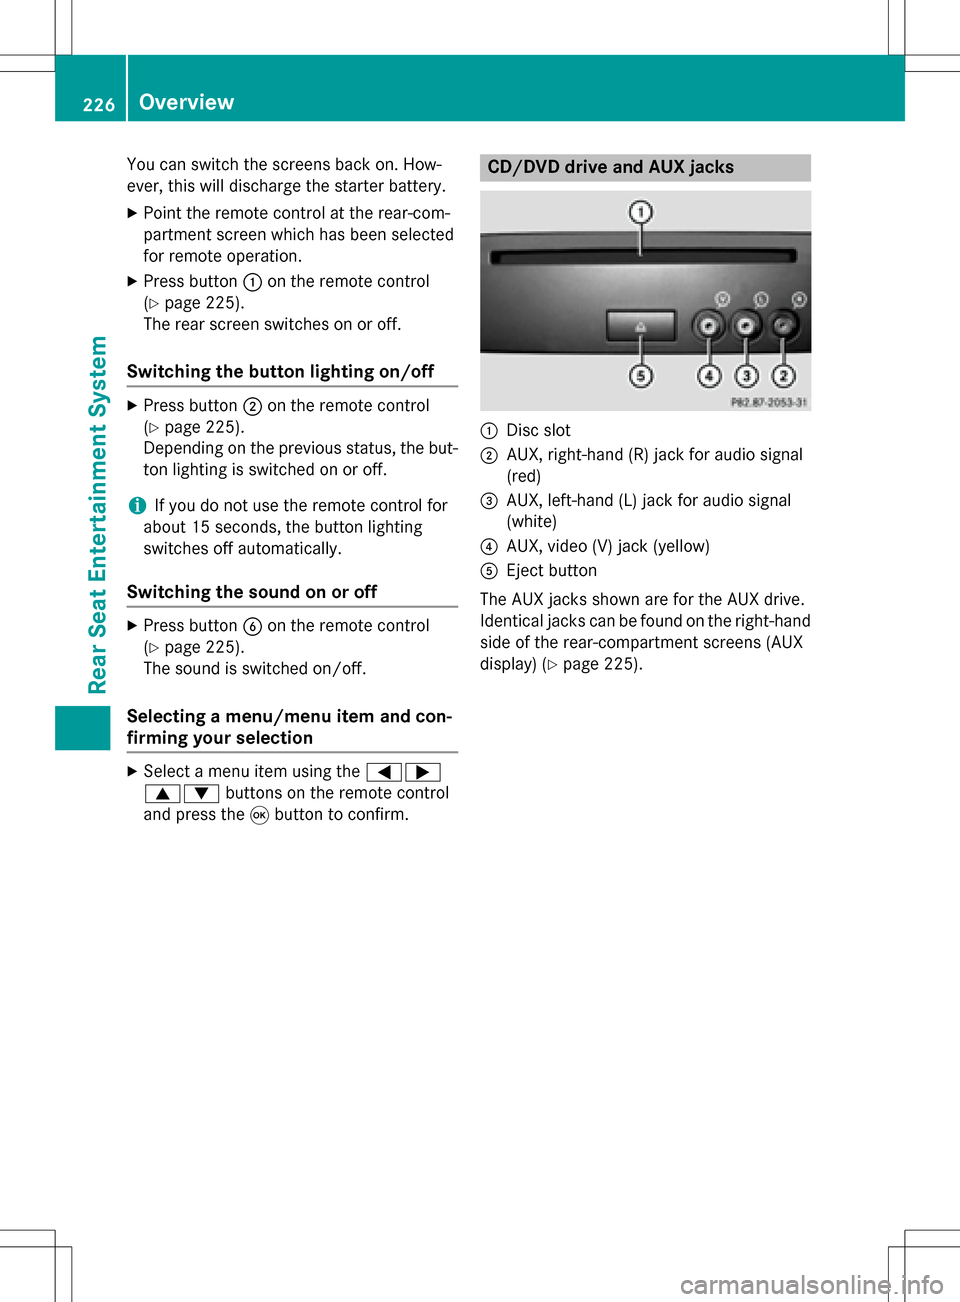
CD/DVD drive and AUX jacks
:Disc slot
;AUX, right-hand (R) jack for audio signal
(red)
=AUX, left-hand (L) jack for audio signal
(white)
?AUX, video (V) jack (yellow)
AEject button
The AUX jacks shown are for the AUX drive.
Identical jacks can be found on the right-hand
side of the rear-compartment screens (AUX
display) (
Ypage 225).
226Overview
Rear Seat Entertainment System