2016 MERCEDES-BENZ AMG GT ROADSTER steering
[x] Cancel search: steeringPage 88 of 289
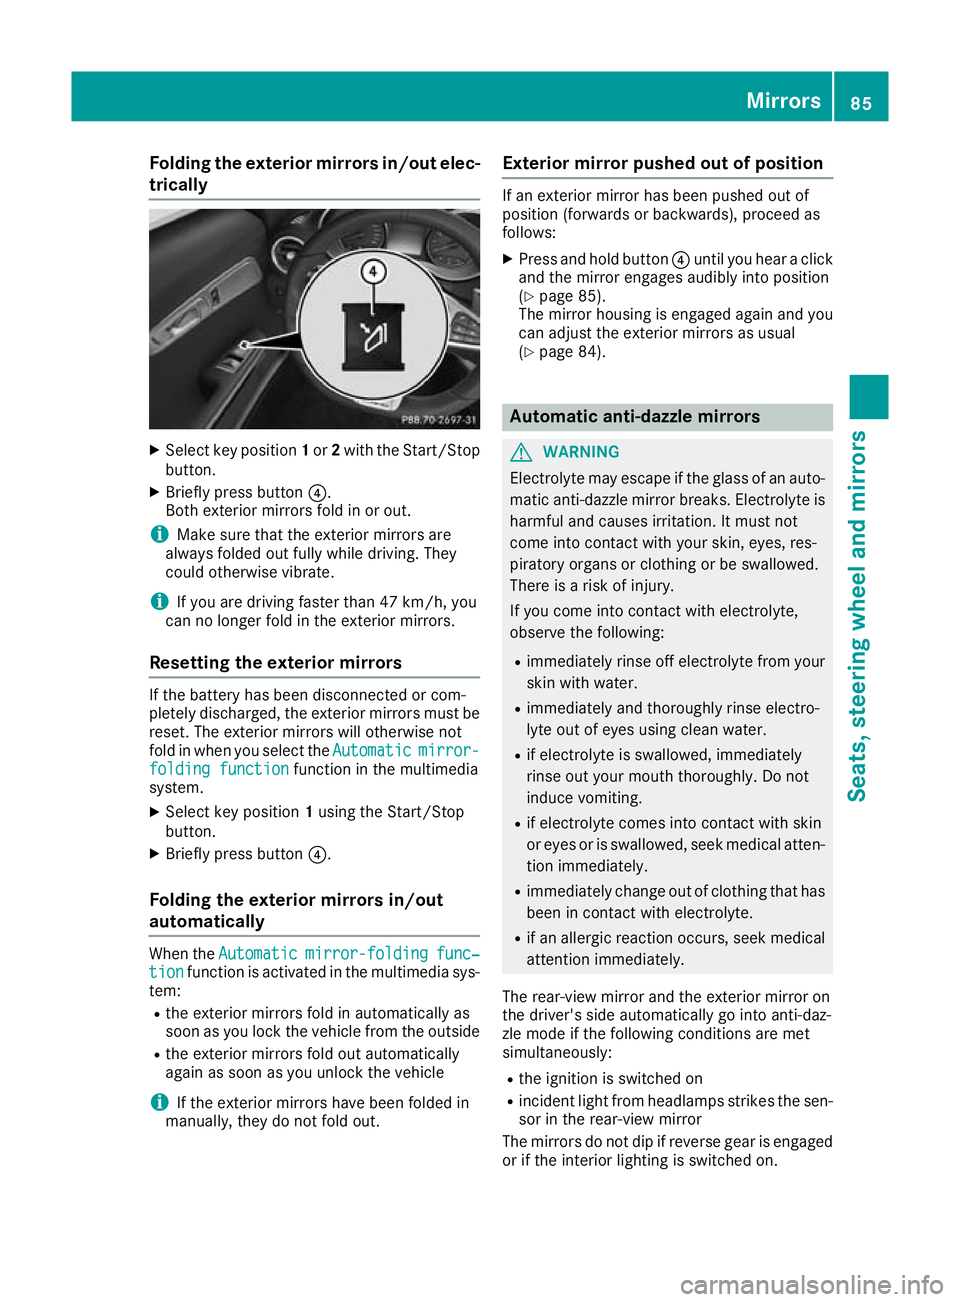
Folding the exterior mirrors in/out elec-
trically X
Select key position 1or 2with the Start/Stop
button.
X Briefly press button ?.
Both exterior mirrors fold in or out.
i Make sure that the exterior mirrors are
always folded out fully while driving. They
could otherwise vibrate.
i If you are driving faster than 47 km/h, you
can no longer fold in the exterior mirrors.
Resetting the exterior mirrors If the battery has been disconnected or com-
pletely discharged, the exterior mirrors must be
reset. The exterior mirrors will otherwise not
fold in when you select the Automatic Automaticmirror-
mirror-
folding function
folding function function in the multimedia
system.
X Select key position 1using the Start/Stop
button.
X Briefly press button ?.
Folding the exterior mirrors in/out
automatically When the
Automatic
Automatic mirror-folding
mirror-folding func‐
func‐
tion
tion function is activated in the multimedia sys-
tem:
R the exterior mirrors fold in automatically as
soon as you lock the vehicle from the outside
R the exterior mirrors fold out automatically
again as soon as you unlock the vehicle
i If the exterior mirrors have been folded in
manually, they do not fold out. Exterior mirror pushed out of position If an exterior mirror has been pushed out of
position (forwards or backwards), proceed as
follows:
X Press and hold button ?until you hear a click
and the mirror engages audibly into position
(Y page 85).
The mirror housing is engaged again and you
can adjust the exterior mirrors as usual
(Y page 84). Automatic anti-dazzle mirrors
G
WARNING
Electrolyte may escape if the glass of an auto- matic anti-dazzle mirror breaks. Electrolyte is
harmful and causes irritation. It must not
come into contact with your skin, eyes, res-
piratory organs or clothing or be swallowed.
There is a risk of injury.
If you come into contact with electrolyte,
observe the following:
R immediately rinse off electrolyte from your
skin with water.
R immediately and thoroughly rinse electro-
lyte out of eyes using clean water.
R if electrolyte is swallowed, immediately
rinse out your mouth thoroughly. Do not
induce vomiting.
R if electrolyte comes into contact with skin
or eyes or is swallowed, seek medical atten-
tion immediately.
R immediately change out of clothing that has
been in contact with electrolyte.
R if an allergic reaction occurs, seek medical
attention immediately.
The rear-view mirror and the exterior mirror on
the driver's side automatically go into anti-daz-
zle mode if the following conditions are met
simultaneously:
R the ignition is switched on
R incident light from headlamps strikes the sen-
sor in the rear-view mirror
The mirrors do not dip if reverse gear is engaged or if the interior lighting is switched on. Mirrors
85Seats, steering wheel and mirrors Z
Page 89 of 289
Parking position of the exterior mirror
on the front-passenger side
Storing the parking position You can set the front-passenger side exterior
mirror so that you can see the rear wheel on that side as soon as you engage reverse gear. You
can store this position.
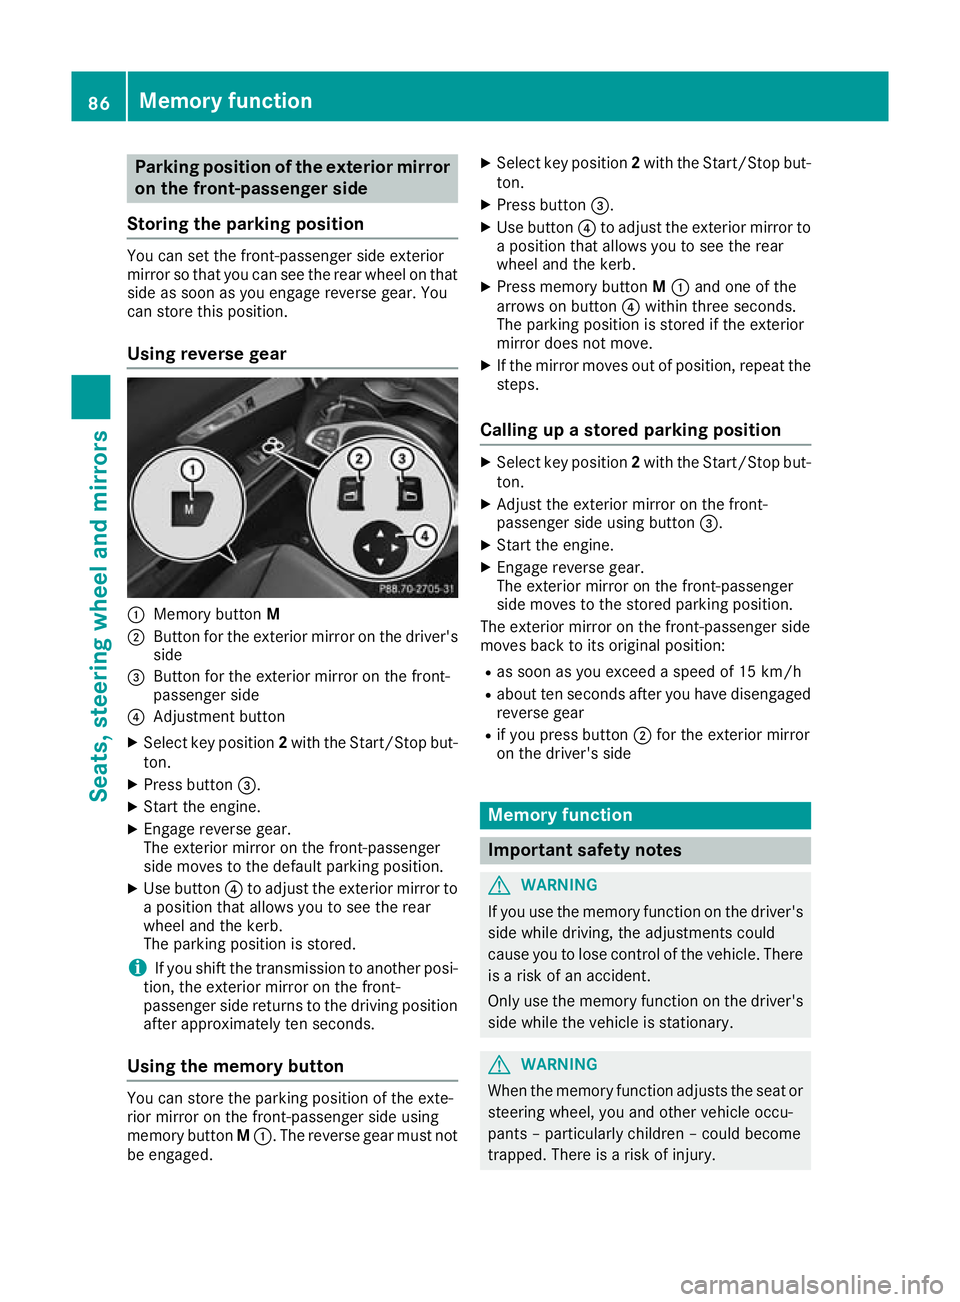
Using reverse gear :
Memory button M
; Button for the exterior mirror on the driver's
side
= Button for the exterior mirror on the front-
passenger side
? Adjustment button
X Select key position 2with the Start/Stop but-
ton.
X Press button =.
X Start the engine.
X Engage reverse gear.
The exterior mirror on the front-passenger
side moves to the default parking position.
X Use button ?to adjust the exterior mirror to
a position that allows you to see the rear
wheel and the kerb.
The parking position is stored.
i If you shift the transmission to another posi-
tion, the exterior mirror on the front-
passenger side returns to the driving position
after approximately ten seconds.
Using the memory button You can store the parking position of the exte-
rior mirror on the front-passenger side using
memory button
M:. The reverse gear must not
be engaged. X
Select key position 2with the Start/Stop but-
ton.
X Press button =.
X Use button ?to adjust the exterior mirror to
a position that allows you to see the rear
wheel and the kerb.
X Press memory button M: and one of the
arrows on button ?within three seconds.
The parking position is stored if the exterior
mirror does not move.
X If the mirror moves out of position, repeat the
steps.
Calling up a stored parking position X
Select key position 2with the Start/Stop but-
ton.
X Adjust the exterior mirror on the front-
passenger side using button =.
X Start the engine.
X Engage reverse gear.
The exterior mirror on the front-passenger
side moves to the stored parking position.
The exterior mirror on the front-passenger side
moves back to its original position:
R as soon as you exceed a speed of 15 km/h
R about ten seconds after you have disengaged
reverse gear
R if you press button ;for the exterior mirror
on the driver's side Memory function
Important safety notes
G
WARNING
If you use the memory function on the driver's side while driving, the adjustments could
cause you to lose control of the vehicle. There
is a risk of an accident.
Only use the memory function on the driver's
side while the vehicle is stationary. G
WARNING
When the memory function adjusts the seat or steering wheel, you and other vehicle occu-
pants – particularly children – could become
trapped. There is a risk of injury. 86
Memory functionSeats, steering wheel and mirrors
Page 90 of 289
While the memory function is making adjust-
ments, make sure that no one has any body
parts in the sweep of the seat or steering
wheel. If somebody becomes trapped, imme- diately release the memory function position
button. The adjustment process is stopped. G
WARNING
If children activate the memory function, they
could become trapped, especially if they are
unattended. There is a risk of injury.
When leaving the vehicle, always take the key with you and lock the vehicle. Never leave
children unattended in the vehicle. Storing settings
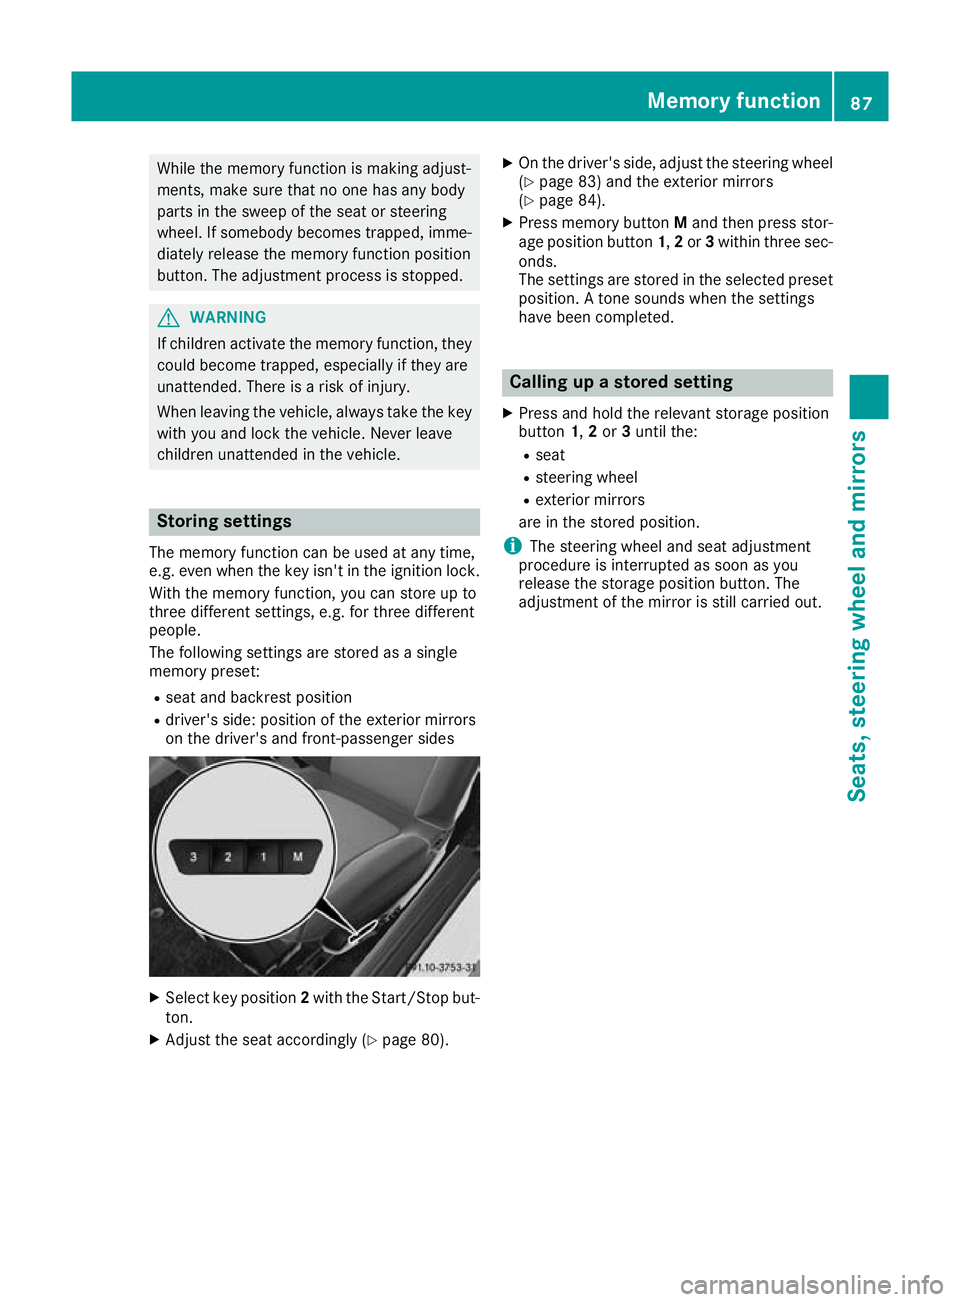
The memory function can be used at any time,
e.g. even when the key isn't in the ignition lock.
With the memory function, you can store up to
three different settings, e.g. for three different
people.
The following settings are stored as a single
memory preset:
R seat and backrest position
R driver's side: position of the exterior mirrors
on the driver's and front-passenger sides X
Select key position 2with the Start/Stop but-
ton.
X Adjust the seat accordingly (Y page 80).X
On the driver's side, adjust the steering wheel
(Y page 83) and the exterior mirrors
(Y page 84).
X Press memory button Mand then press stor-
age position button 1,2or 3within three sec-
onds.
The settings are stored in the selected preset
position. A tone sounds when the settings
have been completed. Calling up a stored setting
X Press and hold the relevant storage position
button 1,2or 3until the:
R seat
R steering wheel
R exterior mirrors
are in the stored position.
i The steering wheel and seat adjustment
procedure is interrupted as soon as you
release the storage position button. The
adjustment of the mirror is still carried out. Memory function
87Seats, steering wheel and mirrors Z
Page 104 of 289
Running-in notes
Important safety notes
In certain driving and driving safety systems, the sensors adjust automatically while a certain dis-
tance is being driven after the vehicle has been delivered or after repairs. Full system effective-
ness is not reached until the end of this teach-in process.
Brake pads/linings and discs that either are new or have been replaced achieve optimum braking
effect only after several hundred kilometres of
driving. Compensate for the reduced braking
effect by applying greater force to the brake
pedal. The first 1,500 km
The more you treat the engine with sufficient
care at the start, the more satisfied you will be
with the engine performance later on.
Observe the following notes on running-in the
engine: R you should therefore drive at varying road
speeds and engine speeds for the first
1,500 km.
R drive the vehicle mainly in drive program Cfor
the first 1,500 km.
R do not drive at speeds above 140 km/h for
the first 1,500 km.
R only allow the engine to reach a maximum
engine speed of 4,500 rpm briefly.
R avoid overstraining the vehicle during this
period, e.g. driving at full throttle.
R do not exceed Ôof the maximum permitted
engine speed for each gear.
R in manual mode Mand temporary manual
drive program, shift up in good time.
R do not perform a RACE START.
R do not shift down a gear manually in order to
brake.
R try to avoid depressing the accelerator pedal
beyond the pressure point (kickdown).
After 1,500 km, you can increase the engine
speed gradually and accelerate the vehicle to
full speed.
You should also observe these notes on running- in if the engine or parts of the drive train on your
vehicle have been replaced.
Always observe the applicable speed limit. Driving
Important safety notes
G
WARNING
Objects in the driver's footwell may restrict
the clearance around the pedals or block a
depressed pedal. This jeopardises the oper-
ating and road safety of the vehicle. There is a risk of an accident.
Stow all objects securely in the vehicle so that
they do not get into the driver's footwell.
Always fit the floormats securely and as pre-
scribed in order to ensure that there is always sufficient room for the pedals. Do not use
loose floormats and do not place several floor-mats on top of one another. G
WARNING
Unsuitable footwear can hinder correct usage of the pedals, e.g.:
R shoes with thick soles
R shoes with high heels
R slippers
There is a risk of an accident.
Wear suitable footwear to ensure correct
usage of the pedals. G
WARNING
If you switch off the ignition while driving,
safety-relevant functions are only available
with limitations, or not at all. This could affect, for example, the power steering and the brake
boosting effect. You will require considerably
more effort to steer and brake. There is a risk of an accident.
Do not switch off the ignition while driving. G
WARNING
If the parking brake has not been fully
released when driving, the parking brake can:
R overheat and cause a fire
R lose its hold function.
There is a risk of fire and an accident. Release
the parking brake fully before driving off. Driving
101Driving and parking Z
Page 116 of 289
Gliding mode is characterised by the following:
R the combustion engine is disconnected from
the drive train
R the engine speed is equal to the engine idling
speed
R status icon Cgoes out and status icon :is
displayed in the multifunction display
(Y page 111)
In drive program C, you can deactivate and acti-
vate gliding mode using the ECO button
(Y page 106).
Gliding mode can be activated under the follow- ing conditions:
R the speed is within a suitable range
R the type of road is suitable, e.g. no steep gra-
dients
R you are no longer depressing the accelerator
pedal
Gliding mode is deactivated under the following
conditions:
R you depress the accelerator pedal
R you depress the brake pedal
R you switch the transmission position using
the E‑SELECT lever (Y page 109)
R you switch to drive program RACE
(AMG GT S), S+orS(Y page 108)
R you switch to manual mode M(Y page 113)
R you leave the suitable speed range
i If you have selected the "Comfort" setting
for the drive (engine management) in drive
program I, you can also activate gliding mode.
You can find information about this in the Dig-
ital Owner's Manual. M button X
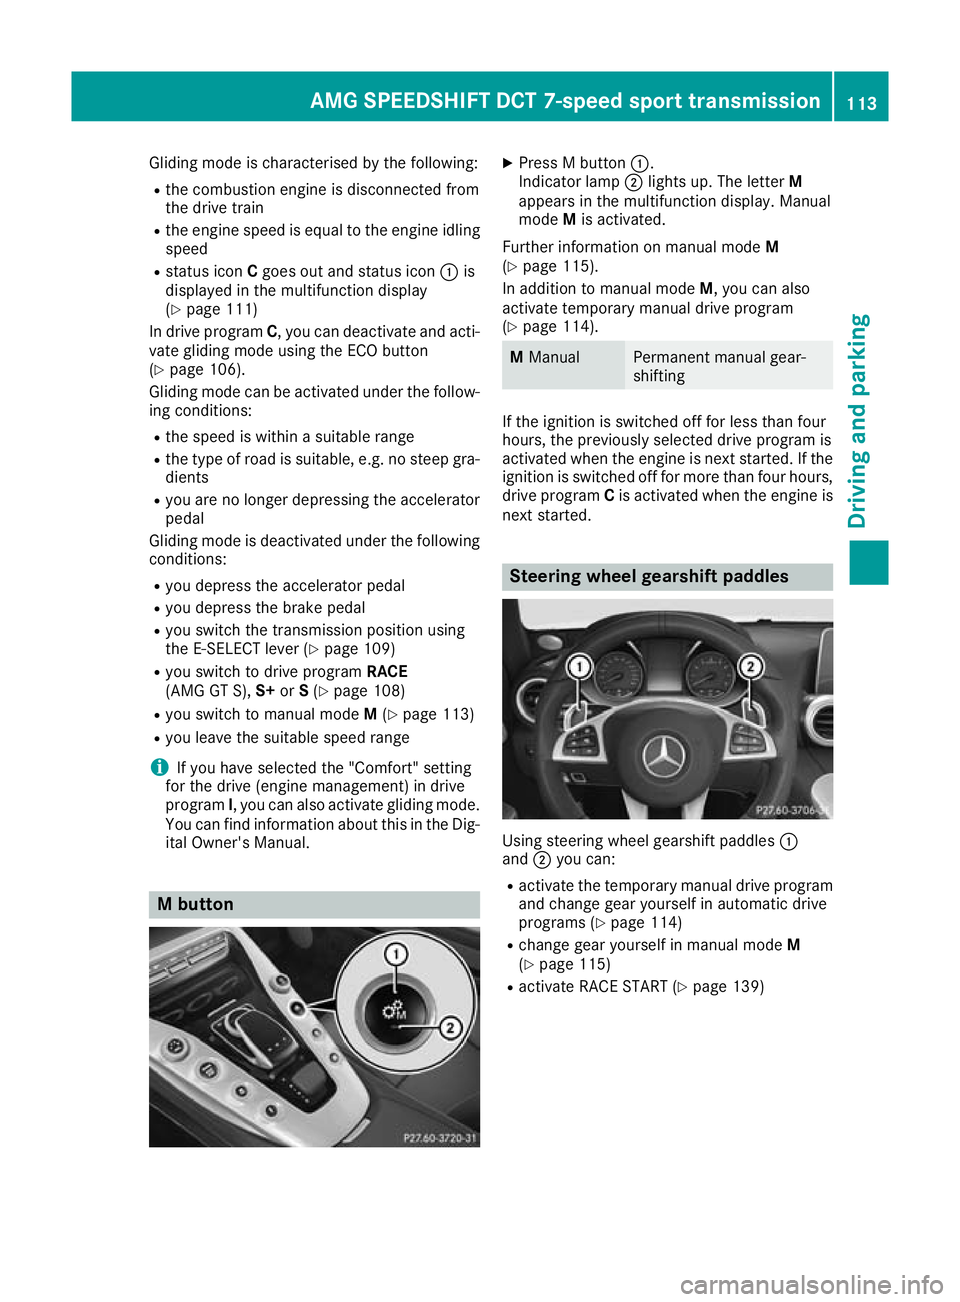
Press M button :.
Indicator lamp ;lights up. The letter M
appears in the multifunction display. Manual
mode Mis activated.
Further information on manual mode M
(Y page 115).
In addition to manual mode M, you can also
activate temporary manual drive program
(Y page 114). M
Manual Permanent manual gear-
shifting
If the ignition is switched off for less than four
hours, the previously selected drive program is
activated when the engine is next started. If the ignition is switched off for more than four hours,
drive program Cis activated when the engine is
next started. Steering wheel gearshift paddles
Using steering wheel gearshift paddles
:
and ;you can:
R activate the temporary manual drive program
and change gear yourself in automatic drive
programs (Y page 114)
R change gear yourself in manual mode M
(Y page 115)
R activate RACE START (Y page 139) AMG SPEEDSHIFT DCT 7-speed sport transmission
113Driving and parking Z
Page 117 of 289
Automatic drive program
Drive program C (Comfort) Drive program
Cis characterised by the follow-
ing:
R the vehicle exhibits comfortable, economical
driving characteristics.
R the vehicle pulling away more gently in
forward and reverse gears unless the accel-
erator pedal is depressed fully.
R the vehicle has improved driving stability, for
example on slippery road surfaces.
R optimal fuel consumption resulting from the
automatic transmission shifting up sooner.
The vehicle is driven in the low engine speed
range and the wheels are less likely to spin.
R gliding mode is available.
R the ECO start/stop function is available.
Drive program S (Sport) Drive program
Sis characterised by the follow-
ing:
R the vehicle exhibits sporty driving character-
istics.
R the automatic transmission shifting up later.
As a result of the later automatic transmission
shift points, the fuel consumption possibly
being higher.
R the suspension exhibits rigid springing and
damping settings
R gliding mode is not available.
R the ECO start/stop function is not available.
R if a period of dynamic driving is followed by an
extended phase with a constant accelerator
pedal position, the vehicle shifts up to a
higher gear. This optimises fuel consumption.
Drive program S+ (Sport Plus) Drive program
S+is characterised by the fol-
lowing:
R the vehicle exhibits particularly sporty driving
characteristics.
R the automatic transmission shifting up later.
As a result of the later automatic transmission
shift points, the fuel consumption possibly
being higher.
R the suspension exhibits particularly rigid
springing and damping settings. R
gliding mode is not available.
R the ECO start/stop function is not available.
R if a period of dynamic driving is followed by an
extended phase with a constant accelerator
pedal position, the vehicle shifts up to a
higher gear. This optimises fuel consumption.
Drive program I (Individual) In drive program
Ithe following properties of the
drive program can be selected:
R the drive (engine management)
R the transmission management
R ESP ®
(Y page 57)
R the suspension (Y page 140)
R the position of the exhaust flap
(Y page 106)
Information about configuring drive program I
with the multimedia system can be found in the
Digital Owner's Manual.
Temporary manual drive program General notes
In this drive program, you can briefly change
gear yourself by using the steering wheel gear-
shift paddles. The transmission must be in posi- tion D.
You can activate the temporary manual drive
program in the automatic drive program. The
switching times correspond to the previously
active automatic drive program.
In addition to temporary manual drive program
you can also activate manual mode M
(Y page 115).
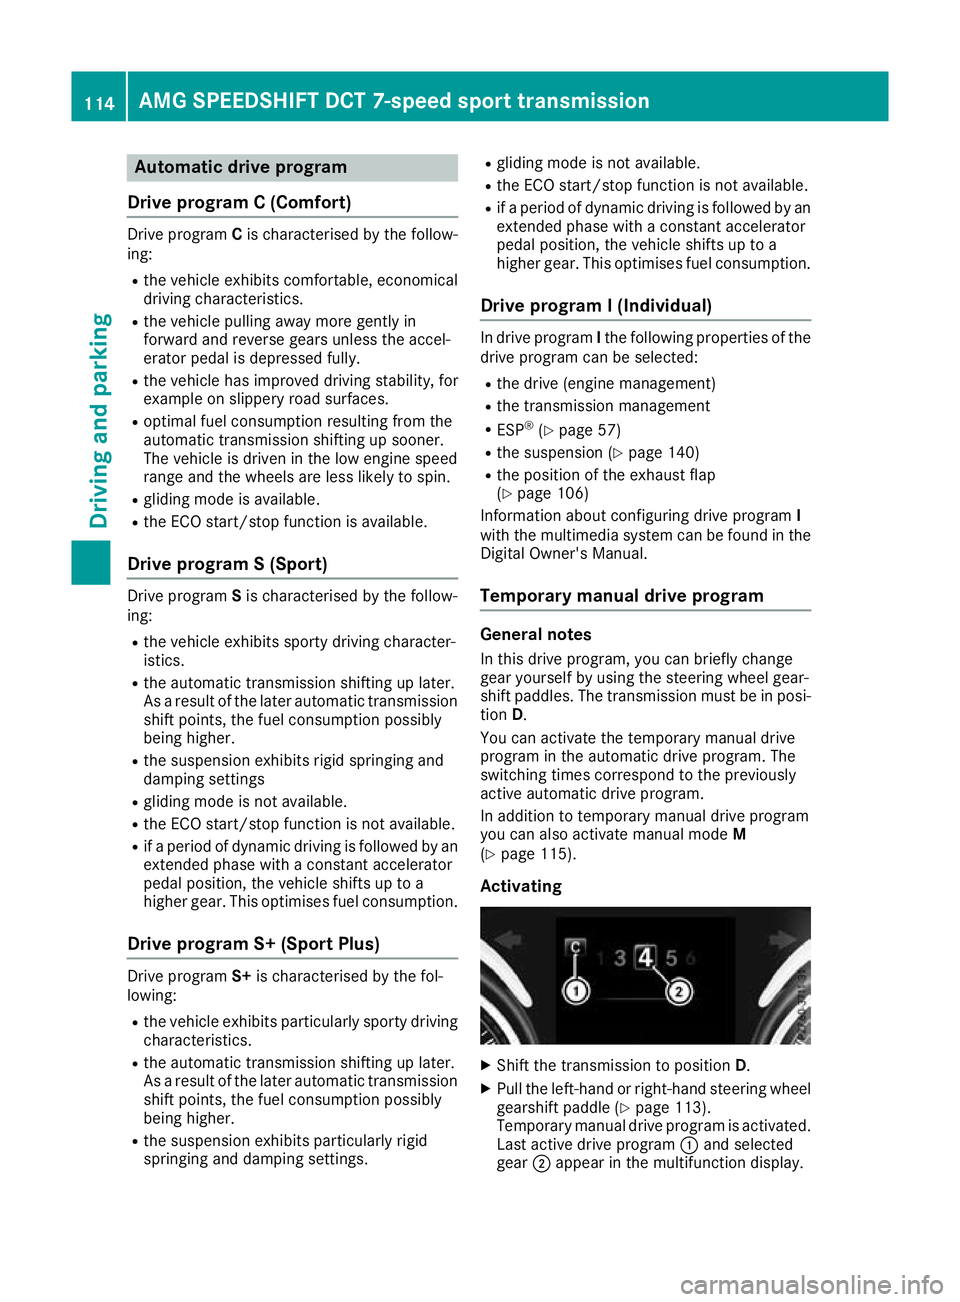
Activating X
Shift the transmission to position D.
X Pull the left-hand or right-hand steering wheel
gearshift paddle (Y page 113).
Temporary manual drive program is activated. Last active drive program :and selected
gear ;appear in the multifunction display. 114
AMG SPEEDSHIFT DCT 7-speed sport trans
missionDriving and parking
Page 118 of 289
Shifting gears
If you pull on the left or right-hand steering
wheel gearshift paddle, the automatic transmis-
sion switches to temporary manual drive pro-
gram for a limited amount of time. Depending on which gearshift paddle is pulled, the automatic
transmission immediately shifts into the next
gear up or down, if permitted.
X To shift up: pull the right-hand steering wheel
gearshift paddle (Y page 113).
The automatic transmission shifts up to the
next gear.
If the maximum engine speed on the currently engaged gear is reached and you continue to
accelerate, the automatic transmission auto-
matically shifts up in order to prevent engine
damage.
The automatic transmission will not shift up to
the next gear when the engine speed is very
low.
X To shift down: pull on the left-hand steering
wheel gearshift paddle (Y page 113).
The automatic transmission shifts down to
the next gear.
If the engine exceeds the maximum engine
speed when shifting down, the automatic
transmission protects against engine damage by not shifting down.
Automatic downshifting occurs when coast-
ing.
When using kickdown, the automatic trans-
mission automatically shifts to a lower gear.
Deactivating If you have activated temporary manual drive
program, it will remain active for a certain
amount of time. Under certain conditions the
minimum amount of time is extended, e.g. in the
case of lateral acceleration, during an overrun
phase or when driving on steep terrain.
When temporary manual drive program is deac-
tivated, the automatic transmission shifts into
the automatic drive program that was last selec-
ted. You can also deactivate temporary manual drive
program yourself:
X Pull on the right-hand steering wheel gearshift
paddle and hold it in place (Y page 113).
or
X Use the DYNAMIC SELECT controller to
change the drive program (Y page 108).
Temporary manual drive program is deactiva-
ted. The automatic transmission switches
into the automatic drive program that was last selected. Manual mode
General notes In manual mode
M, you can permanently change
gear yourself by using the steering wheel gear-
shift paddles. The transmission must be in posi- tion D.
The switching times correspond to the previ-
ously active automatic drive program.
The transmission only shifts down automatically
at low engine speeds depending on the respec- tive gear.
In addition to manual mode M, you can also
activate temporary manual drive program
(Y page 114).
Activating In manual mode
M, you can change gear your-
self using the steering wheel gearshift paddles if the transmission is in position D. The current
drive program and the engaged gear are shown
in the multifunction display.
X Press the M button (Y page 113).
M is shown in the multifunction display and
the indicator lamp on the M button lights up.
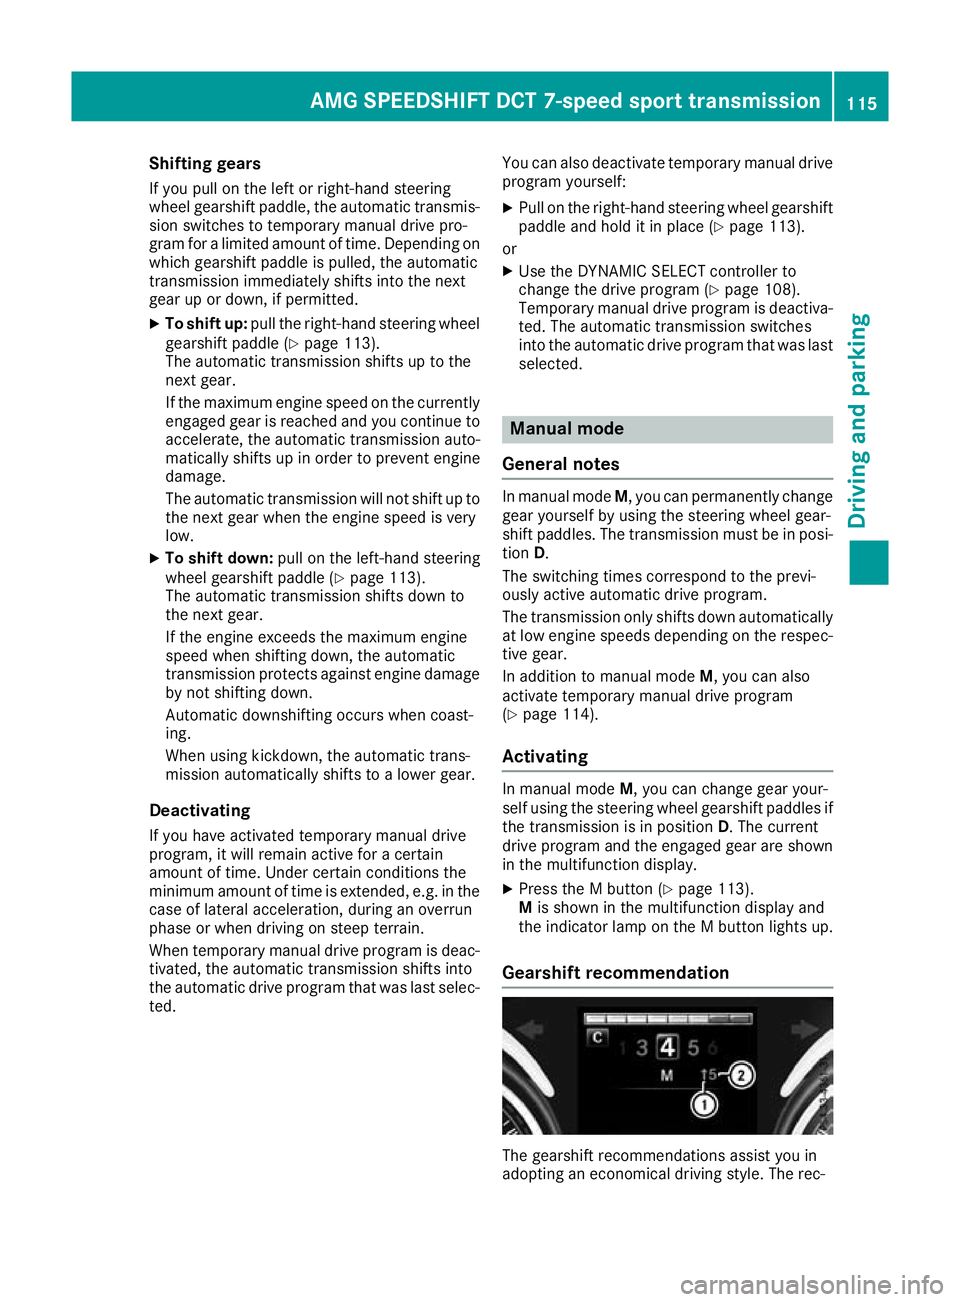
Gearshift recommendation The gearshift recommendations assist you in
adopting an economical driving style. The rec-AMG SPEEDSHIFT DCT 7-speed sport transmission
115Driving and parking Z
Page 119 of 289
ommended gear is shown in the multifunction
display.
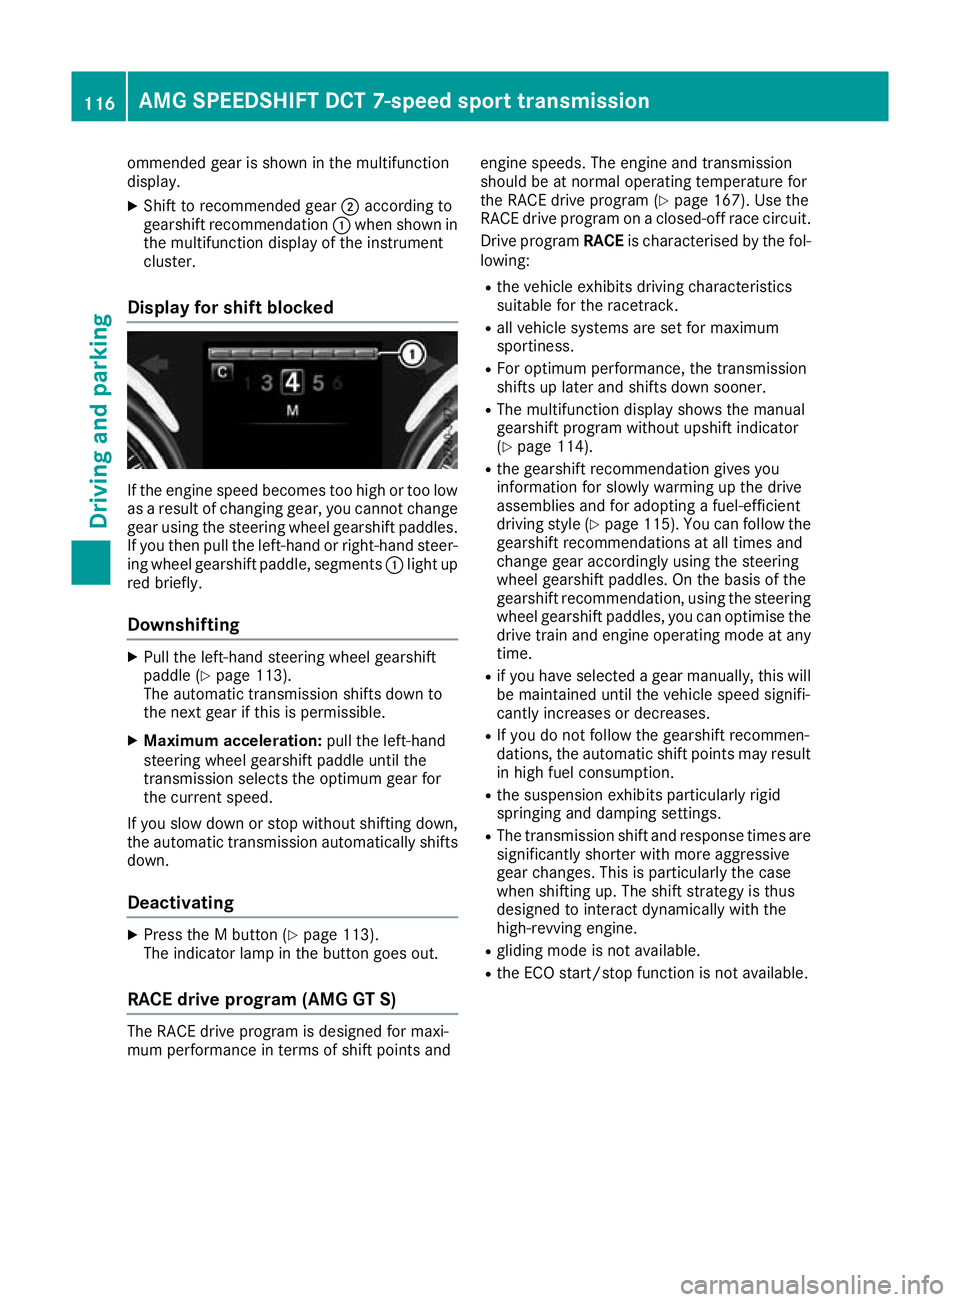
X Shift to recommended gear ;according to
gearshift recommendation :when shown in
the multifunction display of the instrument
cluster.
Display for shift blocked If the engine speed becomes too high or too low
as a result of changing gear, you cannot change
gear using the steering wheel gearshift paddles.
If you then pull the left-hand or right-hand steer- ing wheel gearshift paddle, segments :light up
red briefly.
Downshifting X
Pull the left-hand steering wheel gearshift
paddle (Y page 113).
The automatic transmission shifts down to
the next gear if this is permissible.
X Maximum acceleration: pull the left-hand
steering wheel gearshift paddle until the
transmission selects the optimum gear for
the current speed.
If you slow down or stop without shifting down,
the automatic transmission automatically shifts
down.
Deactivating X
Press the M button (Y page 113).
The indicator lamp in the button goes out.
RACE drive program (AMG GT S) The RACE drive program is designed for maxi-
mum performance in terms of shift points and engine speeds. The engine and transmission
should be at normal operating temperature for
the RACE drive program (Y
page 167). Use the
RACE drive program on a closed-off race circuit.
Drive program RACEis characterised by the fol-
lowing:
R the vehicle exhibits driving characteristics
suitable for the racetrack.
R all vehicle systems are set for maximum
sportiness.
R For optimum performance, the transmission
shifts up later and shifts down sooner.
R The multifunction display shows the manual
gearshift program without upshift indicator
(Y page 114).
R the gearshift recommendation gives you
information for slowly warming up the drive
assemblies and for adopting a fuel-efficient
driving style (Y page 115). You can follow the
gearshift recommendations at all times and
change gear accordingly using the steering
wheel gearshift paddles. On the basis of the
gearshift recommendation, using the steering wheel gearshift paddles, you can optimise the
drive train and engine operating mode at any
time.
R if you have selected a gear manually, this will
be maintained until the vehicle speed signifi-
cantly increases or decreases.
R If you do not follow the gearshift recommen-
dations, the automatic shift points may result
in high fuel consumption.
R the suspension exhibits particularly rigid
springing and damping settings.
R The transmission shift and response times are
significantly shorter with more aggressive
gear changes. This is particularly the case
when shifting up. The shift strategy is thus
designed to interact dynamically with the
high-revving engine.
R gliding mode is not available.
R the ECO start/stop function is not available. 116
AMG SPEEDSHIFT DCT 7-speed sport transmissionDriving and parking